The Best Fluffy Pancakes recipe you will fall in love with. Full of tips and tricks to help you make the best pancakes.


Creative Nails are the manicures I save when a plain color feels too predictable, but I still want something I can actually wear. I am not talking about impossible competition sets or ten layers of decoration. My favorite designs have one clear idea, enough breathing room, and details that still look beautiful when I am typing, holding a coffee, or three weeks into grow-out.
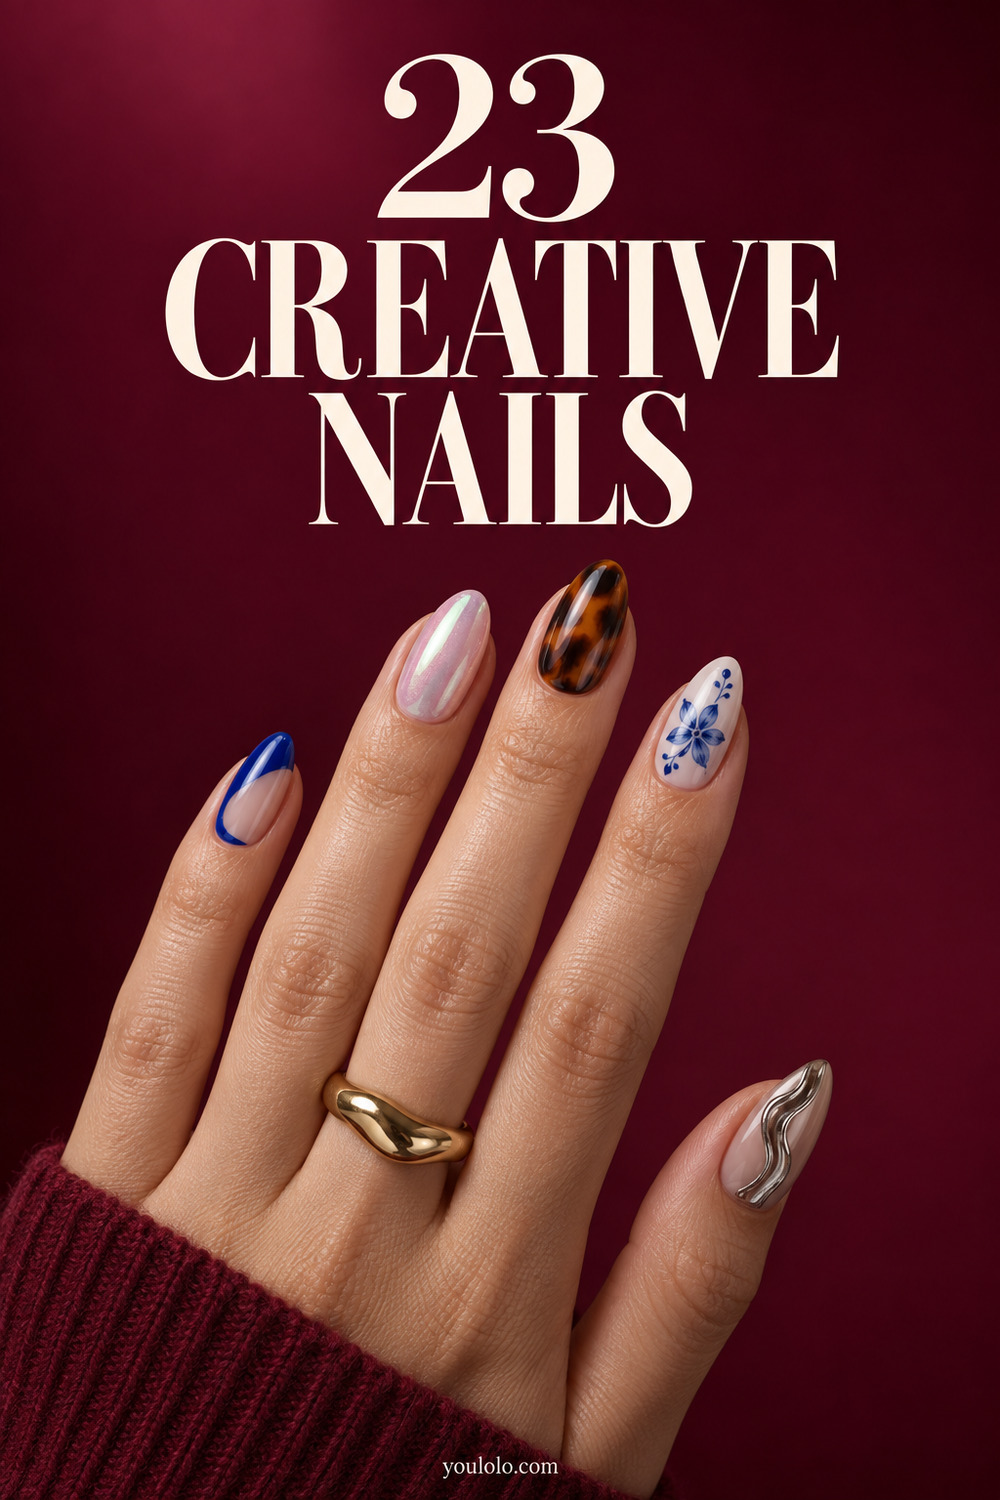
I approached this collection like a page from my studio notebook. For every manicure, I asked three questions: where does the eye land first, what keeps the colors from competing, and could a skilled nail artist repeat it from a reference photo? That immediately ruled out a lot of over-edited inspiration. The 23 ideas below use real techniques such as jelly layering, blooming gel, chrome powder, liner-brush painting, magnetic polish, dried flowers, and builder-gel droplets.
There is a mix of short and medium lengths because creativity is not reserved for extensions. In fact, several of these looks are stronger on compact nails. I have also included the small changes I would make for different lengths, skin tones, and comfort levels. Think of this as inspiration you can edit, not a menu you must copy exactly.
How I Know Creative Nails Will Look Good in Real Life
The first thing I check is visual hierarchy. If every nail has a different color, texture, charm, and pattern, my eye does not know where to rest. A successful mismatched set usually repeats at least one element: the same nude base, one shared accent color, a consistent line weight, or the same glossy finish. That little thread makes five different designs read as one manicure.
Negative space is my easiest balancing tool. A sheer section around bright art lets the natural nail act like a neutral. It also makes detailed work feel lighter and can soften grow-out. This is why cobalt curves, chrome pools, miniature fruit, and even tiny pearls appear more intentional when some of the base remains visible.
Current editorial nail coverage supports this move toward thoughtful detail. Who What Wear’s runway nail report highlights fine lines, nail jewelry, metallic finishes, subtle dots, and animal patterns as real techniques seen backstage. Cosmopolitan’s minimalist nail ideas similarly includes micro French tips, aura color, dots, chrome, and negative-space hearts. Those references helped me keep this list current without turning it into a collection of digital fantasy nails.
I also think about maintenance before choosing detail. Raised drops and pearls need more careful wear than flat line art. Chrome can show surface ridges, while jelly color reveals uneven application. Healthy preparation matters with every style, so I follow the simple care principles in the American Academy of Dermatology’s nail guidance: be gentle with cuticles, keep tools clean, and do not peel off product. Beautiful Creative Nails should never require damaged natural nails.
My Color Rule: One Hero, One Support, One Quiet Space
When a color combination feels nearly right but slightly chaotic, I use a simple three-part formula. Choose one hero color that gets the strongest contrast or largest area. Add one supporting shade that appears in smaller amounts. Let nude, cream, clear, or a very soft version of either color become the quiet space. Cobalt, ivory, and sheer pink are a perfect example. So are olive, espresso, and cream.
For cool skin tones, blue, lilac, silver, cherry red, and blue-green usually look especially crisp. Warm skin often glows beside tomato red, amber, olive, coral, and gold. Deep skin carries pale milky bases and saturated jewel tones with gorgeous contrast. These are not rules that decide what you are allowed to wear. They are simply useful starting points when five polish bottles are open and none seem to belong together.
Finish also counts as color. Pearl chrome lightens a shade; matte top coat makes it look dustier; a jelly formula creates visual depth. If I am combining three bright hues, I keep all three in the same finish. If I want to mix finishes, I reduce the palette. That exchange keeps Creative Nails interesting rather than noisy.
23 Creative Nails From My Studio Notebook
1. Cobalt Negative-Space Curves
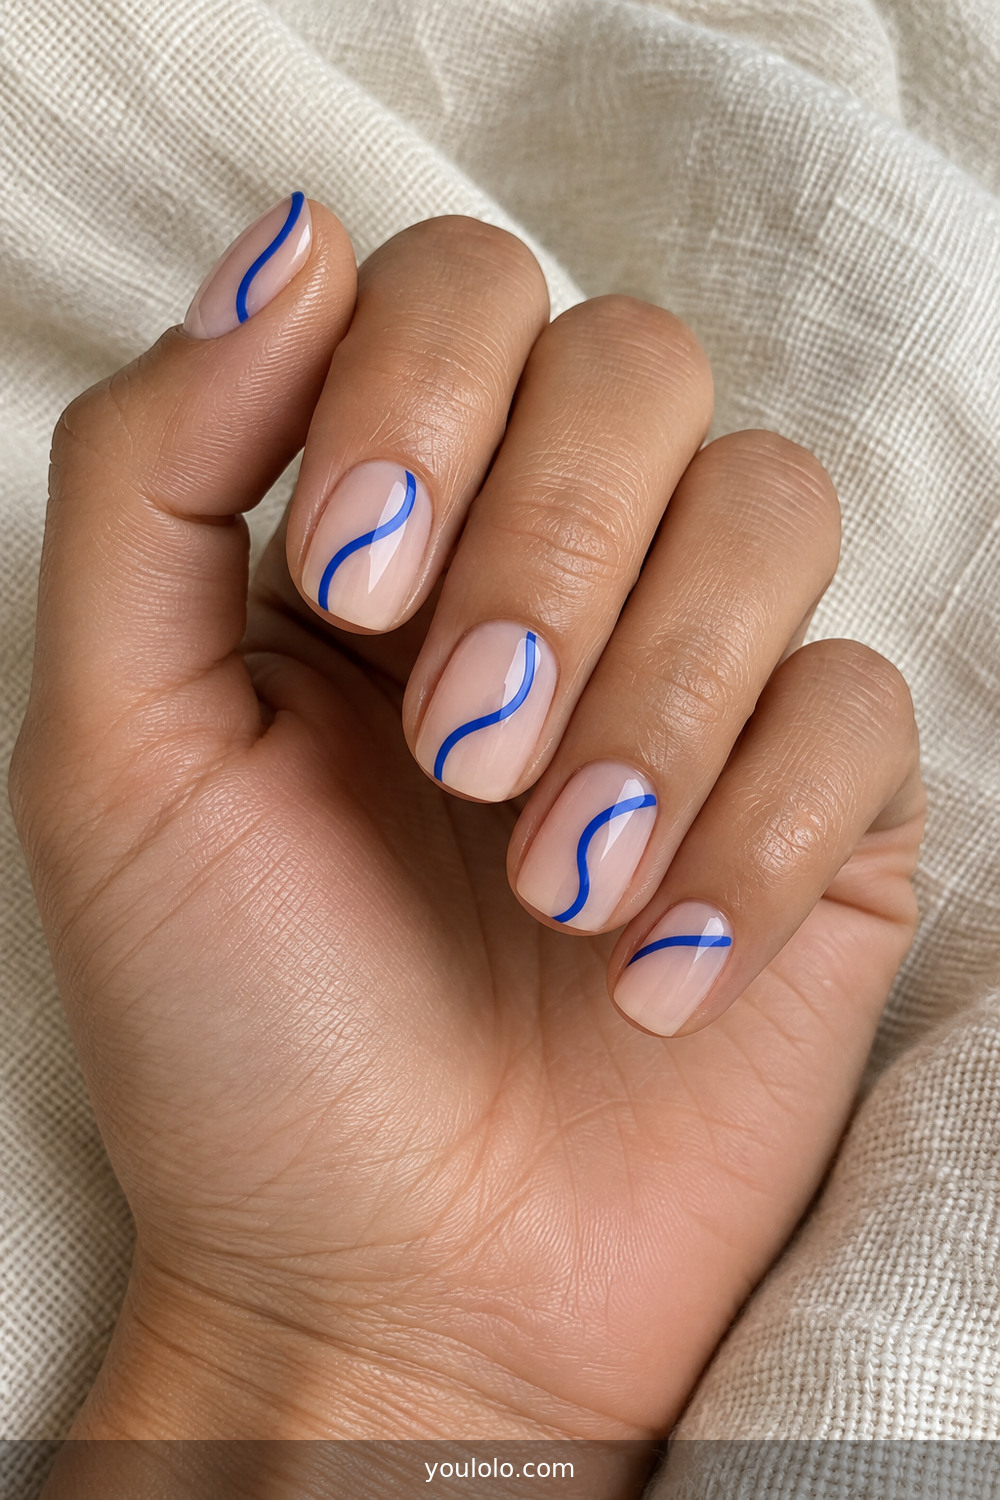
A sheer pink base gives these thin cobalt curves room to move. I like that the lines do not match exactly; one hugs a tip, another crosses the center, and another slips along a sidewall. The repeated blue keeps these Creative Nails connected. On very short nails, ask for one curve per finger. Longer almond nails can hold two intersecting lines without losing the clean, graphic feeling.
2. Tortoiseshell Micro French
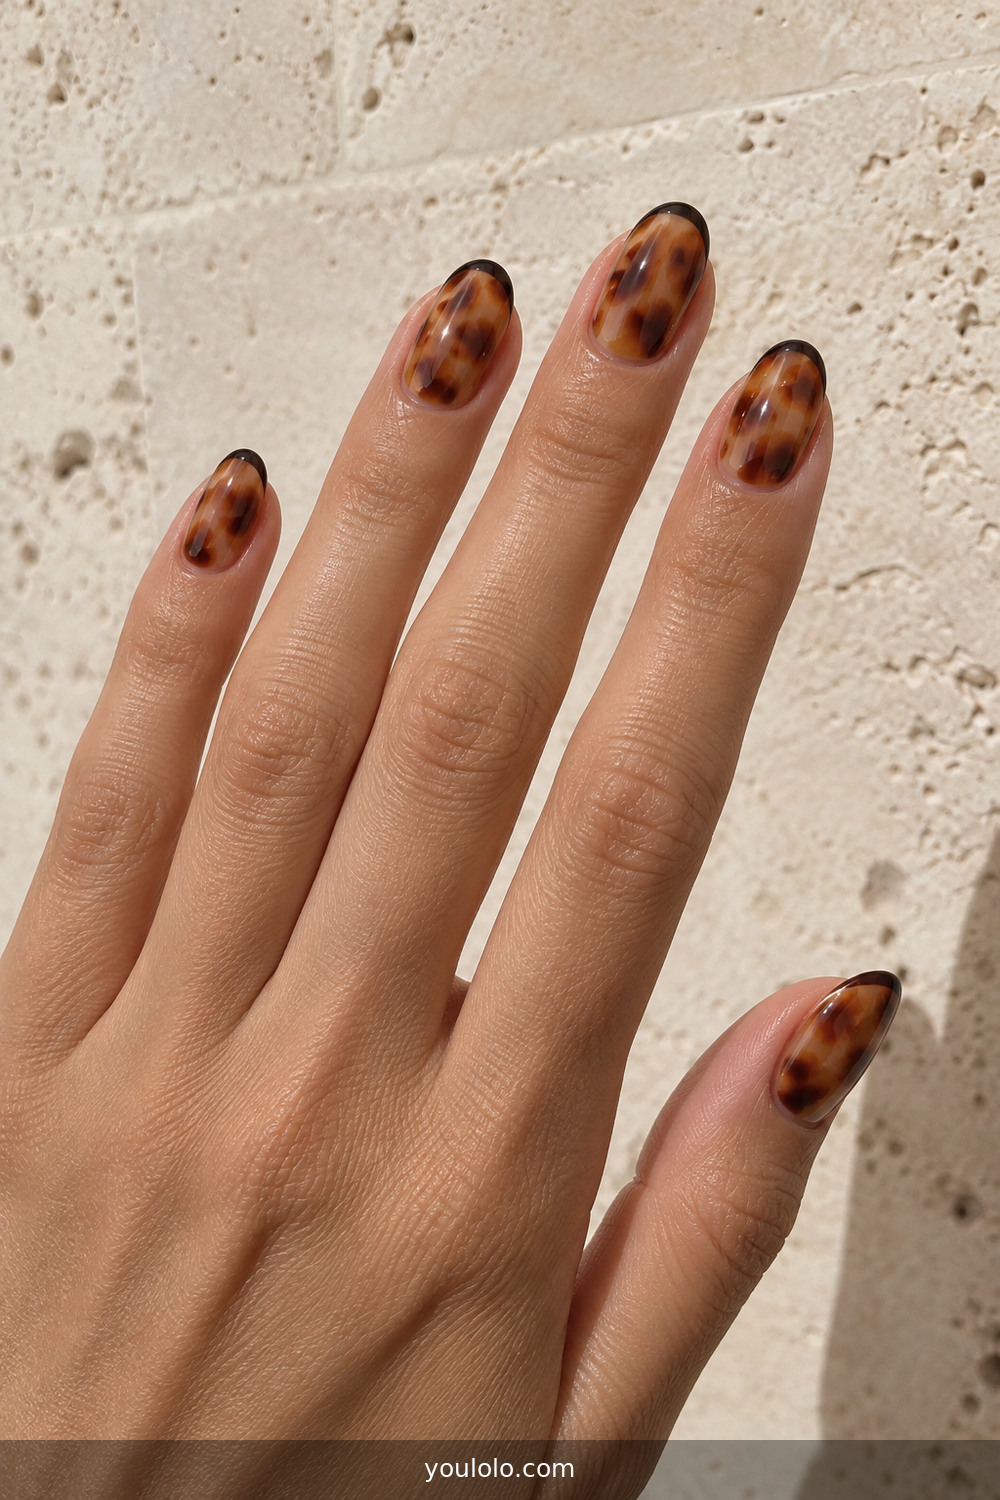
Tortoiseshell works because translucent amber layers allow dark brown spots to appear suspended instead of painted on top. The espresso micro tip gives the pattern a neat edge. I would request varied patches and leave a little warm transparency near the cuticle. This is an artistic manicure that behaves like a neutral, especially beside camel, denim, cream knits, and simple gold jewelry.
3. Peach-Lilac Aura Chrome
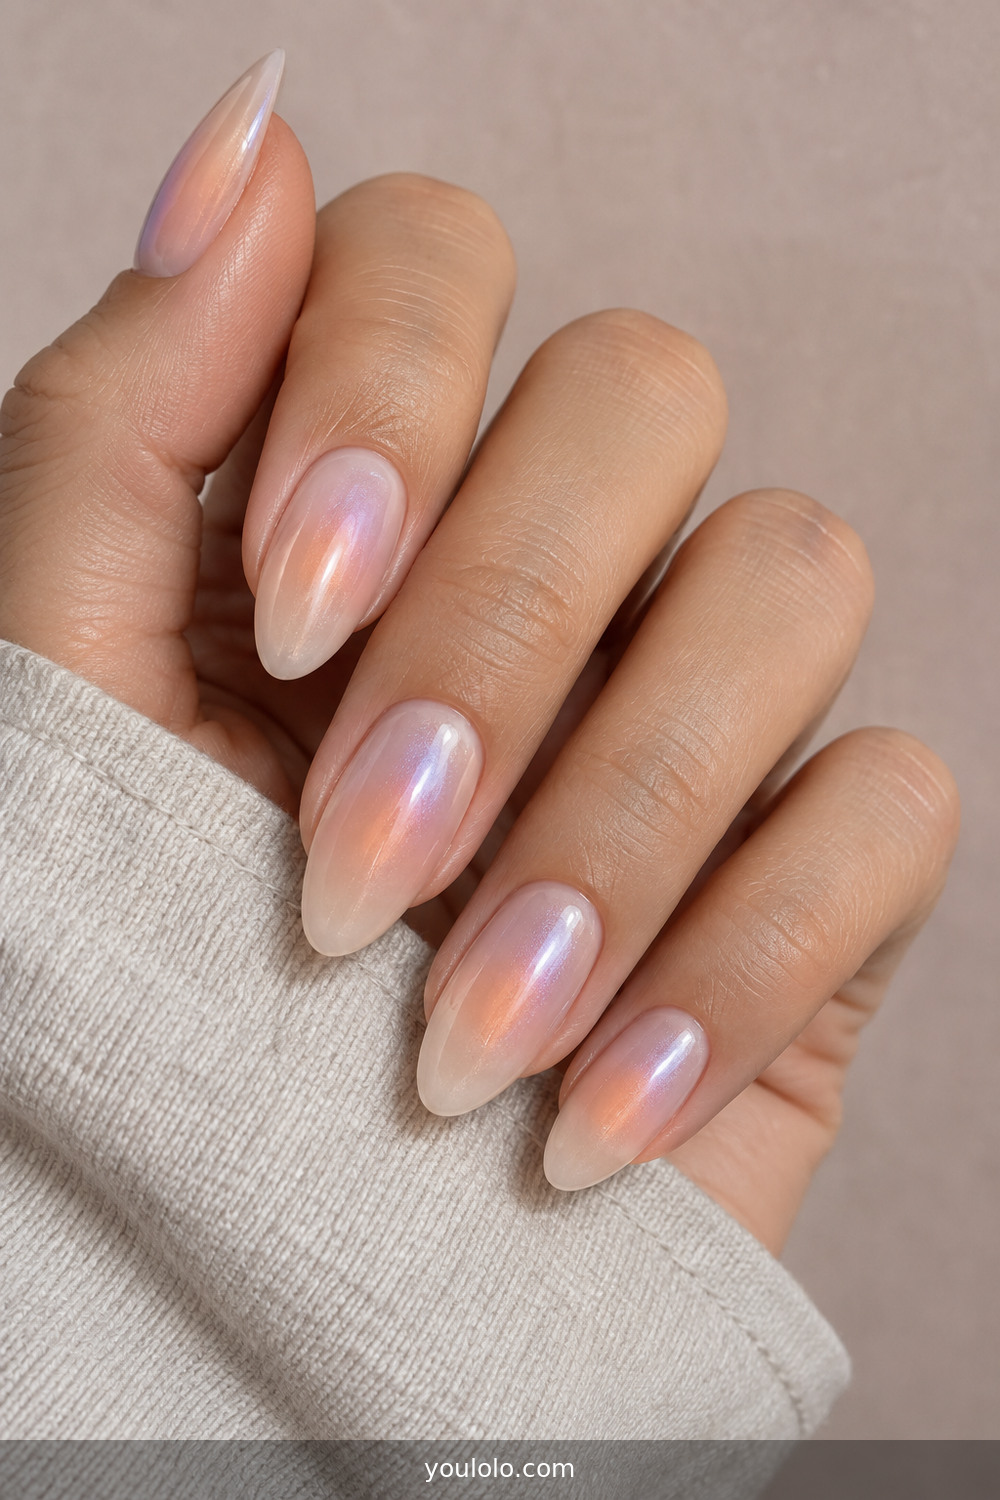
The airbrushed peach center melts into lilac, then fine pearl chrome turns the gradient into light. Because the colors are close in softness, the design changes gently rather than forming a bullseye. Ask for transparent edges and the finest powder available. If you enjoy this glow but want a paler palette, the finishes in my Milky White Chrome Nails collection are an easy companion reference.
4. Blue Porcelain Florals
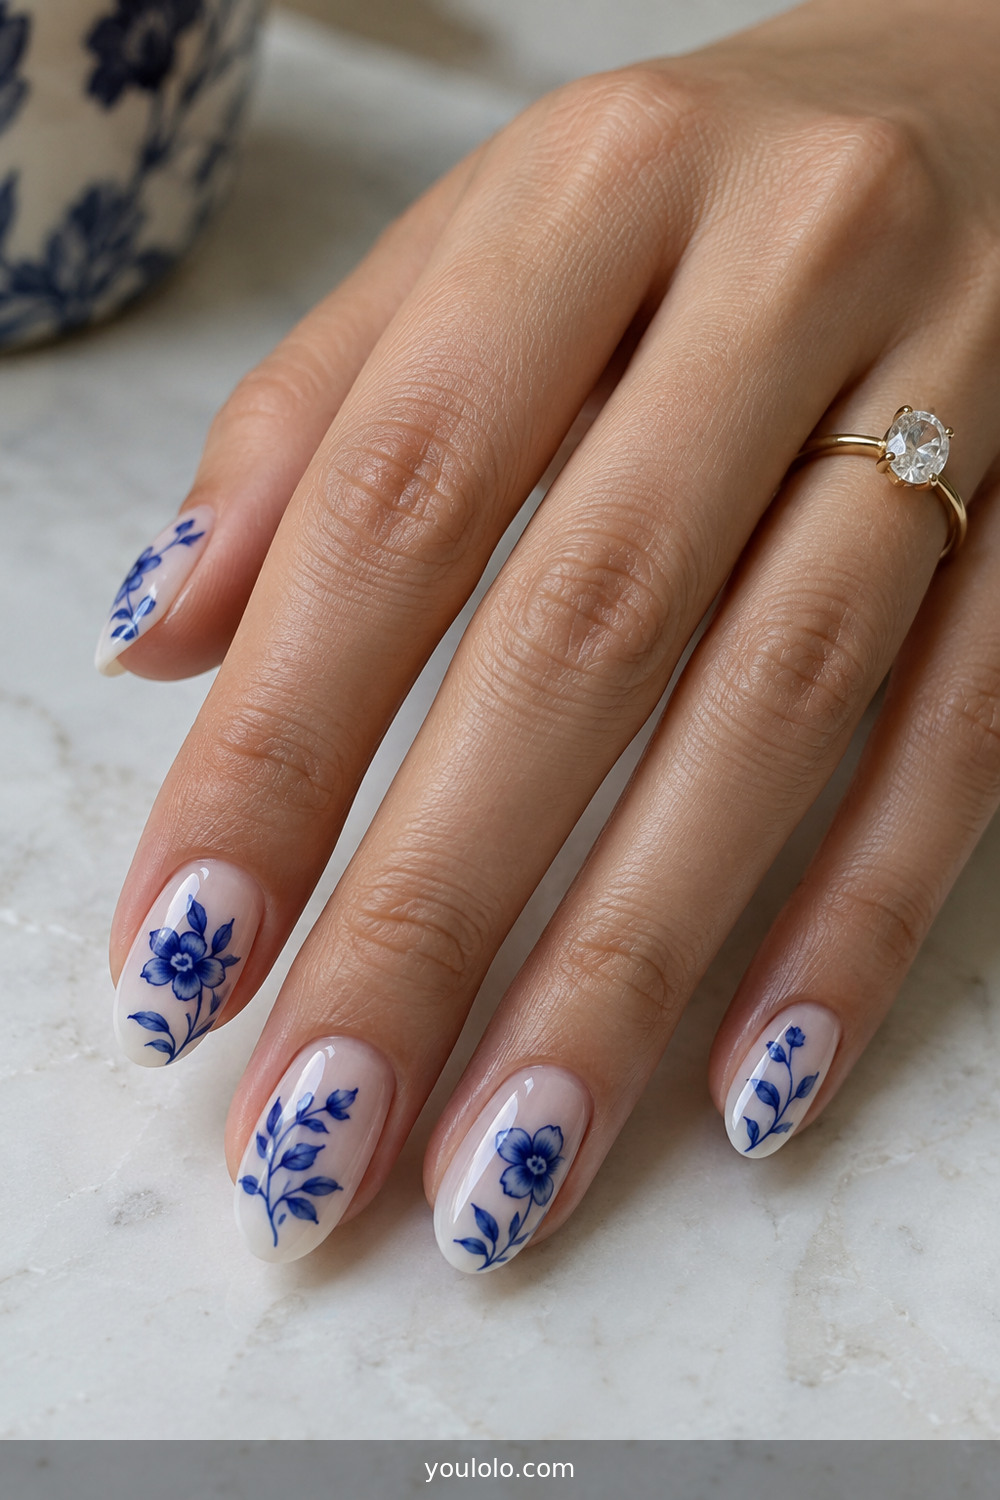
Fine cobalt flowers over milky white remind me of hand-painted teacups. The reason these Creative Nails stay modern is scale: delicate petals, narrow stems, and plenty of untouched base. I would put fuller flowers on two nails and use fragments or single leaves on the others. Short nails suit one tiny bloom near a corner; longer nails can carry a stem that travels diagonally.
5. One Tiny Jewel Dot
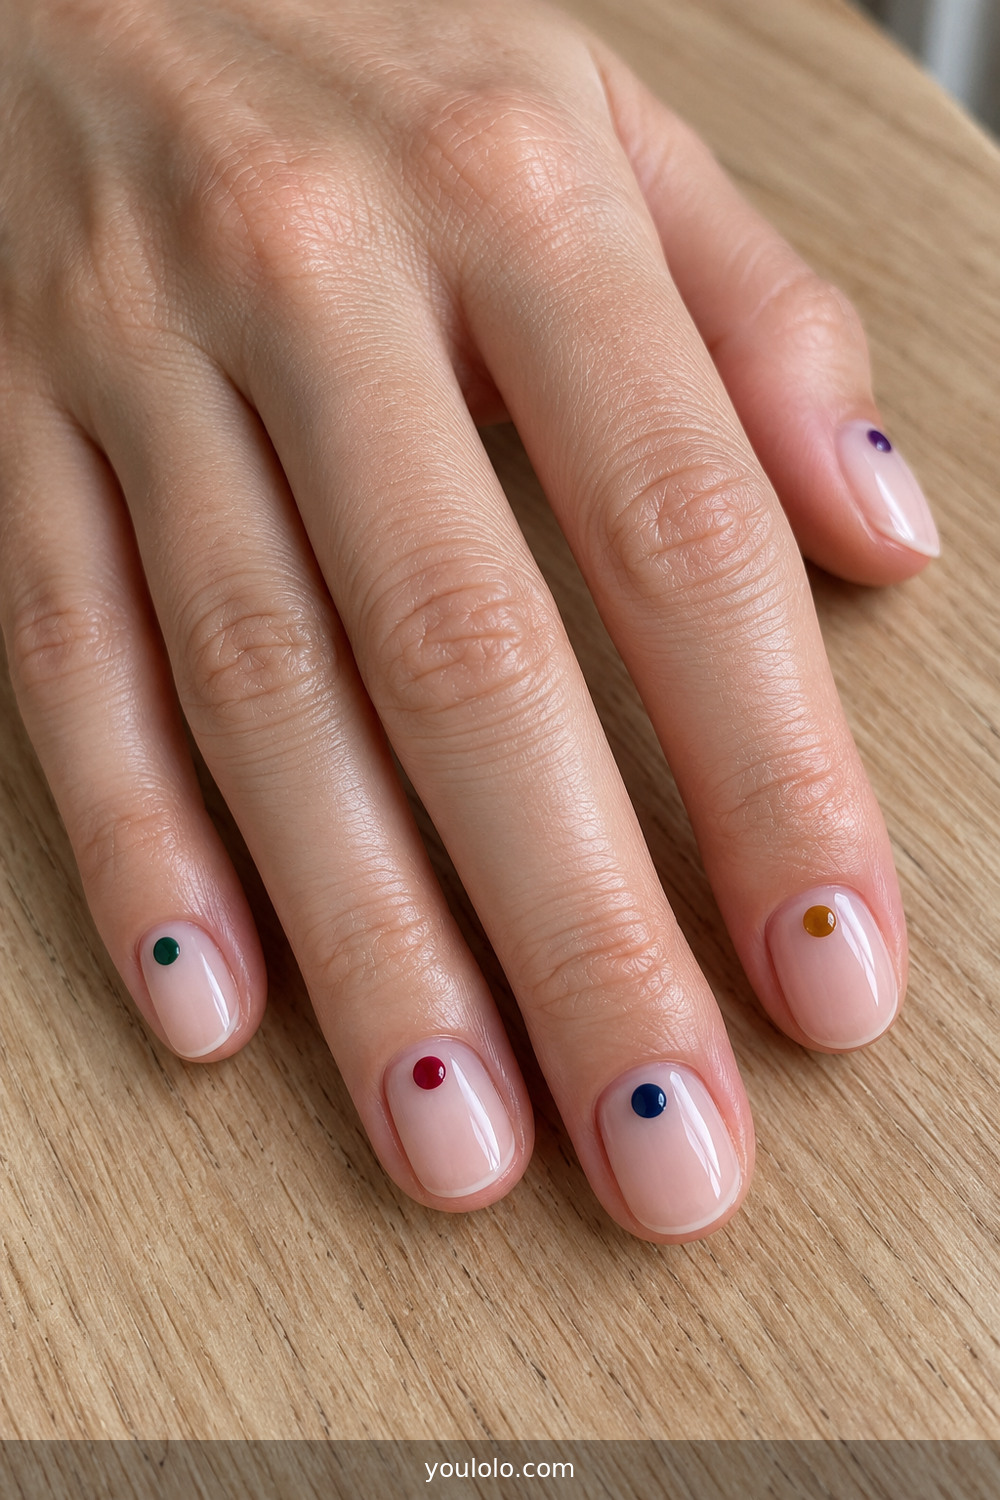
This may be the smallest of these Creative Nails, yet it has real personality. Each sheer nail receives one dot near the cuticle in garnet, emerald, sapphire, amber, or violet. Consistent placement makes the five colors feel considered. It is perfect for short natural nails and surprisingly easy to refresh. A dotting tool or the rounded end of a hairpin can recreate it at home.
6. Molten Silver Side Details
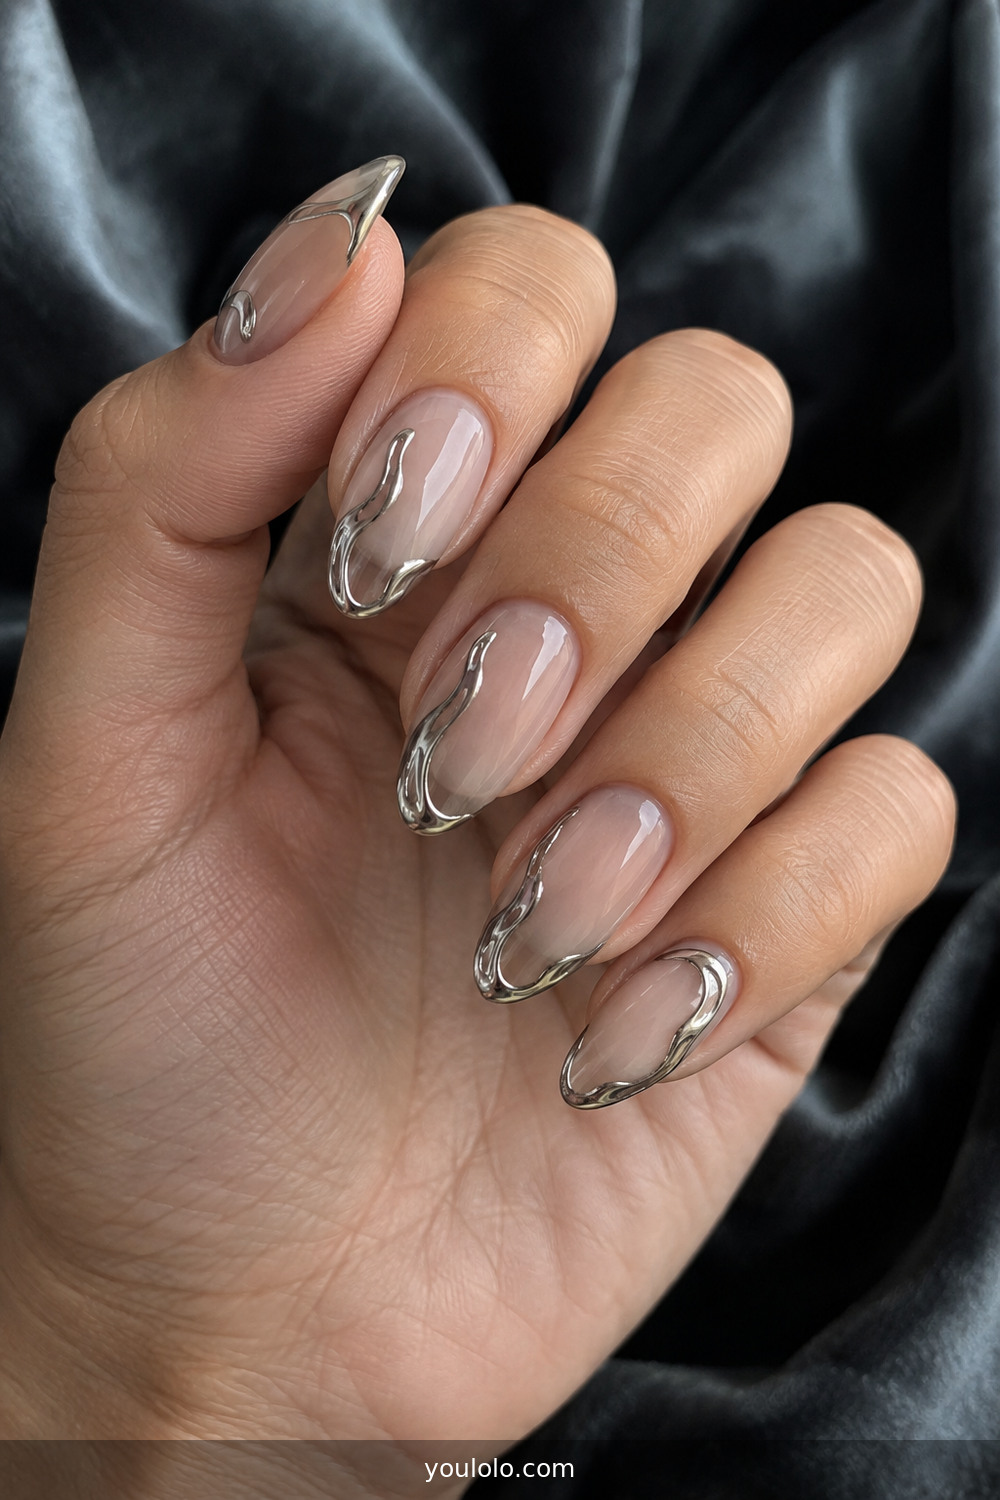
Irregular silver pools sit along the sidewalls like liquid metal, while most of the nail stays transparent. I prefer this to a full chrome set because the reflective texture becomes a detail instead of a costume. Ask your artist to build the shapes smoothly and seal every edge. On short nails, use smaller silver fragments; on almond nails, a longer side accent emphasizes the taper.
7. Olive Checkerboard Mix
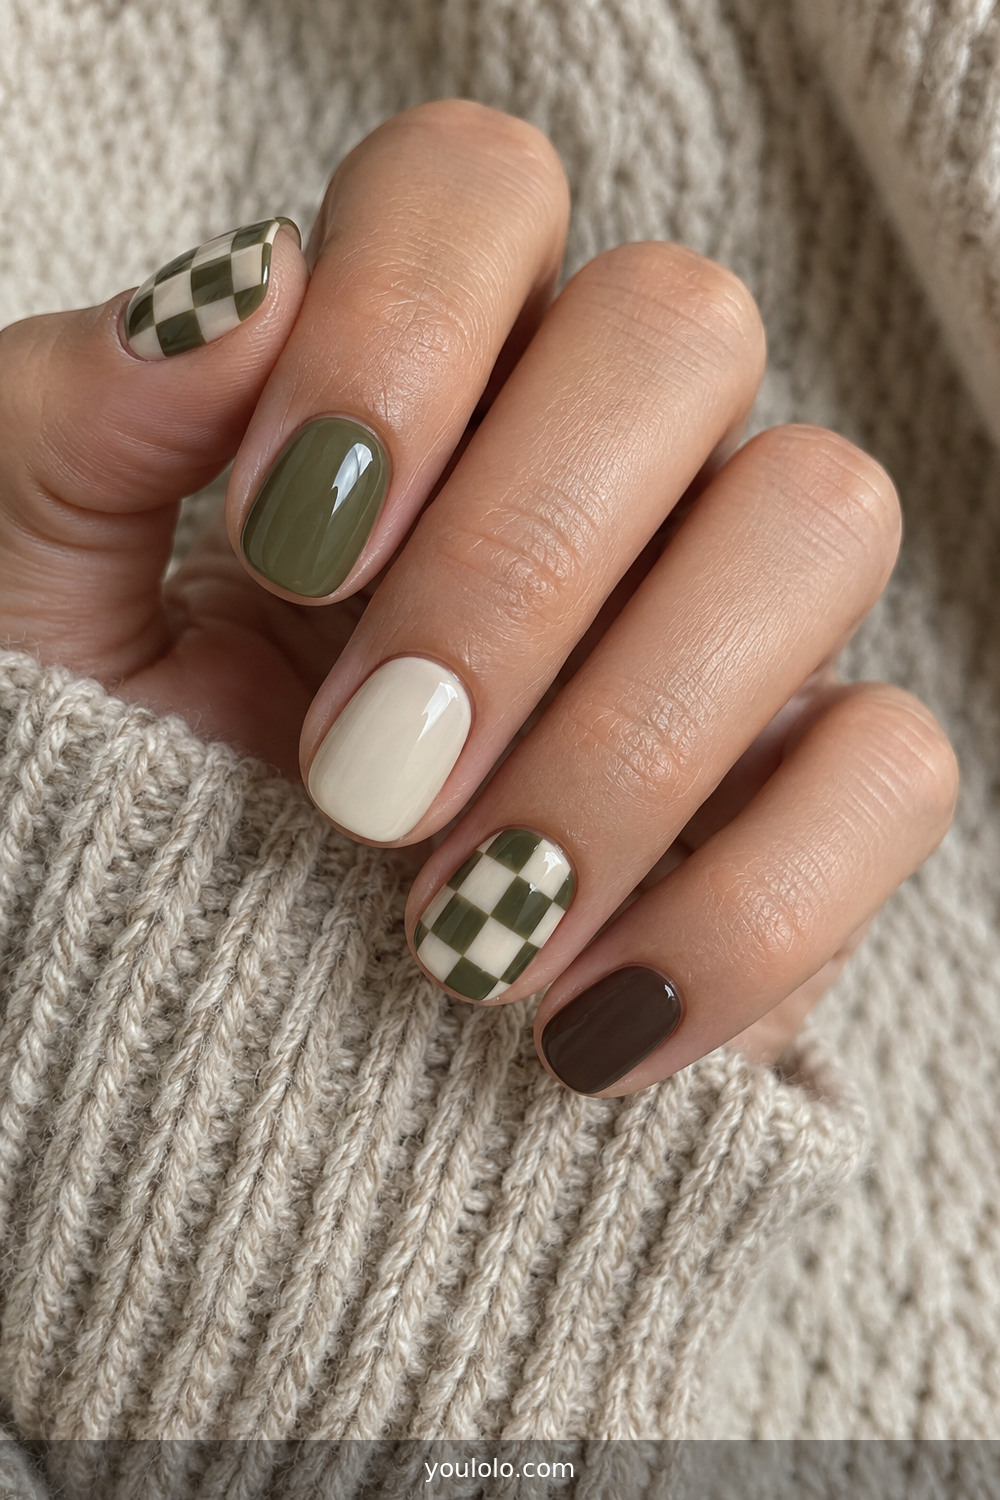
Olive, cream, and espresso make checkerboard feel earthy instead of sporty. My favorite balance is two patterned nails, then three solid nails split between the palette. Tiny imperfections are normal with hand painting, but the grid should stay aligned. A compact squoval shape keeps the squares readable. This combination is especially good for early autumn when bright summer colors suddenly feel too loud.
8. Crystal Dew Drops
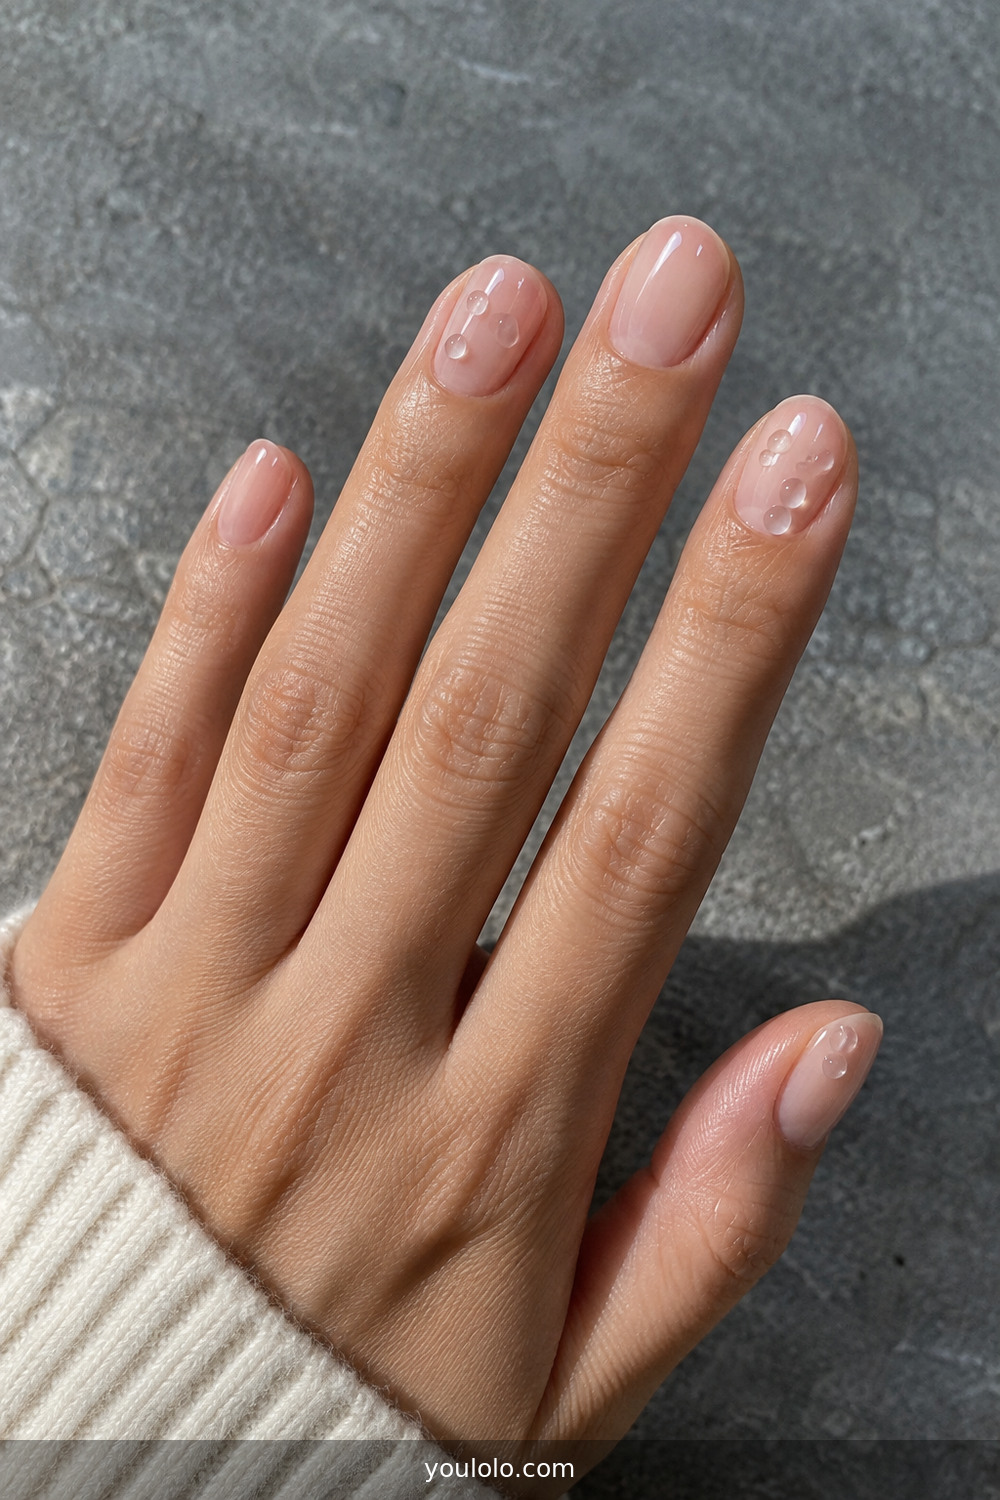
Clear builder-gel droplets create texture without introducing another color. The trick is restraint: a small cluster on one or two nails and perhaps one drop on an accent finger. They should be rounded, smooth, and fully cured, with no sharp edges. I would choose this set before a short event rather than a month of gardening or heavy cleaning because raised details need gentler hands.
9. Fine Line-Art Faces
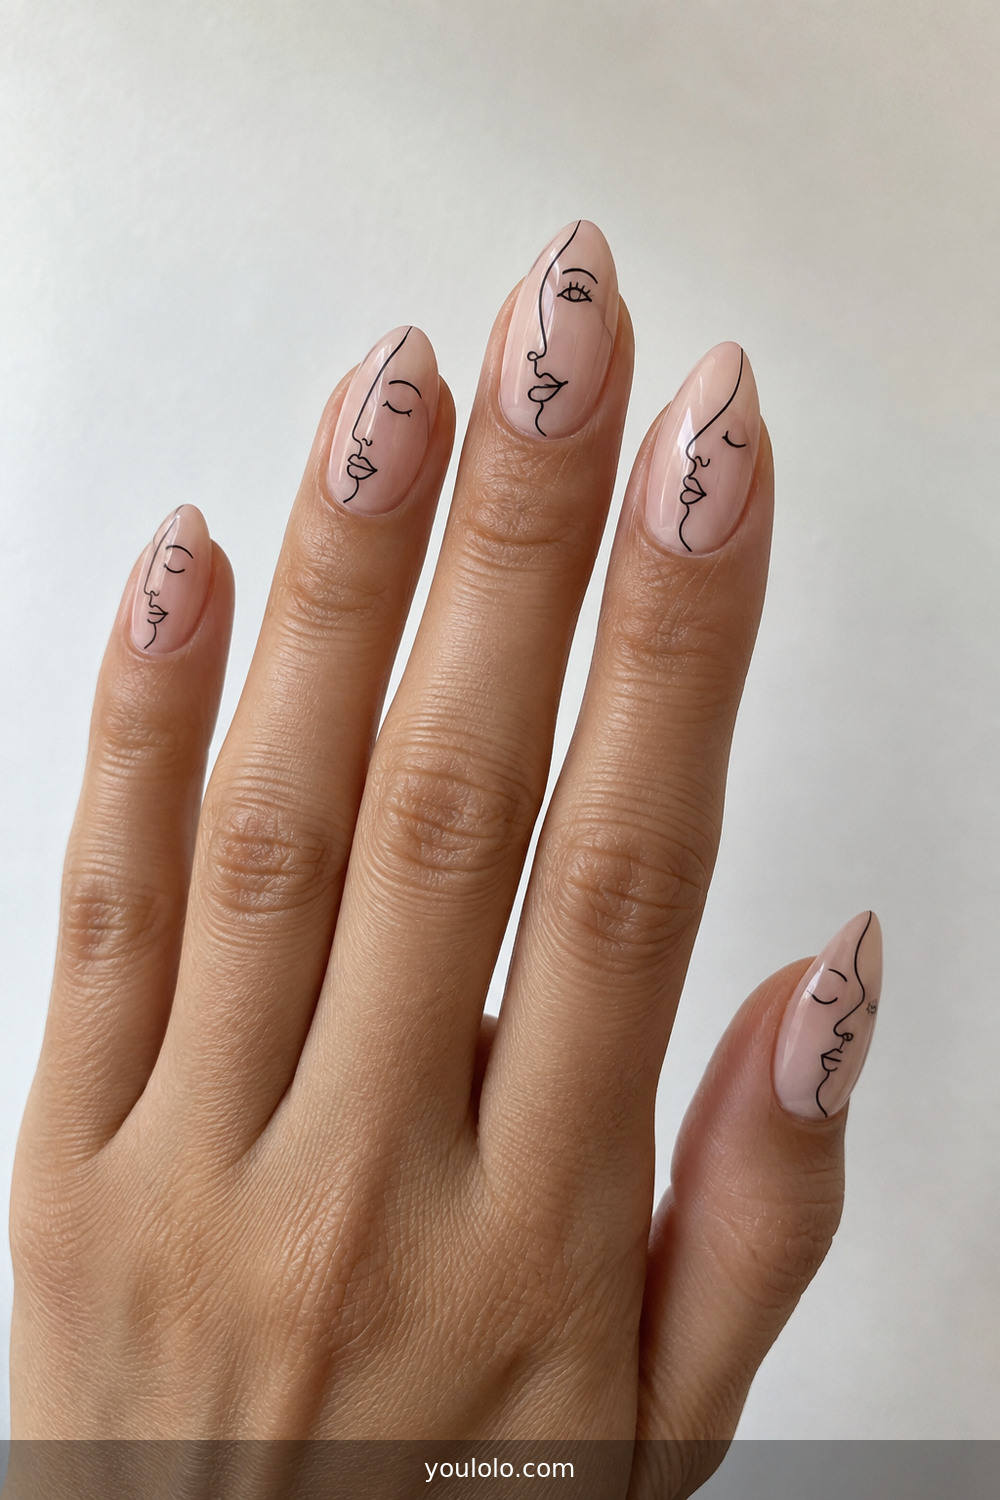
One fine black profile per nail turns a nude manicure into a miniature sketchbook. The art looks best when lines vary and no face is copied like a stamp. I would keep the base translucent and avoid extra glitter. If ten illustrated features feel busy, place faces on the middle and ring fingers and leave the others glossy nude. The empty surface is part of the drawing.
10. Miniature Fruit Market
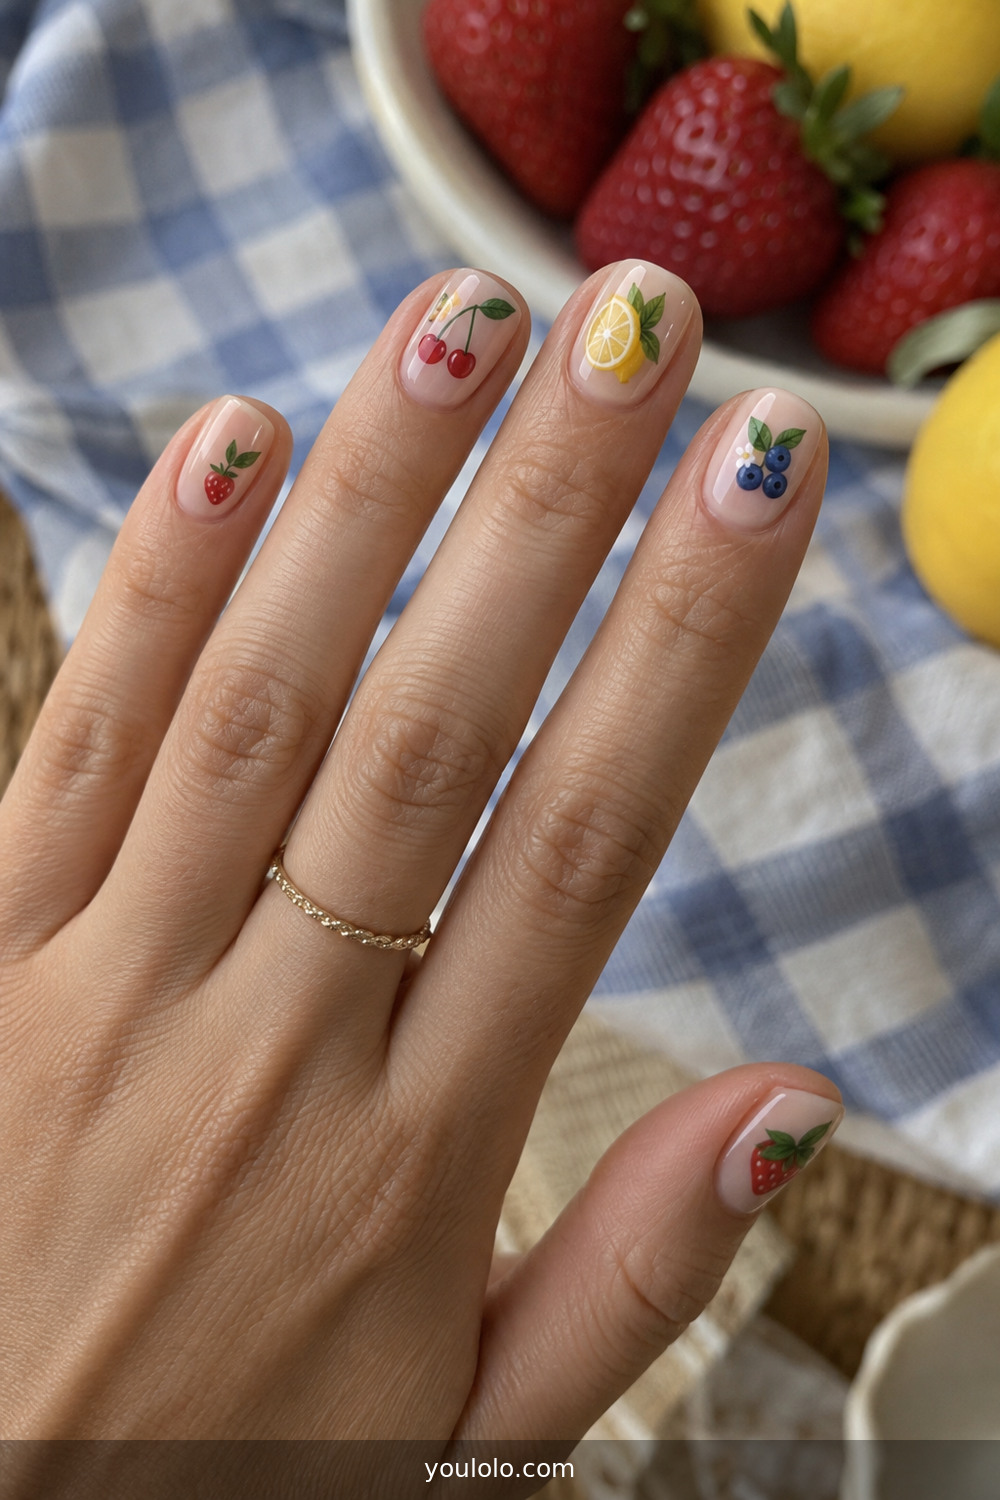
Tiny cherries, lemon slices, blueberries, and strawberries make a playful mismatch that still feels polished on a sheer base. I would repeat green leaves across two motifs so the fruit shares a visual thread. Ask for miniature scale and realistic color rather than large cartoon decals. On very short nails, one cherry or berry cluster is enough; crowding multiple fruits removes their charm.
11. Jelly Lava-Lamp Blobs
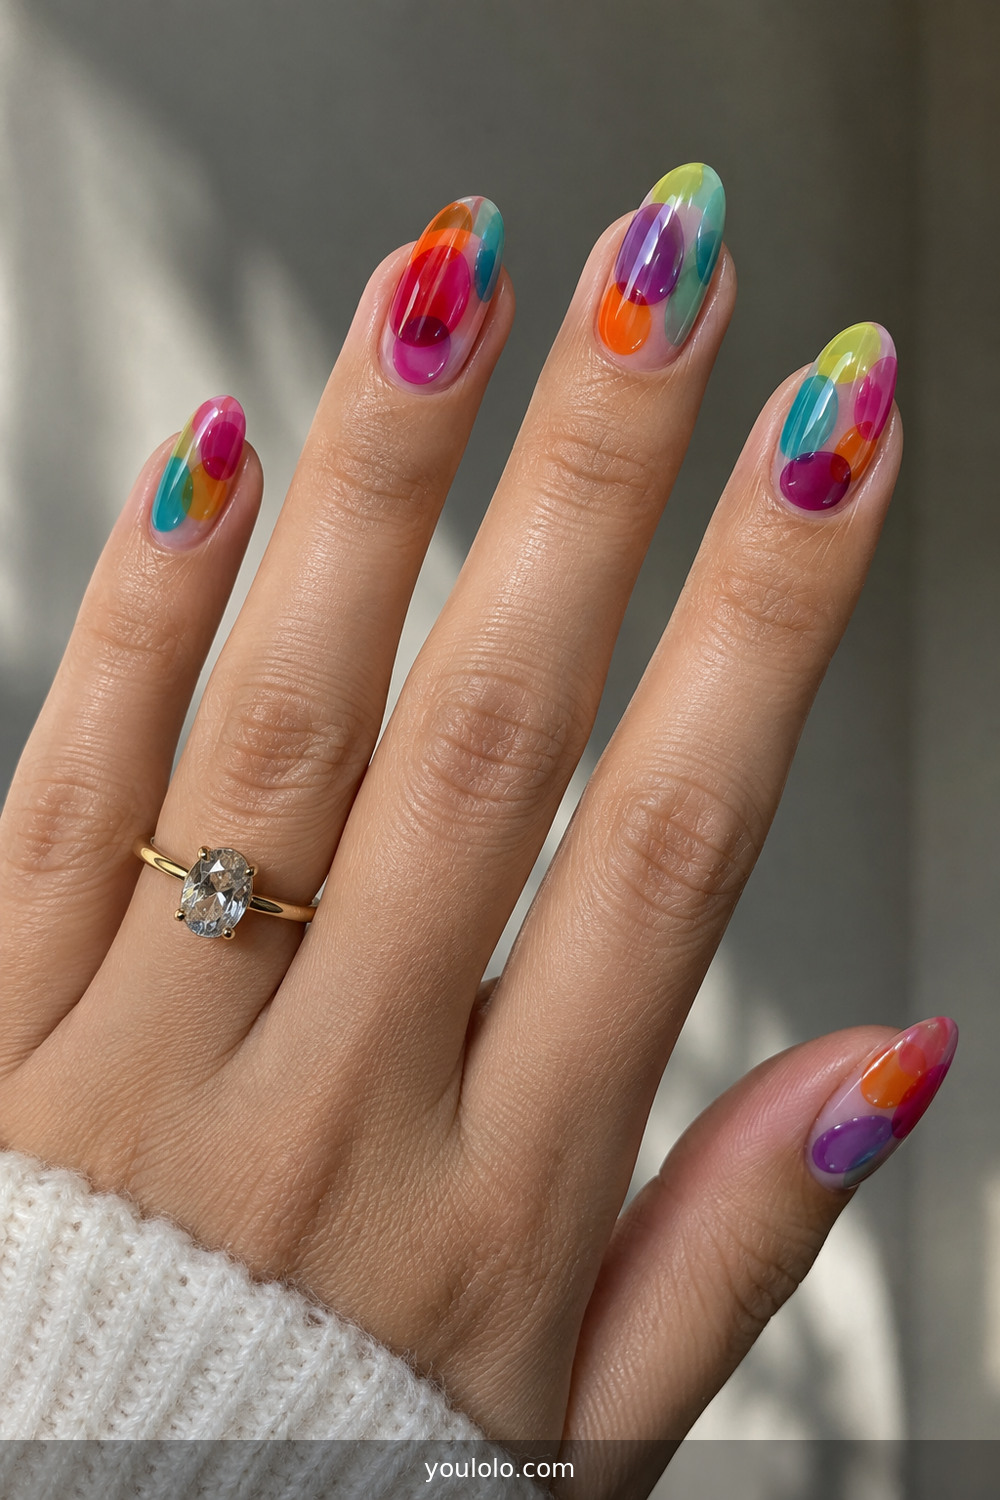
Translucent raspberry, orange, violet, aqua, and lime overlap in soft-edged shapes. Blooming gel helps the blobs expand, while jelly polish keeps the intersections luminous. The palette is bold, so I would avoid charms and chrome. Medium oval nails give the colors space to overlap. On short nails, limit each finger to two shades and keep a small clear border around the cuticle.
12. Stained-Glass French Tips
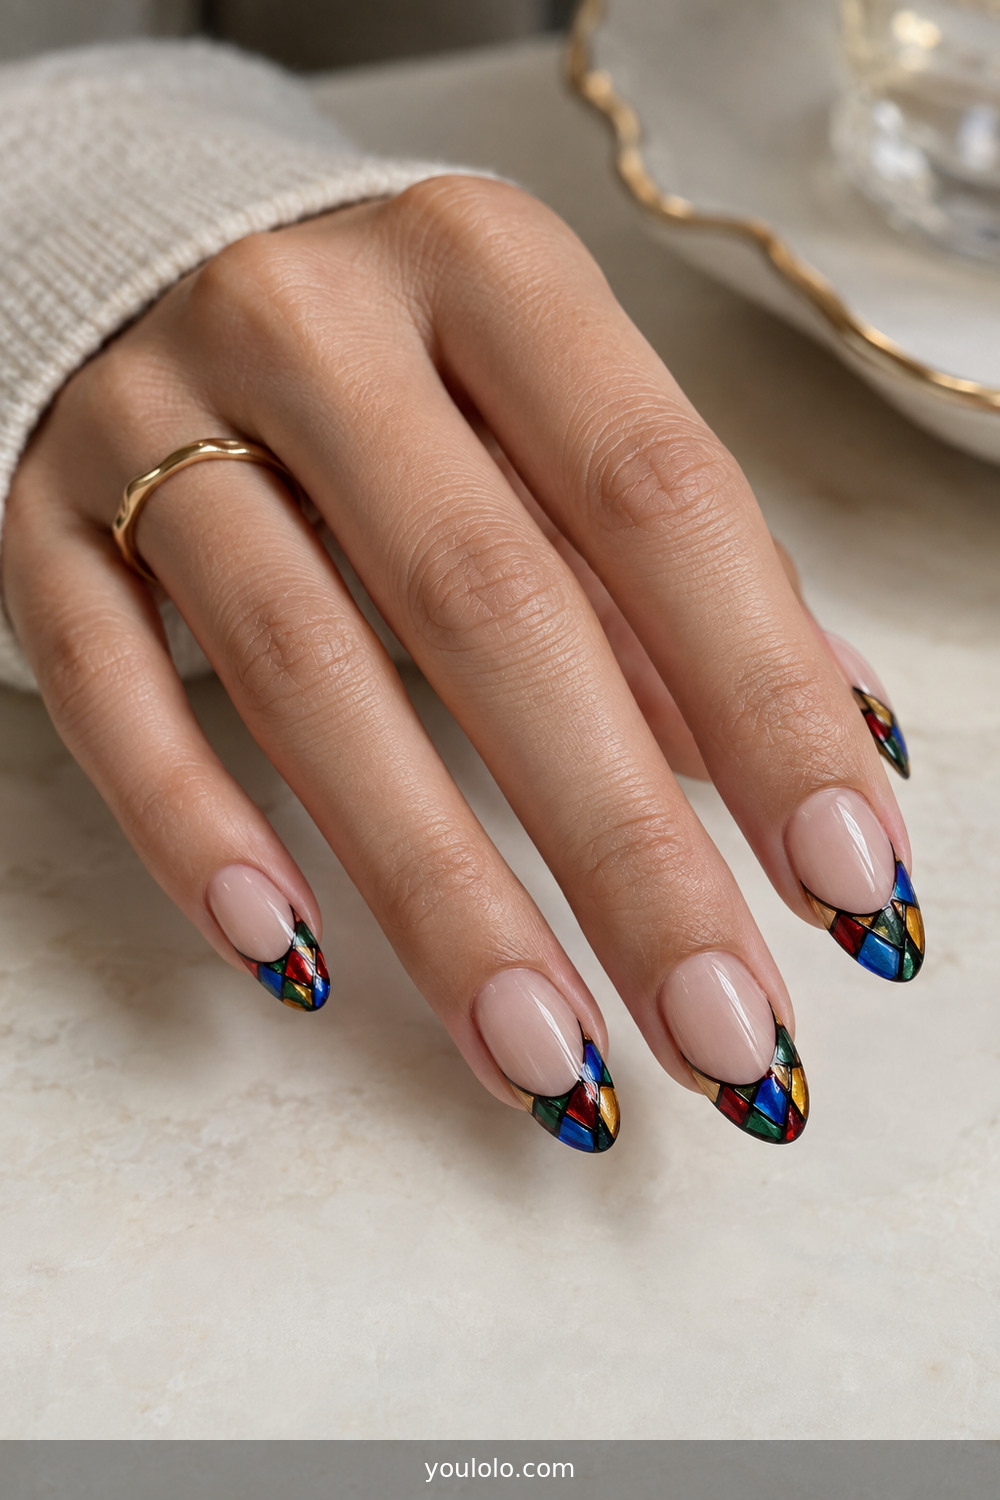
Small ruby, amber, cobalt, and emerald panes turn the French tip into stained glass. Very thin dark lines separate the translucent colors, while the lower nail stays nude. This requires a steady hand and suits medium length best. Ask for irregular pane sizes so it looks crafted, not tiled. A glossy top coat should smooth the entire surface until no painted line can be felt.
13. Midnight Celestial Details
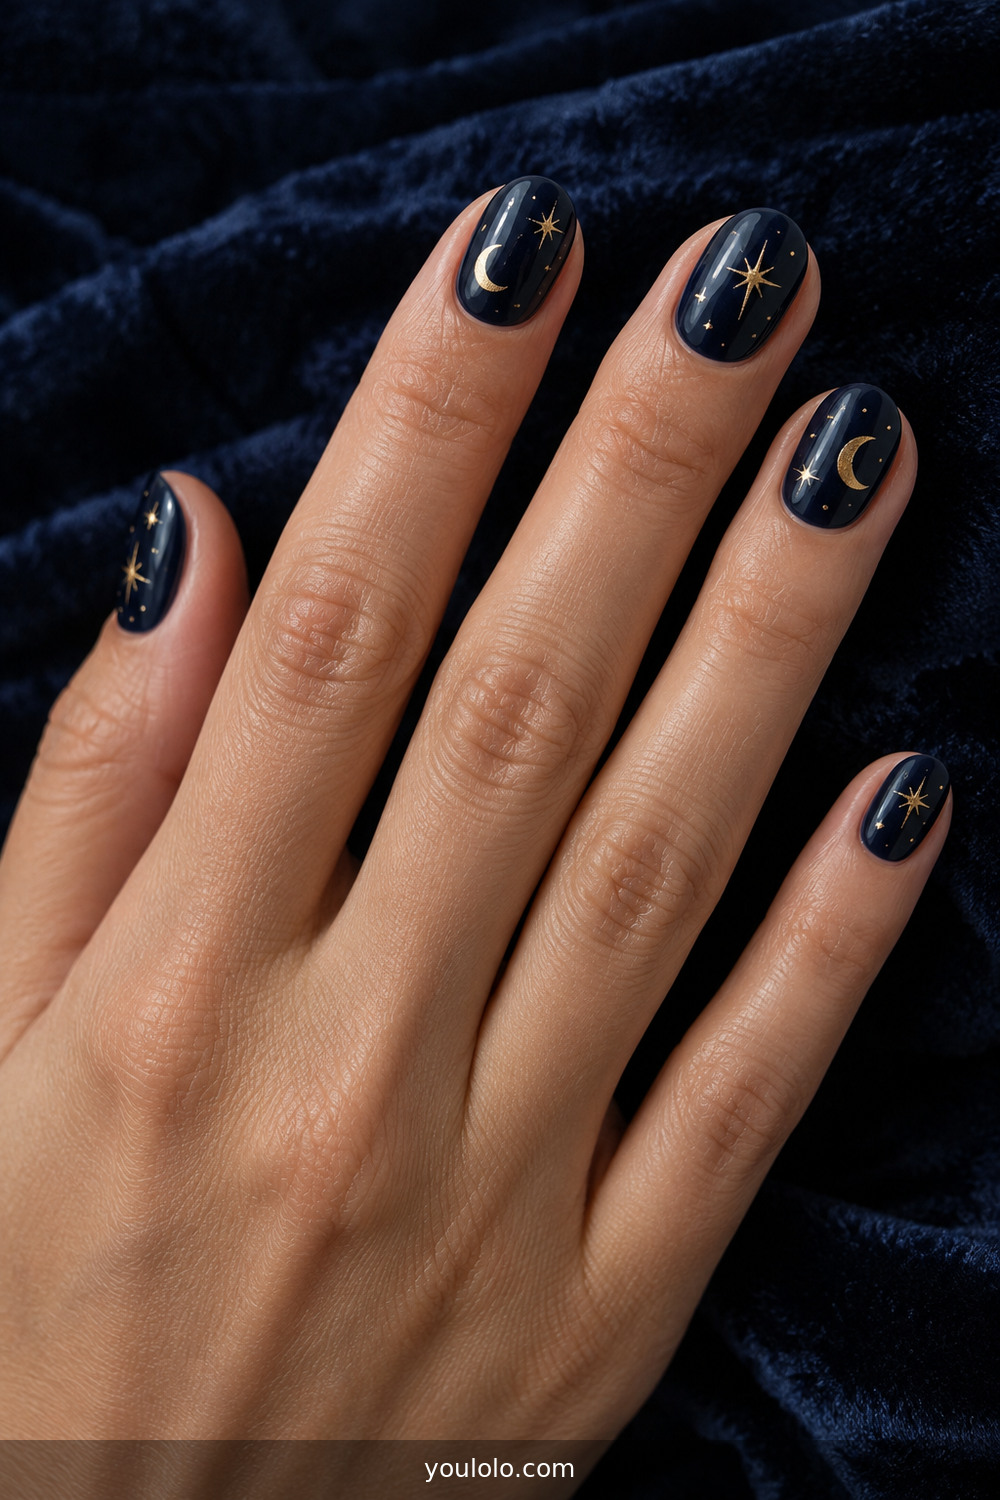
Deep navy becomes the night sky for tiny gold stars, crescents, and scattered dots. I like varying the composition while repeating the same fine gold. A small moon on one finger and two stars on another are enough. Keep metallic details flat so they do not snag. This is one of the dressier Creative Nails options, but short rounded nails stop it feeling theatrical.
14. Cream Terrazzo Chips
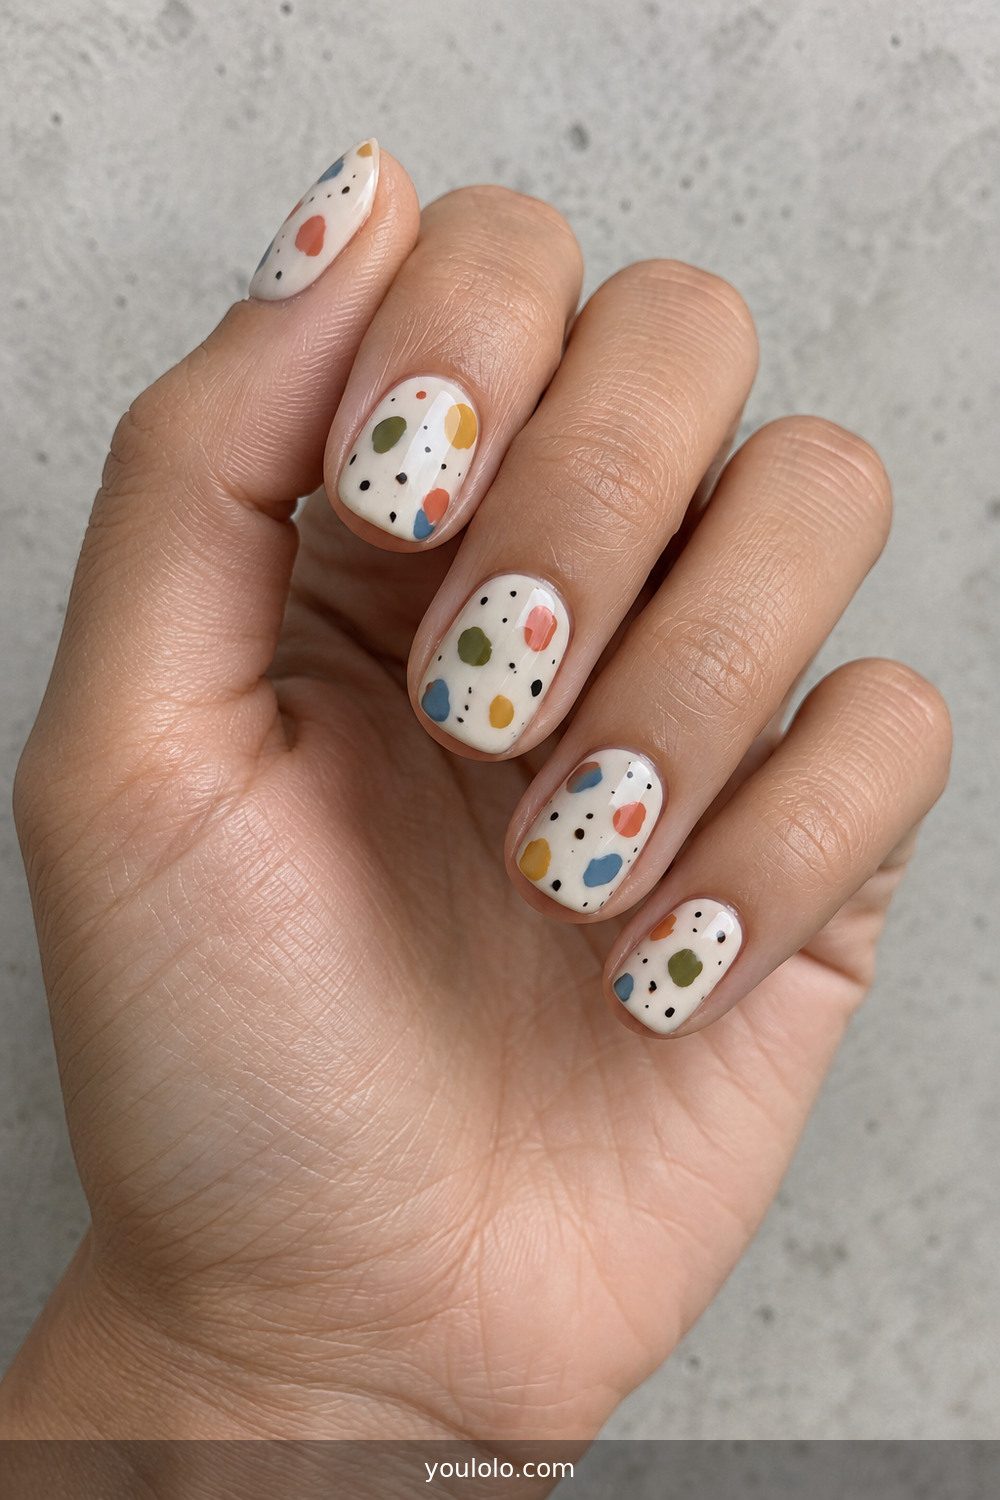
A cream background softens little chips of coral, mustard, sage, cobalt, and black. Terrazzo succeeds when the marks vary in size and direction but do not fill every gap. I would ask for one or two darker chips per nail to anchor the paler colors. The pattern is forgiving on short nails and easier to hand-paint than it appears because perfectly identical pieces would look less authentic.
15. Watercolor Garden
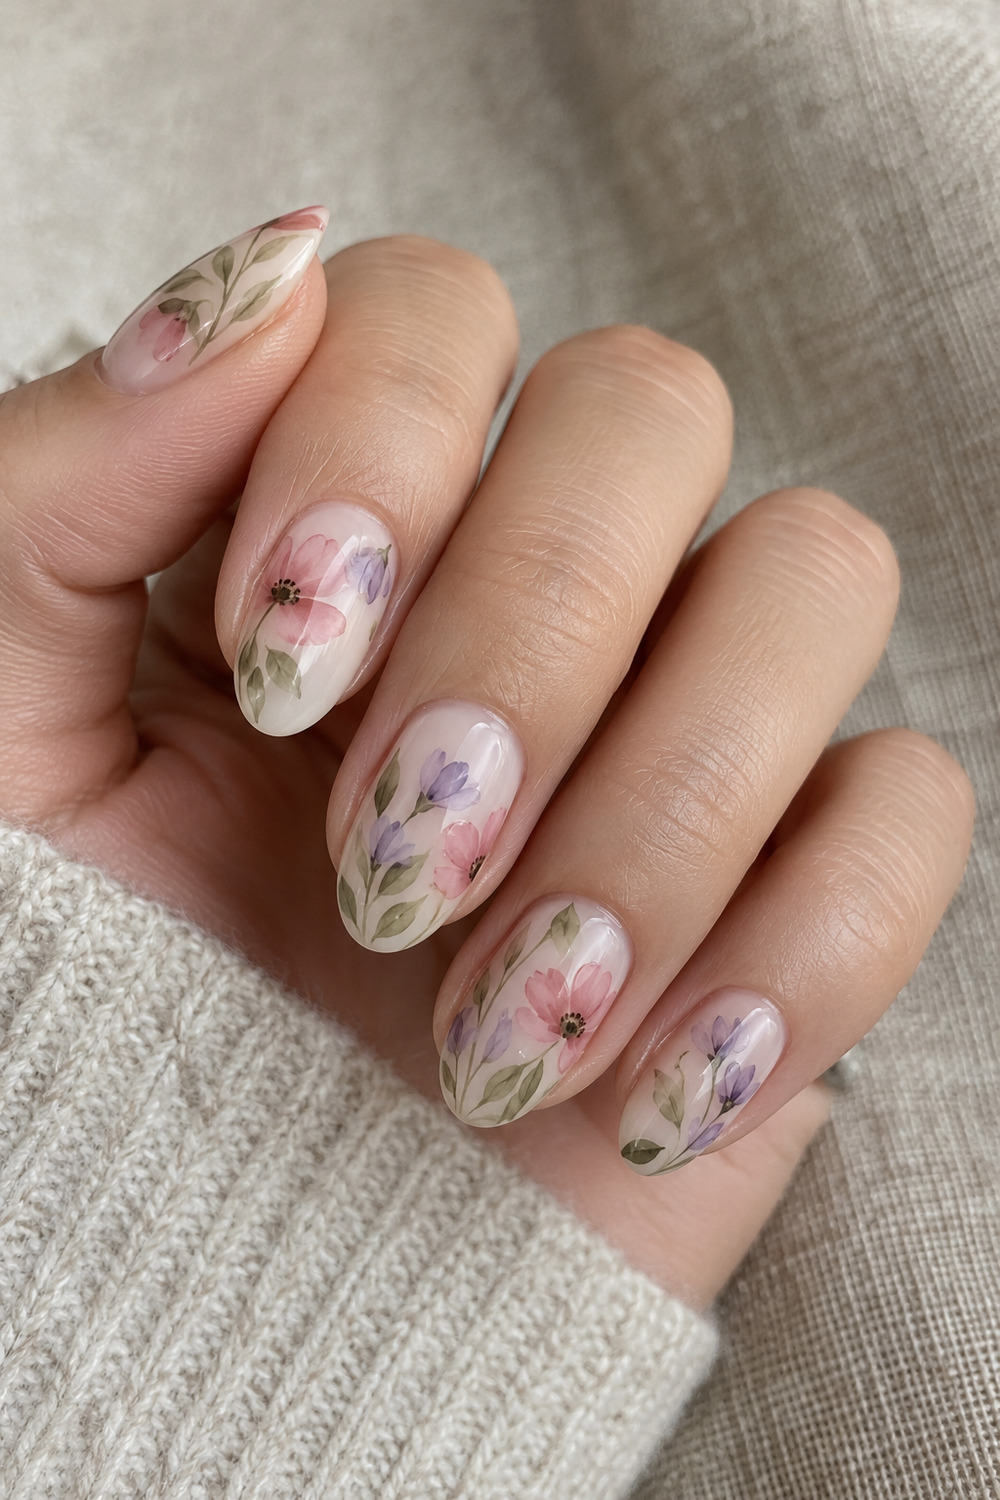
Translucent pink petals, soft lavender, and watery green leaves appear to fade into a milk base. The artist can dilute gel color or use blooming gel for feathered edges, then add only a few sharp lines after curing. That combination of blur and detail makes the flowers believable. I would keep each nail different and allow at least one nearly empty finger to lighten the garden.
16. Lavender Cow-Print Patches
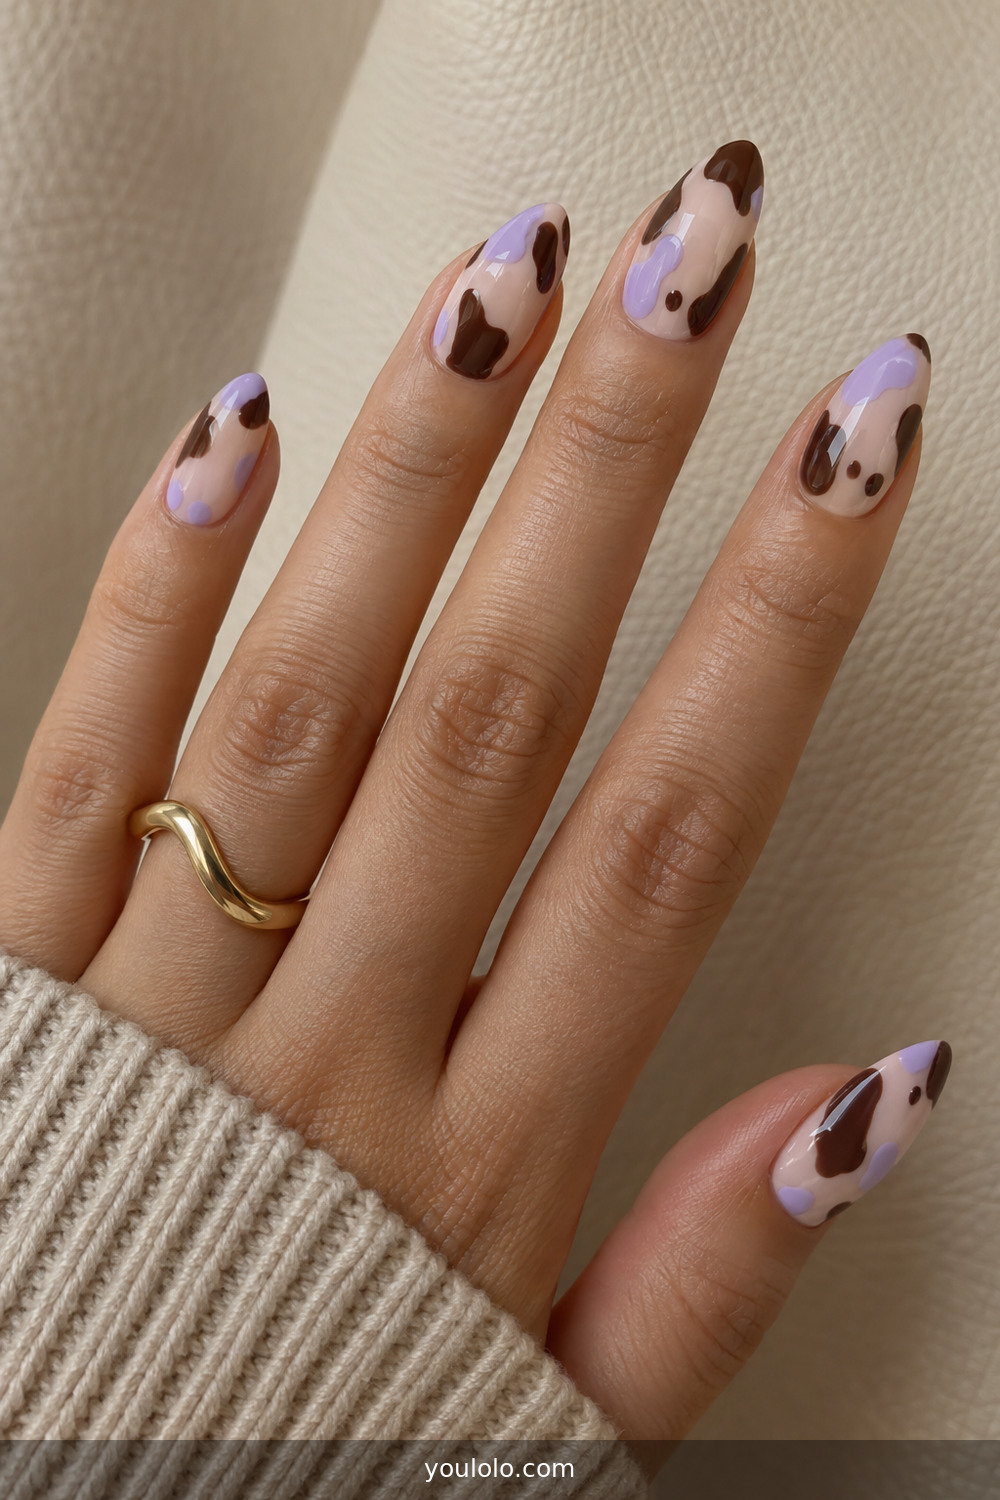
Chocolate patches paired with lavender make animal print less expected. Rather than covering every surface, place a few irregular spots on a sheer milky base. The negative space gives the pattern a cleaner fashion feel. I would use lavender on two nails, chocolate on two, and mix both on one. Rounded spots should remain uneven; symmetry is what makes cow print look artificial.
17. Black-and-Ivory Optical Waves
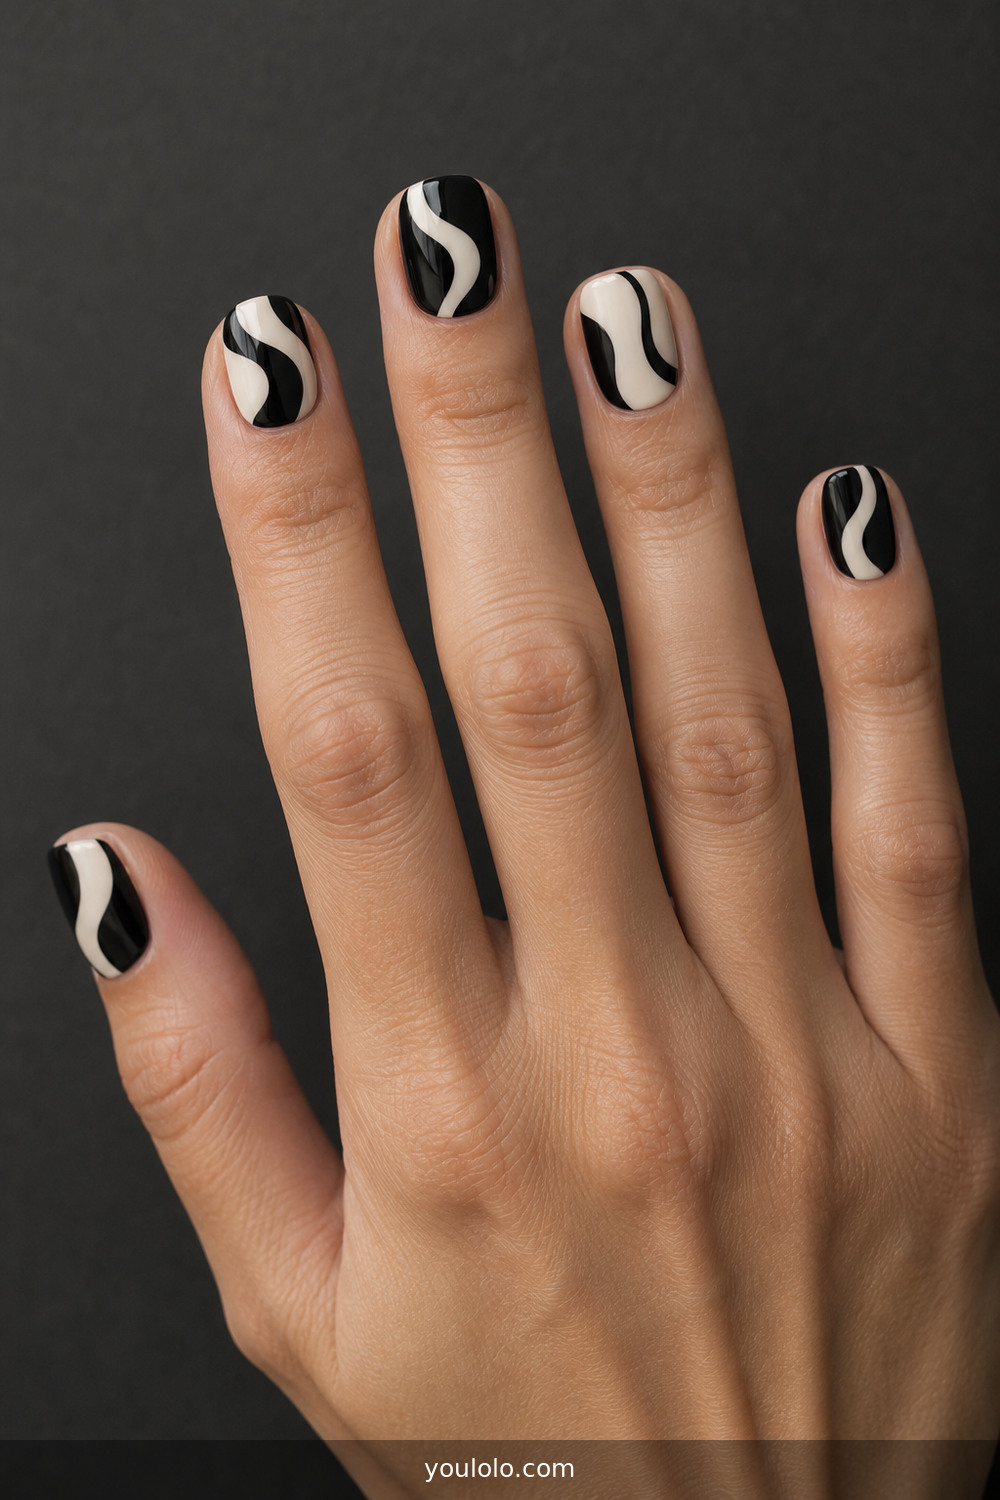
High-contrast waves create movement without requiring a rainbow palette. The lines curve differently on every finger, but black and ivory unify the set. Ask for medium line width: ultra-thin stripes can look shaky, while wide ones swallow a short nail. A glossy finish sharpens the contrast; matte makes it feel more graphic. I would choose short squoval nails so the art resembles small modern prints.
18. Rose-Gold Flame Tips
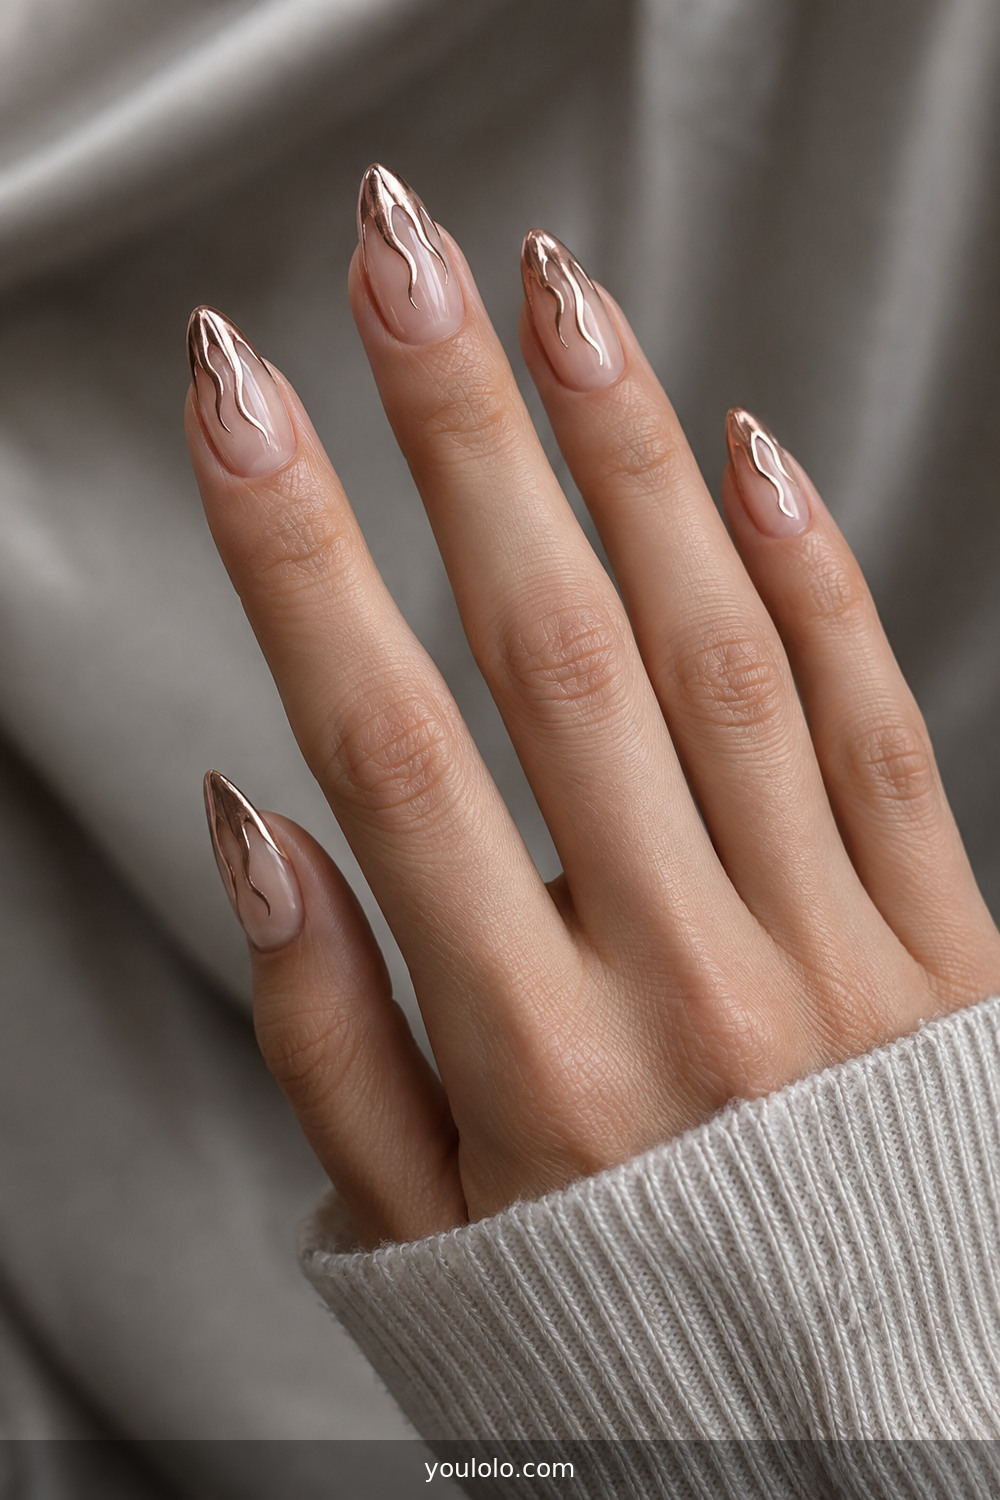
Slender rose-gold flames climb from the tips over a sheer neutral base. Chrome powder makes the shapes reflective, but the soft metal color keeps them wearable. I would keep flames low on shorter nails and stretch them along medium almonds to echo the taper. Clean borders are essential. Before the appointment, decide whether you prefer warm coppery rose gold or a cooler pink-silver finish.
19. Pressed Forget-Me-Nots
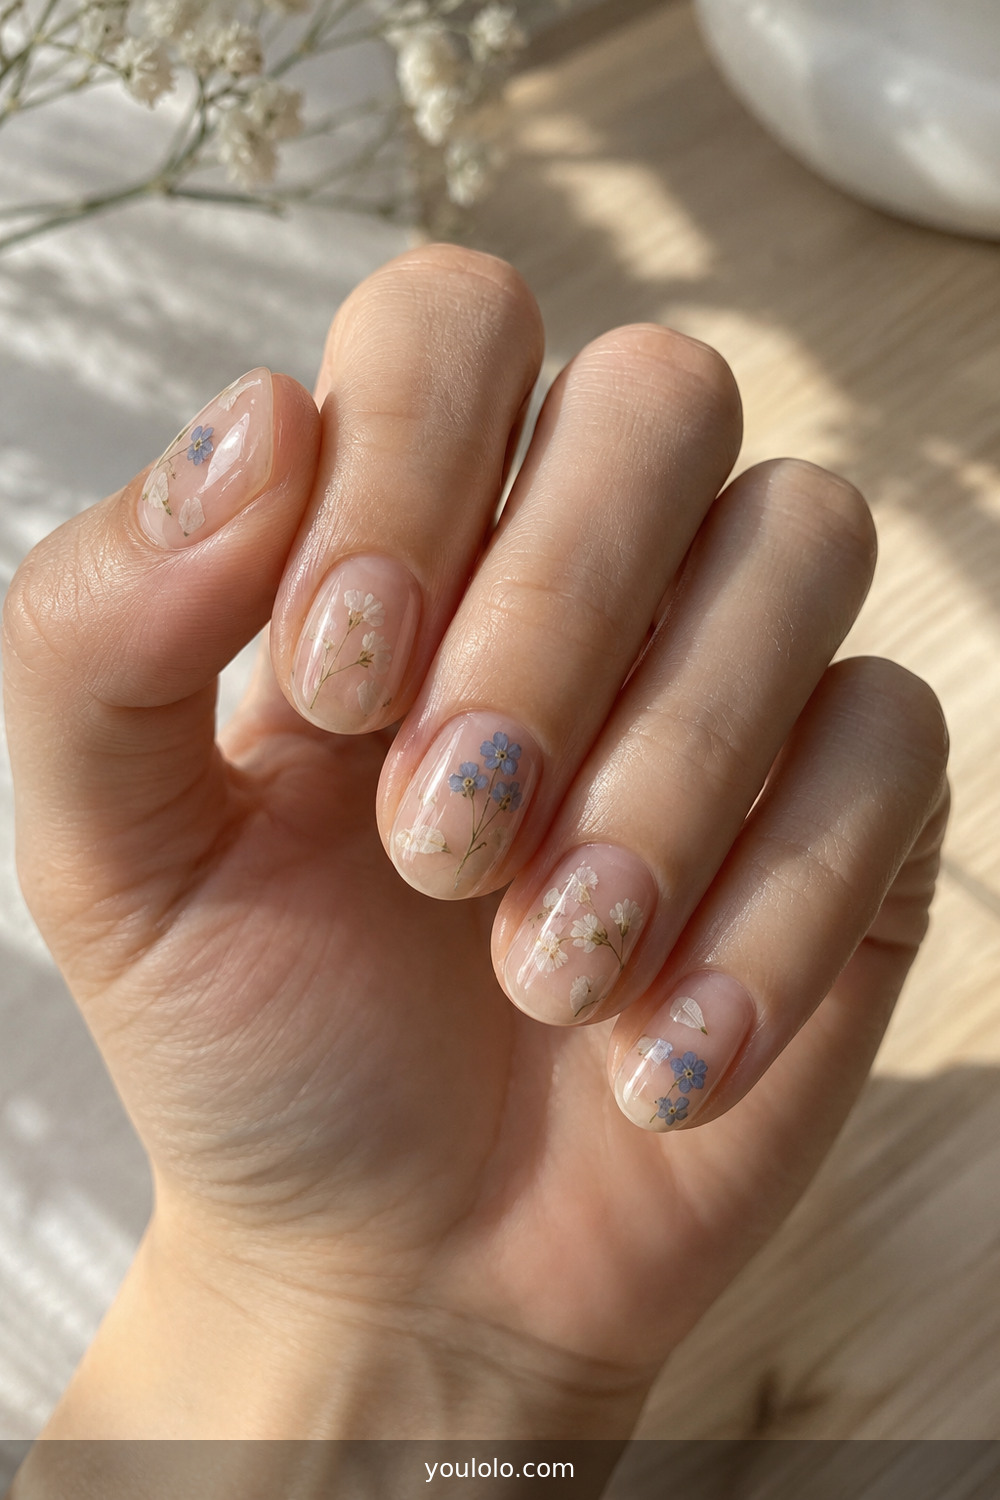
Tiny dried blue and white flowers sealed inside clear gel feel delicate because the petals are real and naturally imperfect. They need to lie flat before encapsulation; bulky stems create uneven surfaces. I would scatter them near corners rather than centering one flower on every nail. A neutral base preserves the botanical effect and lets this set grow out more gracefully than an opaque floral manicure.
20. Soft Pearl Bubbles
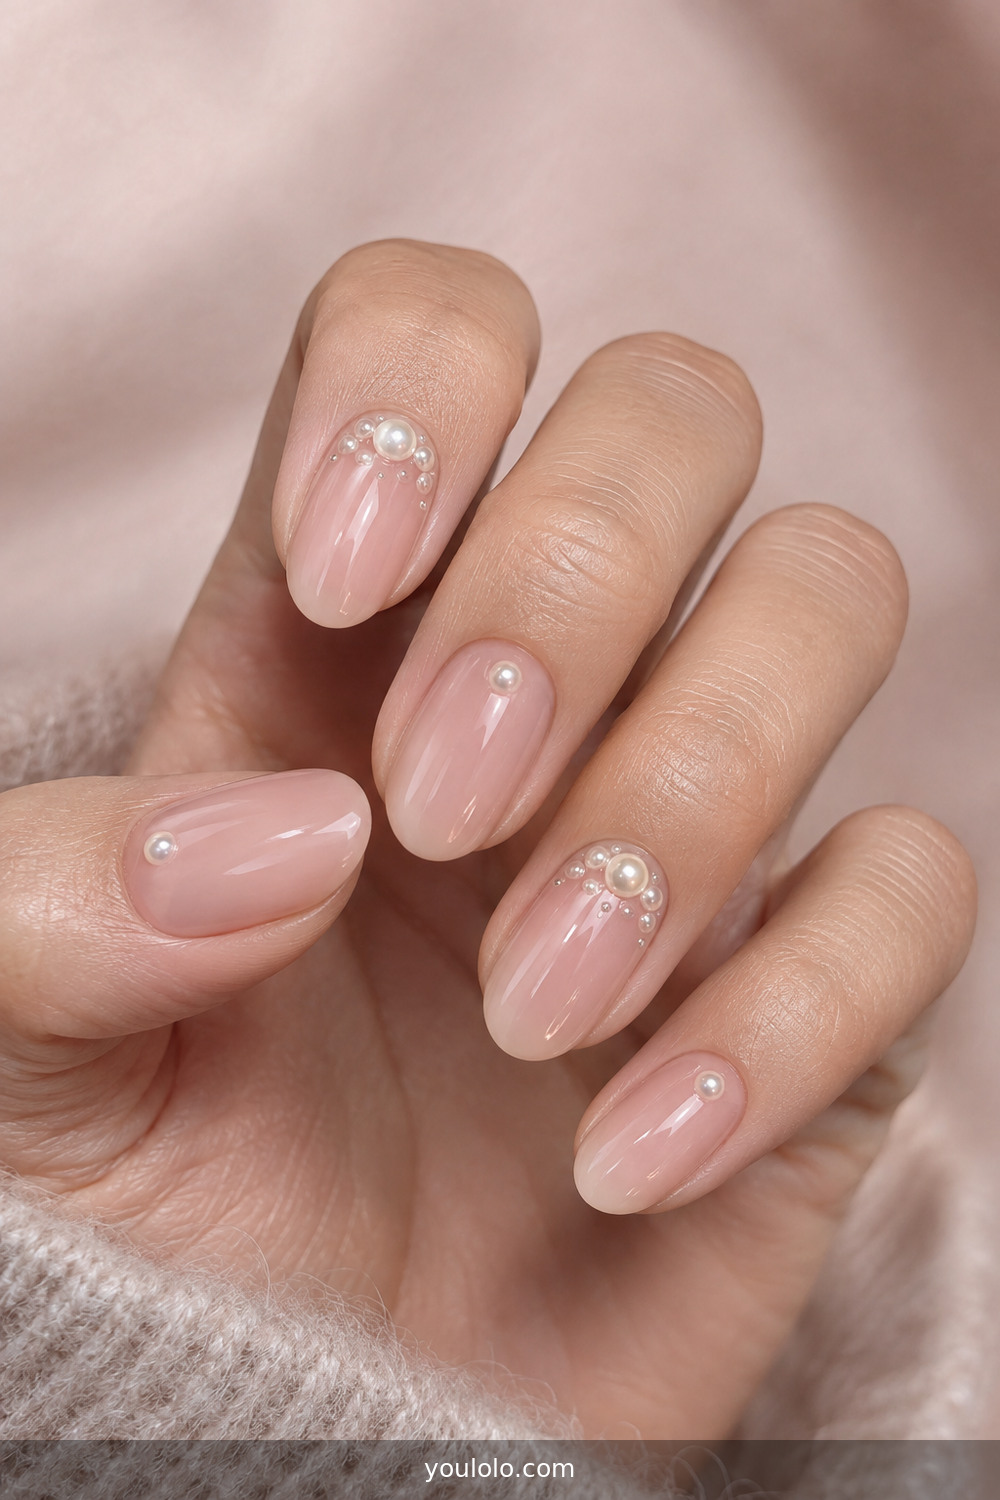
Small pearl-like spheres gather near two cuticles, while the other fingers carry a single accent or none. That change in density makes the set feel designed. Use flat-back pearls or rounded gel that can be sealed securely. I would save this for a wedding weekend or special dinner because dimensional details require care. Against sheer pink, the pearls look luminous rather than bridal-costume white.
21. Asymmetric Primary Color Blocks
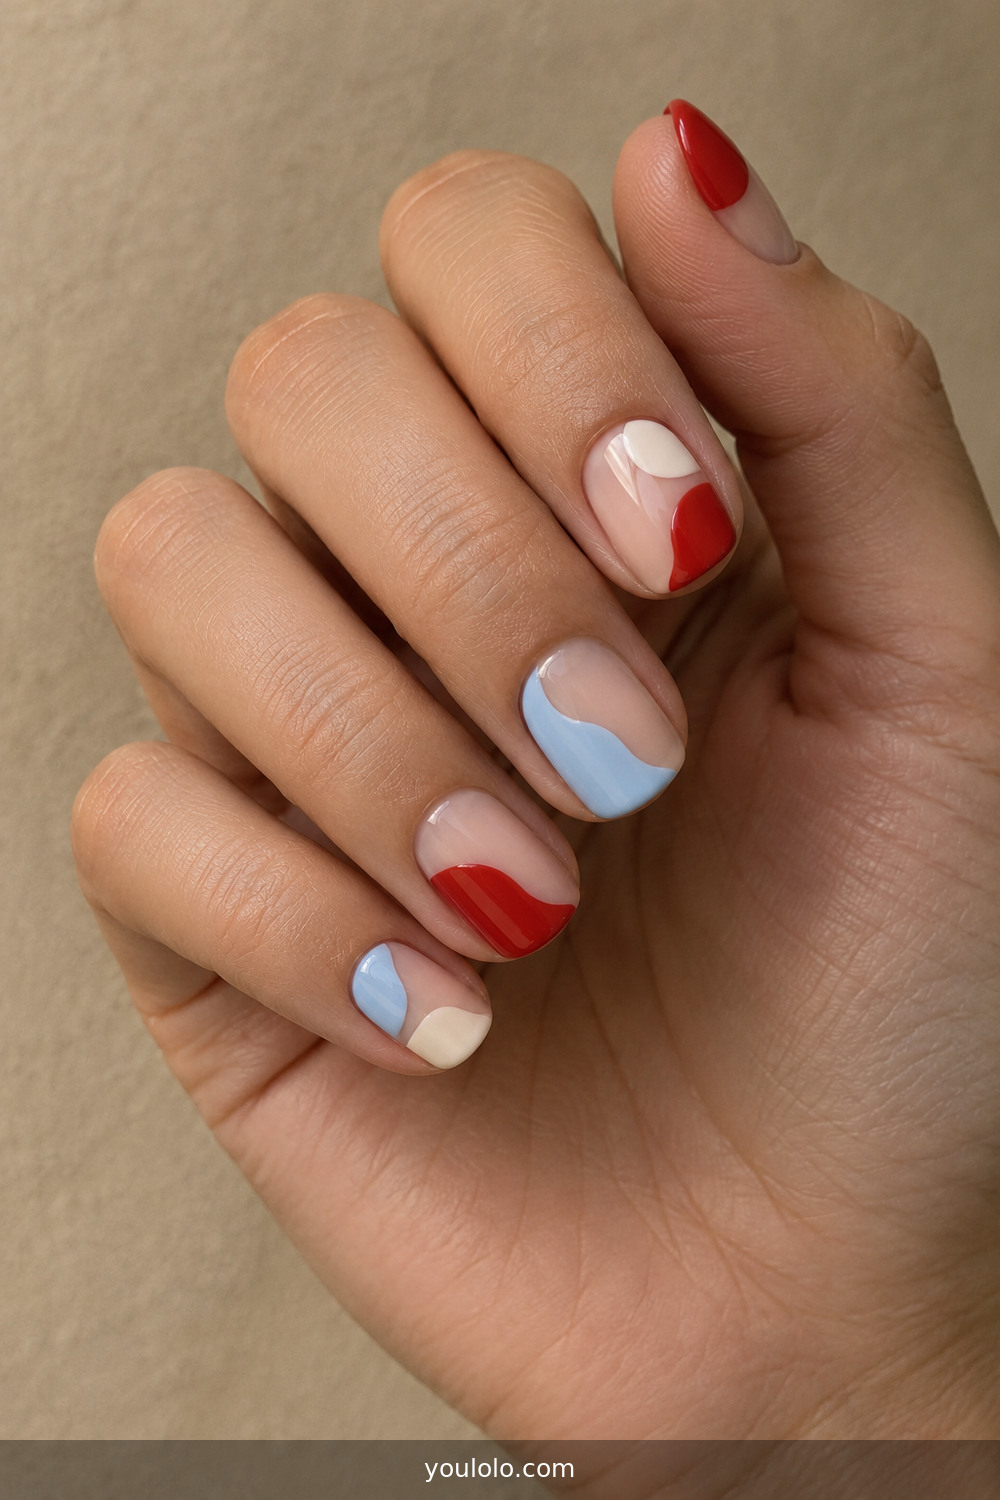
Tomato red, powder blue, and warm cream form curved blocks over nude. The colors are simple; the asymmetry supplies the creativity. I would make red the hero, blue the support, and cream the visual pause. Curves should change position from nail to nail while staying similar in scale. This design adapts beautifully to short nails because it does not rely on tiny illustration or long vertical space.
22. Teal Orbit Cat-Eye
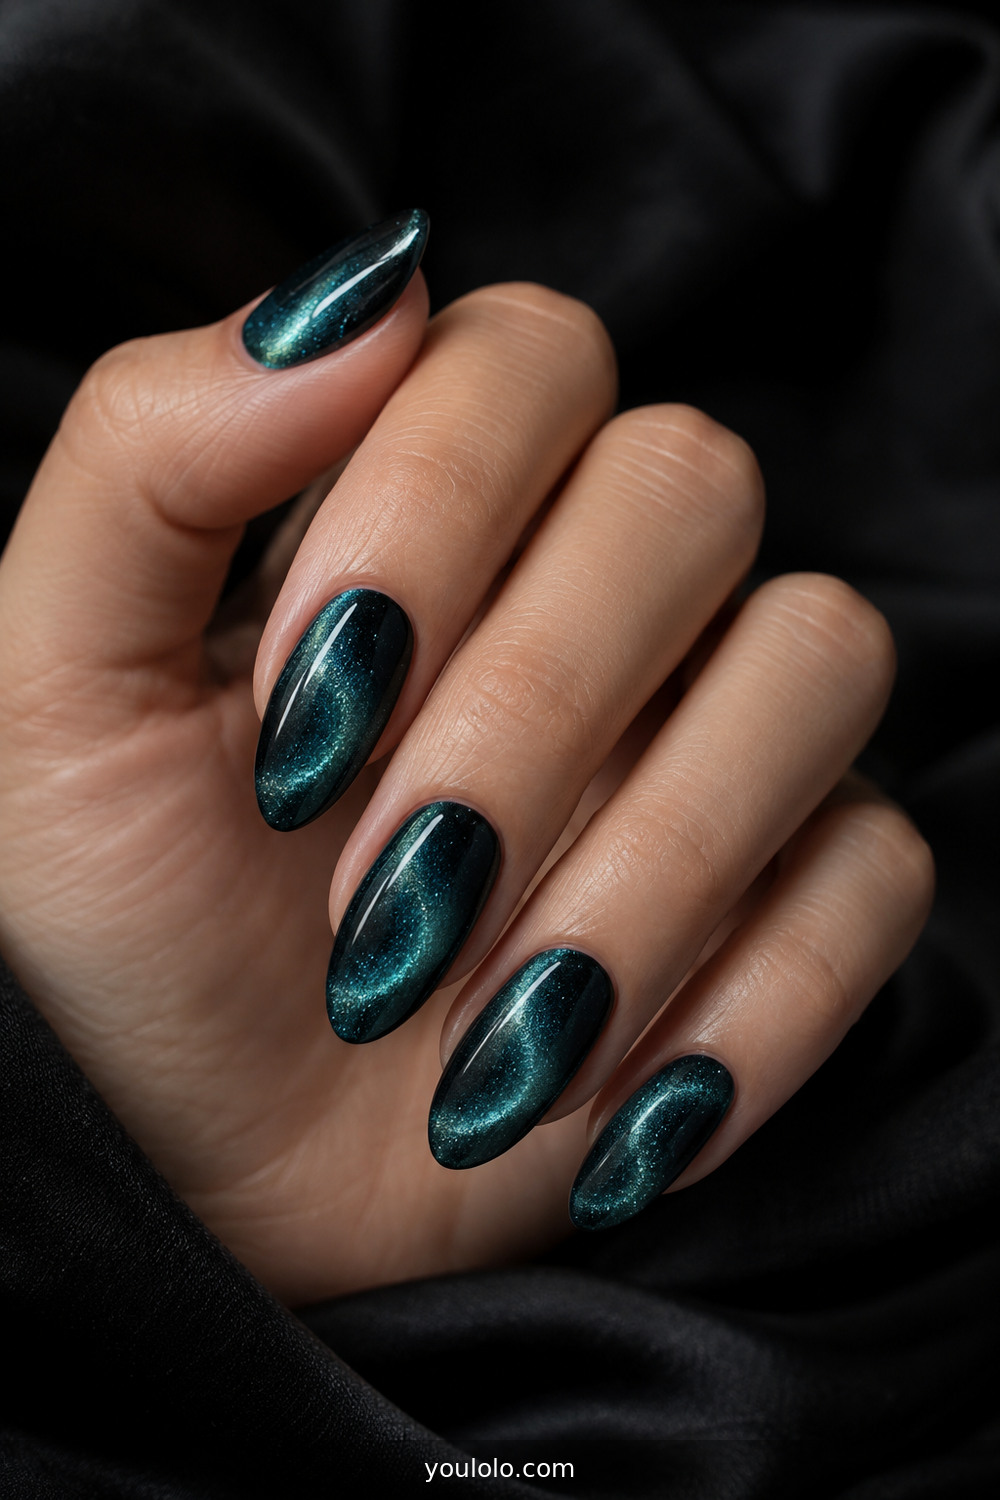
Deep teal magnetic pigment is pulled into curved halos instead of the familiar straight cat-eye stripe. The moving light creates a galaxy effect without painted stars. Ask the artist to magnetize and cure one nail at a time because particles continue drifting before the gel sets. These Creative Nails need no additional art. For a brighter cosmic palette, see my Purple Chrome Nails ideas.
23. Controlled Graffiti Scribbles
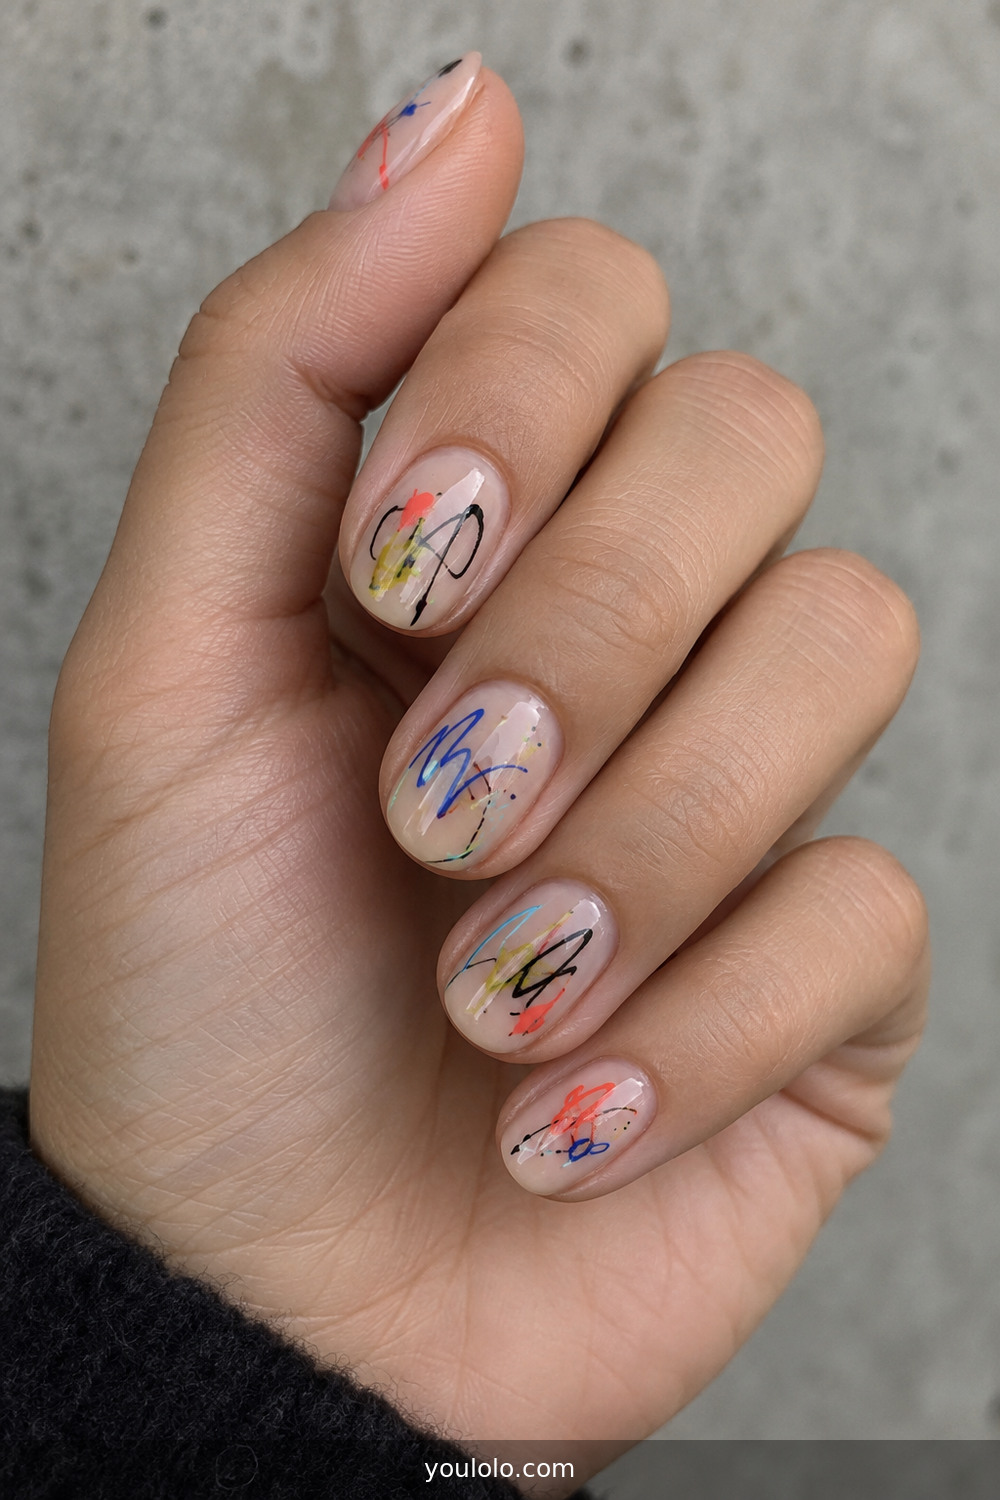
Fine cobalt, coral, chartreuse, and black scribbles bring energy to a nude base. The lines should overlap in only a few places and leave visible quiet space around the cuticle. I would repeat black on every finger as the connector, then rotate the bright colors. Short rounded nails make these Creative Nails feel spontaneous, like tiny notebook margins, without becoming overwhelming.
How I Would Edit These Ideas for Short or Long Nails
Short nails need fewer marks, not necessarily softer colors. One cobalt curve, a small terrazzo cluster, a single fruit, or two color blocks can look stronger than a miniature copy of a long-nail design. Keep art away from crowded sidewalls and use vertical or diagonal movement when you want the nail to appear longer. A sheer base also reduces the visual weight.
Medium almond nails have more room for aura fades, chrome flames, stained-glass tips, and line drawings. The tapered edge naturally adds drama, so I often reduce the number of colors. Long nails can handle layered jelly and complex flowers, but I would choose one focal technique and let the remaining fingers echo it. Extra length is already a statement.
If you are uncertain, bring your technician two references: one for art and one for shape. Say which part matters most. I might say, “I love this cobalt line placement, but I need my natural short squoval length,” or “Keep the aura colors, but make the chrome much finer.” That language is more helpful than asking for identical Creative Nails on a completely different nail bed. If tip proportion is your main concern, my French Tip Nails guide has useful shape references.
What I Would Tell My Nail Artist Before We Start
I begin with wear time and lifestyle. If I work with my hands, I choose flat art: dots, linework, jelly, magnetic polish, or color blocking. For a holiday or event, I am more open to dew drops and pearls. Then I show the palette in ordinary daylight. Salon lights can make lilac look pink and navy look black, so checking swatches near a window prevents surprises.
Next, I agree on the distribution. Saying “two floral nails, two small fragments, and one plain milky nail” is clearer than letting the design evolve finger by finger. For mismatched art, I place the strongest detail on the middle or ring finger and repeat a smaller cue elsewhere. This gives the set a focal point while still feeling spontaneous.
Finally, I ask for smooth edges and a practical top coat. Chrome should be sealed at the free edge. Dried flowers need full encapsulation. Lines and miniature fruit should feel flat after top coat. Raised gel needs rounded transitions. The best Creative Nails are not only photogenic on appointment day; they remain comfortable in hair, clothing, and everyday life.
Keeping Detailed Nail Art Looking Fresh
Cuticle oil is the smallest habit with the biggest visual payoff. I use a drop around each nail in the evening and massage it in. It softens the dry border that can make a fresh manicure look older than it is. I wear gloves for cleaning, avoid using nails as tools, and file a tiny snag before it turns into a lifted edge.
With clear or sheer Creative Nails, I also protect the natural edge underneath. A gentle nail brush removes makeup or product without scraping. If a charm or gel drop begins lifting, I do not glue it down at home; I ask the salon to repair or remove it safely. Peeling product can take surface layers of the natural nail with it.
Take your reference photo in natural light before heavy cuticle oil. That shows the true color and linework, which is useful if you want to repeat or modify the set later. I keep those photos in small folders by technique rather than season. It makes future Creative Nails appointments much easier to plan.
Frequently Asked Questions
Can creative nail art work on very short natural nails?
Yes. Choose one or two readable elements per nail, such as a curve, dot, tiny flower, color block, or small patch of pattern. Strong color and clean placement matter more than length.
How do I make a mismatched manicure look cohesive?
Repeat one anchor across the set: the same base, one connecting color, consistent line thickness, or a shared finish. Limit the palette to roughly three main colors and let some negative space remain.
Which nail-art techniques are easiest to maintain?
Flat designs such as dots, micro French tips, line art, jelly layers, magnetic polish, and color blocking are generally easiest. Raised pearls, charms, and gel droplets require gentler daily wear.
What should I bring to a detailed nail appointment?
Bring one clear art reference, one shape reference, and a realistic idea of your preferred length. Tell your technician which detail is essential and where you are happy for them to adapt the design.
I hope at least one set here changes how you build a manicure. Start with the detail you cannot stop looking at, give it quiet space, and edit everything else around it. That is the difference between decoration and a design that genuinely feels like yours.