The Best Fluffy Pancakes recipe you will fall in love with. Full of tips and tricks to help you make the best pancakes.

Easy Halloween Nails should actually be easy. I have clicked on far too many “beginner” manicures that quietly require six gel colors, a detail brush the width of an eyelash, and the steady hand of someone who paints nails for a living. This collection is for normal evenings at home, when I have a mug beside me, twenty minutes before bed, and every chance of smudging my thumb.
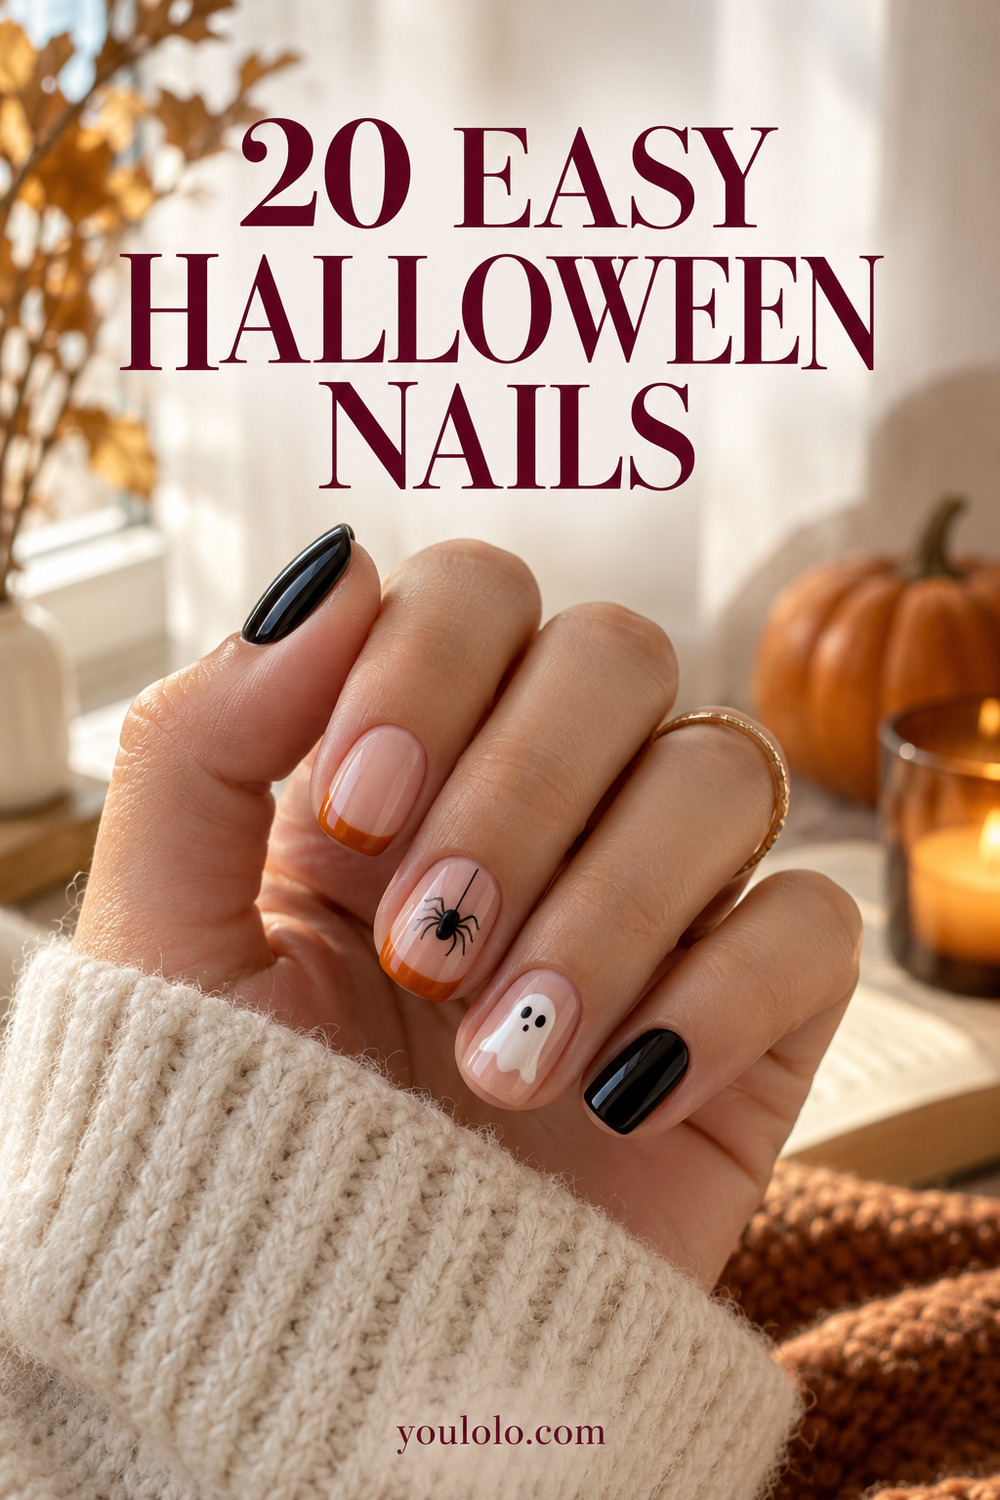
I chose 20 real designs that are already part of the Halloween nail vocabulary: black polish, pumpkin orange, ghosts made from dots, a corner cobweb, tiny bats, slime tips, and simple decals. The difference is that I sorted them by effort rather than by color. Some take one bottle. Some need a toothpick. A few are much easier if you decorate only one nail and leave the other nine alone.
I also tested each idea against one rule: could I explain it to a friend without pretending she owns a nail studio? If the answer was no, it did not make the list. That is why there are no miniature haunted houses or ten different character faces here. These Easy Halloween Nails are polished enough for dinner, work, and October weekends, but the methods stay refreshingly ordinary.
Before You Start: My Five-Minute Setup
The most useful Halloween nail tool in my bathroom is not a professional brush. It is a wooden toothpick. The blunt end makes dots, the point pulls a dot into a drip, and the side can tidy a small line before it dries. A bobby pin makes larger ghost eyes. A piece of ordinary tape helps with color blocking. If I want a bat or moon that looks perfectly crisp, I use a flat nail sticker and feel absolutely no guilt about it.
The best Easy Halloween Nails begin with a smooth base, so I spend more time on two thin color coats and less time chasing microscopic details.
I keep a folded paper towel, remover, and a small angled makeup brush nearby. That cleanup brush makes a basic manicure look far more expensive. I also wait until the base color is genuinely dry before adding art. “Dry to the touch” is not enough for tape; if a fingerprint still appears when I press lightly, I give it another ten minutes.
One practical note: nail-art polish and regular lacquer are not interchangeable in every situation. A slightly thicker, opaque polish makes dots and tiny faces easier. Very watery black lacquer spreads. If yours is thin, place a drop on foil and leave it for a minute before using the toothpick. The texture becomes much easier to control.
Easy Halloween Nails You Can Finish in Ten Minutes
This first group needs no drawing at all. The trick is choosing colors that already suggest Halloween, then keeping the shape and cuticles neat. I use these when I want the mood without wearing obvious little characters.
1. One-Coat Glossy Black
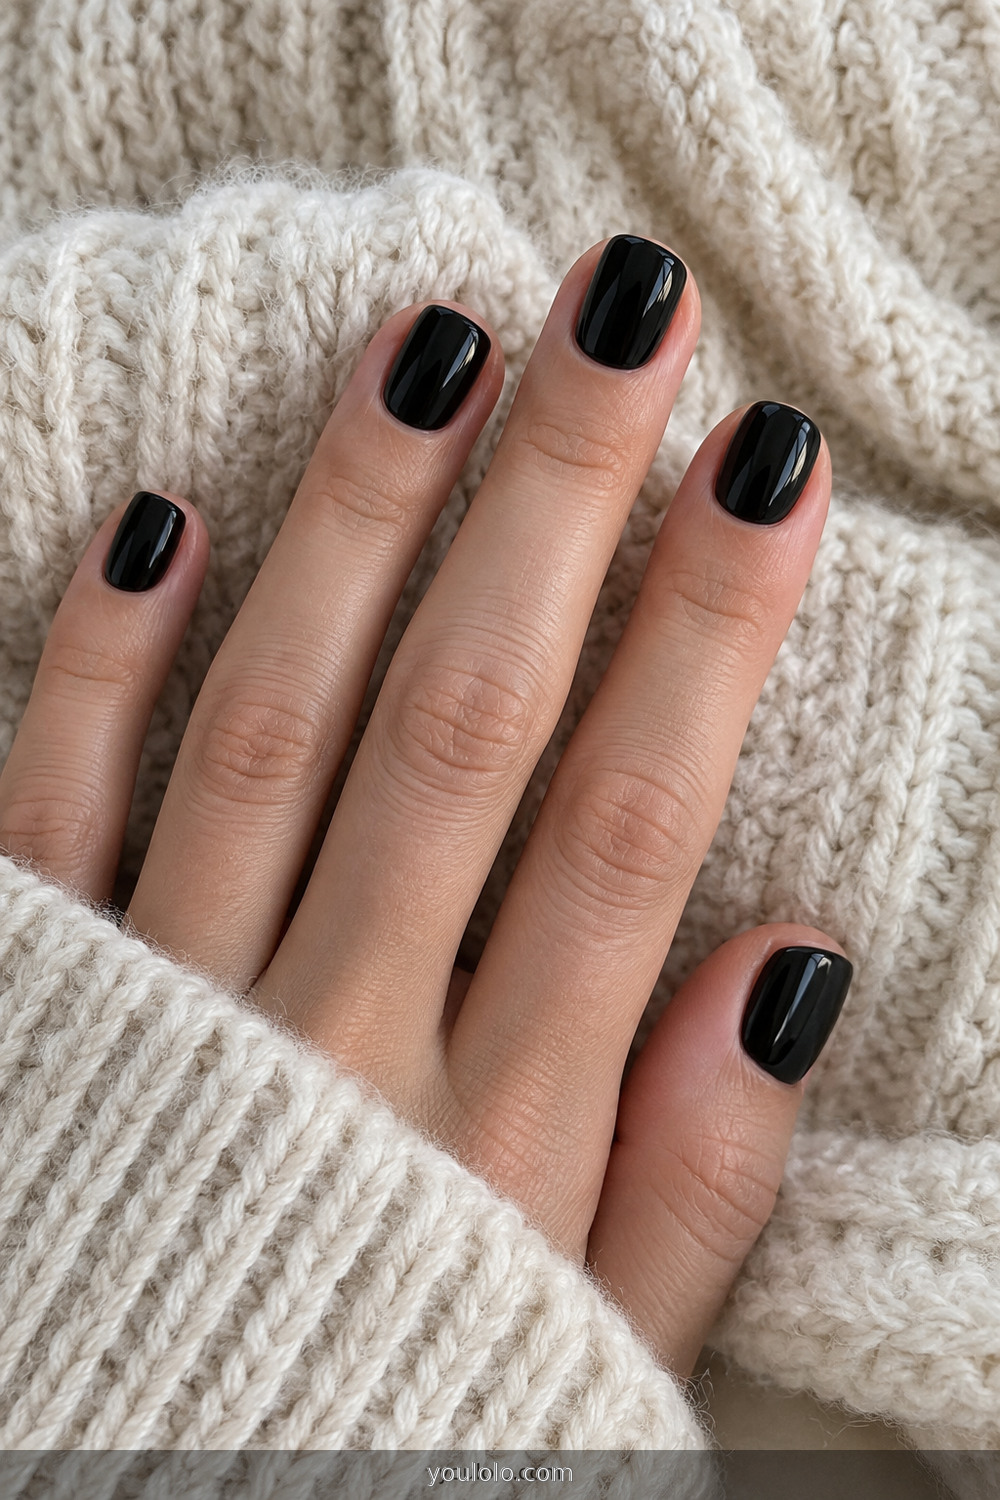
A short black manicure is the little black dress of October. It works because the finish is simple and the edges are clean. I use two thin coats even when the bottle claims one-coat coverage; one thick coat tends to flood the cuticle and dent later. Run the brush across the free edge before top coat. That tiny step makes dark polish look tidier and helps disguise early tip wear.
2. Alternating Orange and Black
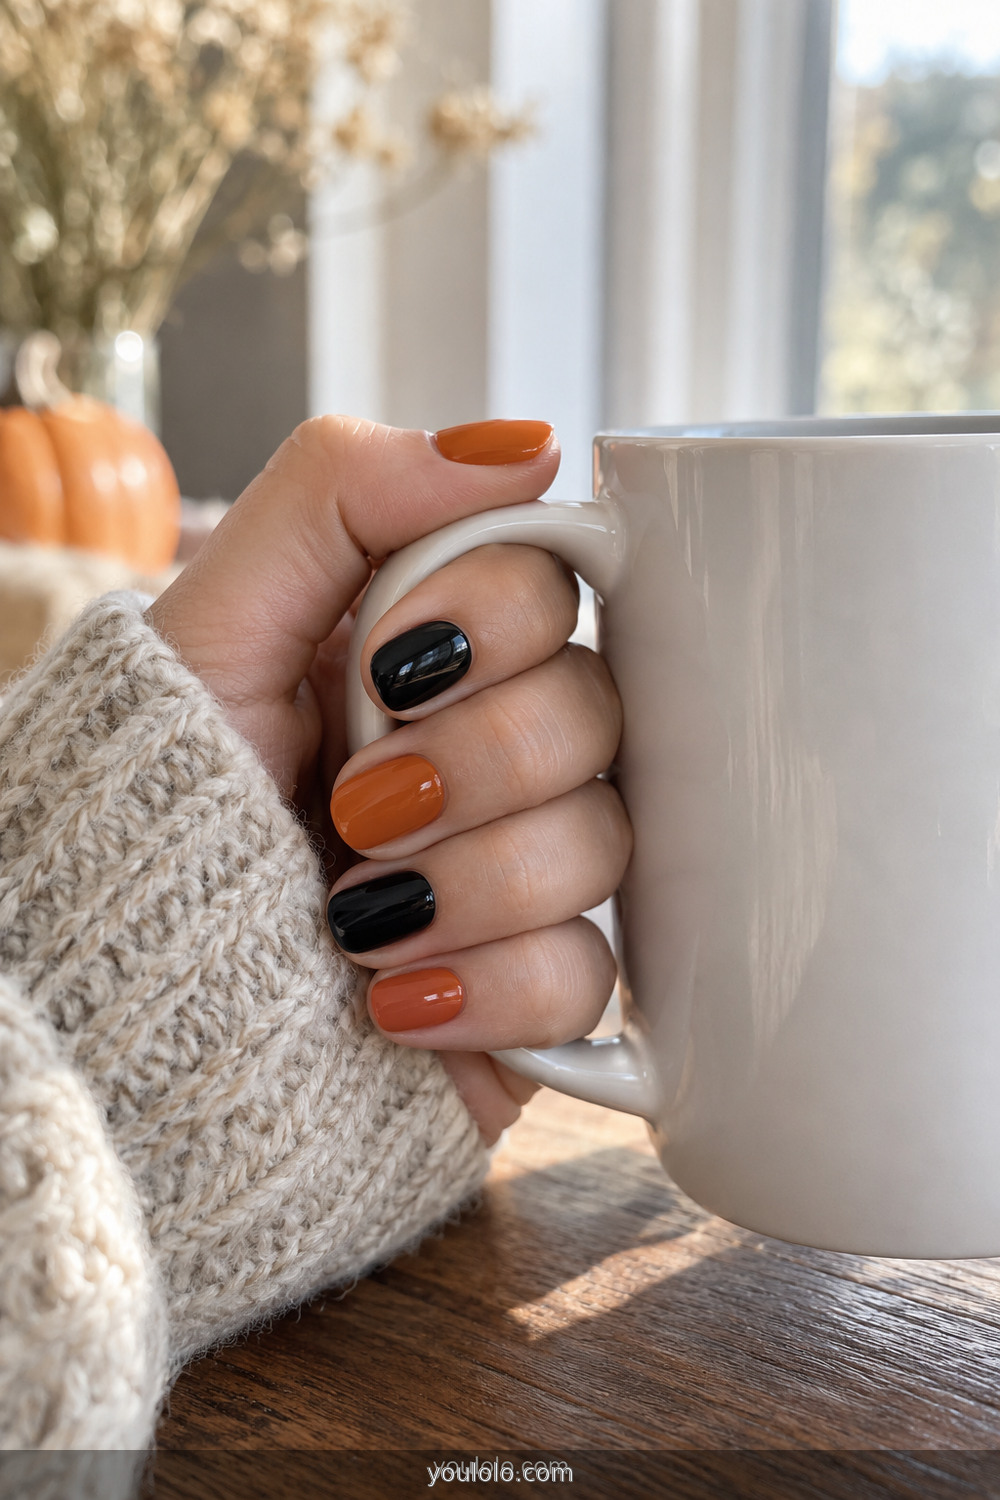
This is what I paint when I have two colors and no patience for nail art. A softened pumpkin orange looks more grown-up than neon orange, while true glossy black keeps the contrast clear. Alternate the shades rather than trying to create a perfectly symmetrical pattern on both hands. It looks intentional, and the second hand cannot expose which order you forgot halfway through.
3. Halloween Color Skittle
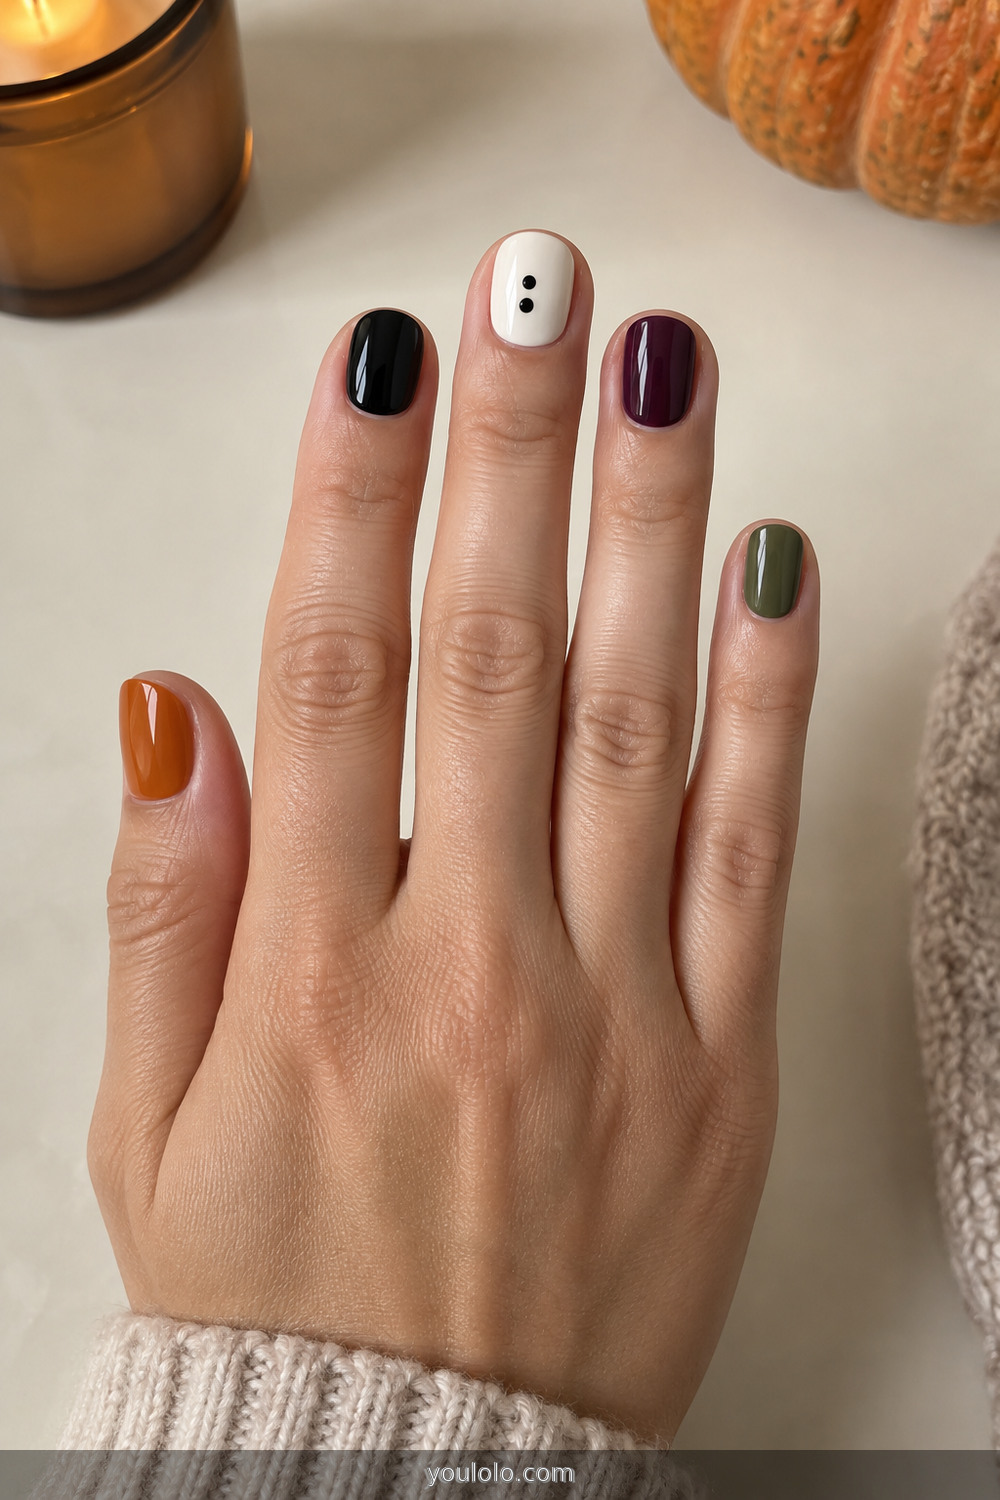
A skittle manicure is wonderfully forgiving because every nail is supposed to be different. My wearable palette is pumpkin, black, milky white, deep plum, and olive. They share a muted undertone, so the hand still looks coordinated. Byrdie’s fall gradient examples are a useful reminder that complementary solid colors can create a complete design without any drawing.
4. Matte Black With Glossy Tips
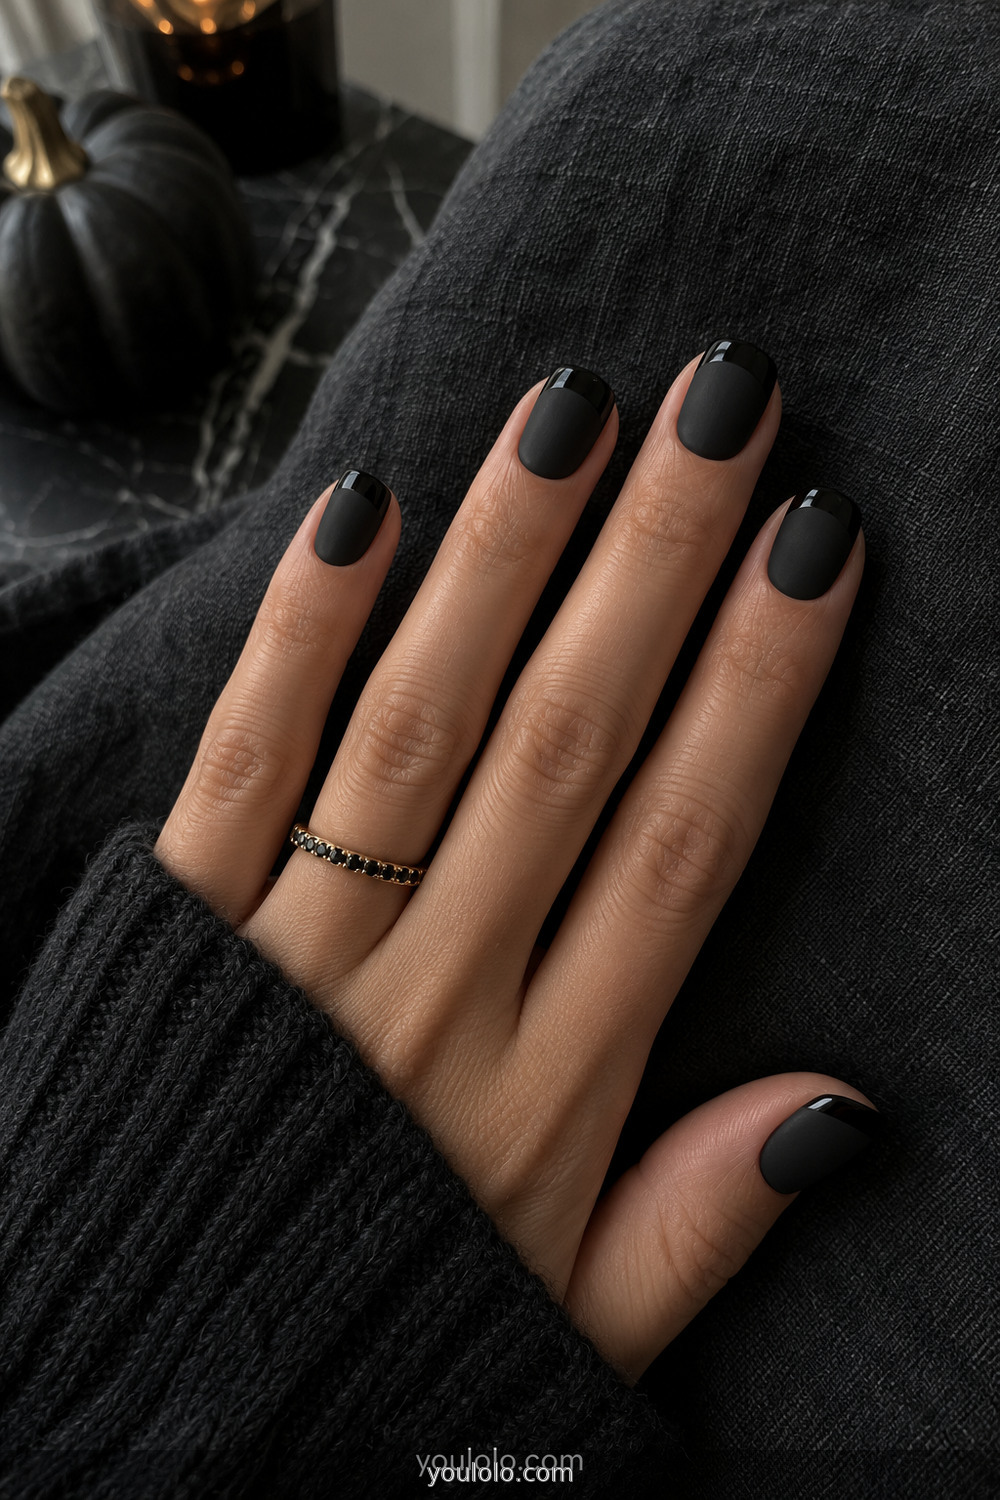
The difference between the base and tip appears only when light moves across the nail, which makes this my quietest spooky option. Paint everything black, add matte top coat, let it dry, then sweep glossy top coat across the tips. The line does not need to be razor thin. A slightly deeper curve is easier with the bottle brush and looks especially good on short rounded nails.
5. Orange Micro French
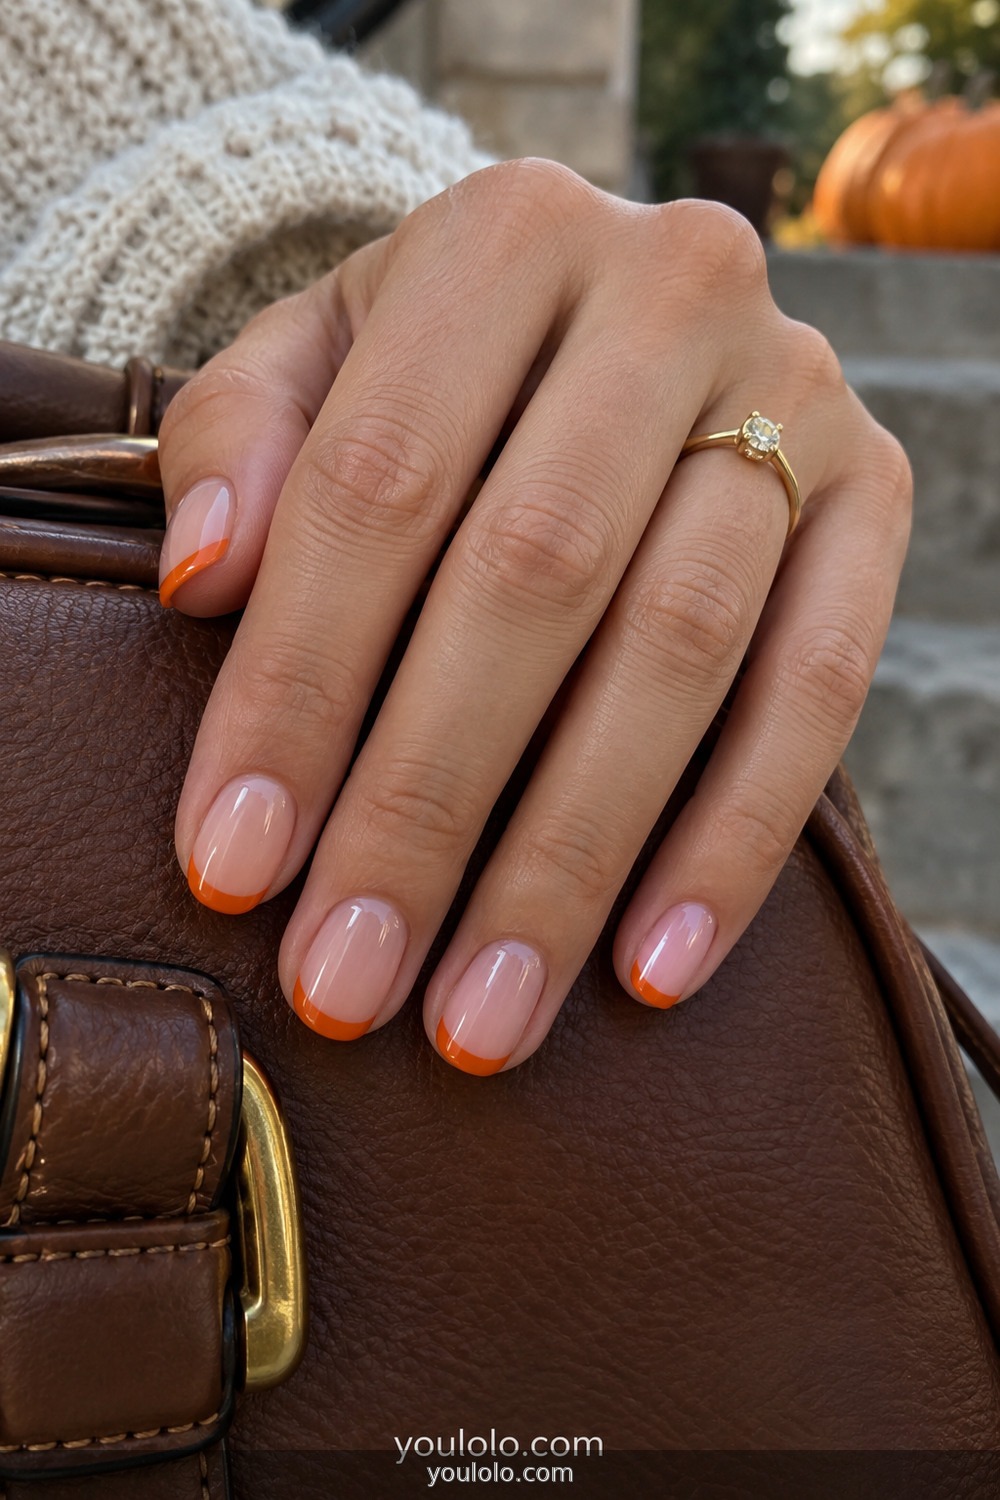
If black polish feels heavy, a pumpkin-orange tip is cheerful but still seasonal. Wipe most polish from the brush, turn the finger rather than dragging the brush across it, and let the natural curve guide you. My first hand is never identical to my second, but a thin line hides small differences. A sheer pink or beige base makes the finished set look clean rather than bare.
The Toothpick Group: Dots That Pretend to Be Nail Art
A dot is the best beginner technique because it does not have to be perfectly round to read clearly. Use the blunt end for larger dots and the pointed end for smaller ones. Reload between nails; the dot shrinks every time the polish leaves the tool.
6. Sparse Black Dots on Milky White
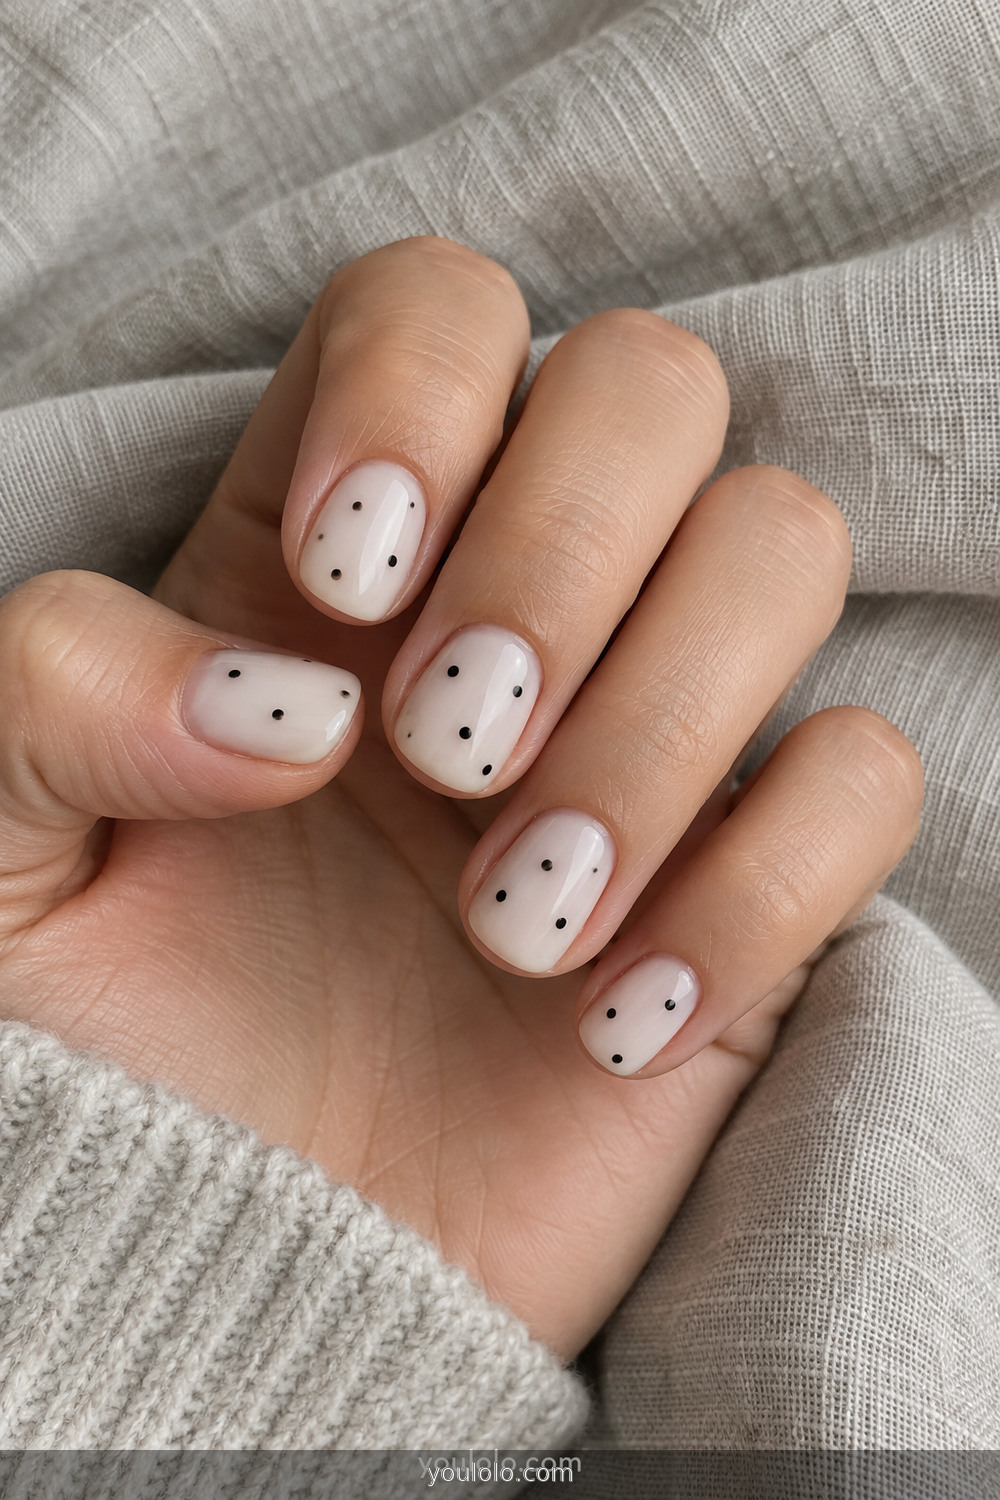
Milky white with uneven black dots feels playful without becoming costume-like. I deliberately vary the size and spacing, because trying to build a perfect grid is where a relaxing manicure becomes homework. Three to six dots per nail are enough. This is also a clever way to rescue pale polish that looked slightly streaky after two coats: the scattered pattern distracts the eye.
7. Two Tiny Spooky Eyes
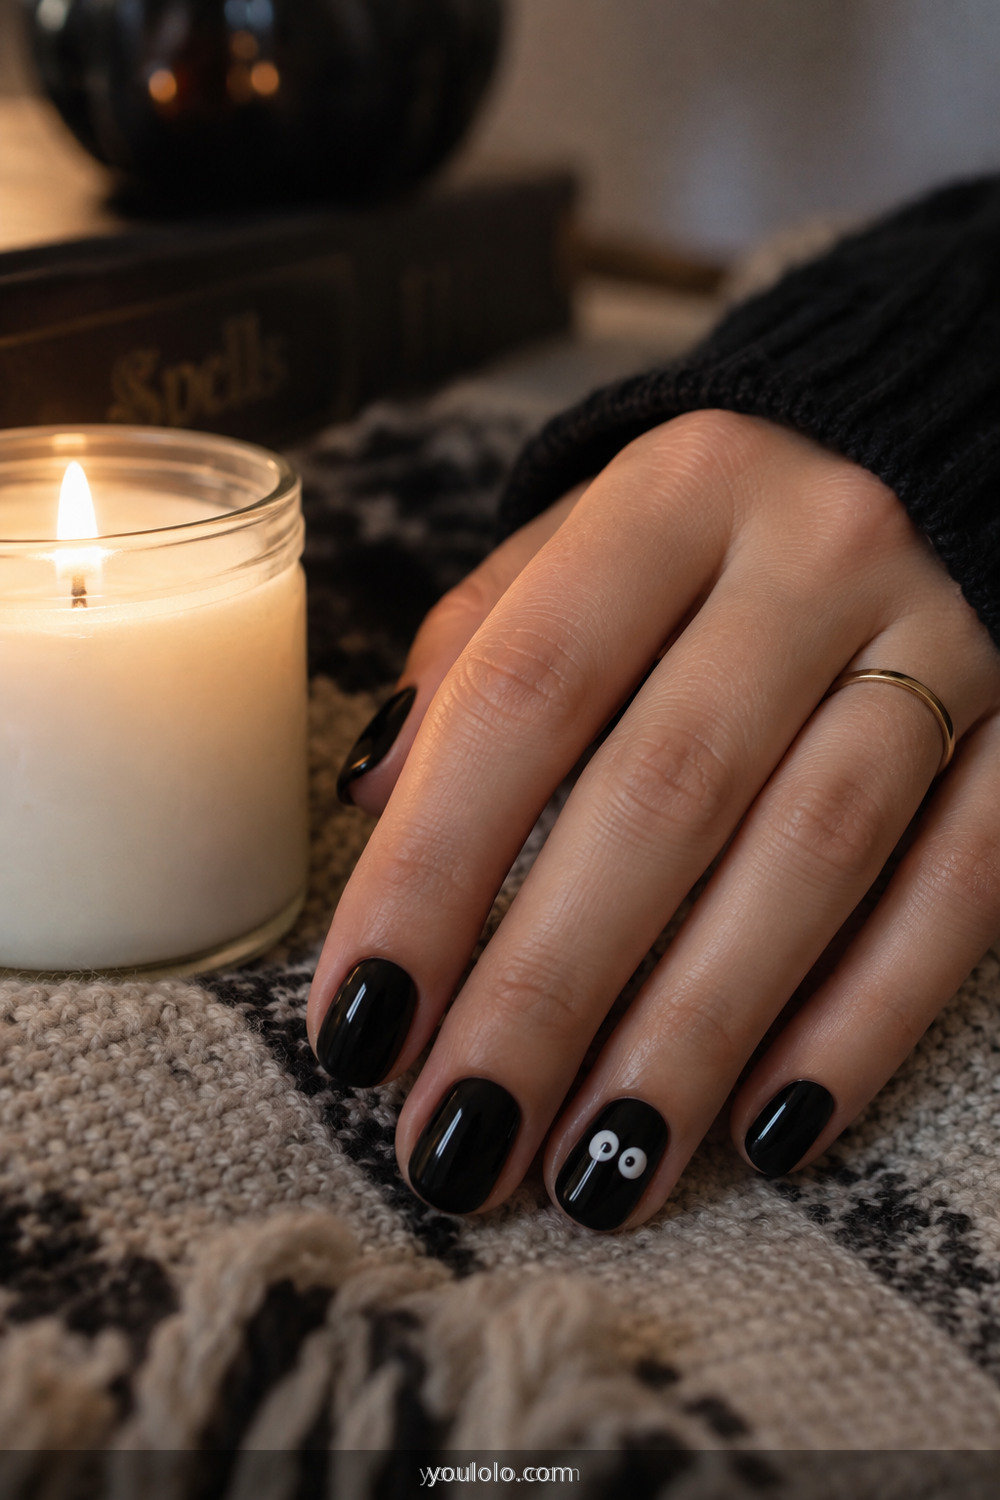
On a black base, place two white dots beside each other and let them dry. Add much smaller black dots slightly off-center. Suddenly they look like eyes peeking from the dark. I keep this detail on one or two nails. Ten pairs can feel busy, and repeating the pupils precisely is harder than the idea deserves. One accent gives the joke space to land.
8. The Three-Dot Ghost
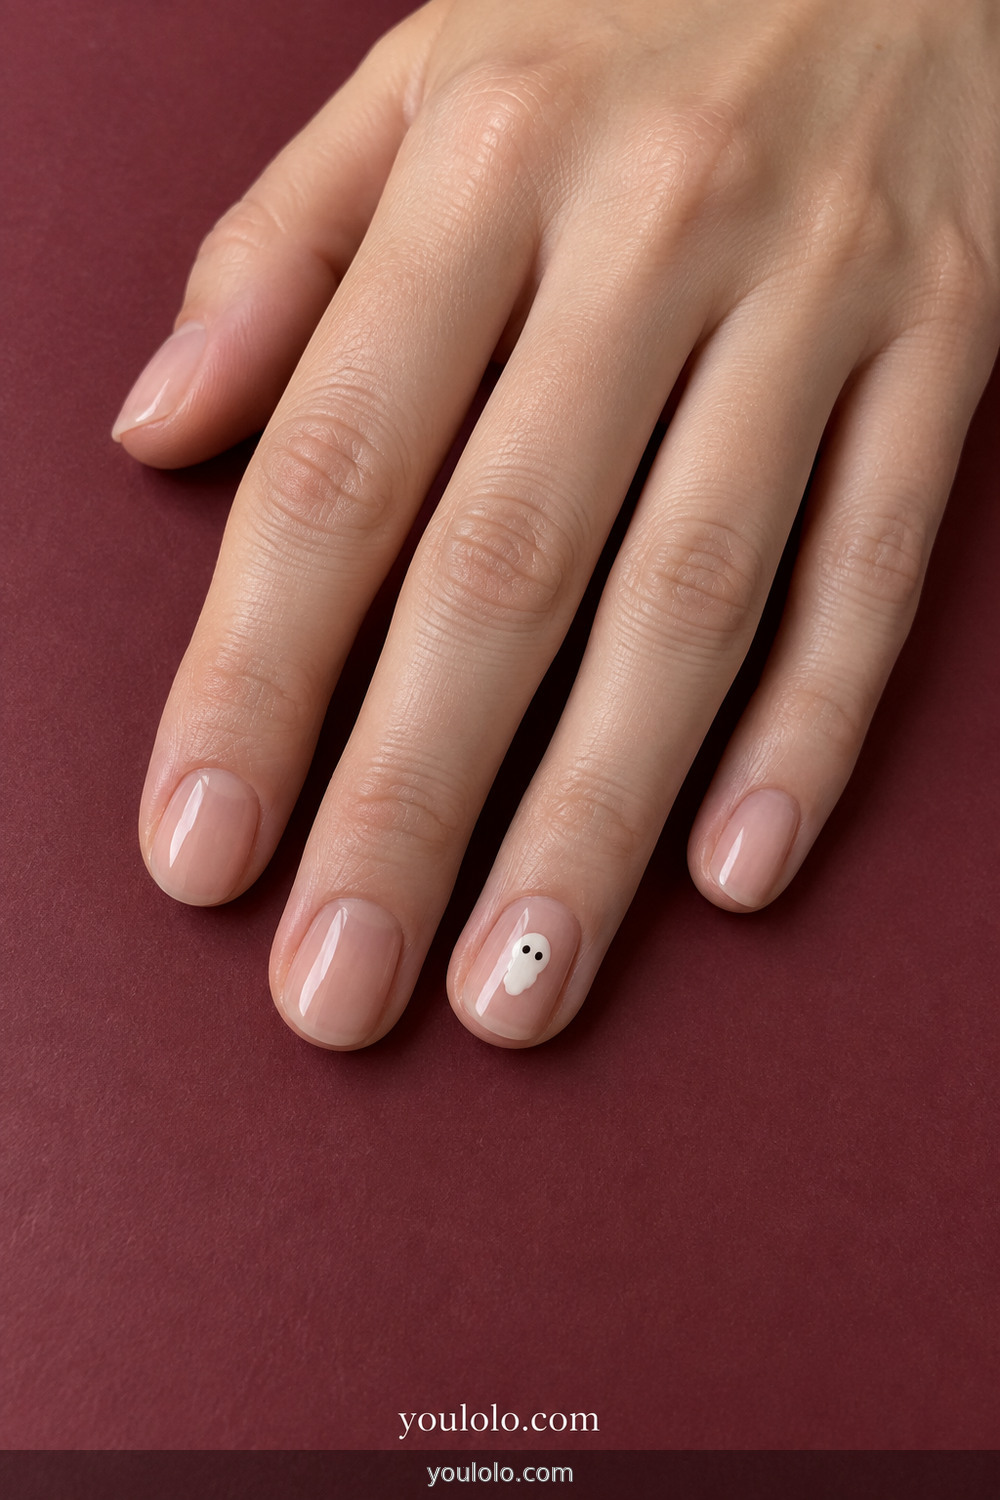
Place one larger white dot for the head and two touching dots underneath, then gently join them with the toothpick. Add two black eyes only after the white is dry. That is the entire ghost. Mine never has perfectly even edges, but the slightly wobbly outline makes it sweeter. A sheer nude background leaves plenty of negative space and means you only need to decorate the ring finger.
9. Lavender Ghost Accent
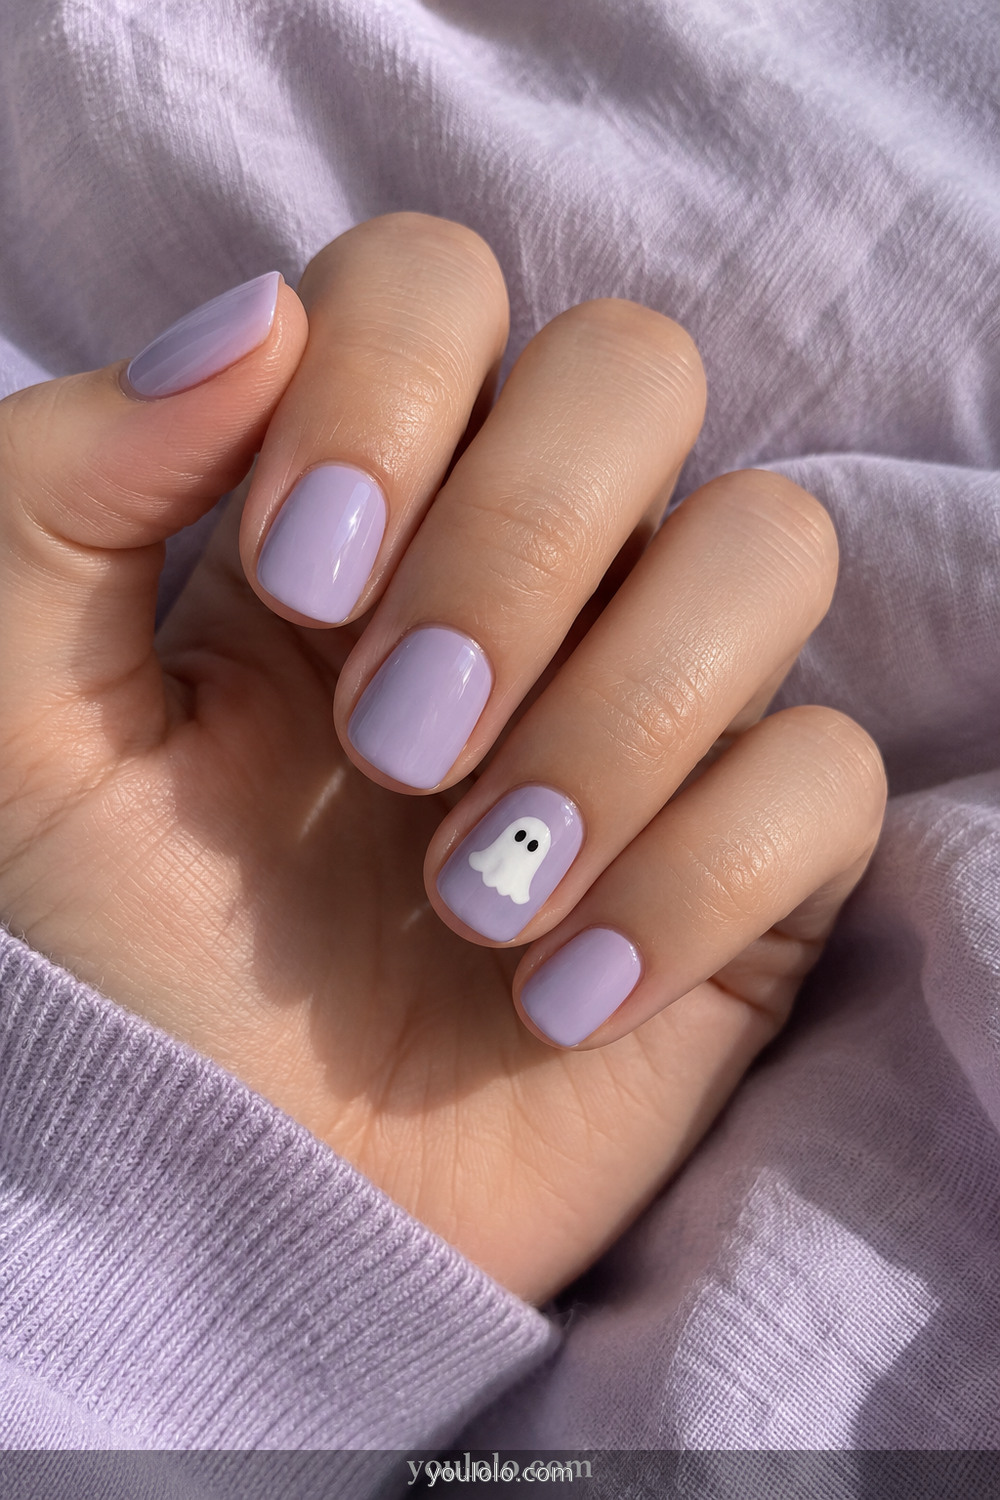
Halloween does not have to stay inside the orange-black palette. Soft lavender makes a little white ghost feel cute rather than spooky, and it transitions easily back into everyday life after October 31. This version uses the same three-dot method, so there is nothing new to learn. I like it for anyone who usually wears pastels and does not want a manicure that fights every outfit.
10. A Tiny Jack-o’-Lantern Face
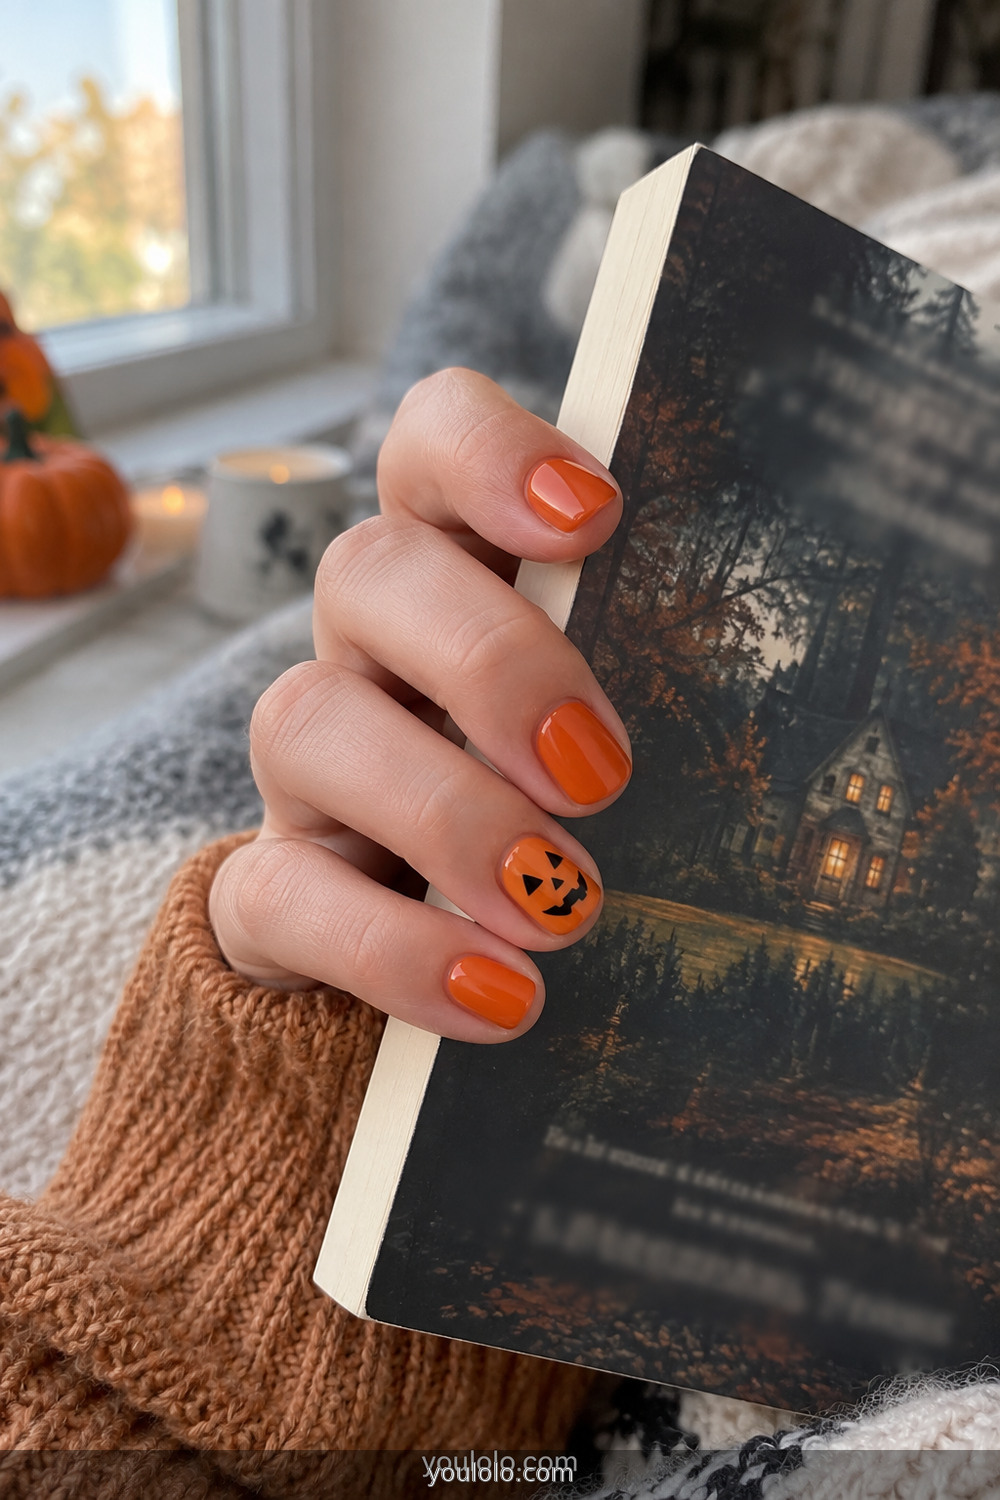
Paint the set orange, then add a face to only one nail. Two black triangles and a short crooked mouth are enough; a full pumpkin outline is unnecessary because the base color already tells the story. My easiest shortcut is using the pointed end of a toothpick to pull small round dots into triangles. If the mouth becomes too thick, leave it alone. Trying to correct wet black polish usually creates a bigger problem.
One Accent Nail, Fifteen Calm Minutes
These Easy Halloween Nails need a little line work, but only on one finger. Paint the base color the evening before if you can. Working over fully cured polish means a mistake can often be wiped away quickly without destroying everything underneath.
11. Simple Spider Accent
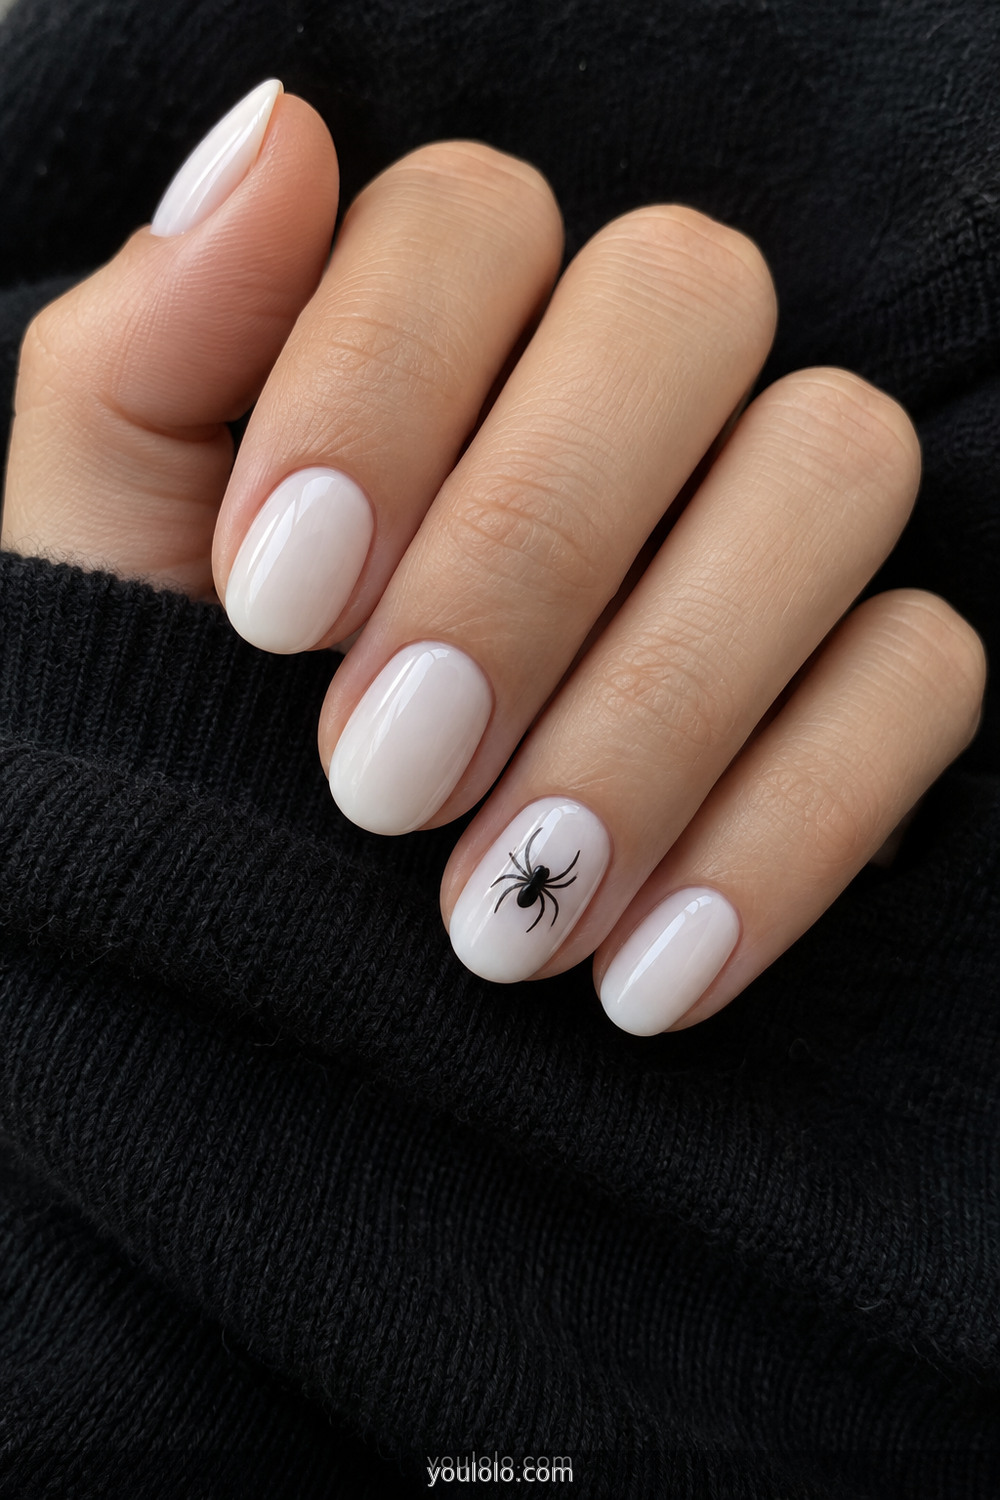
Start with one black dot for the body and a smaller dot for the head. Add four short strokes on each side. The legs do not need elaborate bends, and the spider does not need a web. Opaque black over white gives you the cleanest result. If your lines spread, the brush has too much polish; wipe it almost dry and make two fine passes rather than one wet stroke.
12. Corner Cobweb
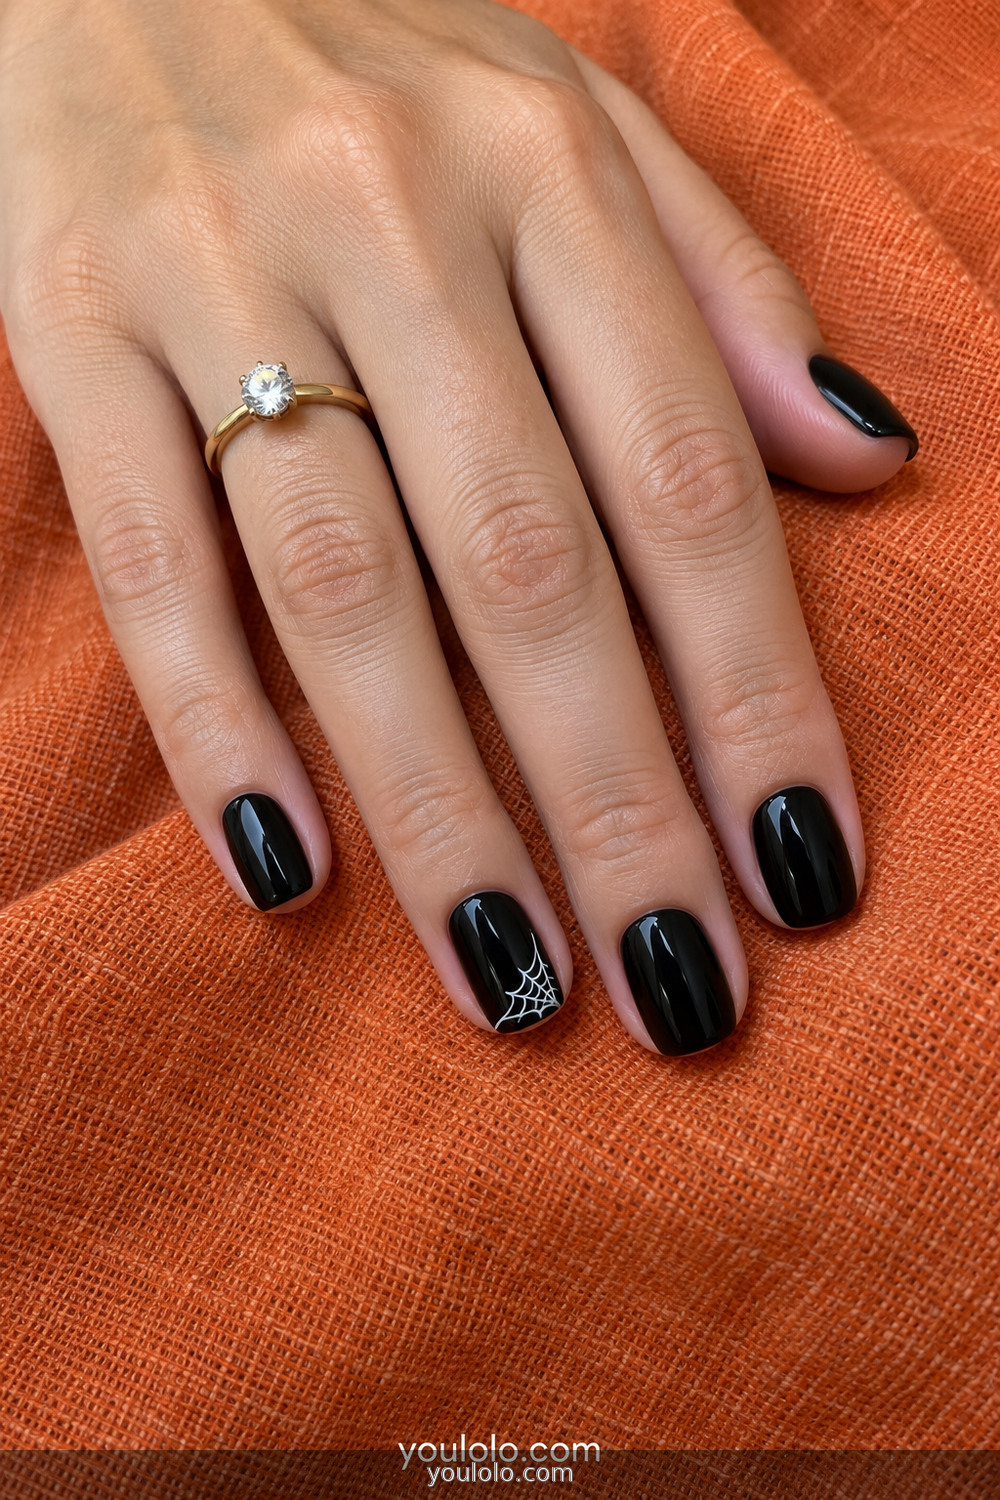
A whole web is difficult on a small nail, so I use only one corner. Draw three short lines radiating from the side, then connect them with two shallow curves. Stop there. The empty black space is part of the design. A white stamping polish or opaque art polish helps because ordinary white lacquer sometimes needs a second pass and makes the lines bulky.
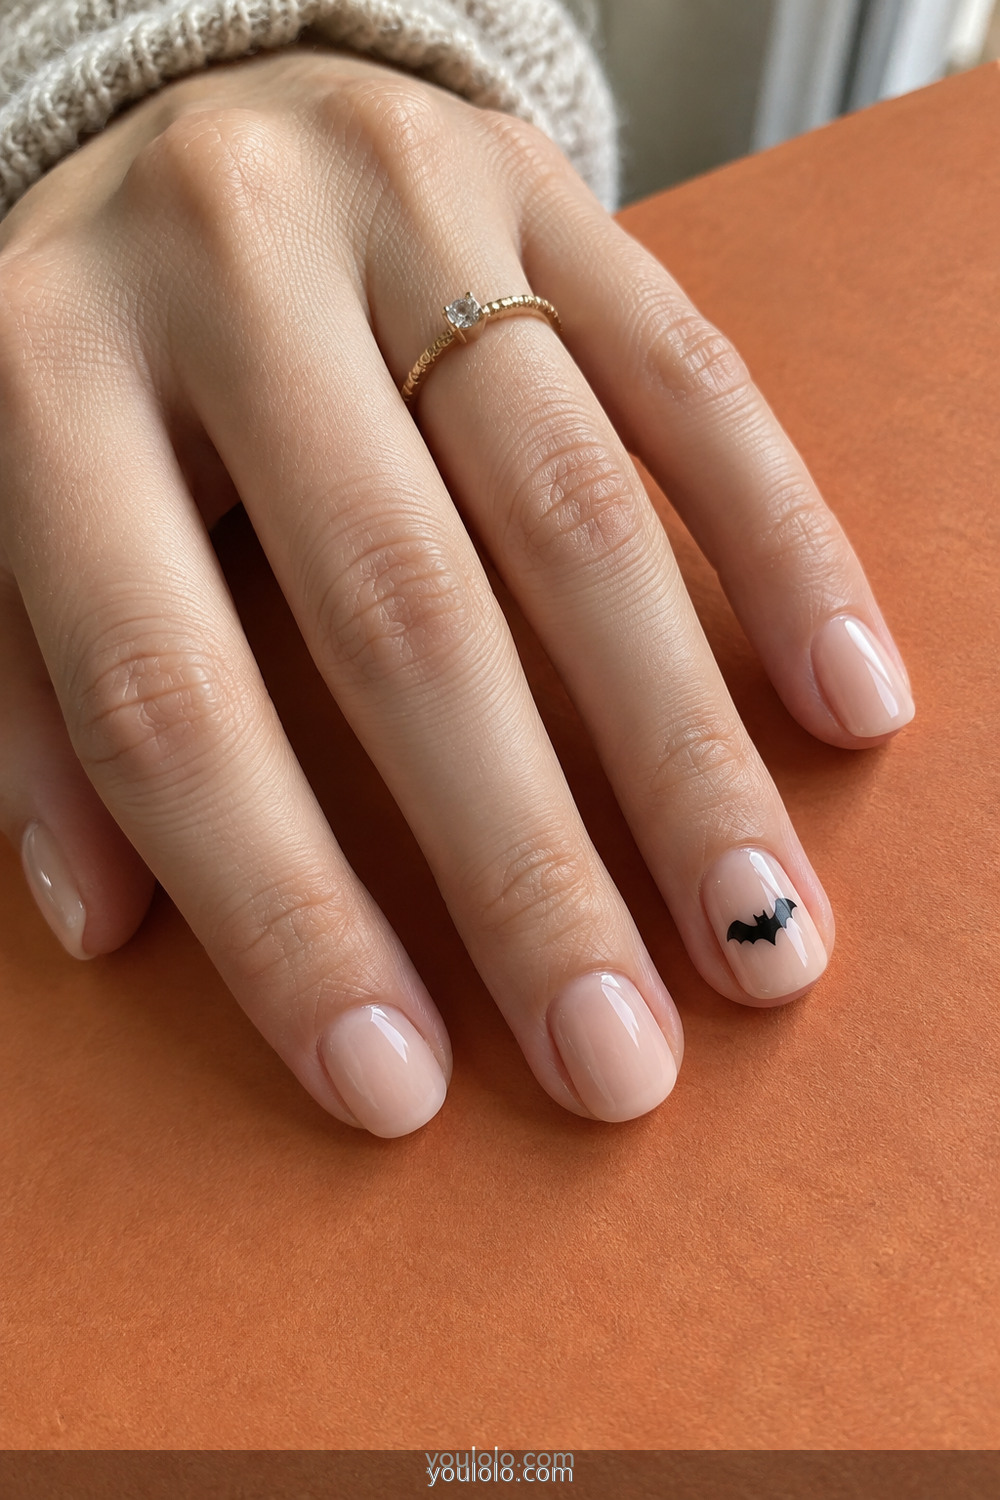
13. One Tiny Bat Sticker
This is my honest salon shortcut: use the sticker. A tiny bat silhouette has pointed wings and narrow negative spaces that are frustrating to paint with a toothpick. Press the decal onto completely dry polish, smooth the edges with a silicone tool or clean fingertip, then seal it with two thin layers of top coat. One bat on a nude nail looks more modern than a full sheet of identical decals.
14. Black Cat Tip
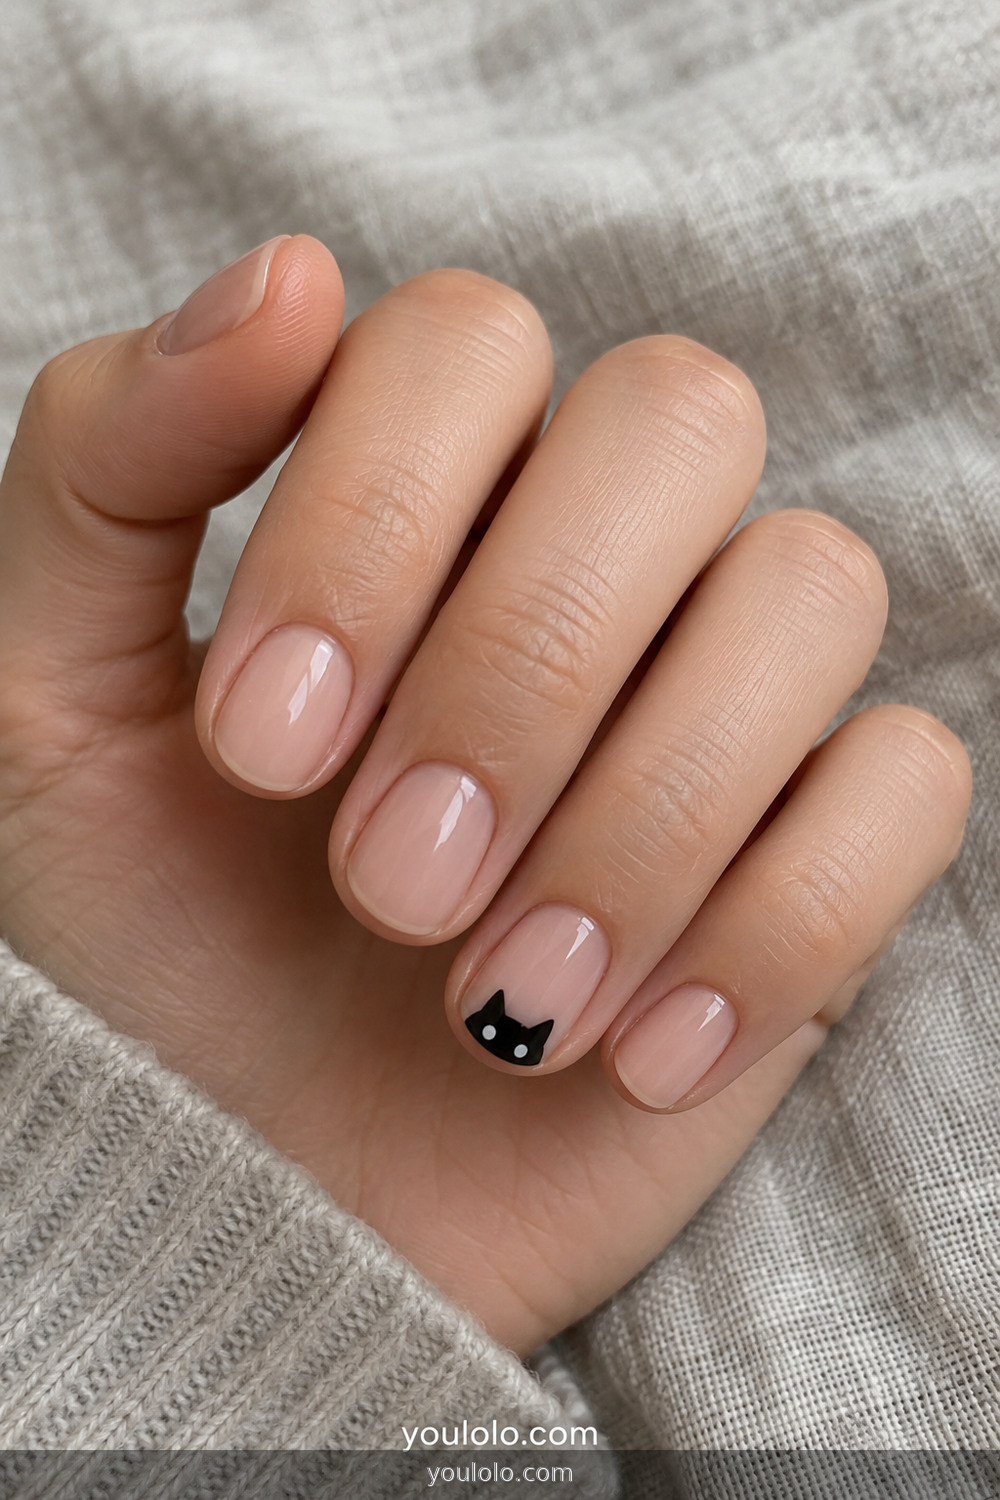
Paint a small black half-moon across the ring-finger tip and pull up two tiny triangular ears. Add dot eyes if there is room. The free edge hides most imperfections, so this is easier than painting a cat in the center of the nail. It also grows out gracefully. I would keep the remaining nails sheer or repeat a plain black micro tip on them.
15. Crescent Moon and Dot Trail
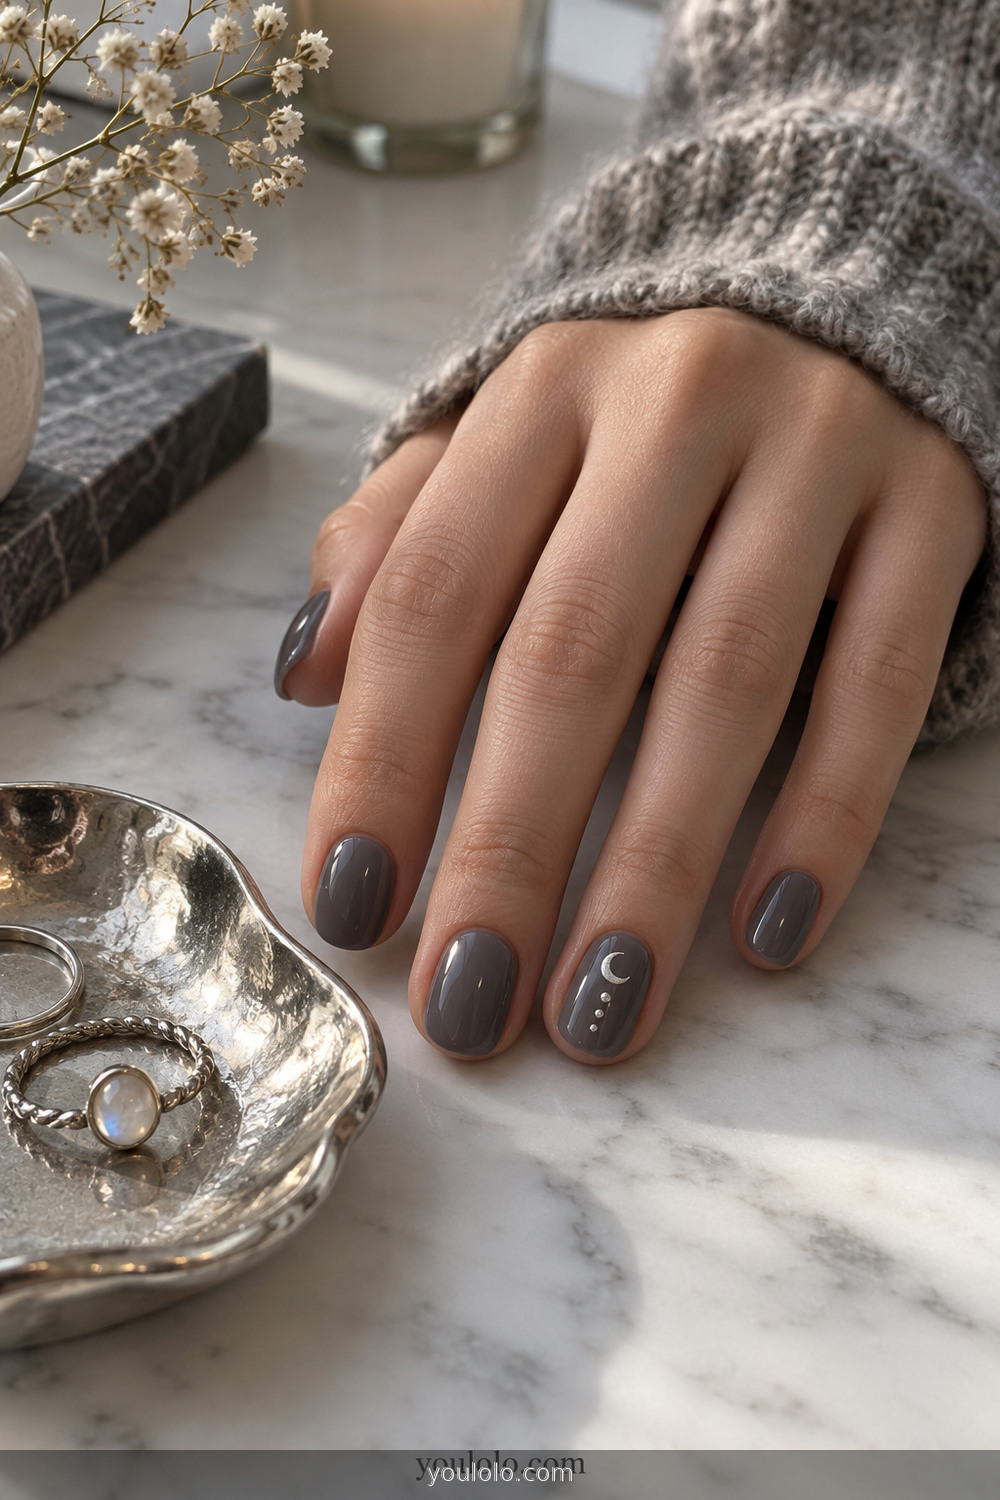
A slim moon decal and three descending dots give smoky gray polish a witchy feeling without literal Halloween characters. This idea is close to the elegant moon-and-dot manicure covered by Allure, but the home version stays deliberately smaller. Use a flat metallic decal instead of a raised charm so the top coat can seal it and hair will not catch underneath.
Easy Halloween Nails With One Extra Technique
The final five are still beginner-friendly, but I would allow twenty to thirty minutes because they need drying time, tape, or repeated tips. They are the designs I choose when painting my nails is the evening activity rather than one more job before bed.
16. Black Micro French
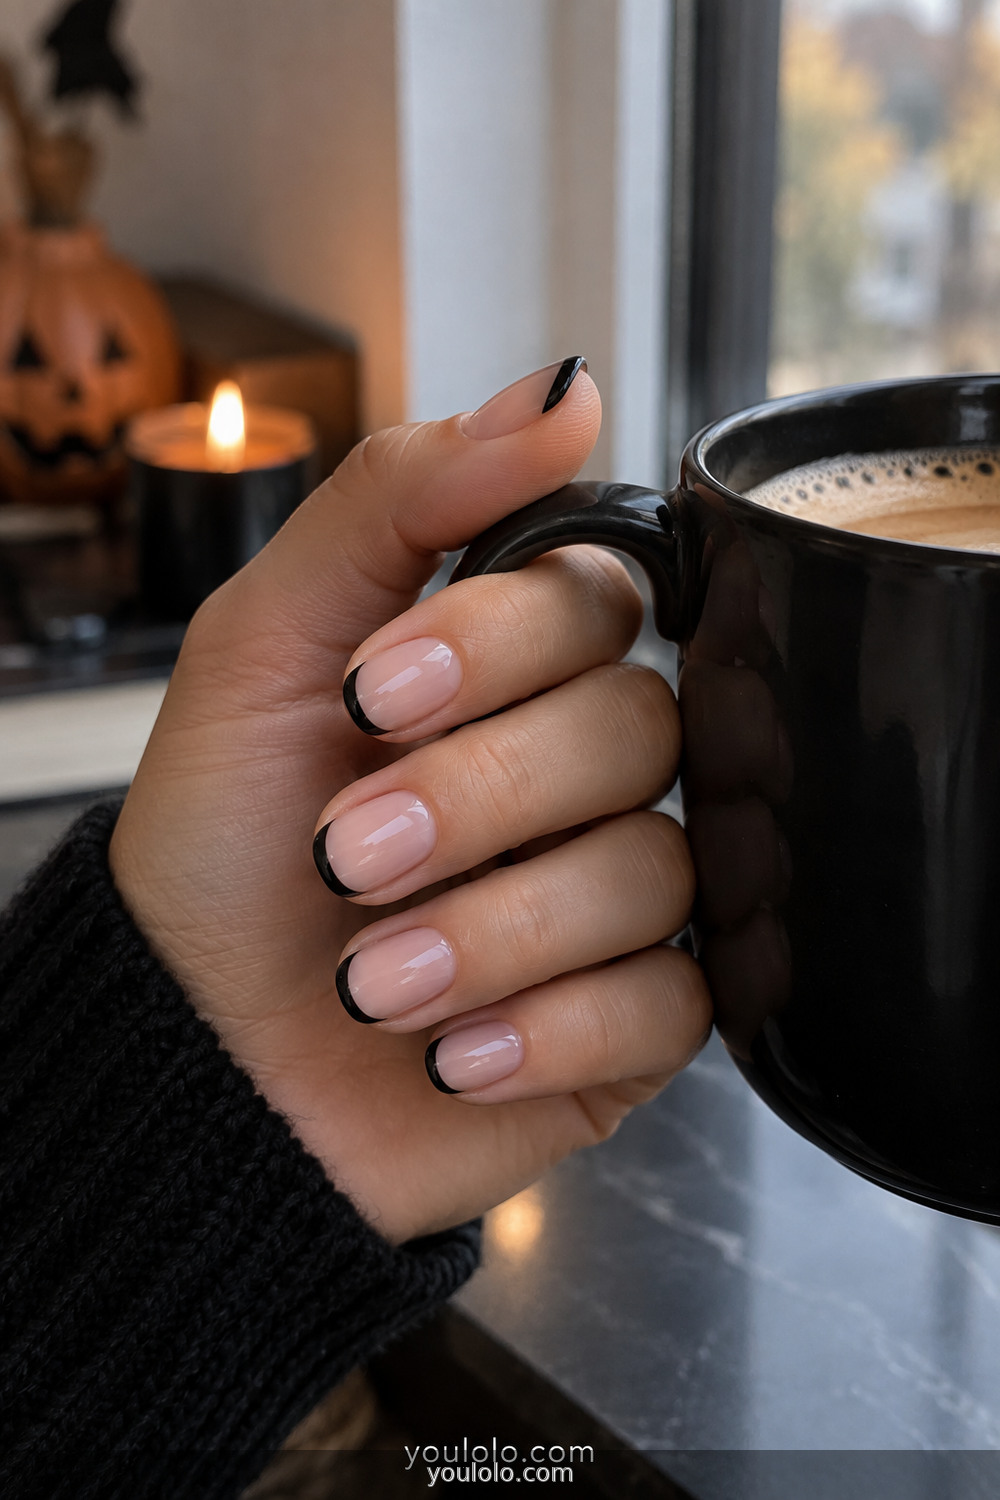
Black micro tips look crisp, slightly gothic, and completely wearable in November too. Short oval nails are ideal because the natural curve provides the guide. Rest both elbows on the table, hold the brush still, and rotate the finger through the polish. If one line becomes wider, widen the others a touch instead of endlessly correcting that nail.
17. Rounded Green Slime Tips
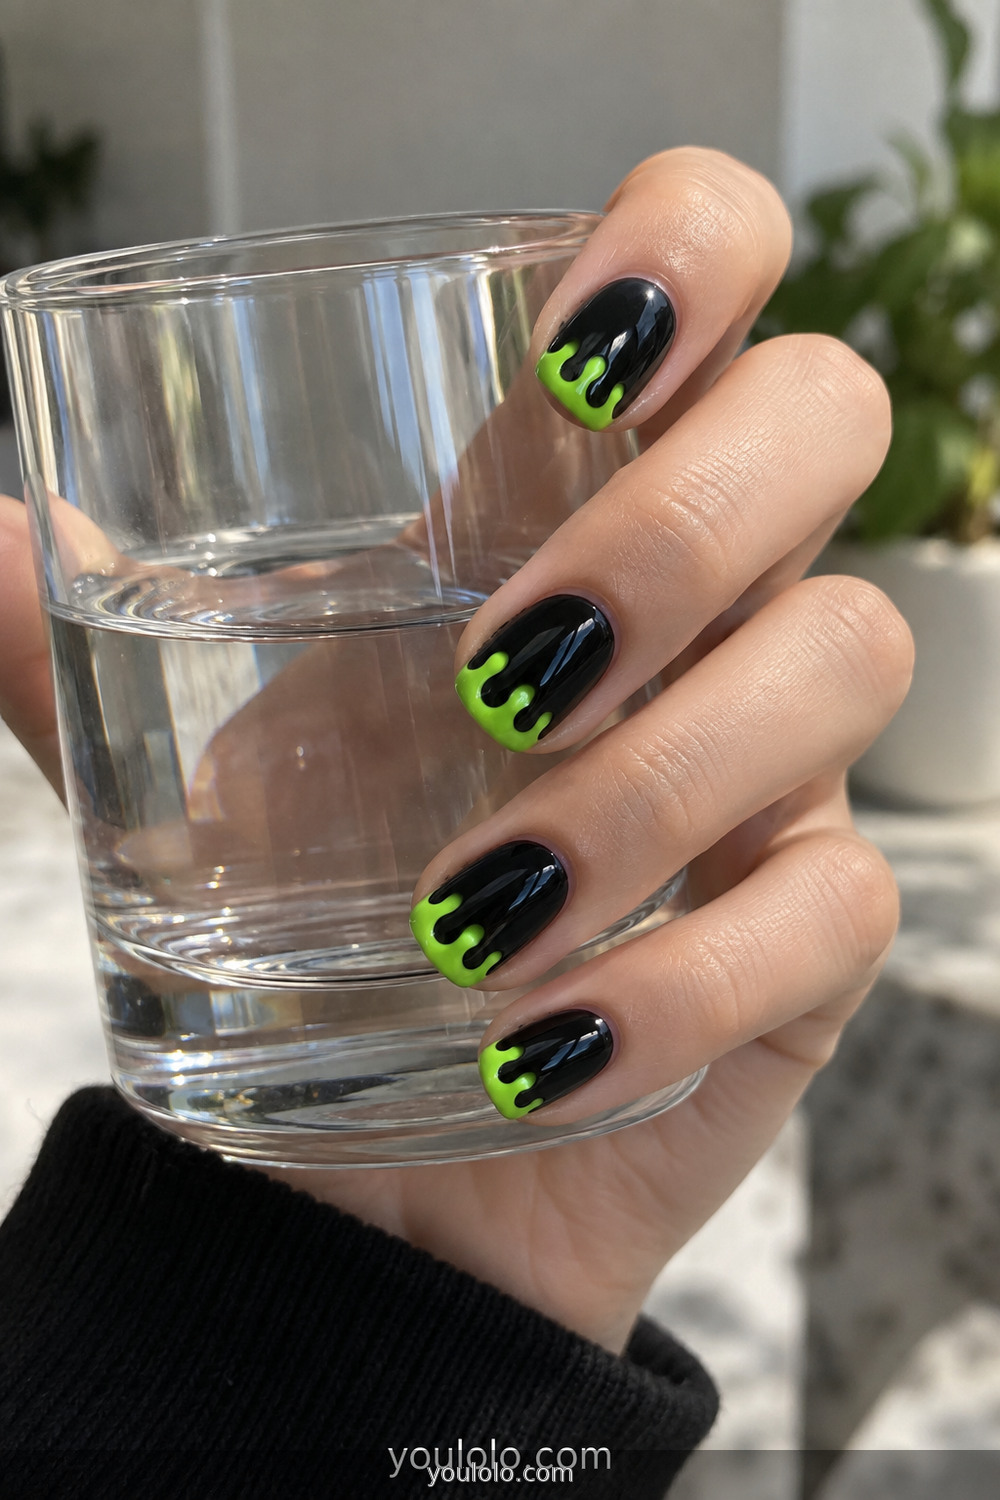
Paint a small green French tip, then add two or three dots below it and connect them upward while wet. Rounded drips are far easier than long sharp ones. The bright green needs an opaque formula to show over black; if yours is sheer, paint the slime in white first and cover it with green. That extra base saves several thick, lumpy layers.
18. Red Drip Tips on Nude
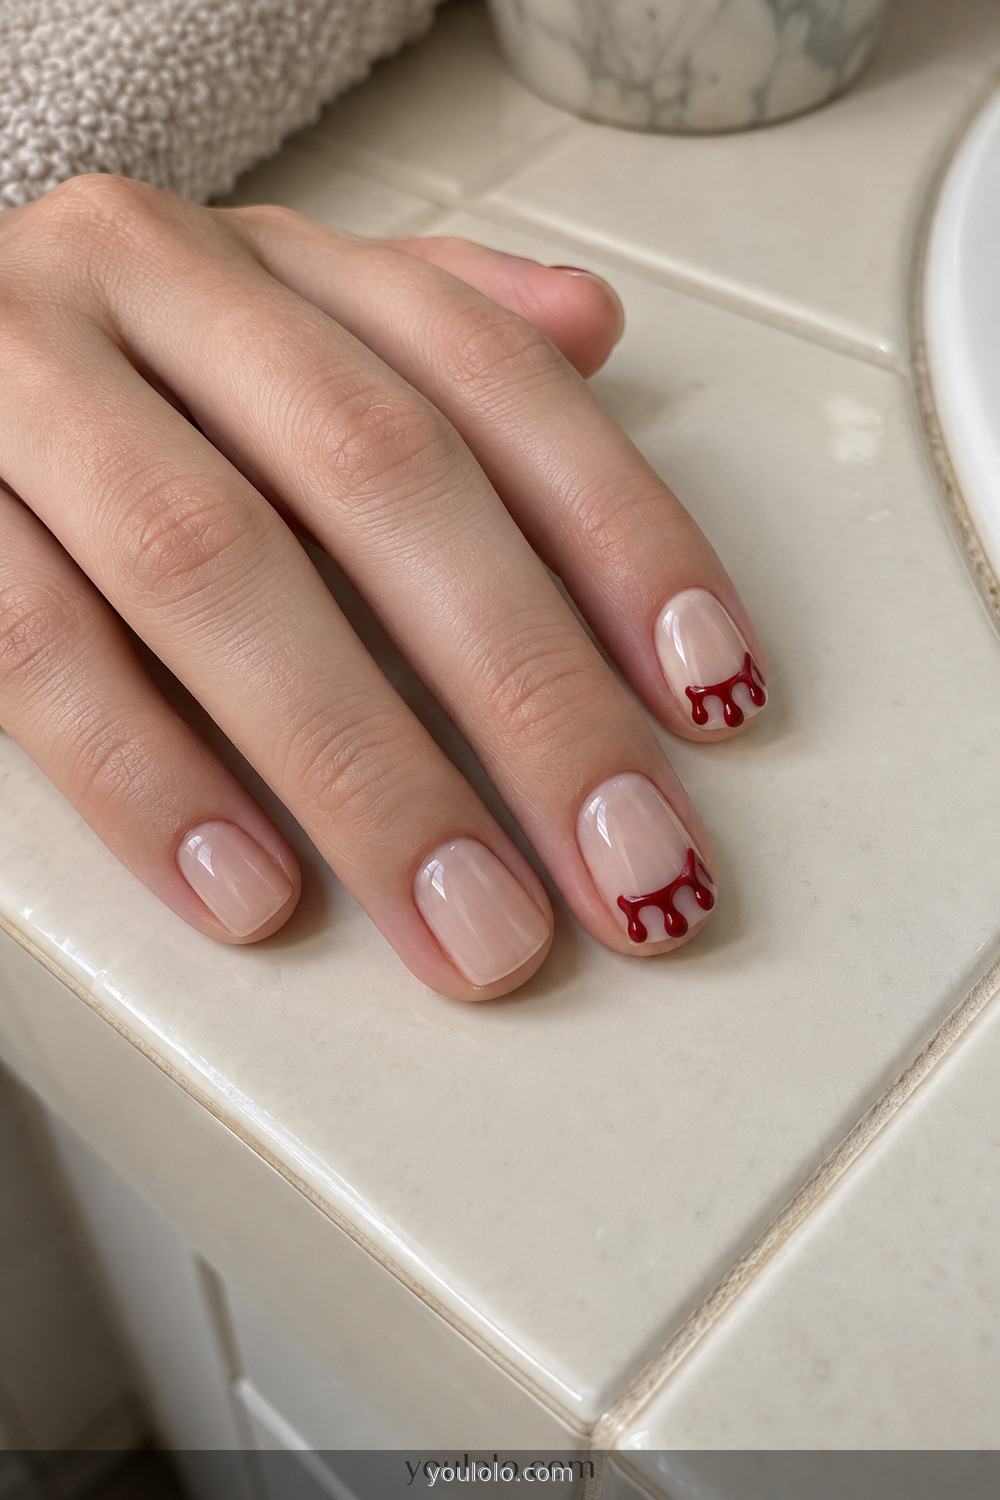
The method is the same as the slime design: red tip, two dots below, connect while wet. Keeping the background sheer makes the graphic detail feel lighter. I prefer a deep cherry red because it reads as a fashionable manicure from a distance and a Halloween detail up close. Skip this one if the theme feels too theatrical for you; black or plum drips work just as well.
19. Candy Corn Color Blocking
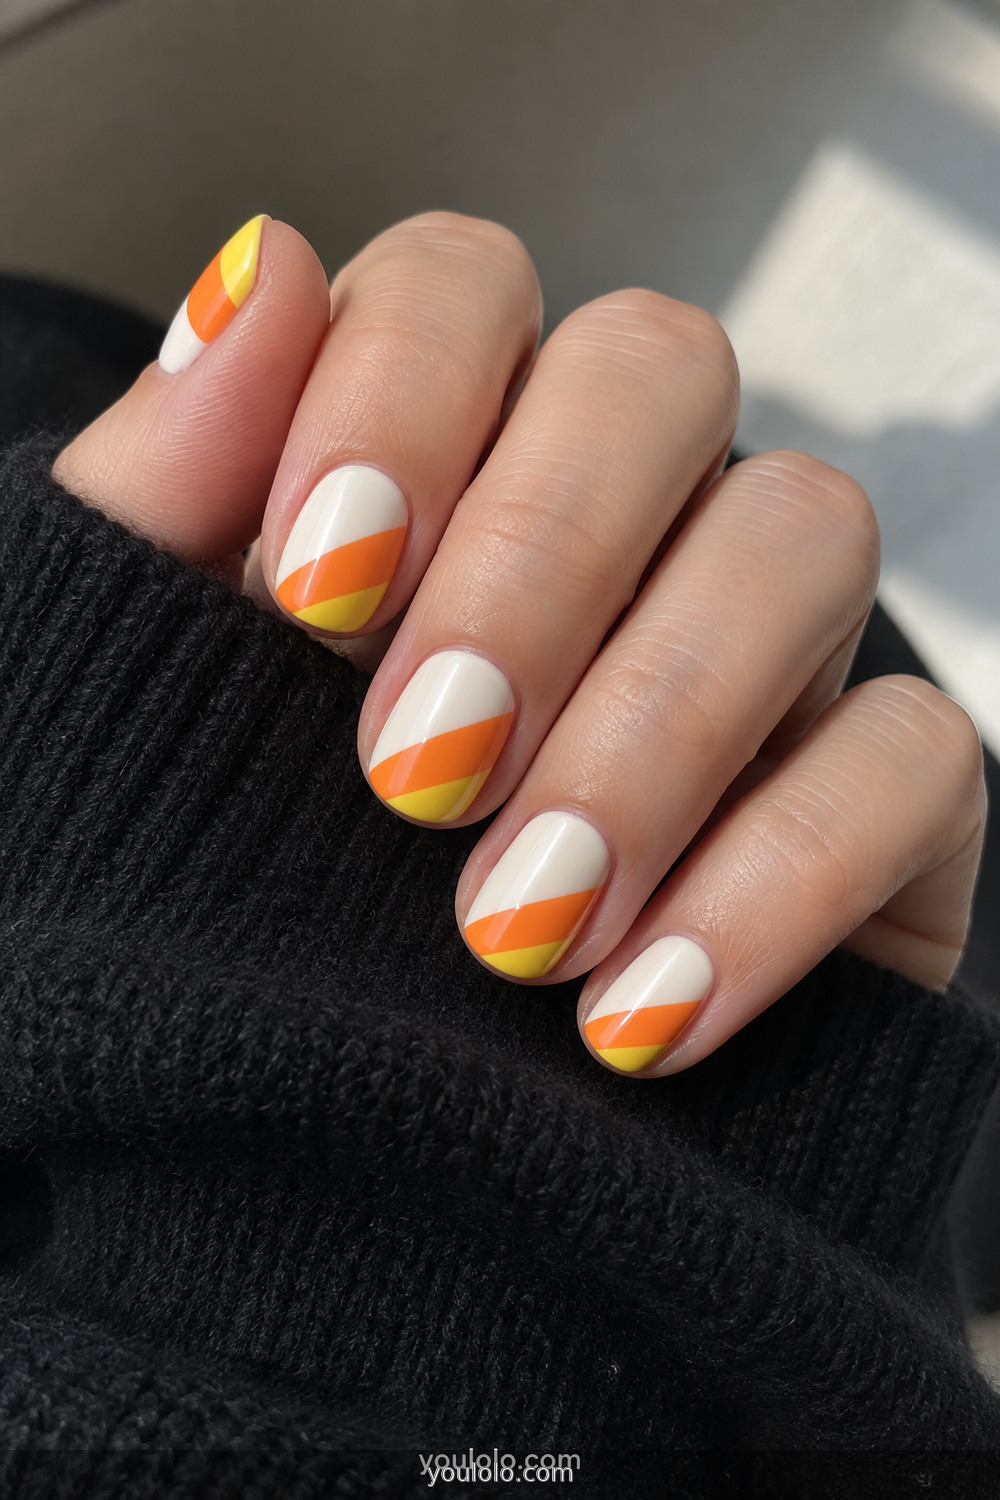
Cream, orange, and yellow bands reference candy corn without painting individual candies. Begin with cream and let it dry fully. Add the orange band, then finish with a small yellow tip. Tape can help, but I actually prefer slightly softened freehand lines; perfect geometric stripes can make the set look like press-ons. Use thin layers because three opaque colors become bulky surprisingly fast.
20. Sparse Celestial Stickers
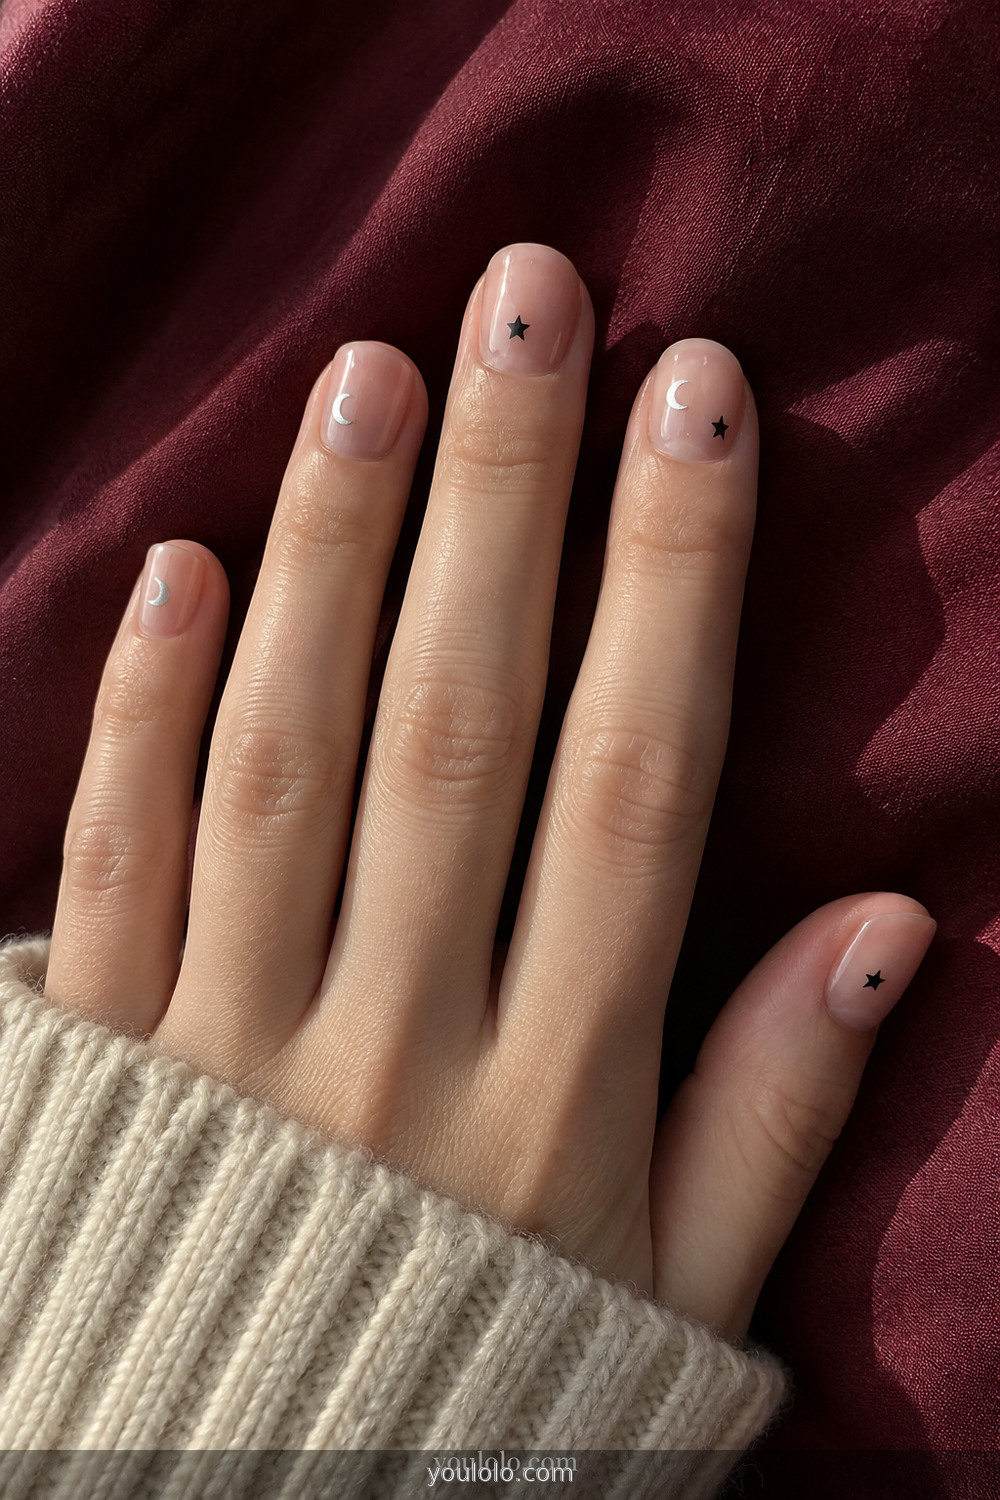
A few black stars and silver moons give you the most polished result for the least drawing. The important word is few. I place one decal near a cuticle, another toward a tip, and leave at least two nails plain. Too many stickers reveal the sheet they came from. Press every point flat and float top coat over the surface rather than dragging the brush hard across it.
What Usually Goes Wrong at Home
The first problem is starting art over a base that is not dry. The toothpick digs a groove, tape lifts the color, and every correction makes the surface thicker. The second is loading too much polish onto the tool. For dots, I put a small drop on foil and touch the toothpick lightly into the edge. For lines, the brush should look almost empty.
The third mistake is trying to make both hands identical. I cannot paint a tiny bat with my non-dominant hand as neatly as I can with my dominant one, and pretending otherwise is how I end up removing the whole manicure. Instead, I put the detailed accent on one hand and use a dot, solid color, or sticker on the other. The colors connect the two hands even when the artwork changes.
Finally, give top coat a moment. If you brush straight across fresh black eyes or web lines, they streak. Wait at least five minutes, load the brush generously, and float it above the design with light pressure. Some nail artists also use a water-based top coat over detailed art before adding their usual protective coat. A toothpick tutorial from CutePolish shows just how many recognizable shapes can begin with dots rather than specialist equipment.
How I Choose the Right Design for the Week
For a work-heavy week, I choose black micro French, matte-and-gloss black, orange tips, or a single moon. For a party, I am more likely to wear slime, red drips, or candy-corn blocks. If children are involved, little ghosts and pumpkin faces are the designs everyone notices first. And when I know I will remove the manicure in two days, alternating solid colors saves both time and supplies.
That flexibility is why Easy Halloween Nails are more useful to me than one complicated matching set: I can adjust one accent and keep the rest familiar.
Short nails are not a limitation here. They actually make the simple motifs look deliberate because there is no empty length demanding more decoration. If you prefer a longer almond shape, keep the character small and use the extra space for a sheer base. You can also borrow the clean proportions from our Fall Almond Nails collection.
For an even more practical length, the companion guide to Short Halloween Nails focuses on designs that flatter compact nail beds. If you want Halloween details that still feel polished enough for an event, start with the restraint used in our Classy Nails Design Ideas. A milky base is also easy to reuse after the holiday; our Milky White Chrome Nails guide shows how much the finish can change that color.
Easy Halloween Nails: Questions I Would Ask Before Painting
What is the easiest Halloween nail design for a complete beginner?
Alternating orange and black requires no nail-art skill. If you want an actual motif, two spooky eyes or the three-dot ghost is the easiest place to start. Practice once on foil, then decorate only one nail.
Can I create these designs without a dotting tool?
Yes. A toothpick makes small dots, a bobby pin makes larger ones, and the rounded end of a sewing pin pressed into a pencil eraser works too. Clean the improvised tool between colors so the edges stay clear.
Which designs work best with regular nail polish?
Solid colors, skittle nails, dots, ghosts, micro French tips, stickers, and simple drips all work with regular lacquer. Very detailed stamping and thick charms are easier with gel, but neither is necessary for this collection.
How do I stop black nail art from smearing under top coat?
Let the design dry longer than seems necessary, use a generous bead of top coat, and move the brush with light pressure so the bristles do not scrape the art. Try to cover each nail in three strokes rather than repeatedly brushing the same spot.
Do Easy Halloween Nails have to be orange and black?
Not at all. Lavender with a white ghost, smoky gray with a silver moon, nude with a black bat, olive, plum, or deep cherry all feel seasonal. A small recognizable detail can carry the theme while the base color stays within your normal wardrobe.
My Final Rule for a Relaxed Halloween Manicure
I stop while the design still looks clean. This sounds obvious, but the temptation to add one more star, another dot, and a second accent nail is strong. The simplest sets in this collection work because the eye understands them immediately. A ghost does not need arms. A spider does not need a web. Black polish does not need anything at all.
Choose the version that matches the time you genuinely have, not the manicure you imagine completing in ideal circumstances. With a dry base, one useful toothpick, and permission for the two hands to be sisters rather than twins, Easy Halloween Nails can be exactly what the name promises: fun, recognizable, and finished before the movie starts.