The Best Fluffy Pancakes recipe you will fall in love with. Full of tips and tricks to help you make the best pancakes.

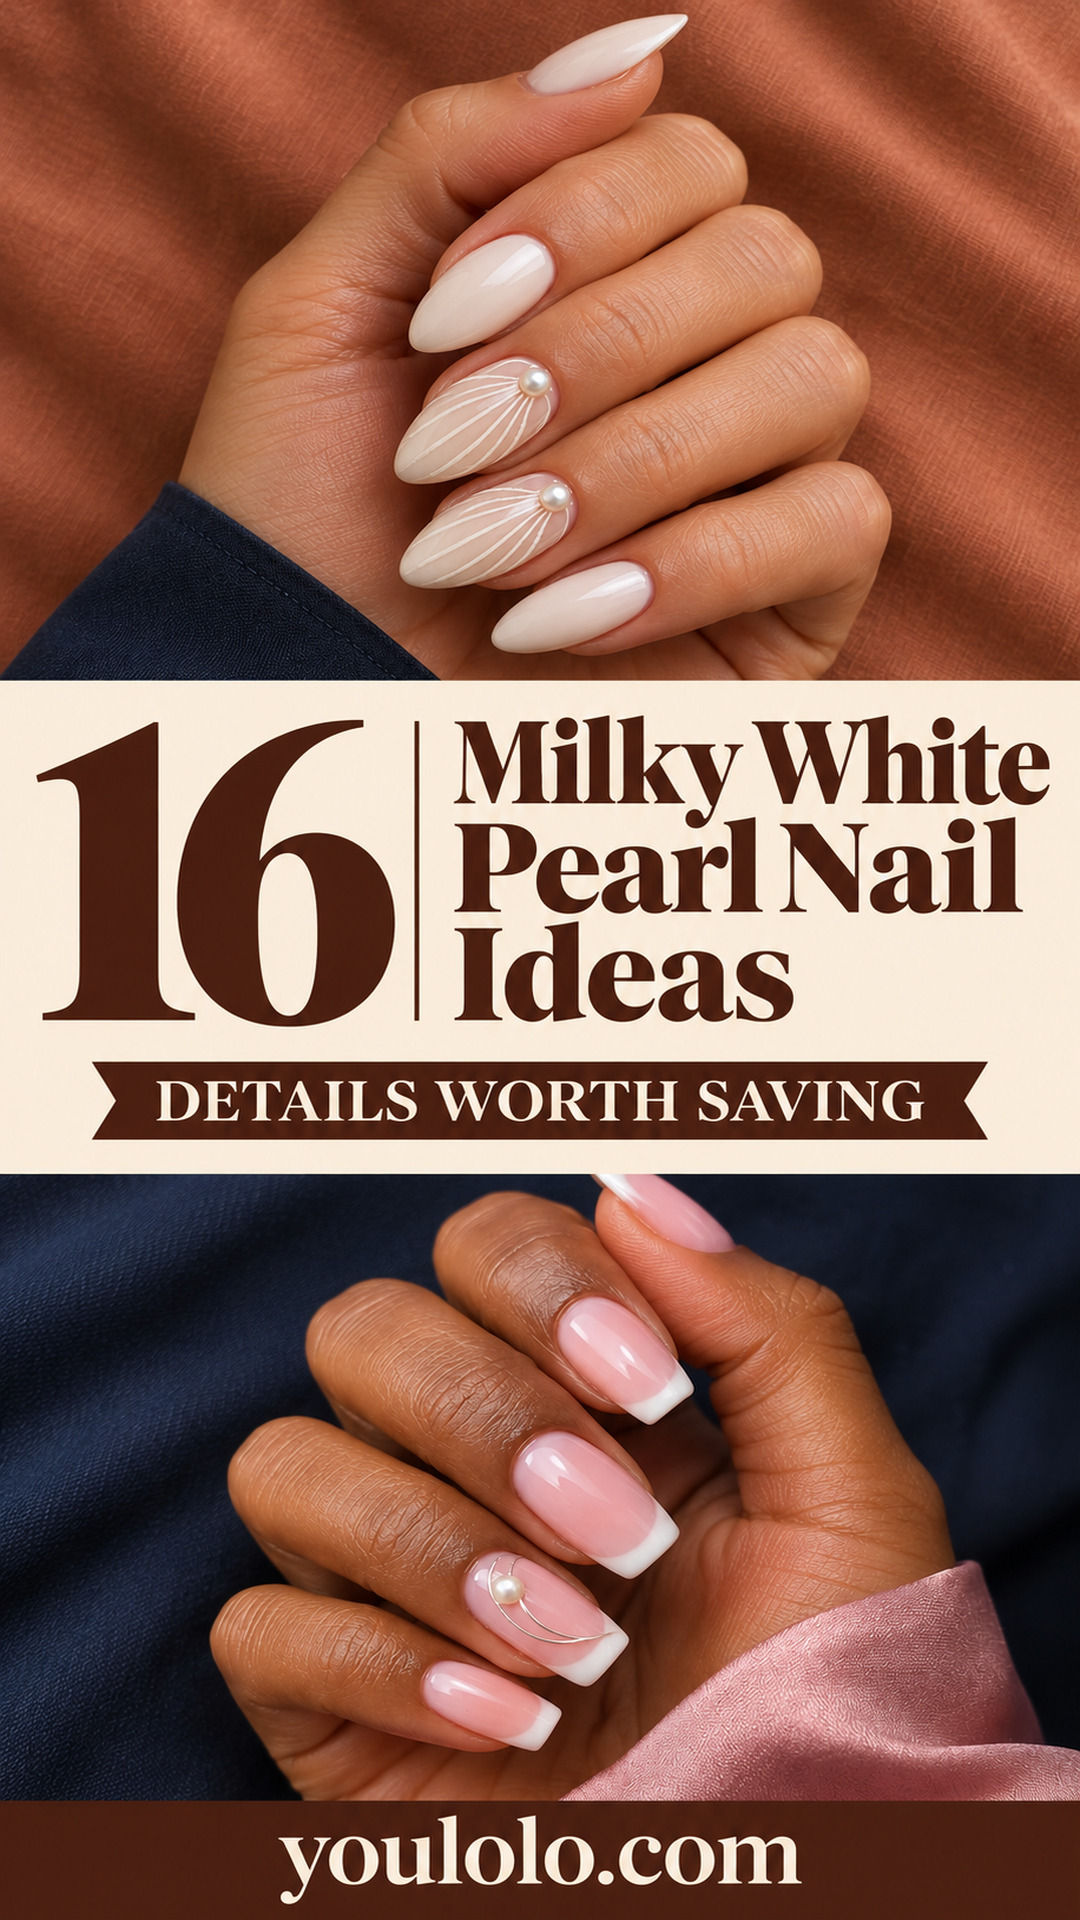
Milky white pearl nail ideas work best when the base and the decoration have room to show separately. A translucent white wash gives the nail softness; a small pearl adds a distinct point of light. Put too many details together, though, and the gentle finish can disappear under the decoration. This collection keeps that balance in mind, with 16 ways to use pearls, painted pearl effects, lace edges and subtle metallic lines.
There is more than one way to get the look. A pearlescent polish creates a smooth reflective finish, while a flat-backed pearl is an actual raised embellishment. A painted dot with a tiny highlight gives a third option: the suggestion of a pearl without a piece attached to the nail. Decide which version you want before choosing a photo for your appointment.
The designs below include short ovals, soft squares and longer almonds. You can borrow the placement from one and the shape from another. A single cuticle accent is an easy starting point; a side trail or shell pattern makes a more noticeable statement. After the gallery, you will find a guide to planning pearl placement, a flat painted alternative and practical notes for explaining the finish to your nail artist.
Choosing the Base for Milky White Pearl Nail Ideas
A milky base is not the same as a fully opaque white. In a sheer version, the natural nail remains faintly visible, which makes the decoration look softer. An opaque ivory gives a more solid backdrop and can make tiny white pearls less distinct. If you want the embellishment to stand out, compare the base and the pearl together on a practice tip before committing to the full set.
Warm ivory pairs easily with champagne lines and cream-colored pearls. A cooler translucent white works with silver, opal-like flakes and clear-looking pink. These are palette choices rather than rules about skin tone. Look at the sample beside your hand in ordinary daylight, especially if you plan to match a dress or jewelry.
Keep the finish in mind as well. Gloss makes the entire nail reflective; a satin base creates more contrast with a shiny pearl. If you choose mixed finishes, limit the extra decoration so the difference between satin and gloss remains visible.
1. Milky Oval Pearl Crescent
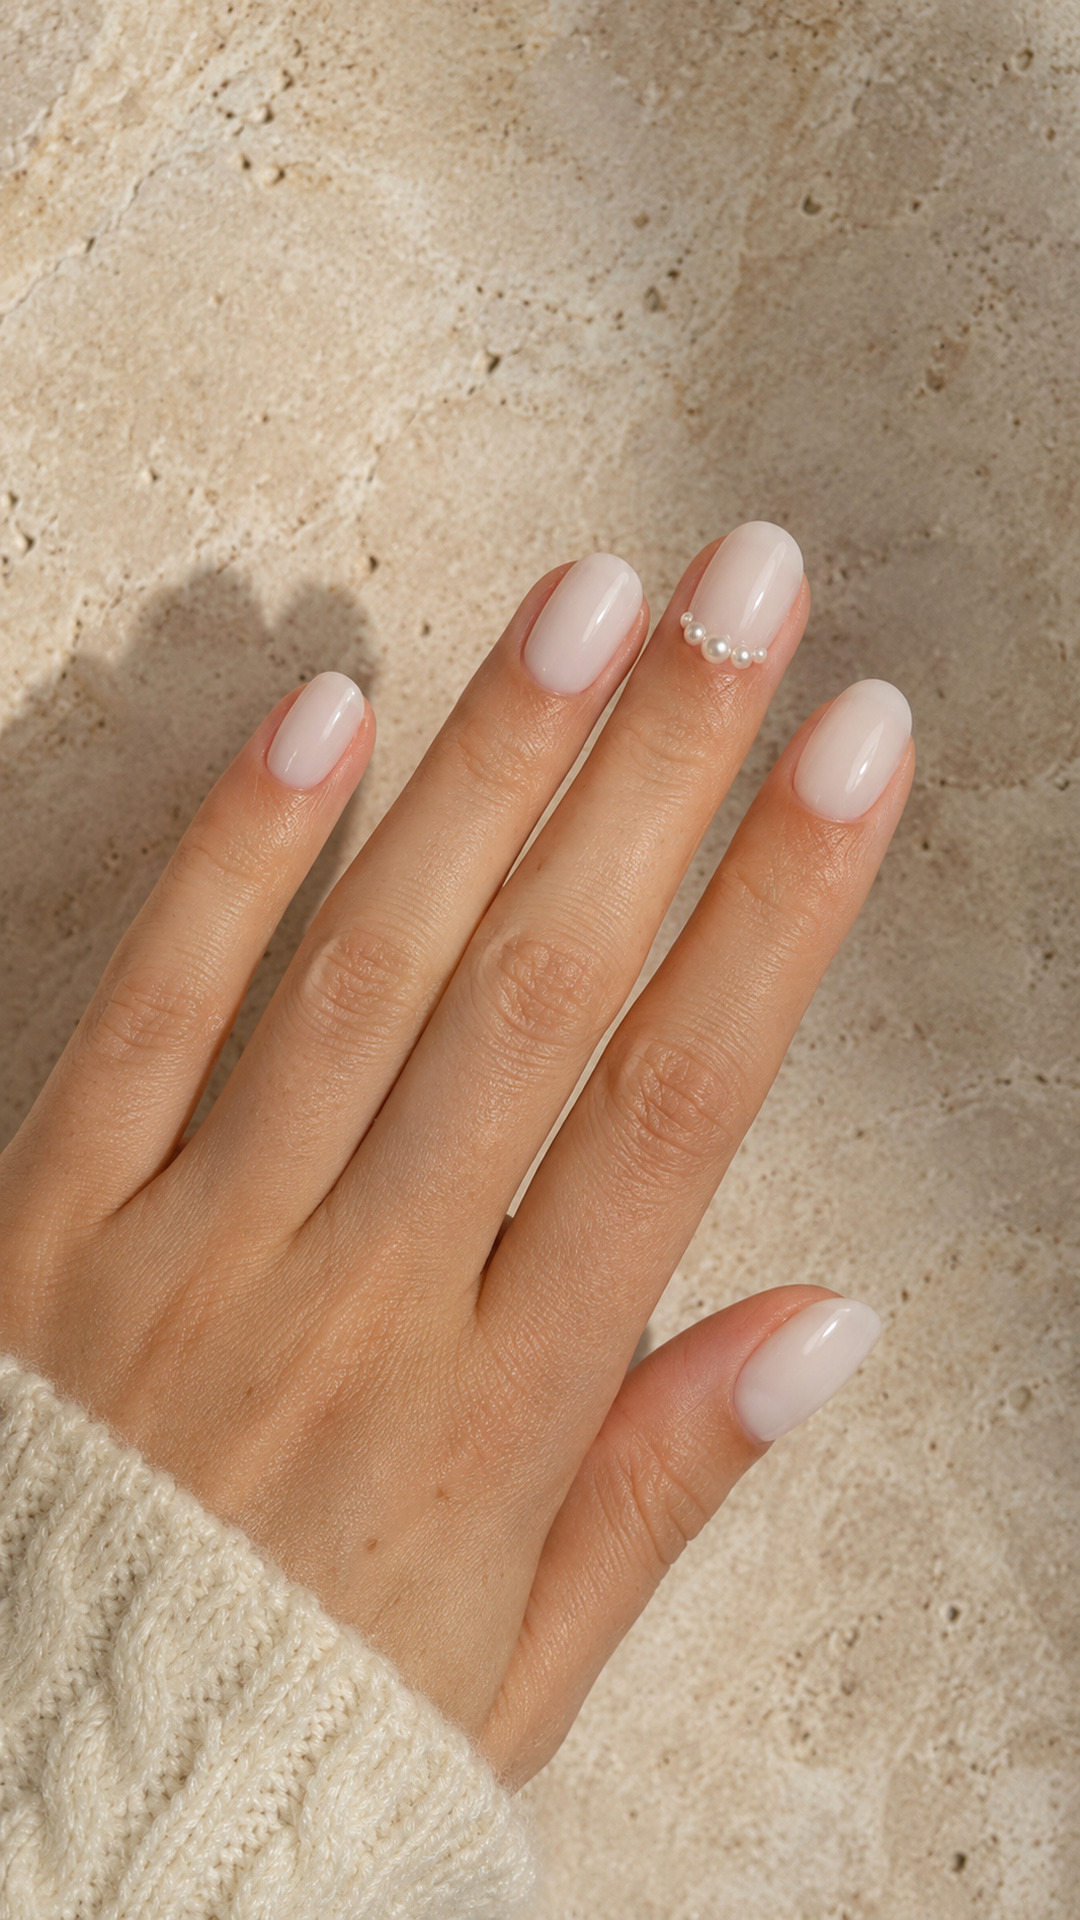
A small pearl crescent draws attention to the base of the nail. Keeping the rest of the surface open makes this a useful starting point for short nails.
2. Porcelain Shell Lines
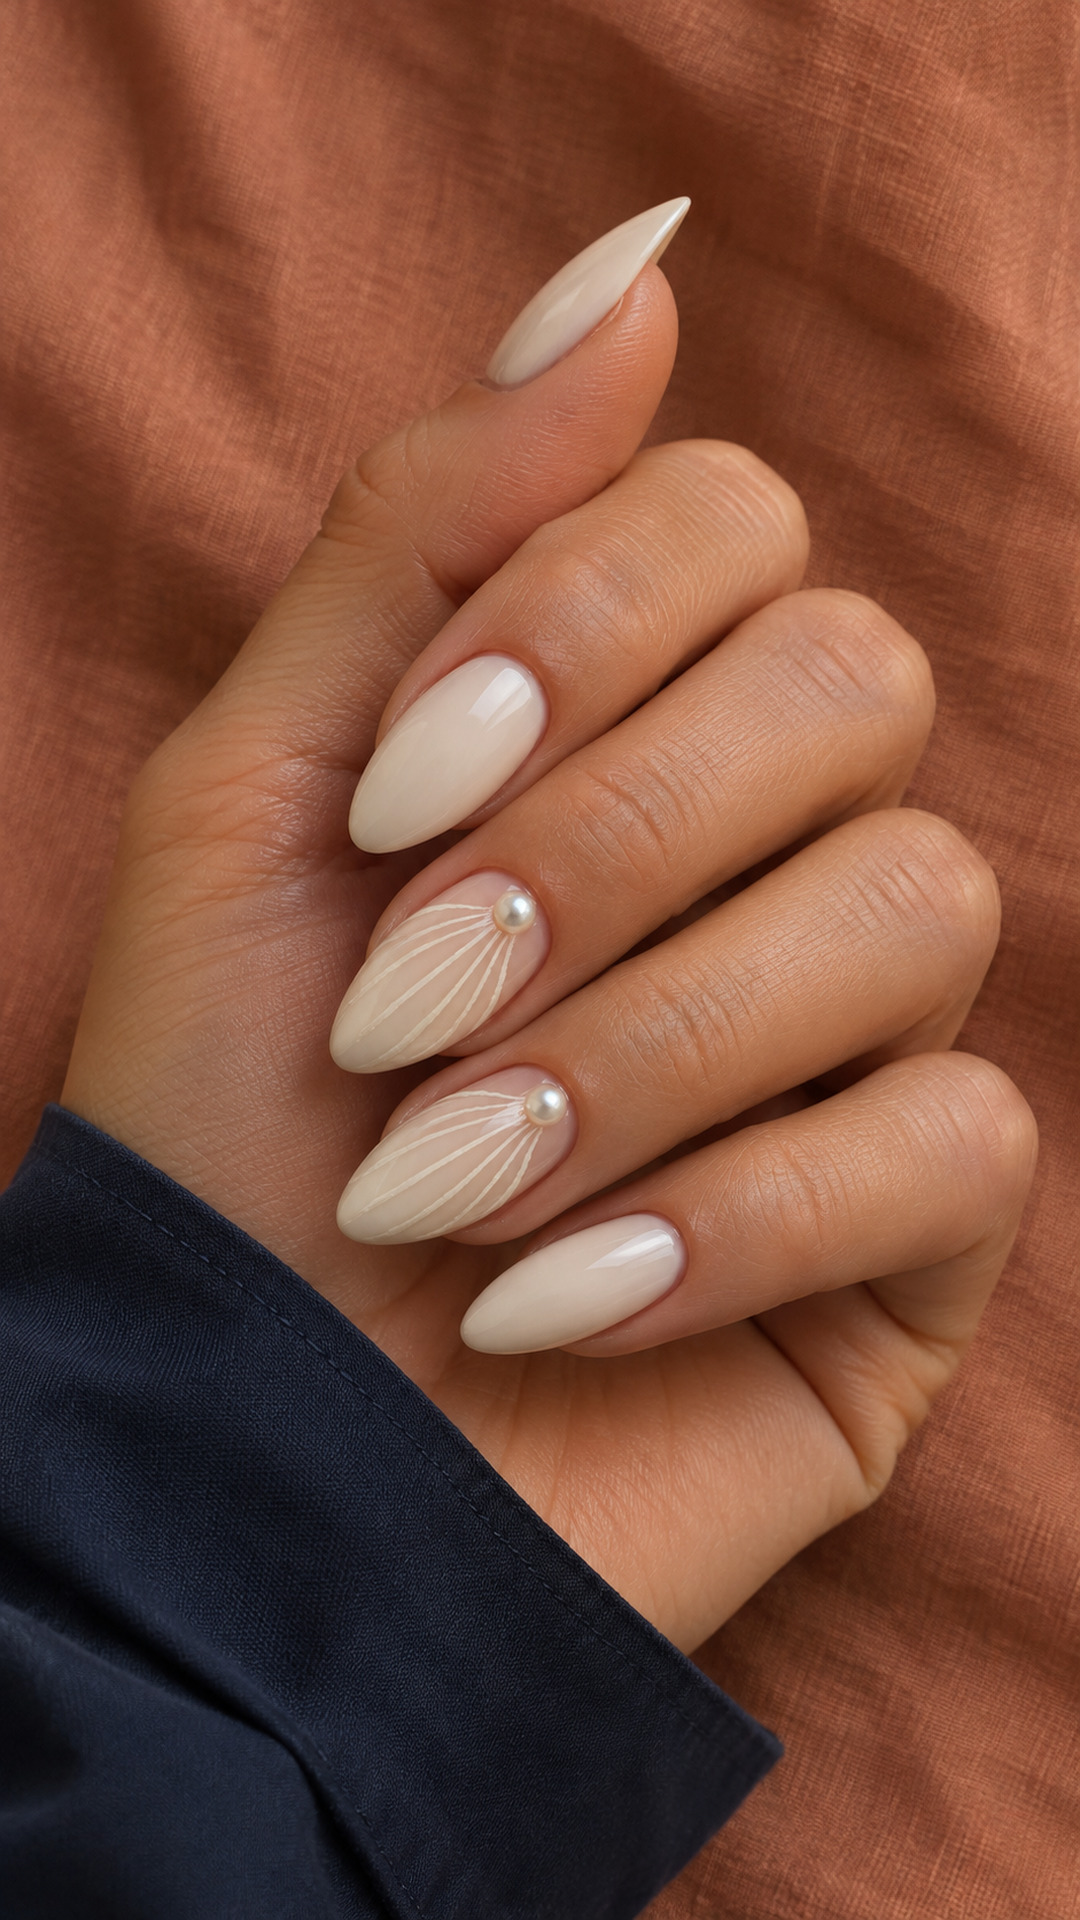
The shell effect comes from curved lines rather than bulky sculpting. Ask for the curves to follow the nail length so the accents look delicate from the side.
3. White French Pearl Knot
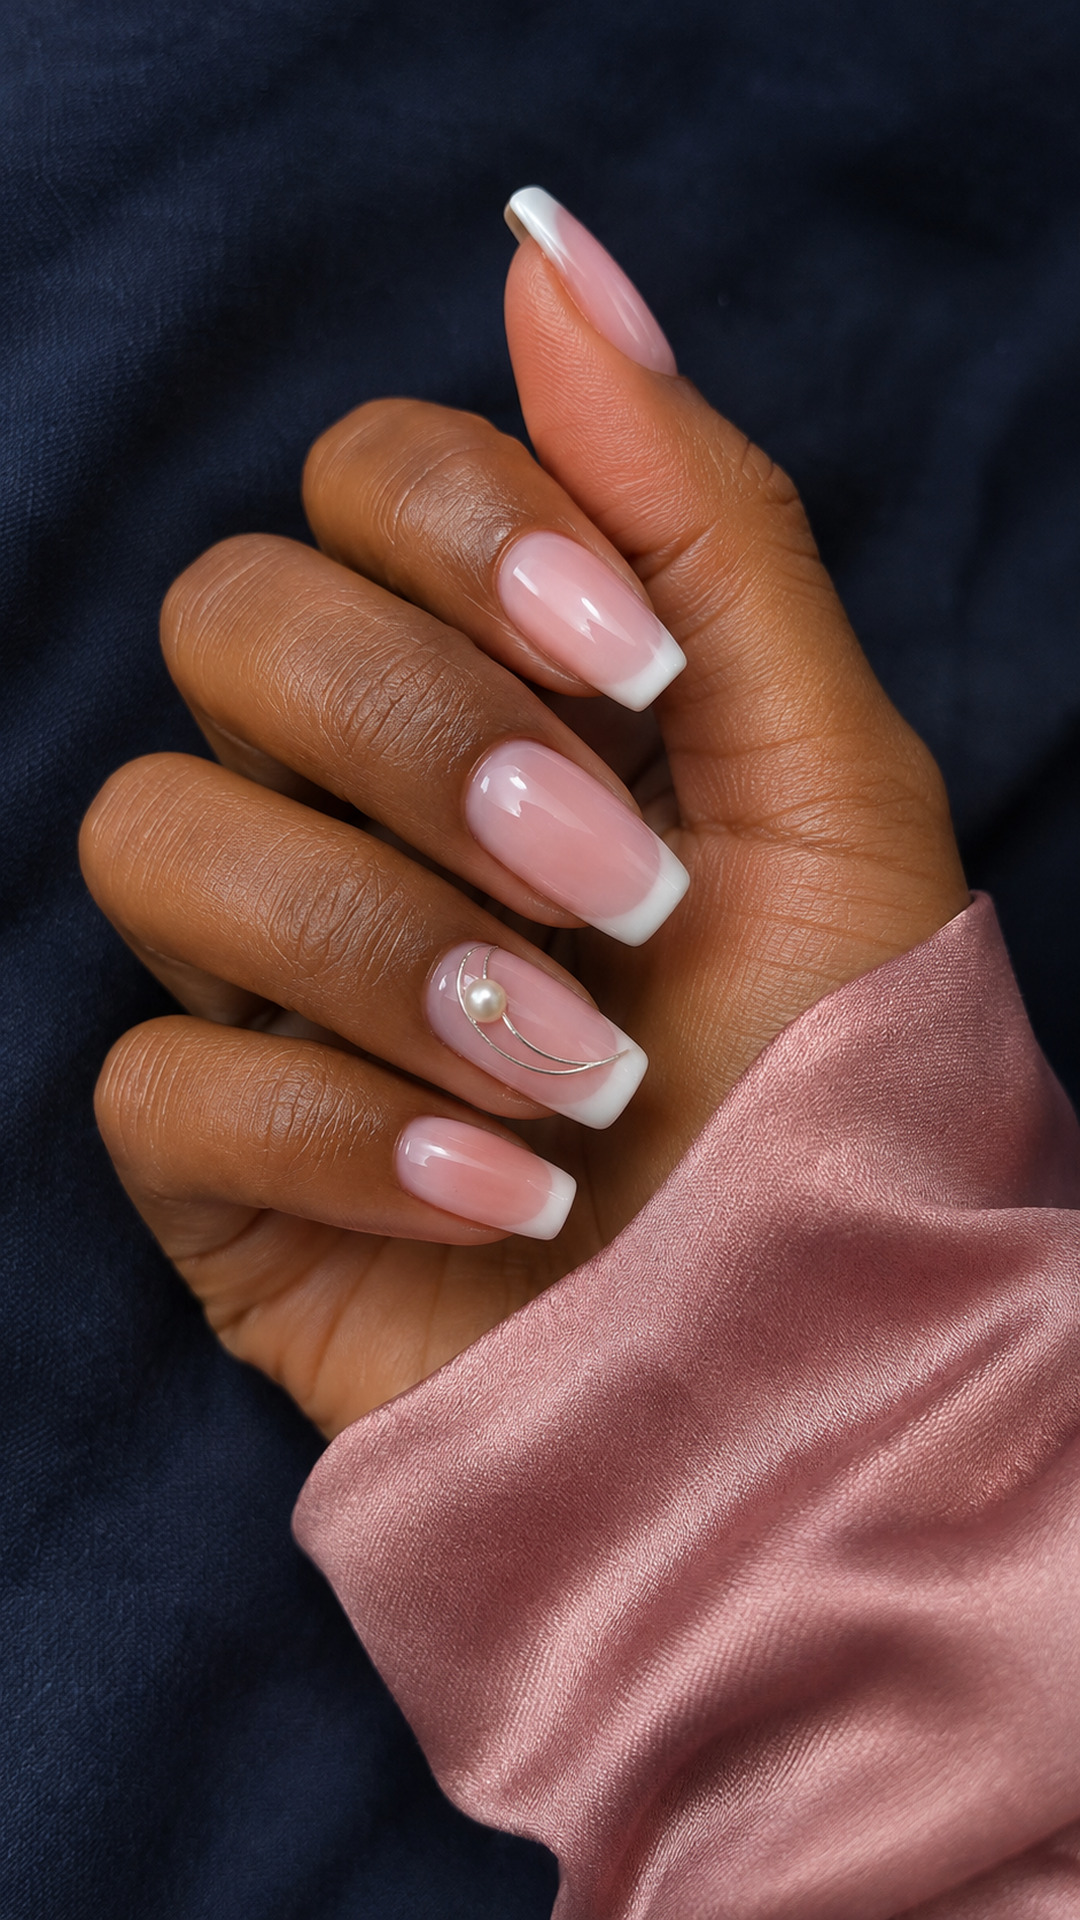
The clear-looking center separates the French tip from the small pearl detail. A single silver knot adds interest without turning every nail into a statement.
4. Soft White Pearl Daisies

Low-contrast petals make the flowers visible only when you look closely. The pearl centers supply enough shine, so the surrounding nails can stay smooth.
5. Ivory Satin and Gloss
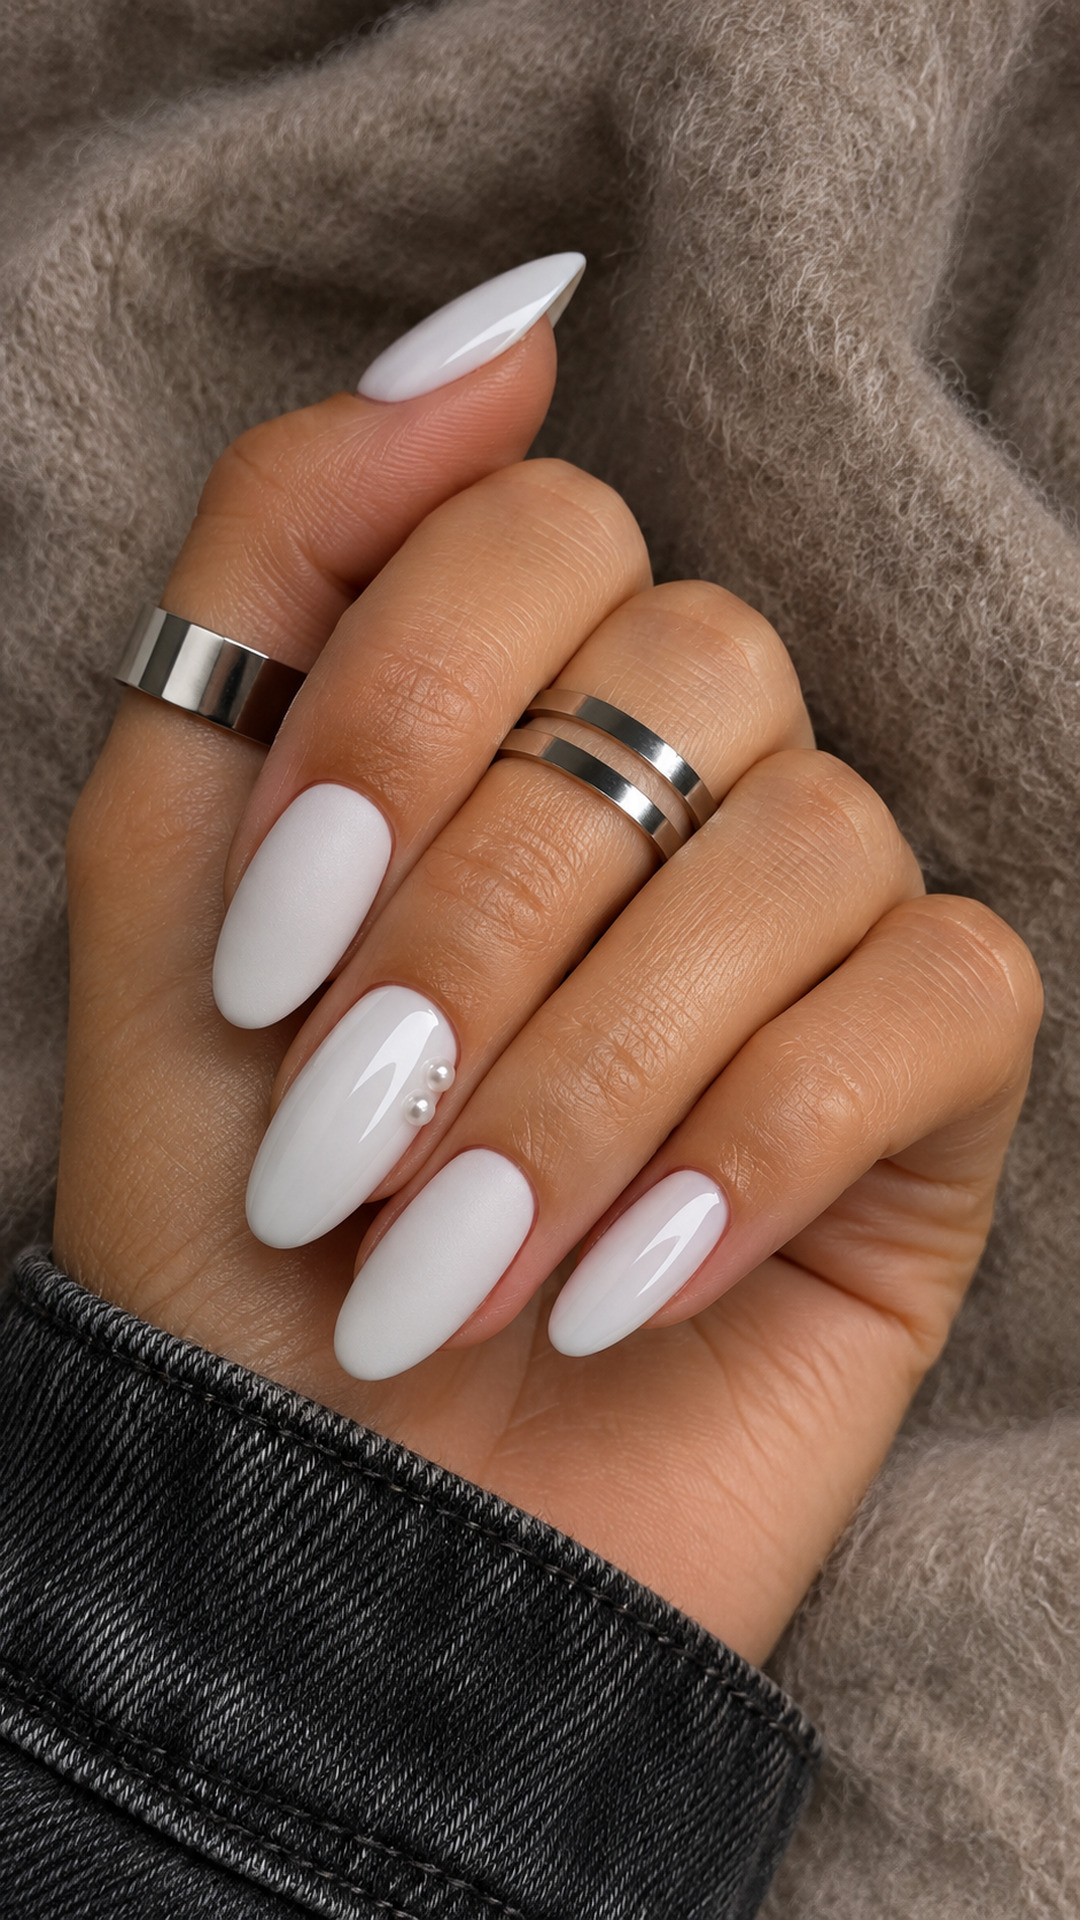
Alternating finishes creates variation inside one color. Place the pearls along the side instead of the center to keep the contrast between finishes easy to see.
If you prefer a metallic accent without raised pearls, compare these white and gold nail ideas.
6. Pearl White Diagonal Ribbon
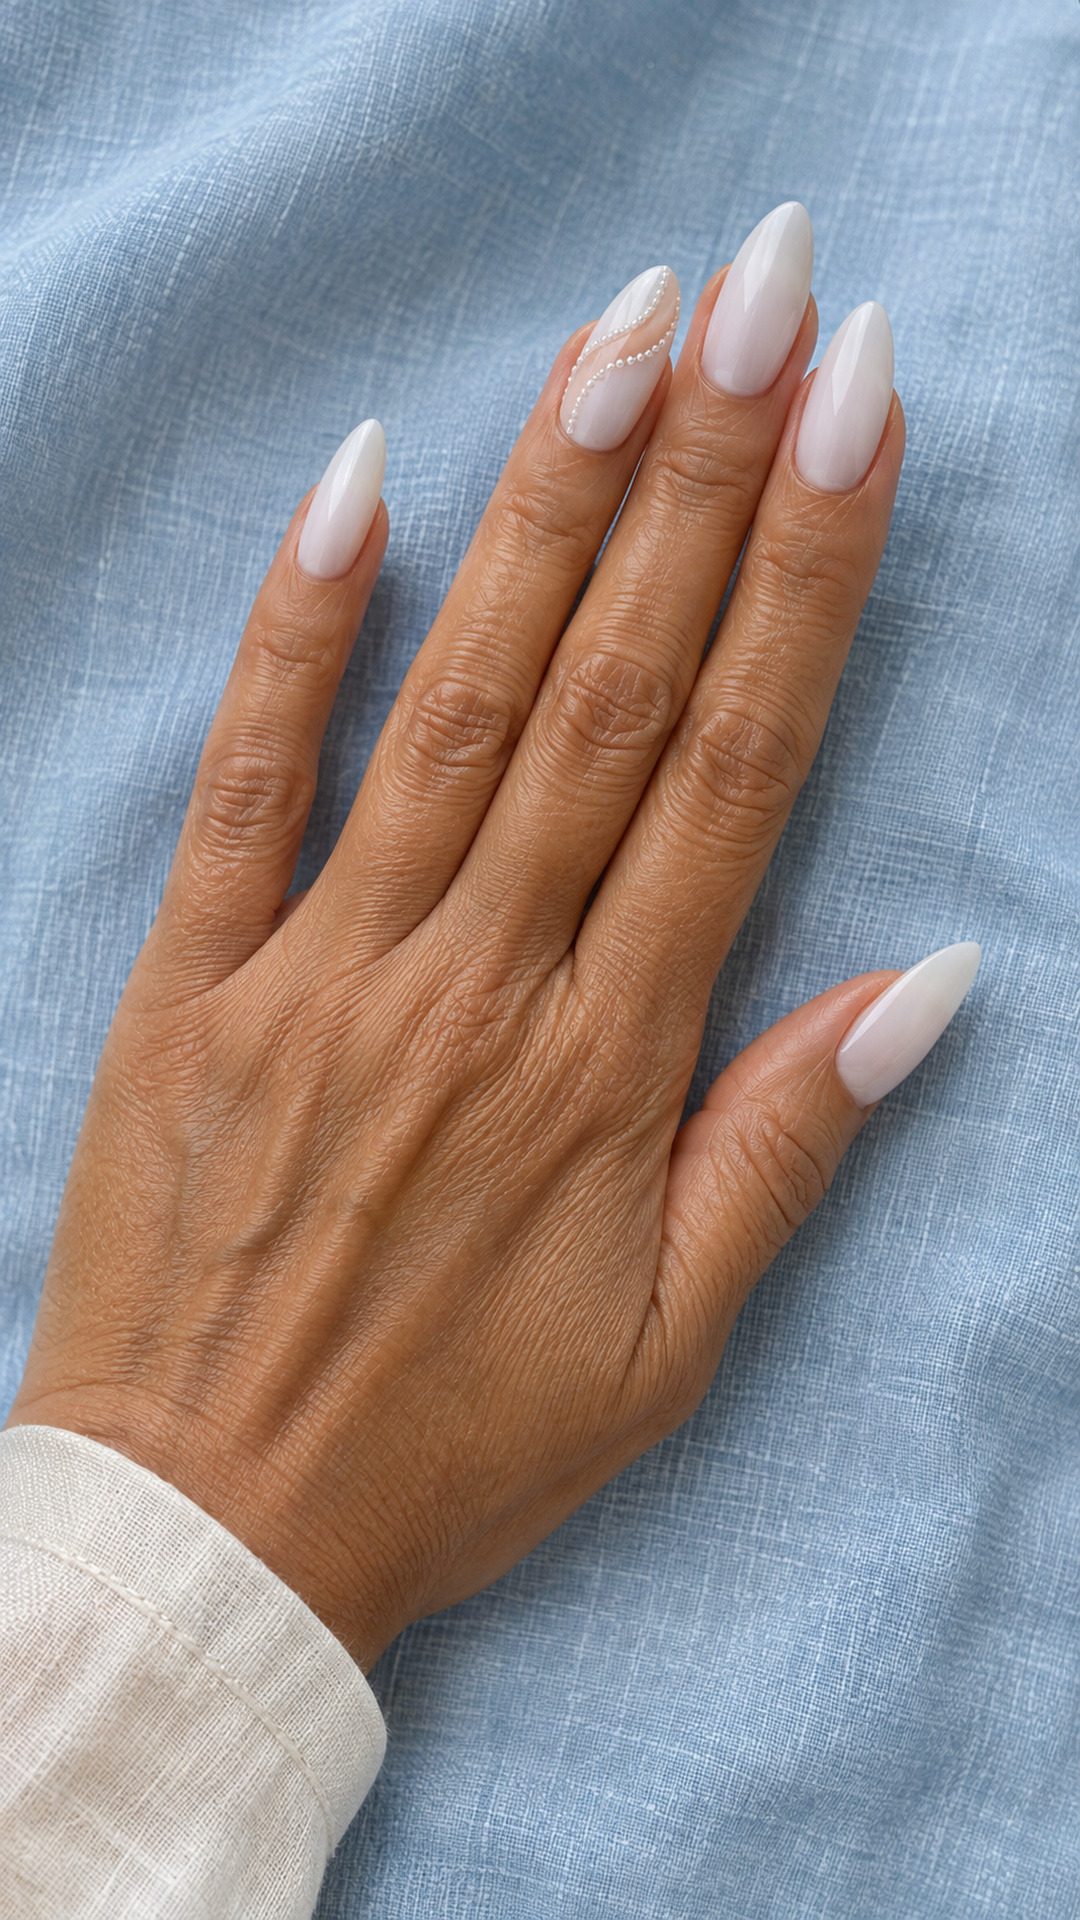
A diagonal ribbon changes the direction of a familiar pearl border. Use a narrow strip of nude so most of the nail still reads as milky white.
7. White Opal Accent
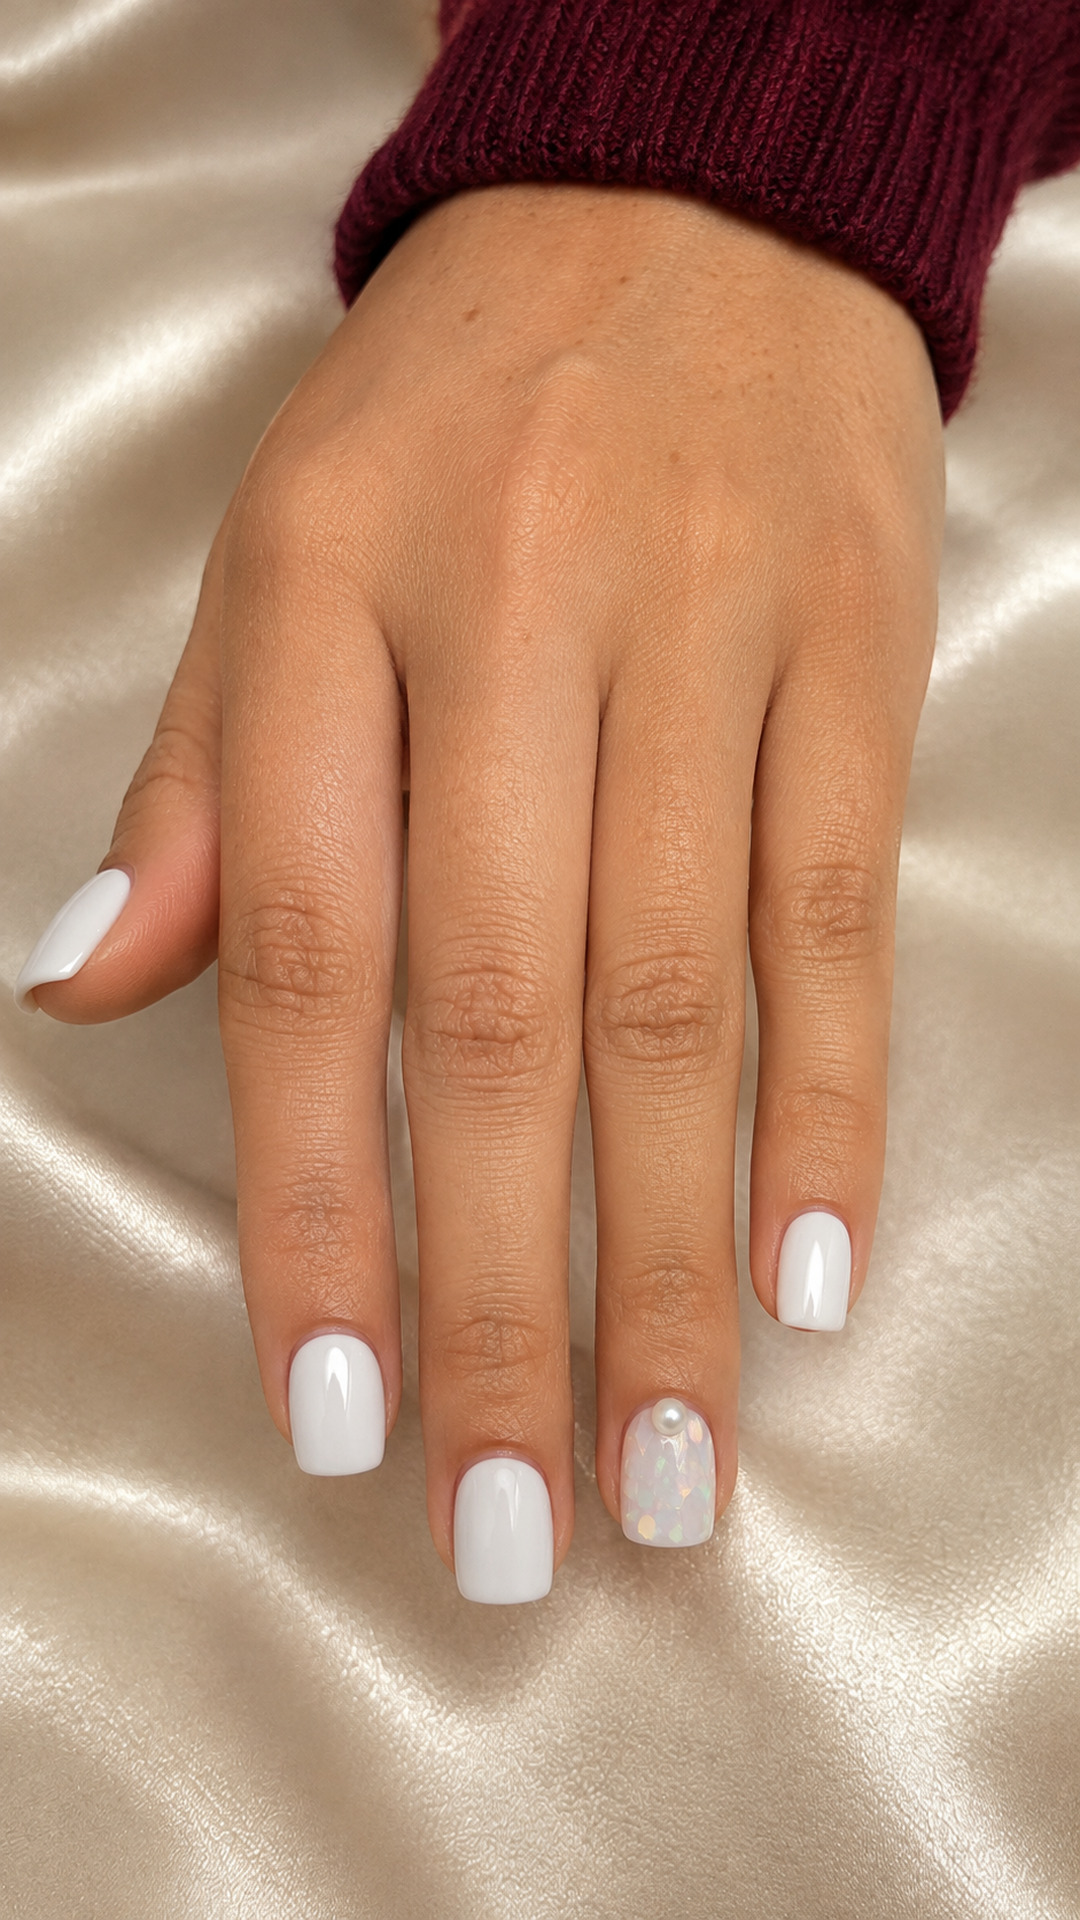
Opal-like pieces add changing reflections next to the solid pearl. Keep the flakes separated so the accent looks luminous rather than densely glittered.
8. Ivory Lace Pearl Edge
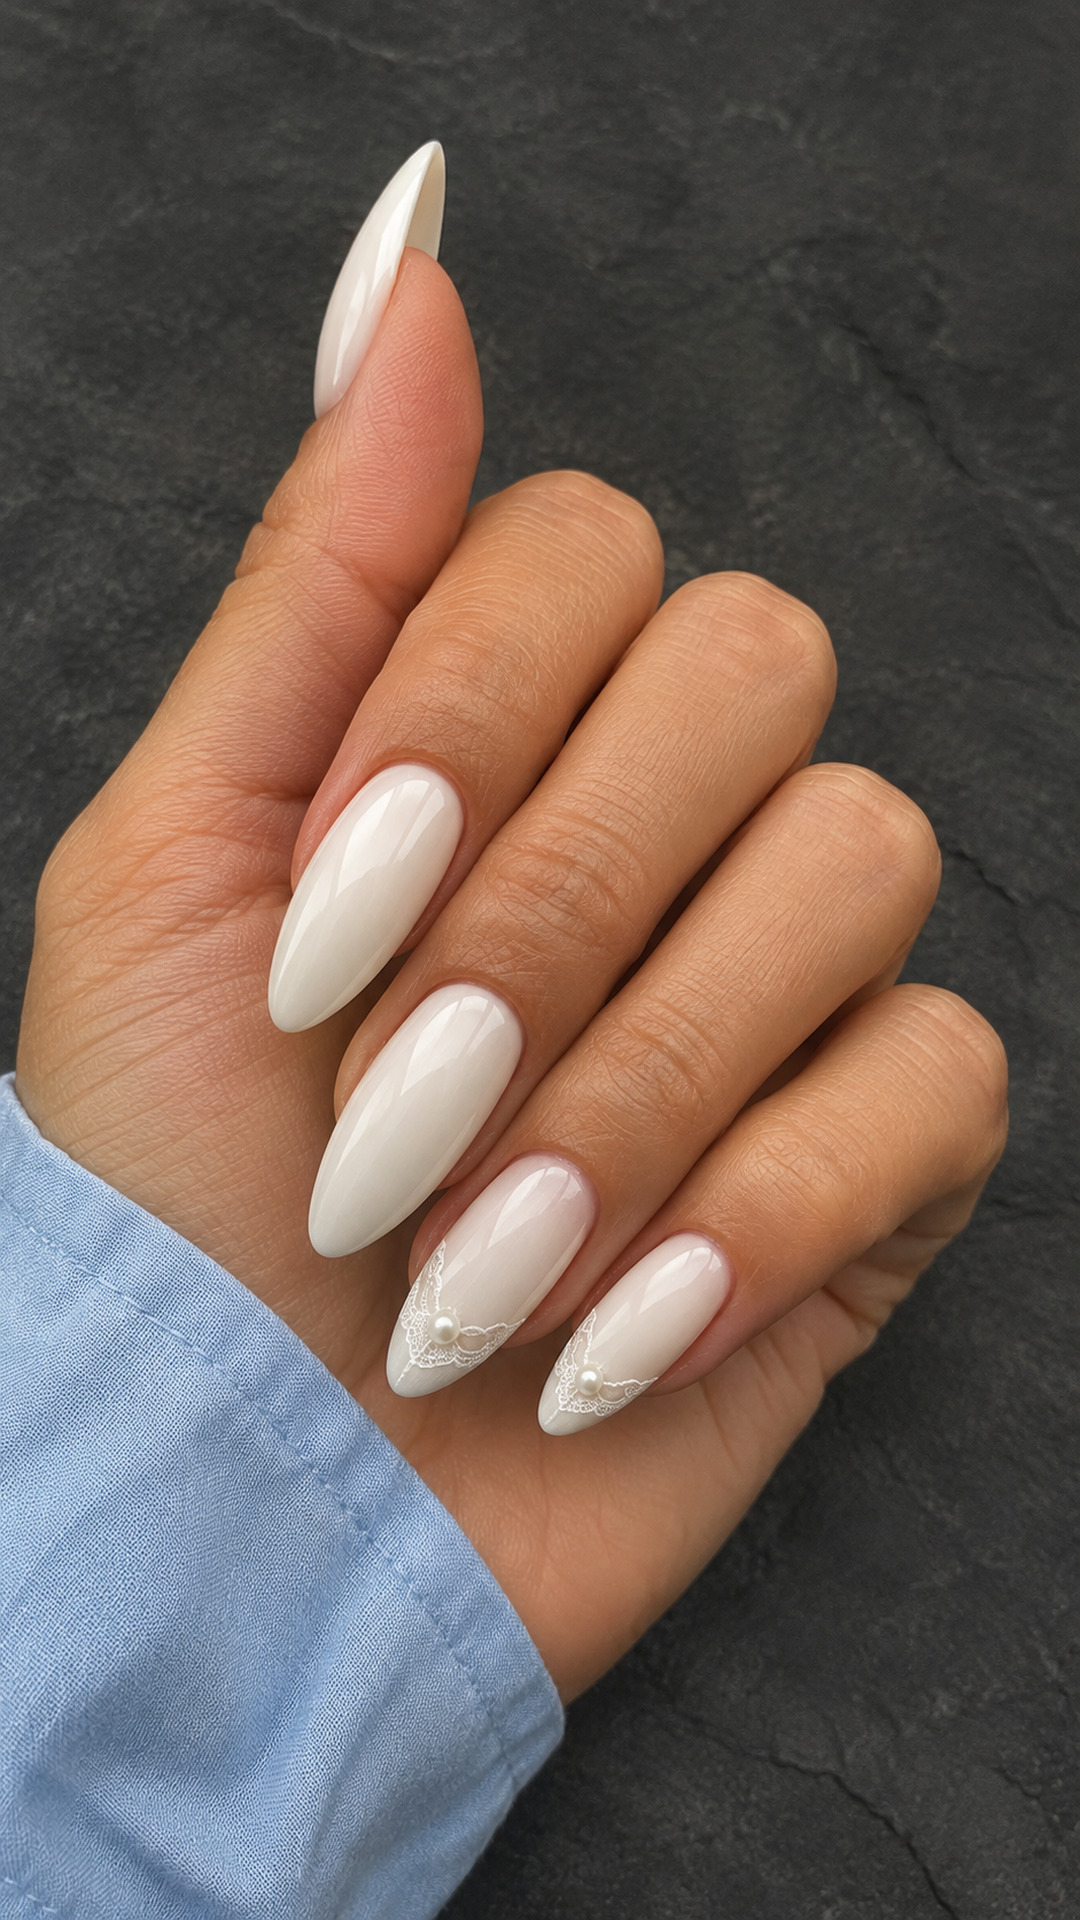
The lace stays near the edge, leaving a simple center. Tiny pearls at just a few joins give the scallops definition without outlining every curve.
Mini Guide: Plan a Pearl Accent Before Your Appointment
You will need a reference photo, a note of your preferred nail shape and an idea of whether you want a flat or raised finish. For a home layout test, use a practice nail and loose decorative pieces; this lets you compare sizes without attaching anything to your natural nail. The aim is to settle the composition first.
- Choose one focal nail. The ring finger is a familiar choice, but an index accent can make a side trail more visible. Keep the other nails plain while you judge the arrangement. You can add a second accent later if the set feels too quiet.
- Start with the smallest pearl that still reads clearly. Place it inside the painted nail area with space around the cuticle and sidewalls. A pearl that fills the whole width of a short nail will change the look from delicate to statement, even if it is the only piece.
- Pick one direction: a crescent at the base, a diagonal ribbon or a trail along one side. Avoid combining all three on the same nail. For a crescent, try three points rather than a complete border; for a trail, let the spacing open toward the tip.
- Check the design from the side as well as from above. Tell your nail artist how much raised texture you are comfortable with. They can choose an attachment system suited to the products and decorations being used. Follow that system’s instructions rather than assuming ordinary top coat can secure every embellishment.
- Photograph the test arrangement. The photo becomes a useful placement guide, while your written note records details that are hard to see, such as a satin finish or a preference for a low-profile decoration.
For a product-specific example of a French manicure finished with pearls, see OPI’s pearl-embellished French tutorial.

9. Milk Glass Double Moon
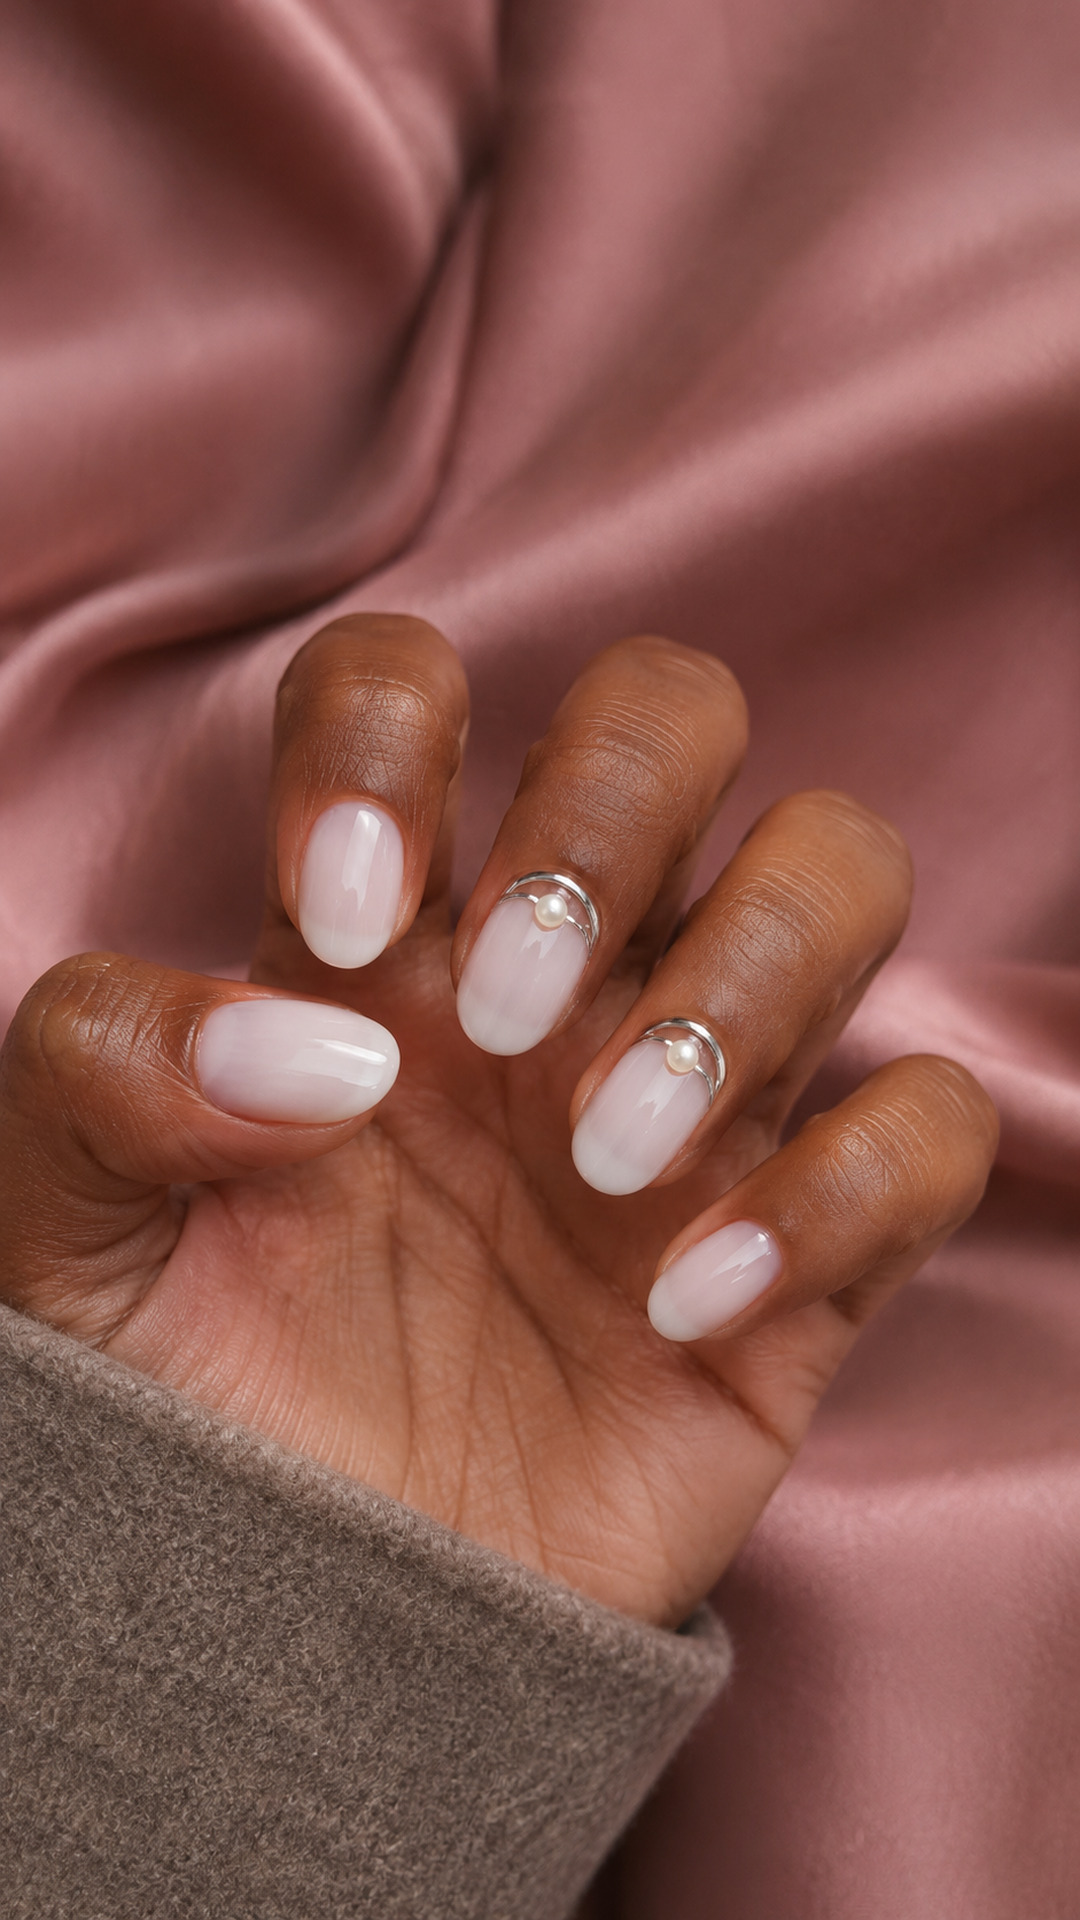
The paired curves create a frame for one pearl. On a very short nail, reduce the width of the moons before reducing the space around the pearl.
10. White Pearl Side Trail

A side trail leaves room for the white base to show. Vary the spacing slightly toward the tip so the decoration feels light rather than like a rigid row.
11. Pearl Glaze with Ivory Bow
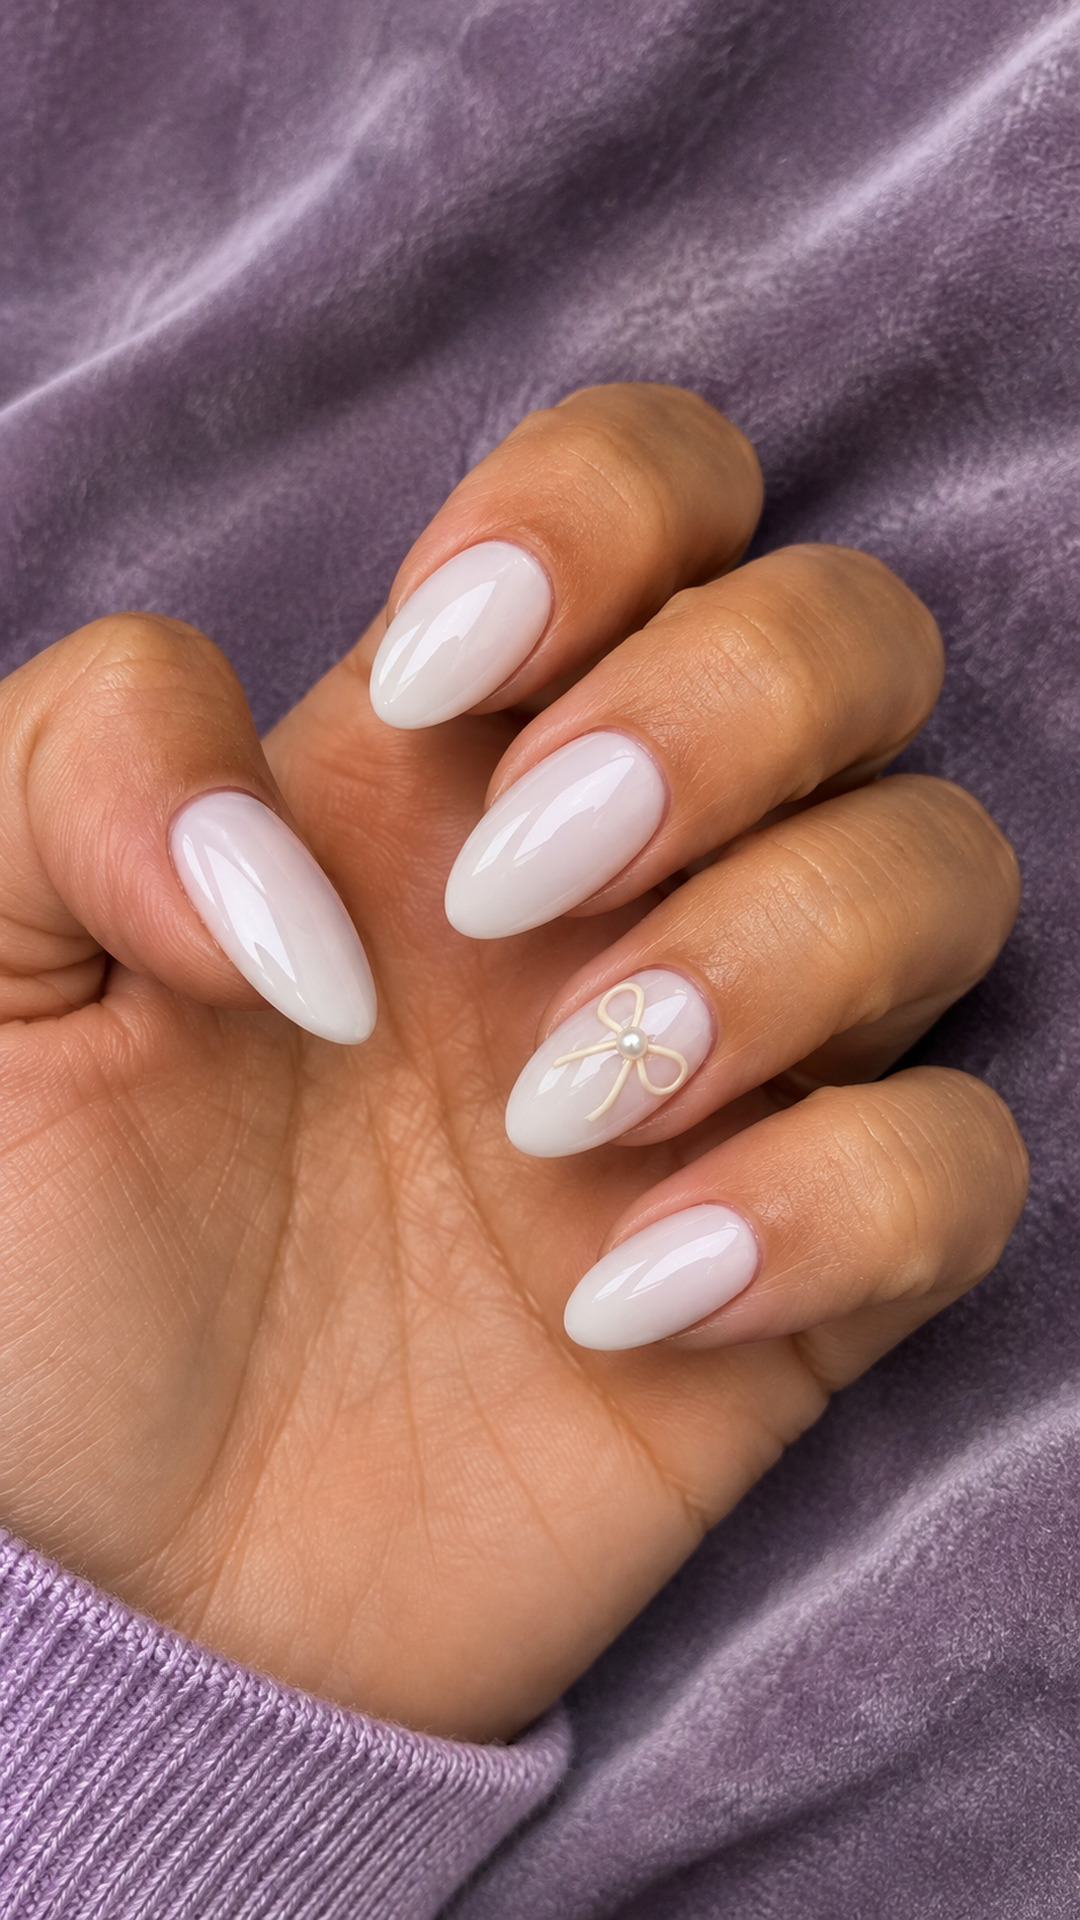
The bow is drawn in a similar shade to the base, which keeps the design soft. Let the pearl mark the knot instead of adding a large raised bow charm.
12. White Petal Half Tips
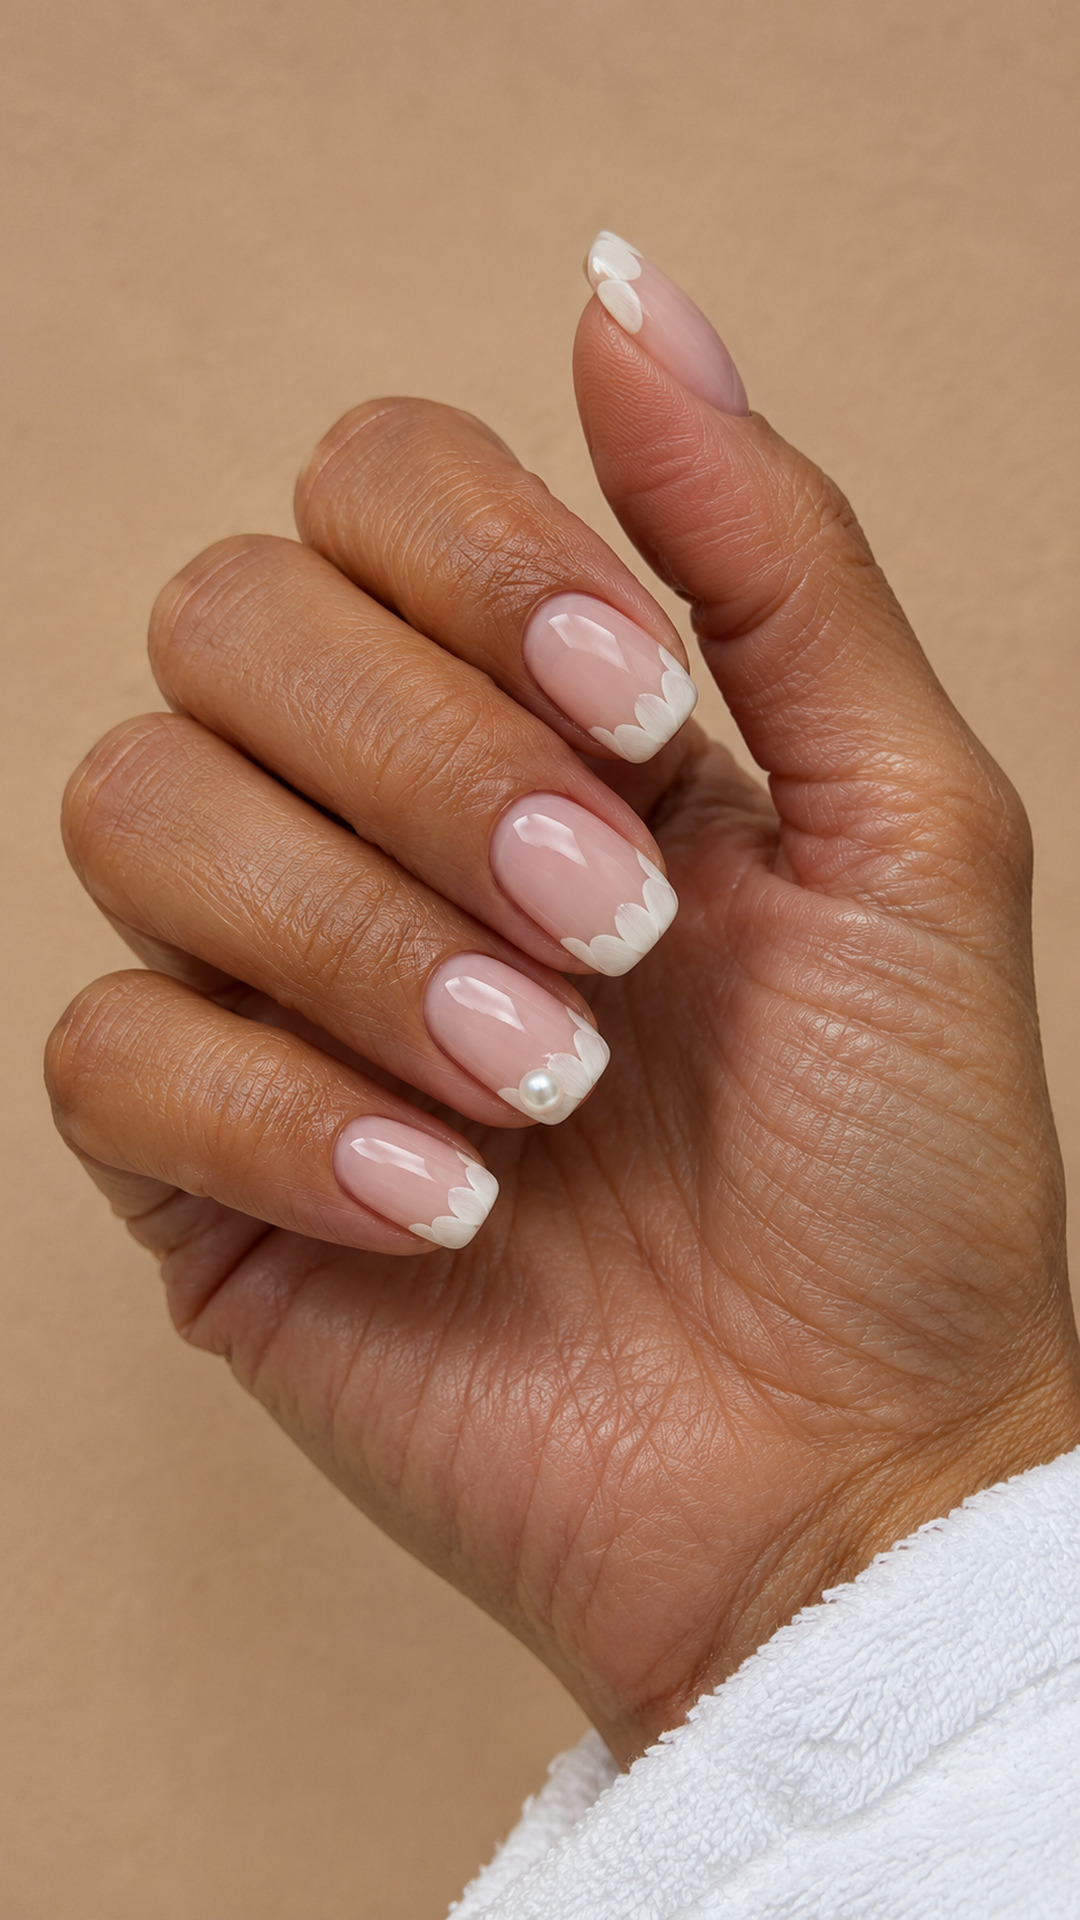
Petal-shaped tips give a familiar French layout a gentle change of outline. Keep their edges rounded and leave the pearl on one finger for balance.
13. Ivory Gold Pearl Frame

A warm metallic outline gives ivory a little definition. The pearl remains the main accent when the frame is thin enough to look almost like a drawn line.
14. Milky White Pearl Constellation
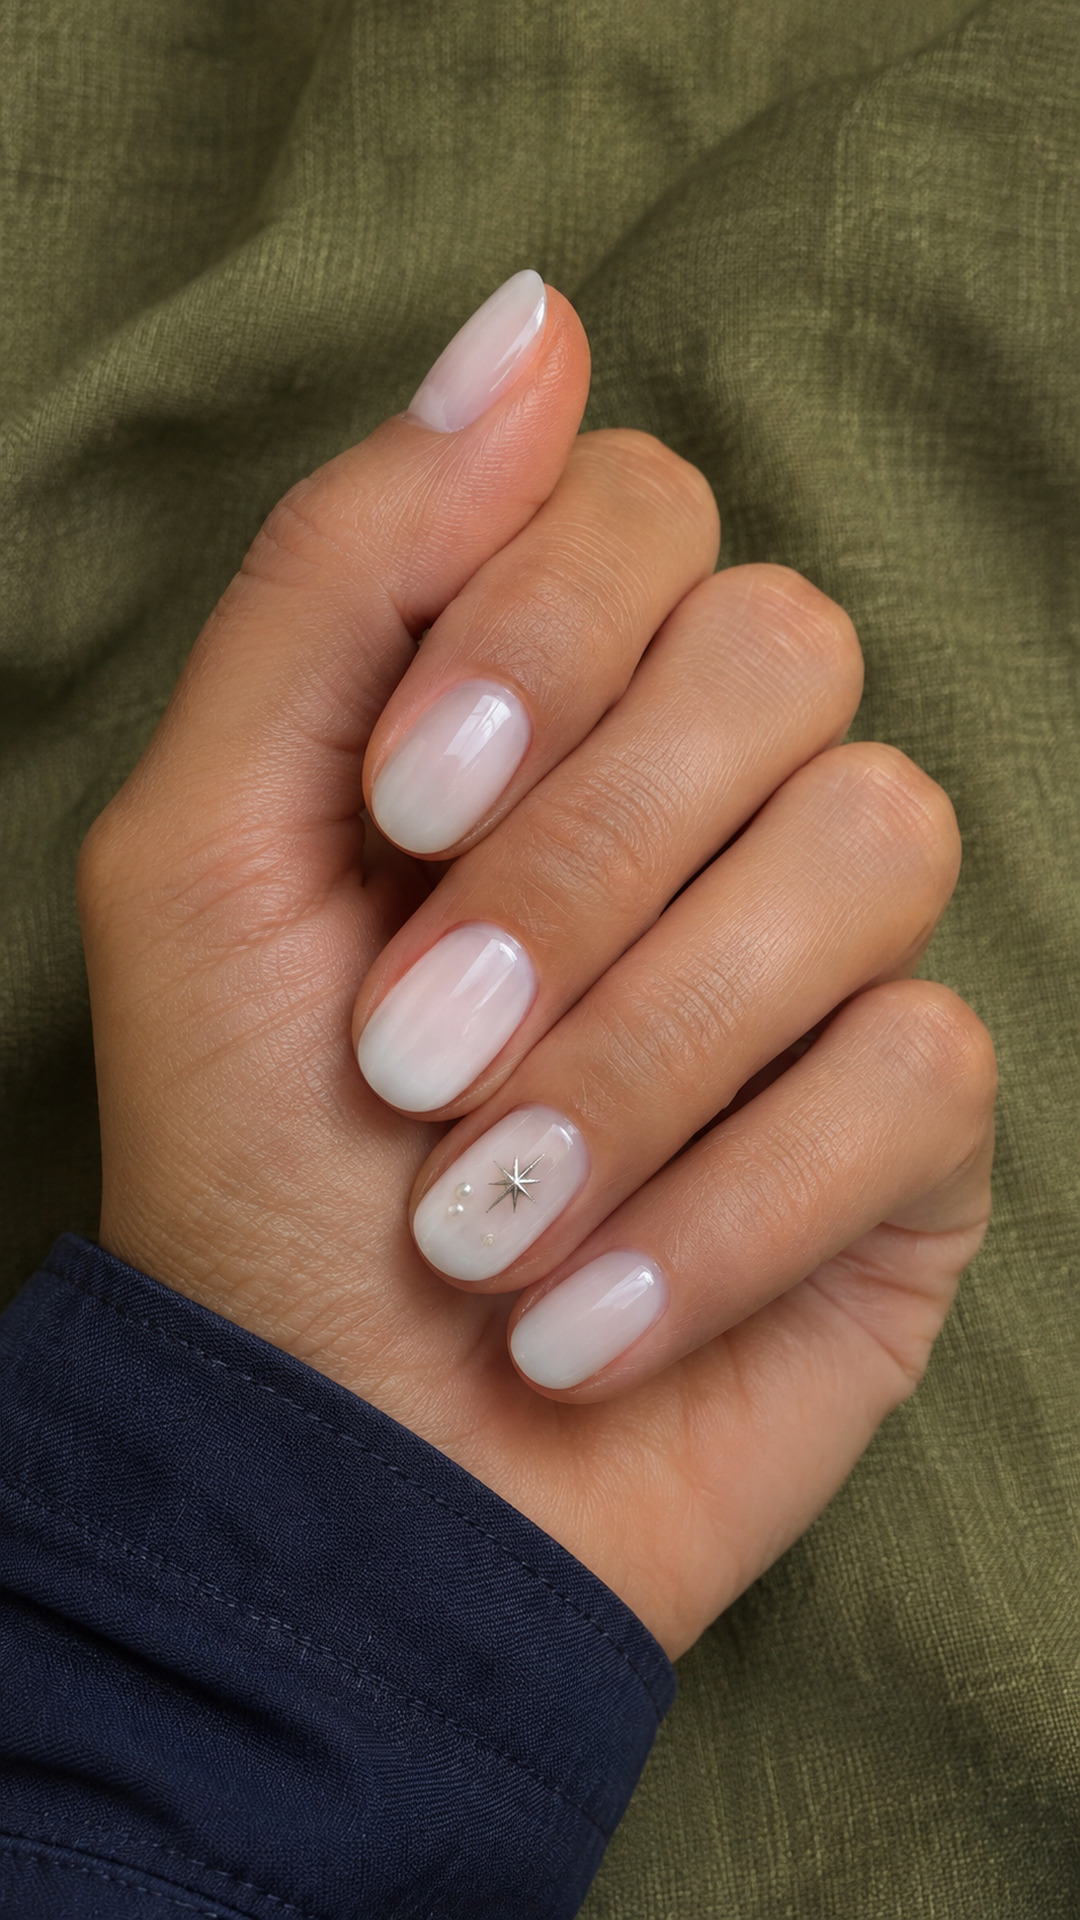
A small cluster can feel more relaxed than a perfectly centered ornament. Leave clear gaps between the pearl dots and star so each shape stays readable.
15. White Swirl Pearl Accent
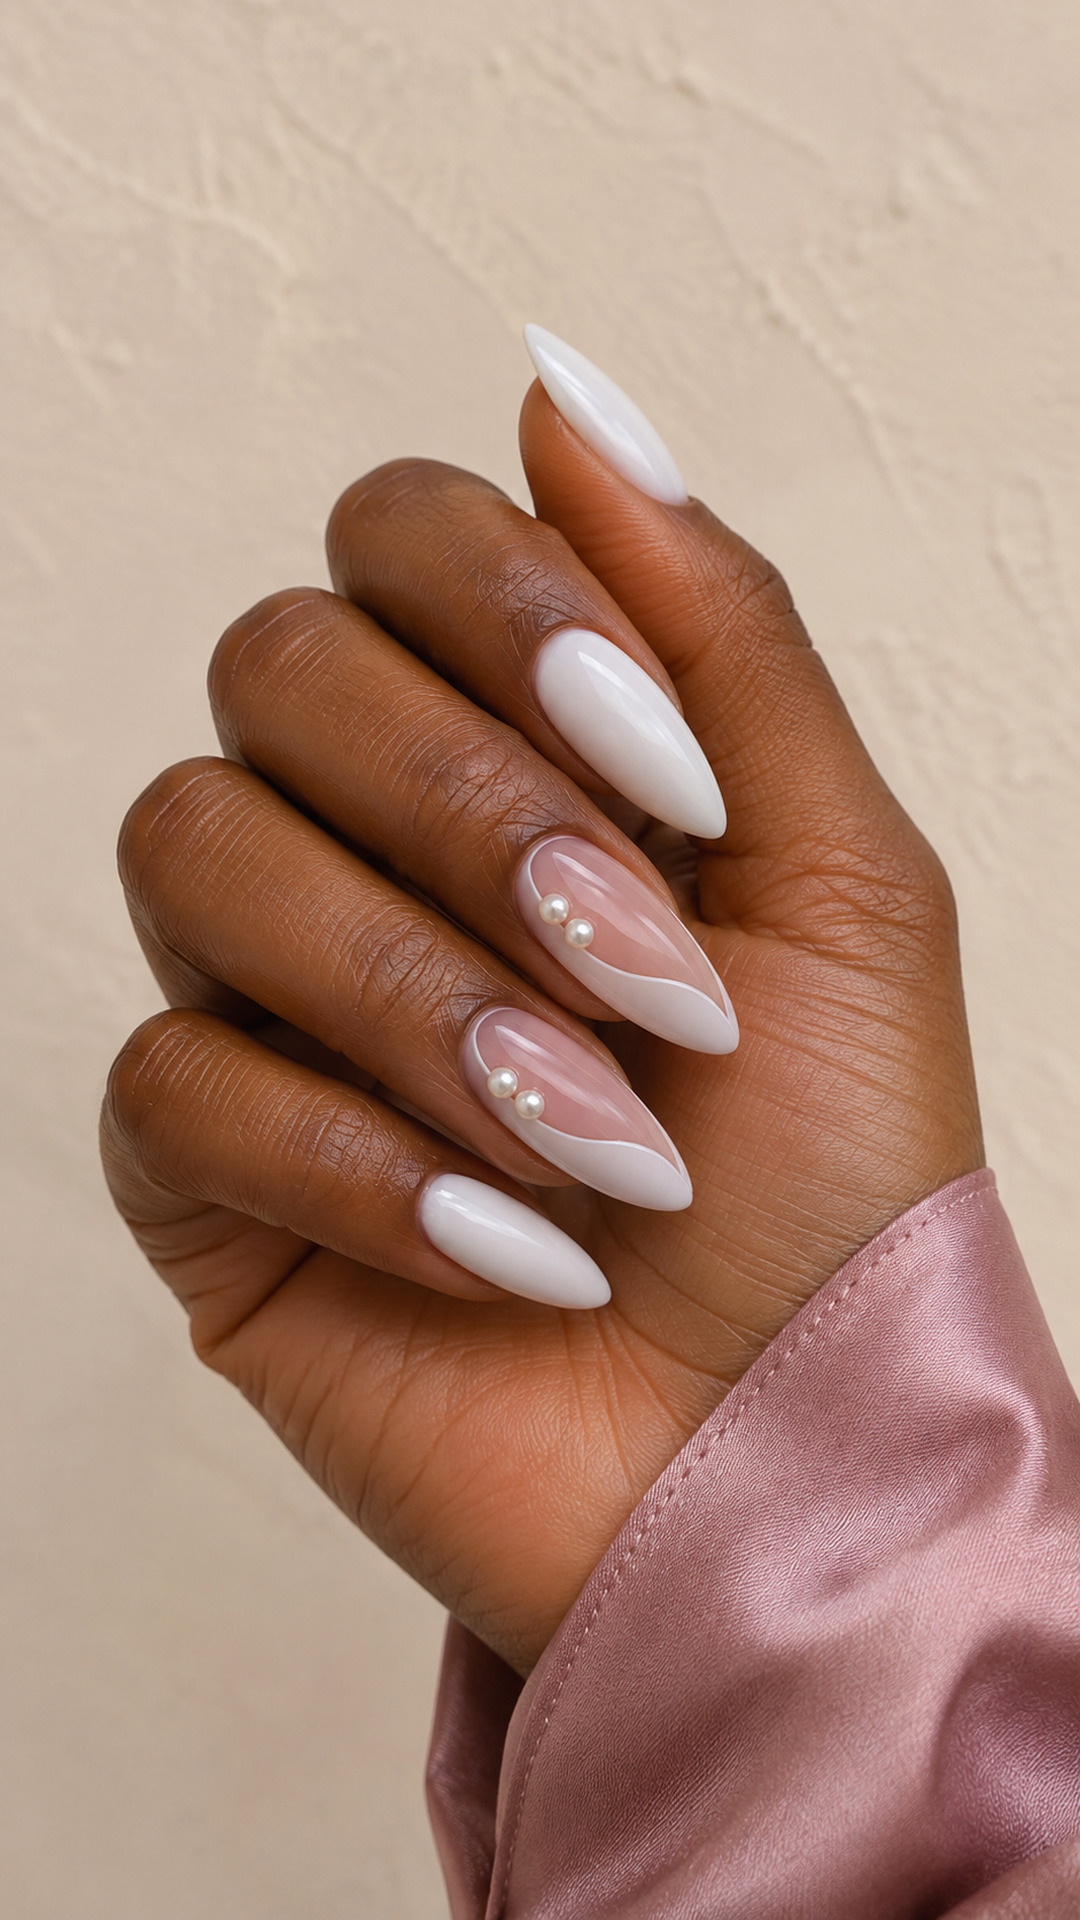
The nude window gives the design breathing room. A couple of pearls can sit beside the curve without filling the negative space that makes it distinctive.
16. Soft Ivory Pearl French
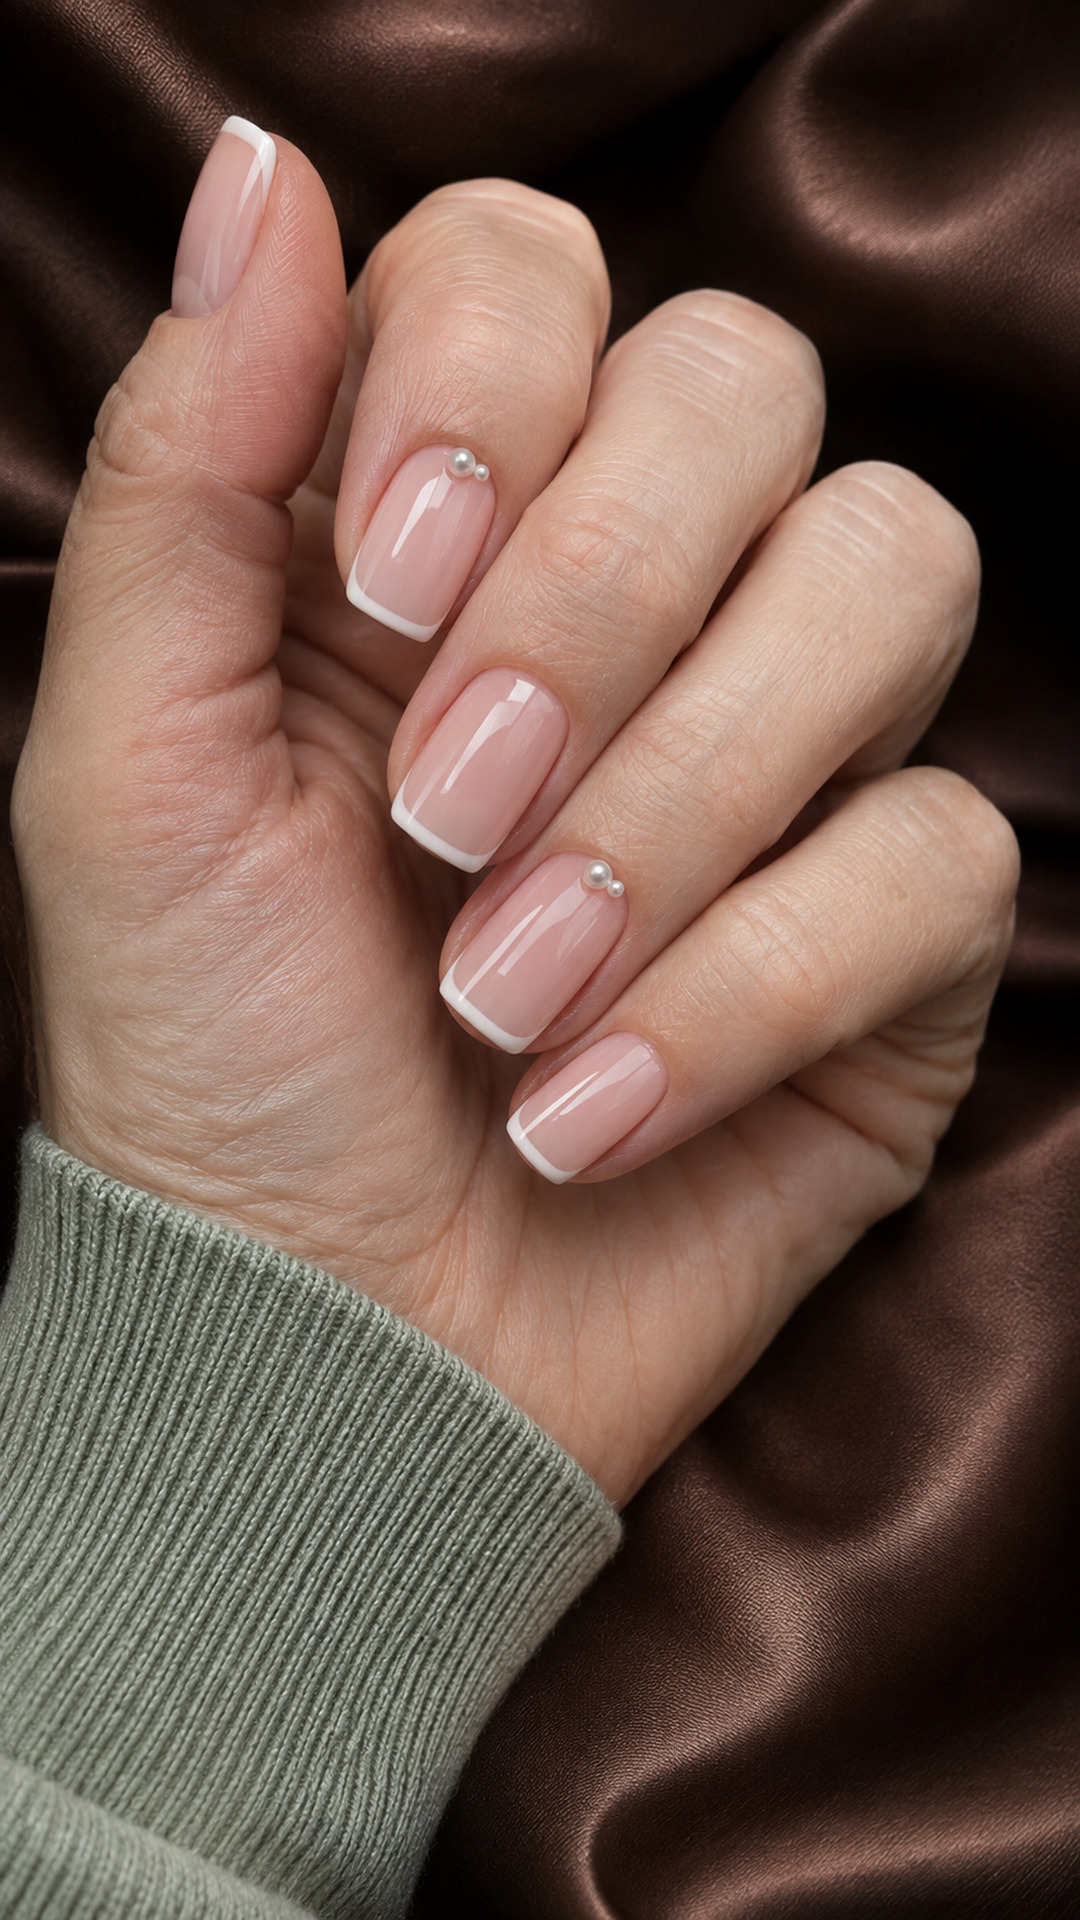
This is a restrained way to combine a French manicure with pearls. Keep both the tip width and the pearl count small so the short shape stays clear.
Mini Guide: Paint a Flat Pearl Effect with Regular Polish
For a smooth alternative, gather a milky base color, an ivory polish, a slightly deeper beige, a fine detail brush or small dotting tool, and compatible base and top coats. Practice on a tip first. This is an optical effect, so the painted circle stays flat rather than becoming a bead.
Apply the base according to its instructions and let it dry enough for detail work. Place one small ivory dot where you want the pearl. Once that dot is dry, add a very thin beige crescent along its lower edge. Finish with a much smaller white highlight near the opposite edge. The difference in scale is what makes the dot look rounded.
Leave a little space between the shadow and the highlight. If both marks fill the circle, the detail can look like a flower center instead. Make one test dot larger than needed, then reduce it on a second practice tip until it fits the nail comfortably.
Allow the artwork to dry before applying a compatible top coat with a light touch. If the brush pulls the detail, stop and give the next test more drying time; do not keep brushing over the same mark. Product drying times vary, so use the label rather than a universal timer.
Small Changes That Keep Pearl Nails Wearable
If you use your fingertips constantly, a painted pearl effect or pearlescent finish may suit you better than a raised trail. You still get the soft white palette and a point of shine, without choosing the same texture as a decorated salon set. A photo is a starting point, not a requirement to copy every material.
For a very short nail, simplify the design before shrinking every element. Keep one pearl and remove the frame, or keep a thin French edge and remove the lace. Several extremely tiny details can be harder to read than one clear feature.
When a layout feels busy, remove a detail before adding another color. For example, the shell lines can stand on their own beside one pearl; they do not also need glitter, a full metallic outline and a second charm. The quiet space around the art is part of the design.
For more fine painted detail around the tips, explore our lace nail ideas.
Frequently Asked Questions
Are pearl nails always raised?
No. The phrase can describe pearlescent polish, attached pearl decorations or painted pearl-like dots. Ask which finish is shown in your reference so you and your nail artist are discussing the same result.
Can I use this look on short natural nails?
Yes. A small cuticle accent, one flat painted pearl or a narrow French tip can fit a short nail. Keep the decoration inside the nail boundary and simplify the surrounding artwork rather than crowding it.
What is the difference between milky white and ivory?
Milky describes a soft, often translucent effect, while ivory describes a warmer white color. A polish can be both milky and ivory. Compare opacity and undertone separately when choosing a base.
Will a pearl decoration stay on for a specific number of weeks?
There is no reliable wear-time promise for every manicure. The decoration, attachment system, nail preparation and daily use all matter. Ask your technician about the specific materials and maintenance for your set.
How can I make this manicure less bridal?
Use a short shape, keep the pearls on one nail and choose an understated side placement. A satin ivory base or a single metallic line can make the look feel more like an everyday neutral.
What should I ask for at the salon?
Describe the base opacity, nail shape, pearl size and placement separately. For example: short oval nails, translucent ivory, one low-profile pearl crescent on the ring finger and glossy plain nails elsewhere.