The Best Fluffy Pancakes recipe you will fall in love with. Full of tips and tricks to help you make the best pancakes.



A snowflake manicure does not have to look like a whole Christmas scene. My favorite versions often leave plenty of space around one little drawing: a clear tip, a soft pearl base, or a deep berry nail with a few fine white branches. The detail feels more special when you can actually see its shape rather than losing it among several competing patterns.
These 18 snowflake nail ideas explore that balance in different ways. There are soft ivory designs, powder-blue accents, glassy clear tips, dark French outlines, and warmer rose-copper details. Some flakes are centered and complete; others sit at the edge so only part of the drawing appears. That small change in placement can make the same winter motif feel entirely different. I have also included a few texture contrasts, where a knit detail or glitter diagonal gives the delicate linework something quiet to sit beside.
If you are choosing a design for shorter nails, focus on the simplest outline rather than squeezing in every branch. For longer shapes, the extra space can remain clear; it does not all need decoration. As you scroll, notice which base color you like and whether you prefer a flat drawing or a more raised-looking detail. The salon briefs will help you explain those choices. I would save one main image and name the snowflake placement you want to keep, then let your technician adjust the scale to your own nails.
Soft Bases and Delicate Snowflake Details
1. Knit Cuff and Offset Snowflakes

The knit accent gives the snowflakes a cozy companion texture. Place the flakes slightly off-center so their branches have room around them. Keeping the other nails in a simple French style makes the different details feel related.
Salon brief: Medium almond nude pink French, one white raised cable-knit nail, two offset white snowflakes near side corners.
2. Pearl Ivory with a Ghost Snowflake

A pale snowflake can be beautiful without strong contrast. Here it almost disappears into the pearl reflection, becoming clearer when the hand tilts. Keep the branches fine and the surrounding surface simple.
Salon brief: Medium oval pearl ivory solids and two translucent blush accents with faint pearly white snowflakes, subtle low contrast.
3. Silver Frost with Tiny Flakes
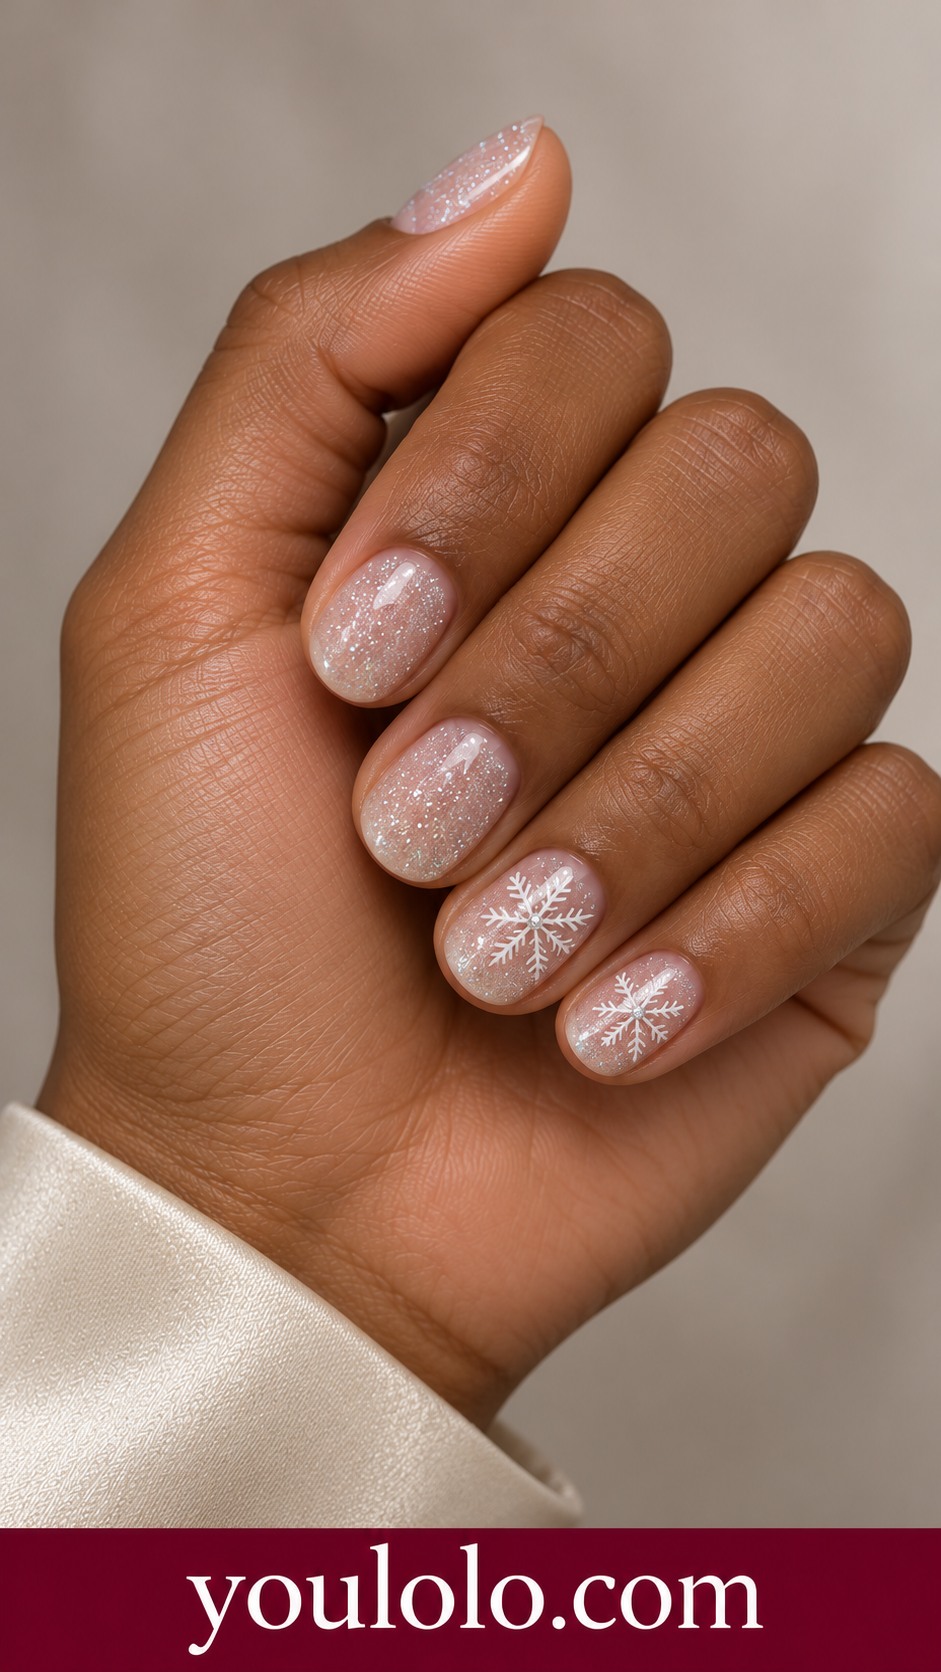
Tiny white flakes sit lightly over fine silver sparkle. The little nude area near the cuticle prevents the finish from looking completely opaque. Choose small motifs so the short shape still feels open.
Salon brief: Short oval fine silver microglitter, small white snowflakes on two accents, translucent nude edge near cuticle.
4. Powder Blue Raised Snowflakes

A raised white snowflake adds dimension to matte blue. The rest of the set can stay plain because the texture already provides a focal point. Ask for a low profile and a clear outline rather than a thick decorative mound.
Salon brief: Medium almond matte powder blue base, small low-relief white snowflake appliques on two nails, other nails matte blue.
5. Silver Tip with an Airy Snowflake
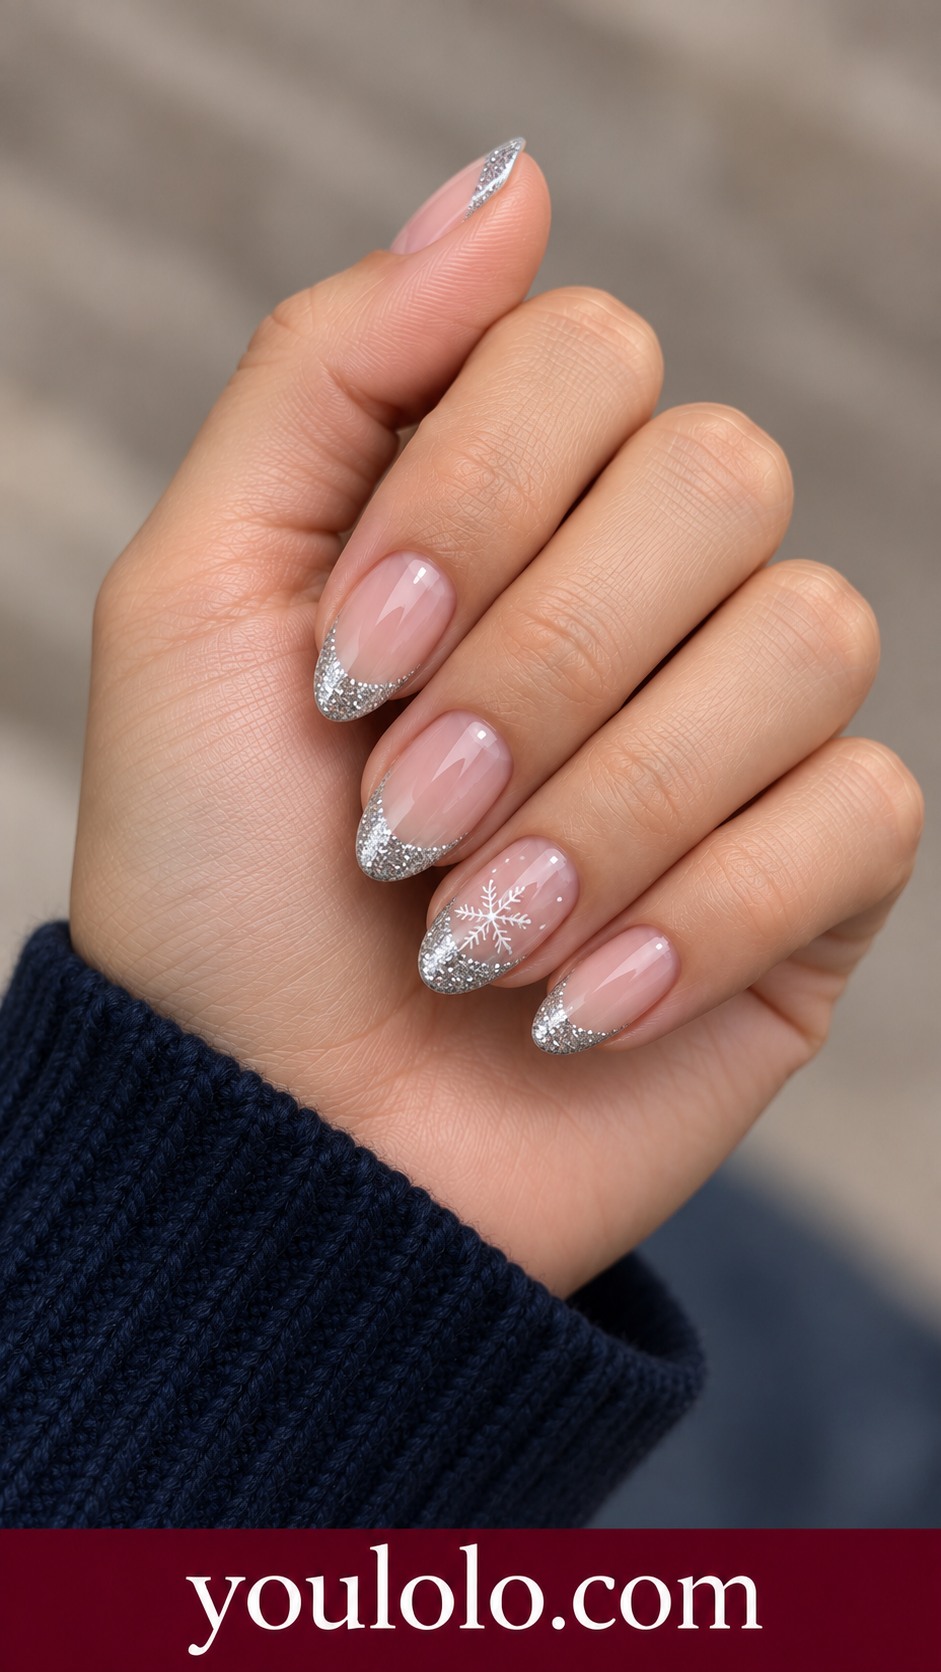
The snowflake crosses the transition between nude and silver, connecting the soft base to the sparkling edge. Keep its white branches clear enough to read against both surfaces. The remaining French nails give the accent room to stand out.
Salon brief: Medium almond nude base, fine silver glitter French tips, one white snowflake at the transition between nude and silver.
Clear Tips and Contrasting Winter Colors
6. Snowflakes on Clear Glass Tips

Clear tips give white snowflakes a floating quality. The transparent area is essential, so avoid adding an opaque white base beneath the drawing. A slightly extended tip provides room for the branches without crowding the nail bed.
Salon brief: Medium tapered coffin nude base and fully clear transparent free edges with intricate white snowflakes only on clear tips.
7. White Nails with Graphite Snowflakes
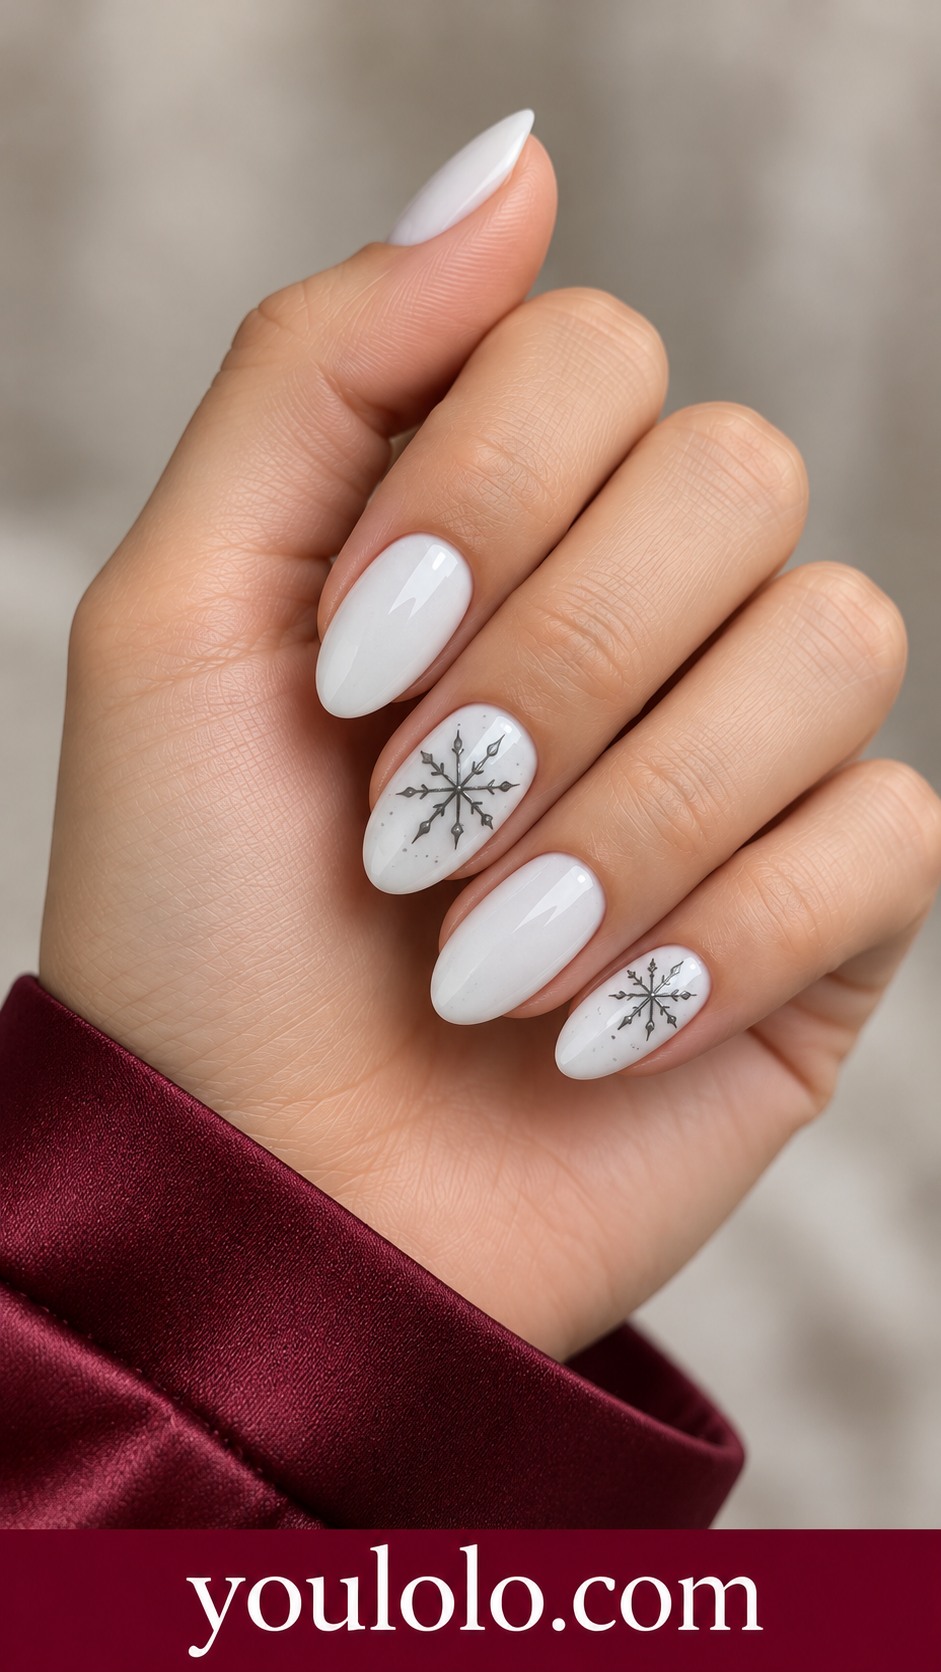
Graphite linework gives white nails a crisp, slightly illustrated look. Varying the flake sizes keeps the set from feeling like a repeated stamp. Leave at least one nail plain so the white can still feel clean.
Salon brief: Medium almond opaque soft white nails, fine graphite-gray snowflakes of different sizes on two nails.
8. Berry-Edged Snowflake Tips

A berry glitter edge warms the translucent base while white snowflakes keep the winter theme clear. Put the flakes in opposite corners rather than centering them all. The narrow tip leaves room for the artwork.
Salon brief: Short softly rounded translucent rose base, thin berry glitter French edges, white corner snowflakes on two accents.
9. One Flake in a Shimmer Haze

One complete snowflake is enough when the background has a soft shimmer fade. I would keep its branches crisp and the other nails free of motifs. The quiet surrounding finish gives the drawing a clear place to stand out.
Salon brief: Short oval nude-to-ivory microshimmer fade, one large delicate white snowflake on accent nail, no foil.

10. Burgundy with Fine Snowfall

Fine white linework stands out beautifully against burgundy. A few small dots connect the flakes without filling every gap. The dark red should remain visibly dominant, especially near the cuticle.
Salon brief: Medium oval burgundy gloss, tiny white snowflakes on two nails and a few pinpoint white dots, sparse layout.
11. Cobalt Snowflakes and Ribbon Stripes

Cobalt gives the white art a bright, graphic setting. Flowing blue, white, and silver ribbons change the rhythm between the snowflake nails. Keep the branches and ribbons on separate surfaces so each treatment remains easy to read.
Salon brief: Medium almond cobalt blue, white snowflakes on two accents, two flowing blue-white-silver ribbon stripe nails.
12. Black French with a Snowflake Panel

A full black snowflake accent anchors the lighter French nails. The contrast makes the white drawing especially clear. I would keep the French tips plain and avoid scattering extra flakes over every nude base.
Salon brief: Medium square nude base with black French tips, one full black nail with two delicate white snowflakes and tiny silver specks.
Warm Metals and Creative Snowflake Placement
13. Rose Copper Snowflakes

Rose-copper shimmer gives snowflake art a warmer setting than the usual blue or silver. The white drawing still reads clearly, but the overall mood feels softer. Fine branches suit the delicate reflective base.
Salon brief: Medium almond rose-copper microshimmer base, thin white snowflake branches on two accent nails, other nails soft rose copper.
14. Blue Ice with Cropped Snowflakes
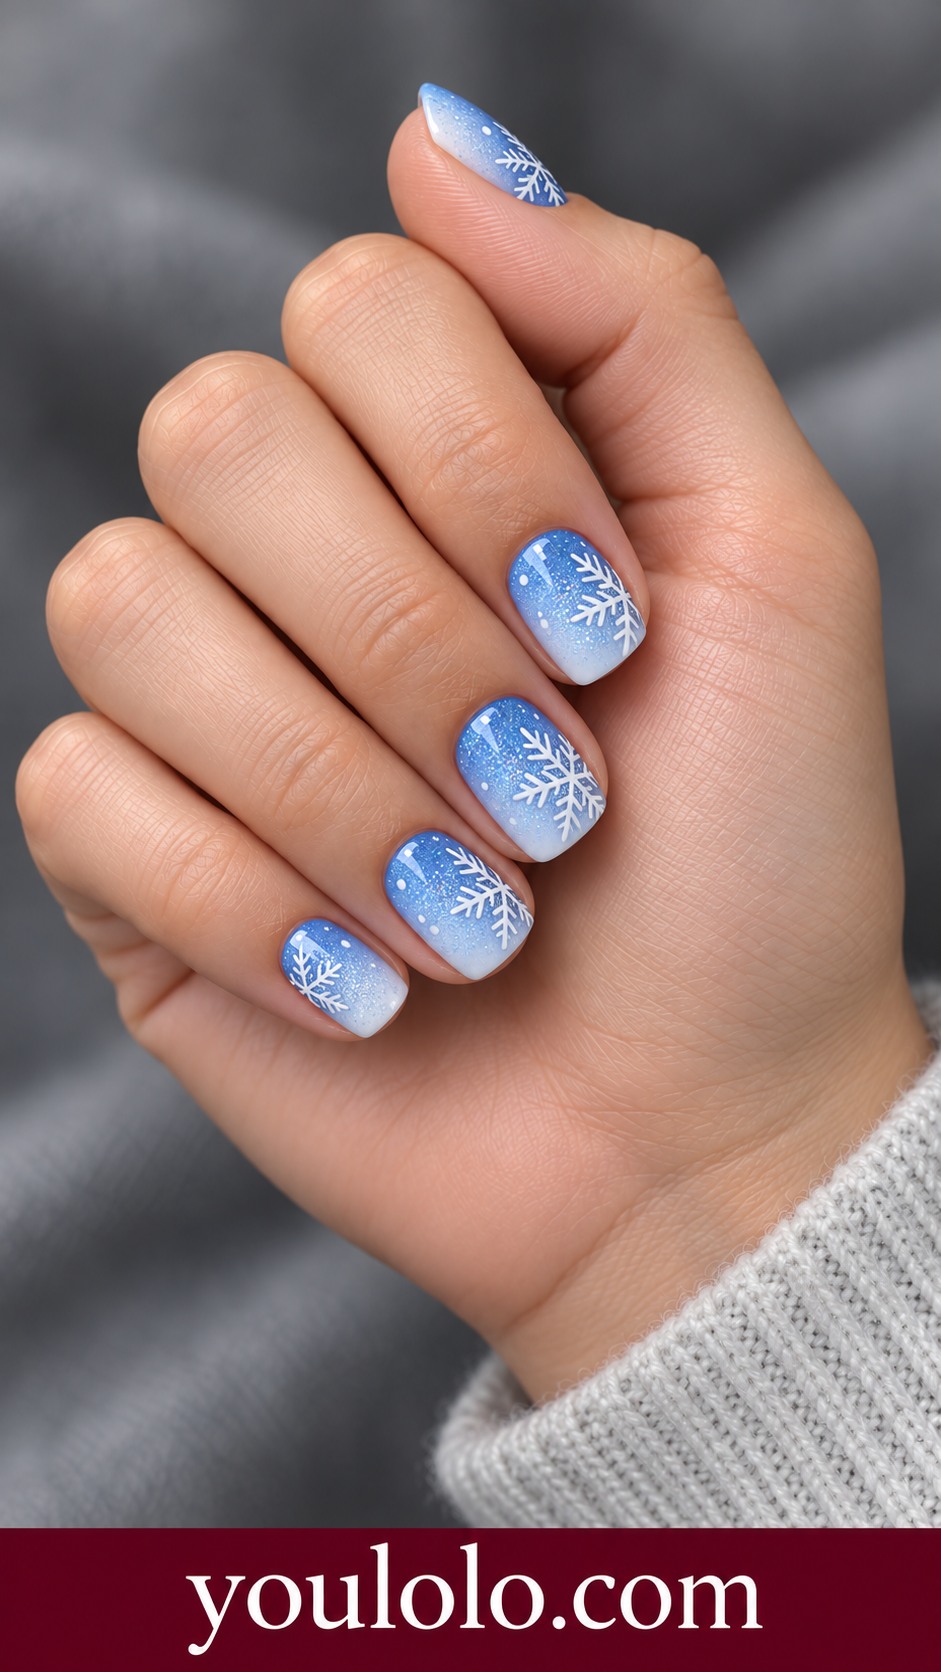
A cropped snowflake can feel more graphic than a small centered motif. Its branches enter from the side and continue beyond the edge in the imagination. Leave some blue visible so the white lines do not merge into a solid patch.
Salon brief: Short square pale blue-to-white luminous fade, large white snowflakes cropped naturally at side edges, fine blue shimmer.
15. Ruby Glitter Diagonals and Snow

Red glitter corners create a festive accent without covering the entire tip. A white flake in the opposite corner balances the diagonal. Keep the central nude space clear so the two details remain separate.
Salon brief: Medium almond nude base with red glitter diagonal corner tips, white snowflakes on opposite corner of two nails.
16. Wine Snowflakes with Dotted Arcs

Dotted arcs add movement around the snowflakes without introducing another motif. The wine base keeps the palette rich. Leave two nails plain so the decorated surfaces have somewhere quiet beside them.
Salon brief: Medium oval deep wine red, white snowflakes mixed with small curved arcs of snow dots, two plain wine nails.
17. Graphite Snowflakes on Pale Sage
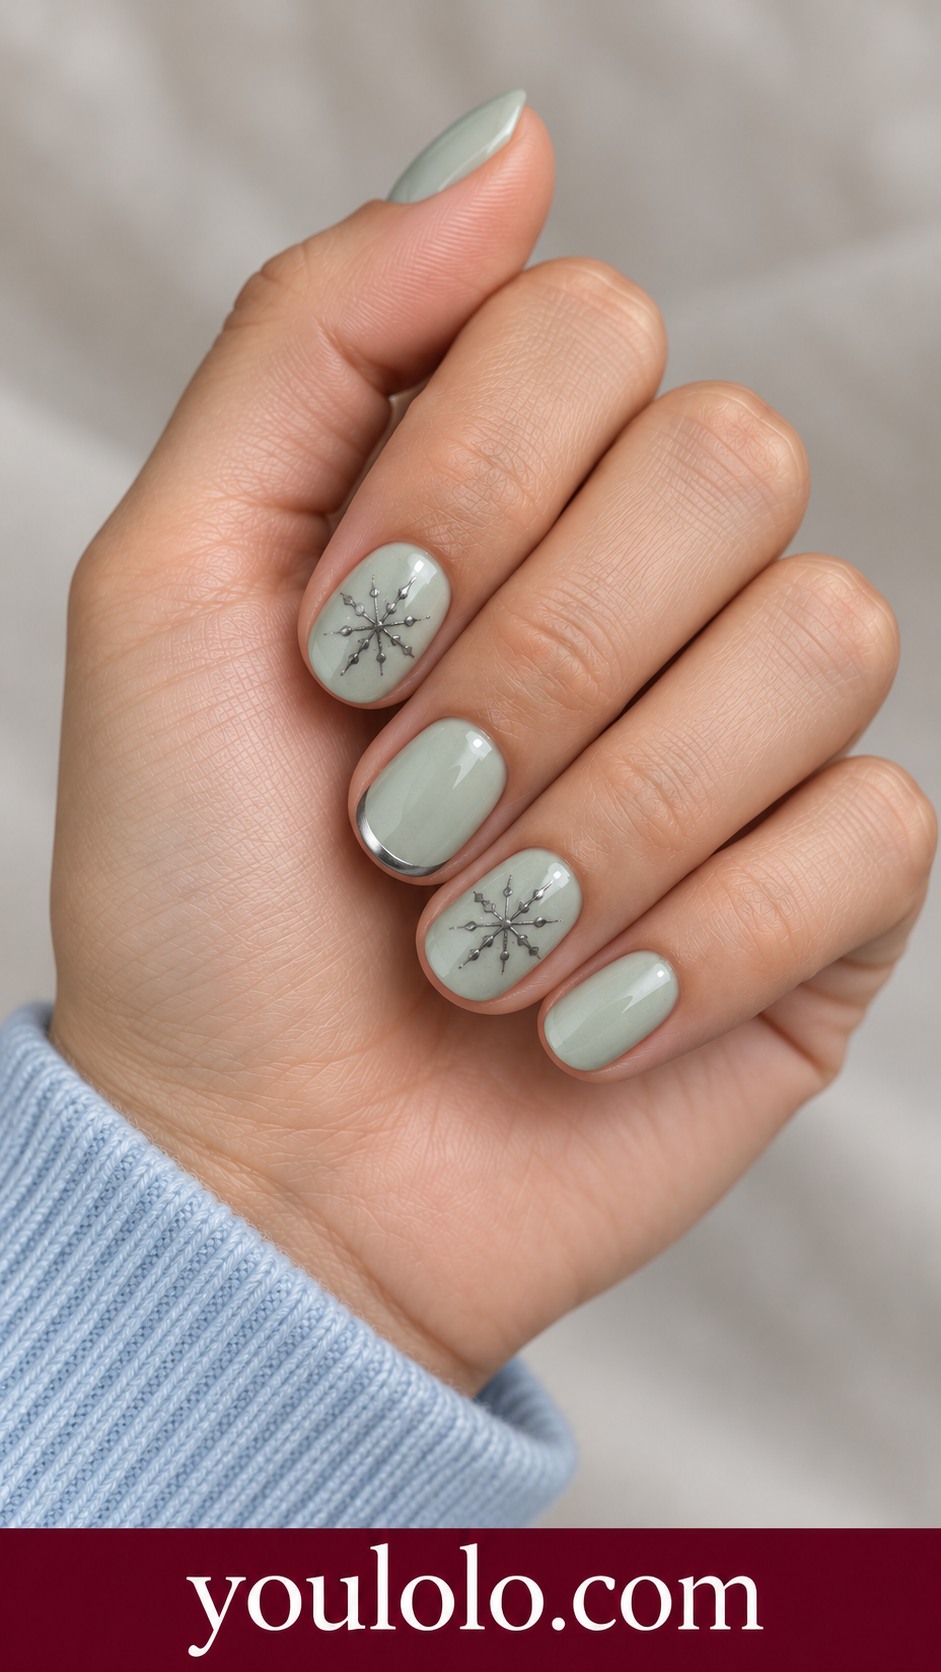
Pale sage and graphite make a less expected snowflake palette. The dark drawing gives the soft green a clear winter direction, while a thin pewter edge adds just a little light. Keep the motifs small and well separated.
Salon brief: Short oval pale sage base, fine graphite snowflakes on two nails, one thin pewter French edge accent.
18. Clear Tips with Silver Snow Lace

Silver snow lace turns the clear tip into a delicate decorative border. A few tiny white dots soften the metallic linework. Keep the pattern confined to the free edge so the transparent effect remains visible.
Salon brief: Medium square translucent nude base with clear tips, fine silver snowflake lace across free edge, one tiny white pearl dot per accent.
Choose the Snowflake Placement First
Decide whether you like a centered flake, a cropped edge, or a delicate trail across a clear tip. Then choose the base. A little contrast makes the branches readable without needing a larger drawing.
Scale the Branches to the Nail
For a smaller nail, retain the main six arms and reduce the finer branches. A larger shape can carry more detail, but it can also look lovely with one small flake and generous empty space. Ask to compare the placement on one nail first.
For additional pattern examples, browse essie’s nail-art gallery. Use it to compare linework and finishes alongside your chosen reference.
Snowflake Nail Ideas: Frequently Asked Questions
Can snowflake nails be worn in January?
Yes. Snowflakes are a winter motif rather than a Christmas-only symbol. Blue, ivory, silver, clear, or berry bases can keep the design seasonal without adding trees, gifts, or other holiday imagery.
Which snowflake designs work on short nails?
One small flake, a cropped corner flake, or a simple six-armed outline is easier to read than several dense drawings. Leave some base visible around the motif and simplify the smaller branches.
Should snowflakes be painted on every nail?
Only if you like a fully patterned set. One or two accent nails can make the drawing easier to notice, while the other nails repeat the base color or a small coordinating detail.
Can I use colors other than white for snowflakes?
Yes. Graphite, silver, rose copper, and dark blue all appear in this collection. Choose enough contrast against the base so the fine branches remain visible.
Are raised snowflakes the same as flat nail art?
No. A raised design has a visible profile, while a flat drawing emphasizes linework on the surface. Discuss the texture and height with your technician rather than assuming a reference photo shows a flat finish.
How do I adapt clear-tip snowflakes to my nails?
Show the amount of transparency you want and discuss the available free edge or any added length. The same placement can also be interpreted over a sheer nude base if you prefer less visible transparency.
Your Next Set, in One Clear Brief
Save the image that feels most like you, then choose the shape, base shade, finish, and one detail you want to keep. A clear reference gives your technician something specific to work from while leaving room to adapt the proportions to your own nails.