The Best Fluffy Pancakes recipe you will fall in love with. Full of tips and tricks to help you make the best pancakes.


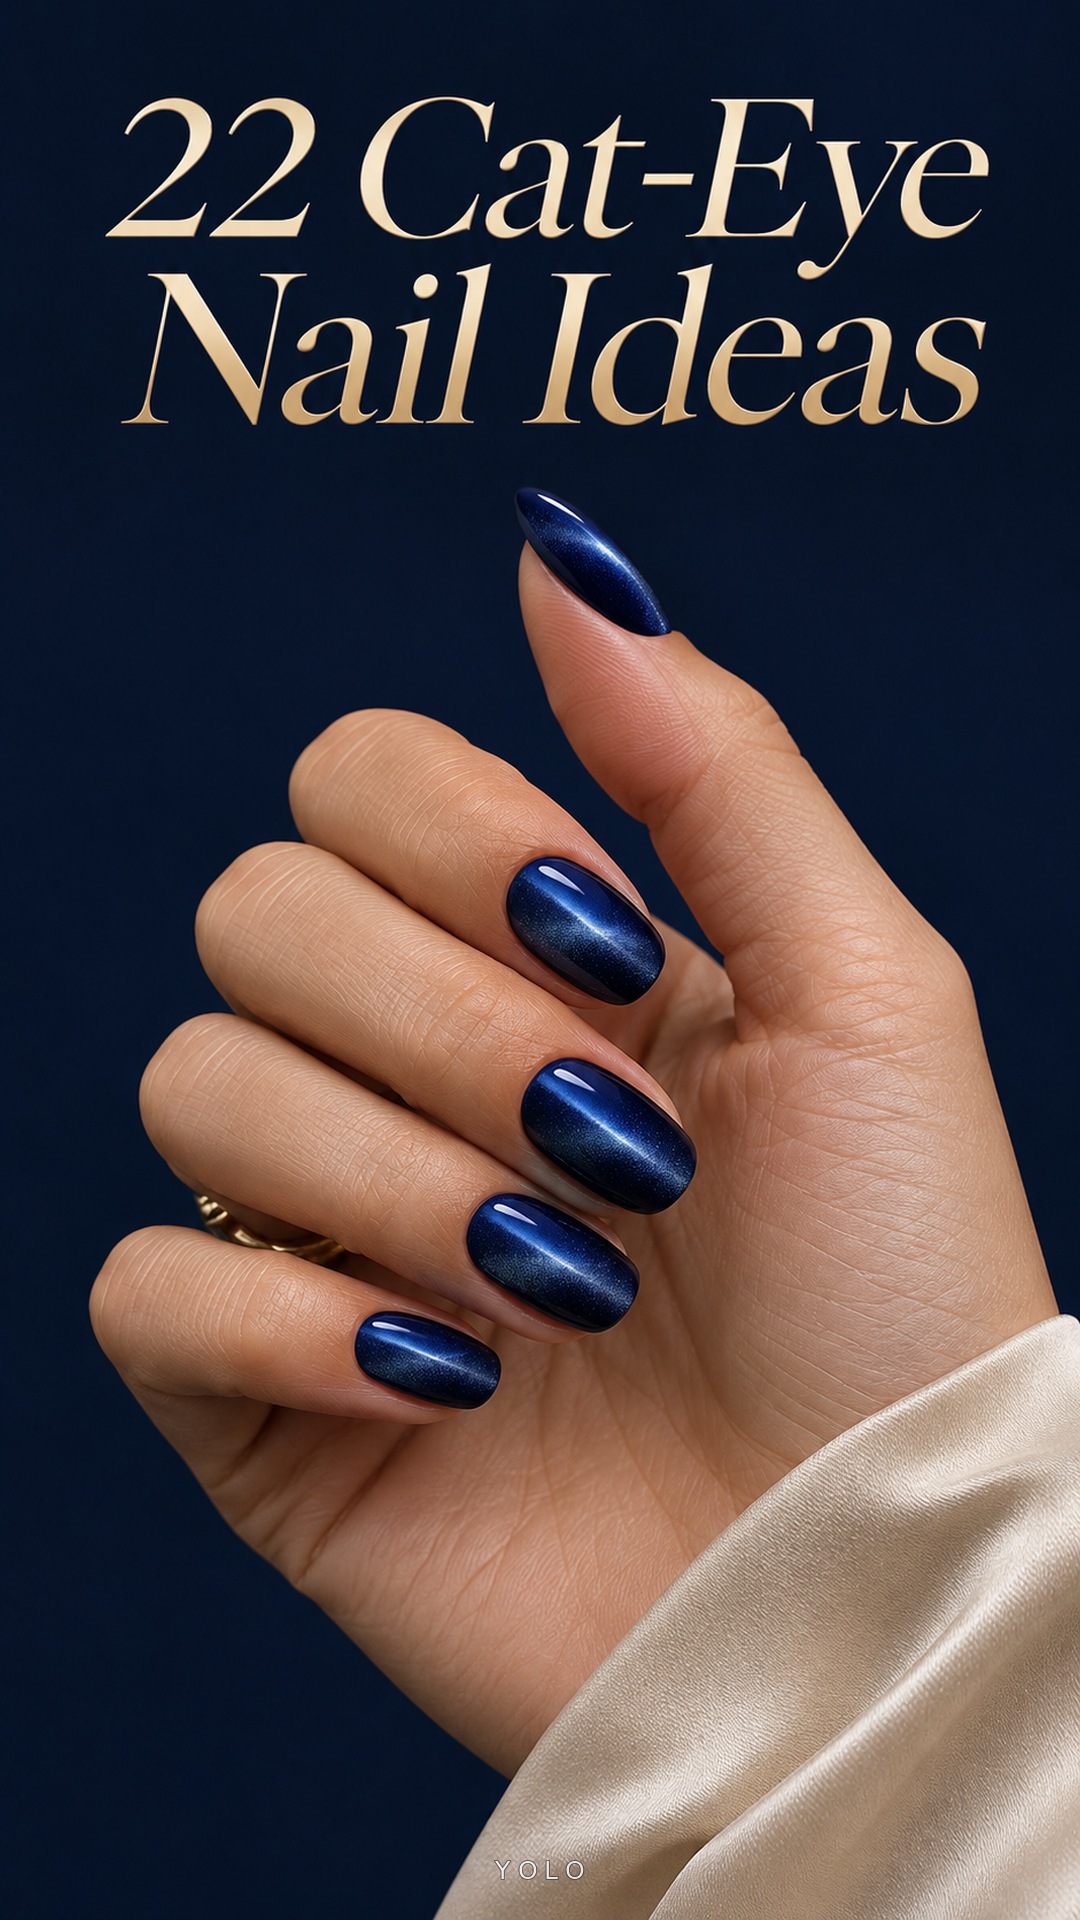
Cat-eye nail ideas can be dramatic, delicate or almost neutral, depending on the color and the way the light is arranged across the nail. A narrow bright band gives a different impression from a broad, soft velvet glow. This collection explores twenty-two combinations of color, shine and small decorative details, from sapphire and garnet to oatmeal and ivory. Use the images to choose a visual direction, then compare a real polish sample before settling on the exact finish.
How to choose cat-eye nail ideas beyond the color
Start with the light pattern. A defined diagonal band creates a clear focal point, while a broader glow makes the whole nail look softly luminous. Neither approach needs a complicated illustration. Decide how much of the shimmer you want to leave visible before adding lines, lace or a small painted motif.
Think about the contrast between the bright area and the surrounding color. A deep sapphire or aubergine can create a pronounced difference. Oatmeal, ivory and pale pink give a gentler result. A dark manicure is not automatically more detailed, and a pale one does not have to be plain.
Choose your preferred length before planning the accents. Short rounded nails can carry a strong magnetic effect without any additional art. A medium almond gives a feather or curved outline more space, but an accent can always be simplified for a shorter shape.
For warmer color pairings, browse our chocolate and cream nail ideas. If you enjoy fine patterned accents, these lace nail ideas offer another way to combine open space with delicate detail.
1. Sapphire Diagonal Light

Deep sapphire creates a clear contrast with the narrow silver-blue light bands in this short oval set. The edges remain dark, which gives the brighter diagonal areas room to stand out without any additional artwork. The glossy reflections follow the nail curves, making the finish feel dimensional rather than flat metallic blue. Keeping the same color on all five nails lets the magnetic effect take the lead. This is a strong starting point if you want a clean cat-eye manicure with a rich, jewel-like shade.
Make it yours: Ask for a distinct diagonal magnetic band with darker edges left visible. Check the direction on each nail before the polish is set, and follow the product instructions. Extra painted details are unnecessary when the contrast between the band and base is this clear.
2. Rose Velvet Botanical

Dusty rose magnetic polish forms a soft luminous background for two burgundy botanical sprigs. The oval nails keep the lines gentle, while the darker leaves add definition against the shifting pink sheen. Most of each accent remains open so the shimmer can still be seen around the artwork. The plain nails create a quieter rhythm between the sprigs, making the set feel coordinated without repeating the same decoration everywhere. It is an appealing combination when you enjoy botanical art but also want the finish itself to be part of the design.
Make it yours: Keep each sprig narrow and offset it slightly rather than filling the entire nail. Use a fine brush for the stem and tapered leaf strokes. Leave an open strip of shimmer beside the drawing so the magnetic finish remains visible.
3. Emerald Crescent Tips
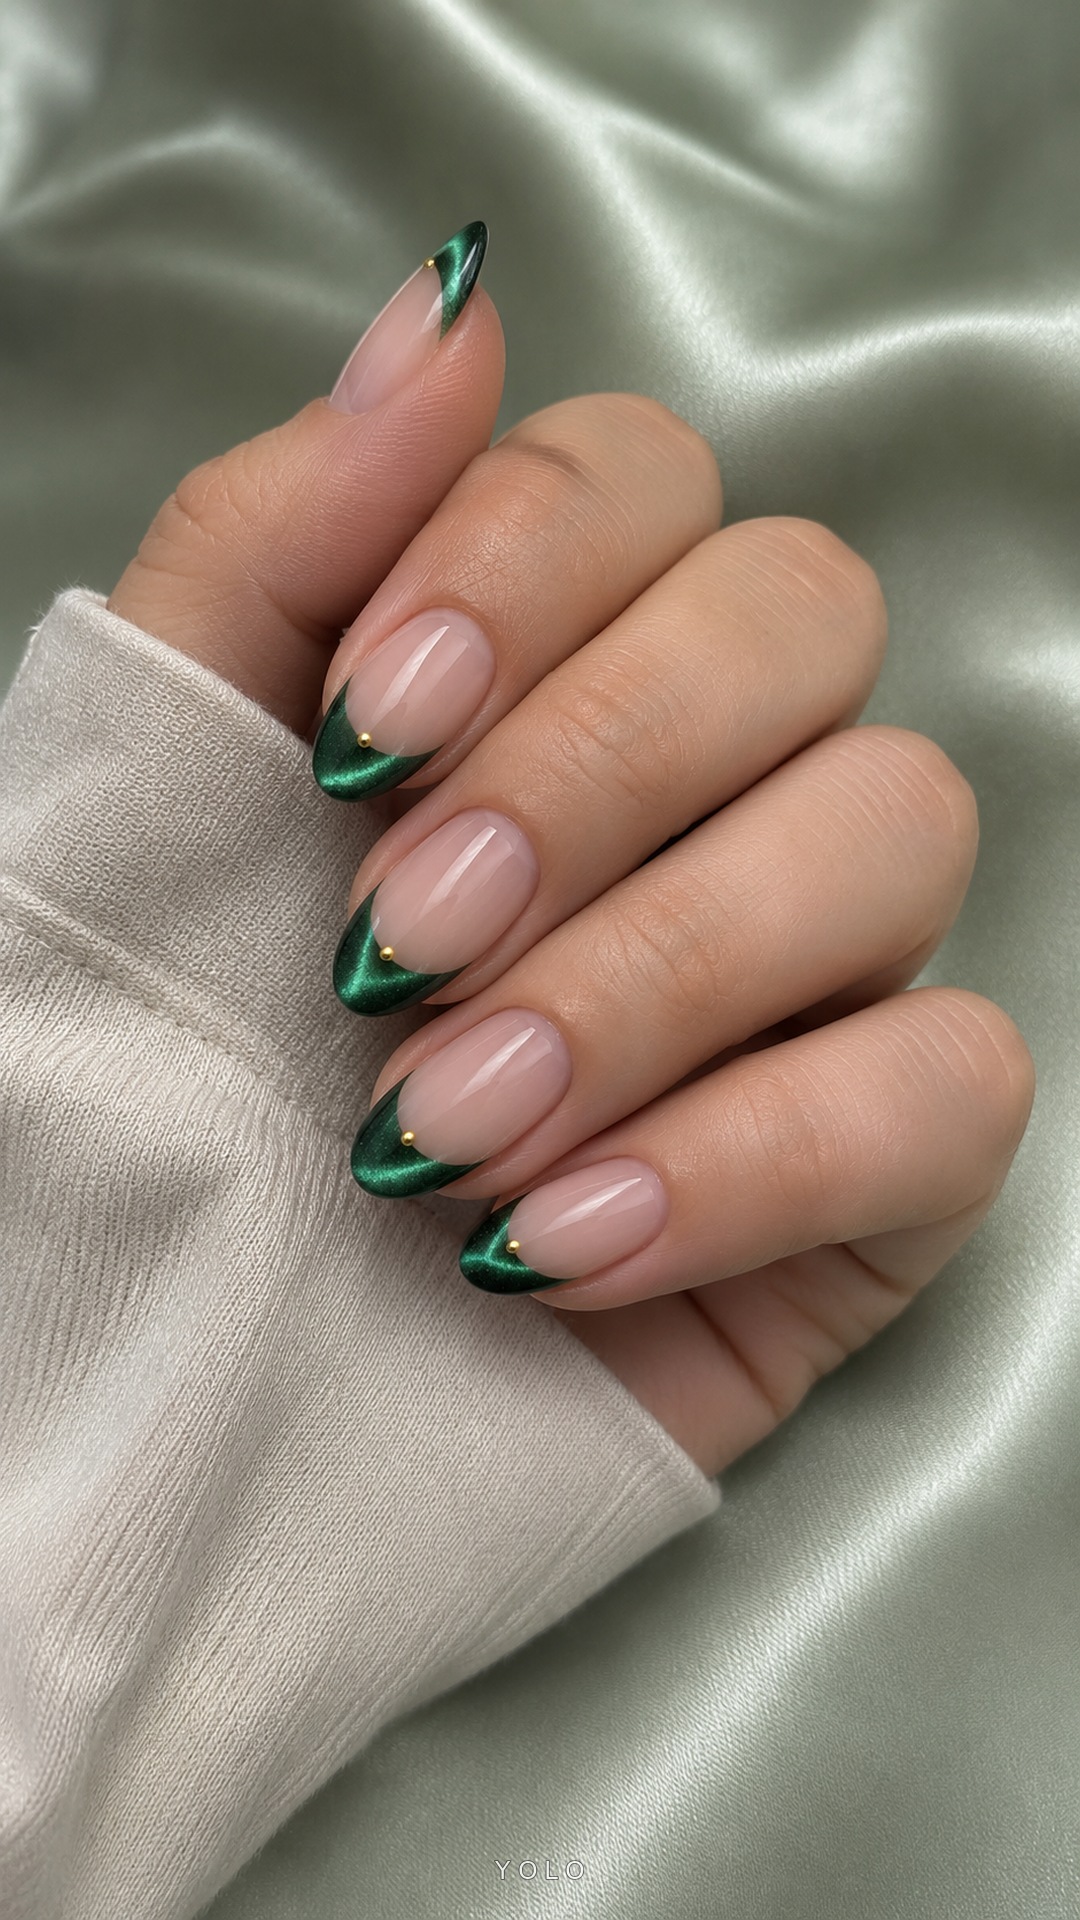
Emerald magnetic French tips place the brightest detail at the edges of a sheer nude manicure. The curved green sections have a luminous sweep, while the clear-looking bases keep the overall set light. Small gold points sit close to the colored borders as restrained finishing details. On the medium almond shape, the tips taper smoothly toward the sides instead of becoming a heavy block of color. This design brings a jewel tone into a French manicure while leaving most of the nail visually quiet.
Make it yours: Shape the French border first so each tip has a consistent depth. Keep the magnetic highlight inside the green area and avoid letting the colored section become too wide. A tiny gold point is enough to complement the finish without distracting from it.
4. Champagne Lace Edge

Champagne beige shimmer gives this compact manicure a soft metallic warmth. Two accent nails carry fine ivory lace near the tips, with open nude areas allowing the pattern to stay delicate. The other nails remain luminous and simple, creating a calm backdrop for the small mesh-like details. The rounded corners soften the short shape, and the taupe knit sleeve echoes the warm neutral palette. Choose this direction when you want subtle ornamental work combined with a reflective finish that does not depend on bold color.
Make it yours: Keep the lace within a narrow tip section and use a fine liner for the crossing threads. Add small scallops only after the main pattern is balanced. Leave the remaining nails plain so the ivory detail has enough contrast to stay readable.
5. Smoke and Blush Swirl

Smoky gray and blush pink soften each other in this alternating cat-eye manicure. The darker nails carry a silvery sweep, while the pink accents show a gentler curved glow. Medium oval tips give the highlights room to bend across the surface without making the set feel dramatic. The effect comes from the contrast between darker edges and concentrated shimmer, with glossy reflections adding depth. This palette is especially useful if you want a magnetic manicure that sits comfortably between a neutral look and a pink statement.
Make it yours: Ask for a softly curved magnetic effect rather than a sharp diagonal beam. Check the sample under more than one light angle, and keep the gray and pink finishes similarly glossy so the alternating colors feel like one set.
6. Cherry Pearl Dots
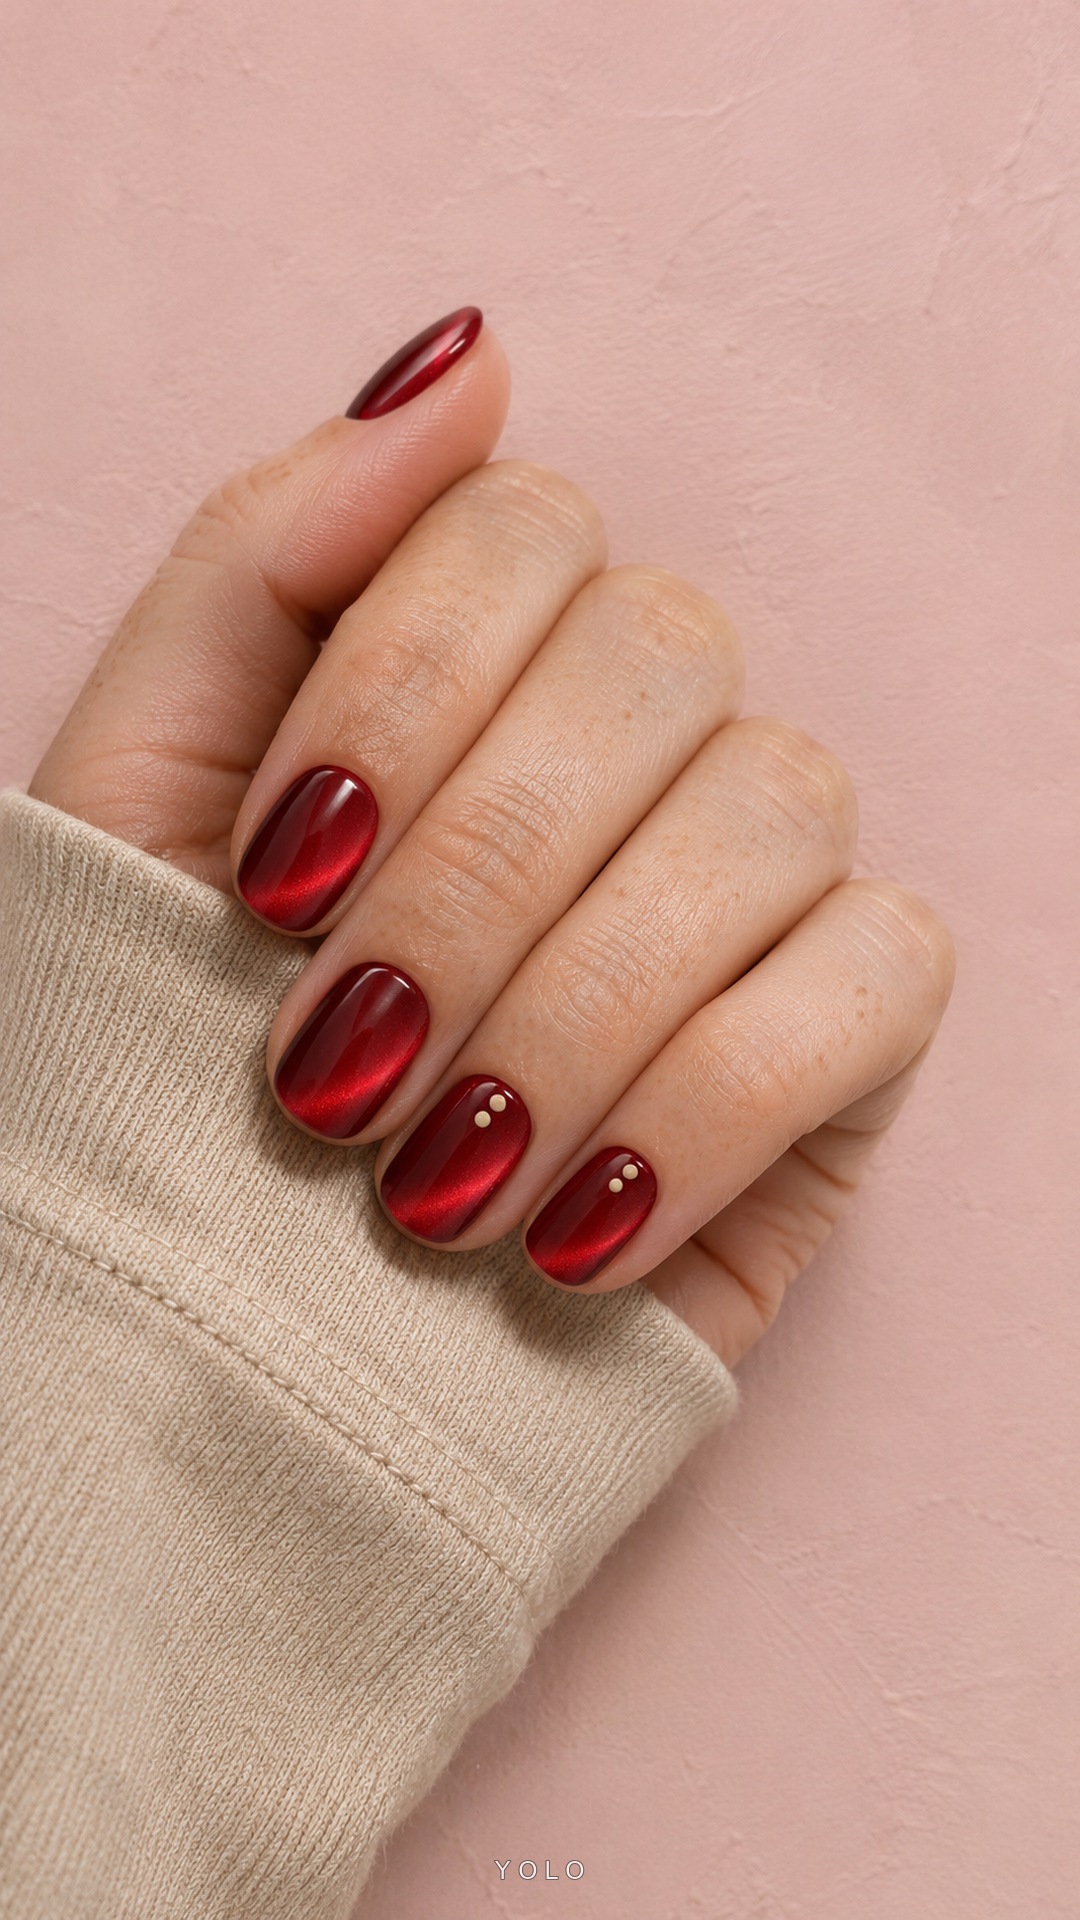
Cherry red magnetic polish gives these short rounded nails more depth than a flat red finish. A brighter red band runs through the darker base, and tiny cream dots add a restrained accent on two nails. The small decorations leave most of the shimmer visible, which lets the light effect remain the main feature. Rounded tips make the rich color feel neat and compact. This is a good reference for someone who loves classic red nails but wants a little extra movement and detail.
Make it yours: Keep the cream dots small and grouped near one edge instead of covering the reflective band. Apply decorative details only when the magnetic layer is ready for them according to the polish system, then finish as directed by its manufacturer.
7. Copper Orbit Lines
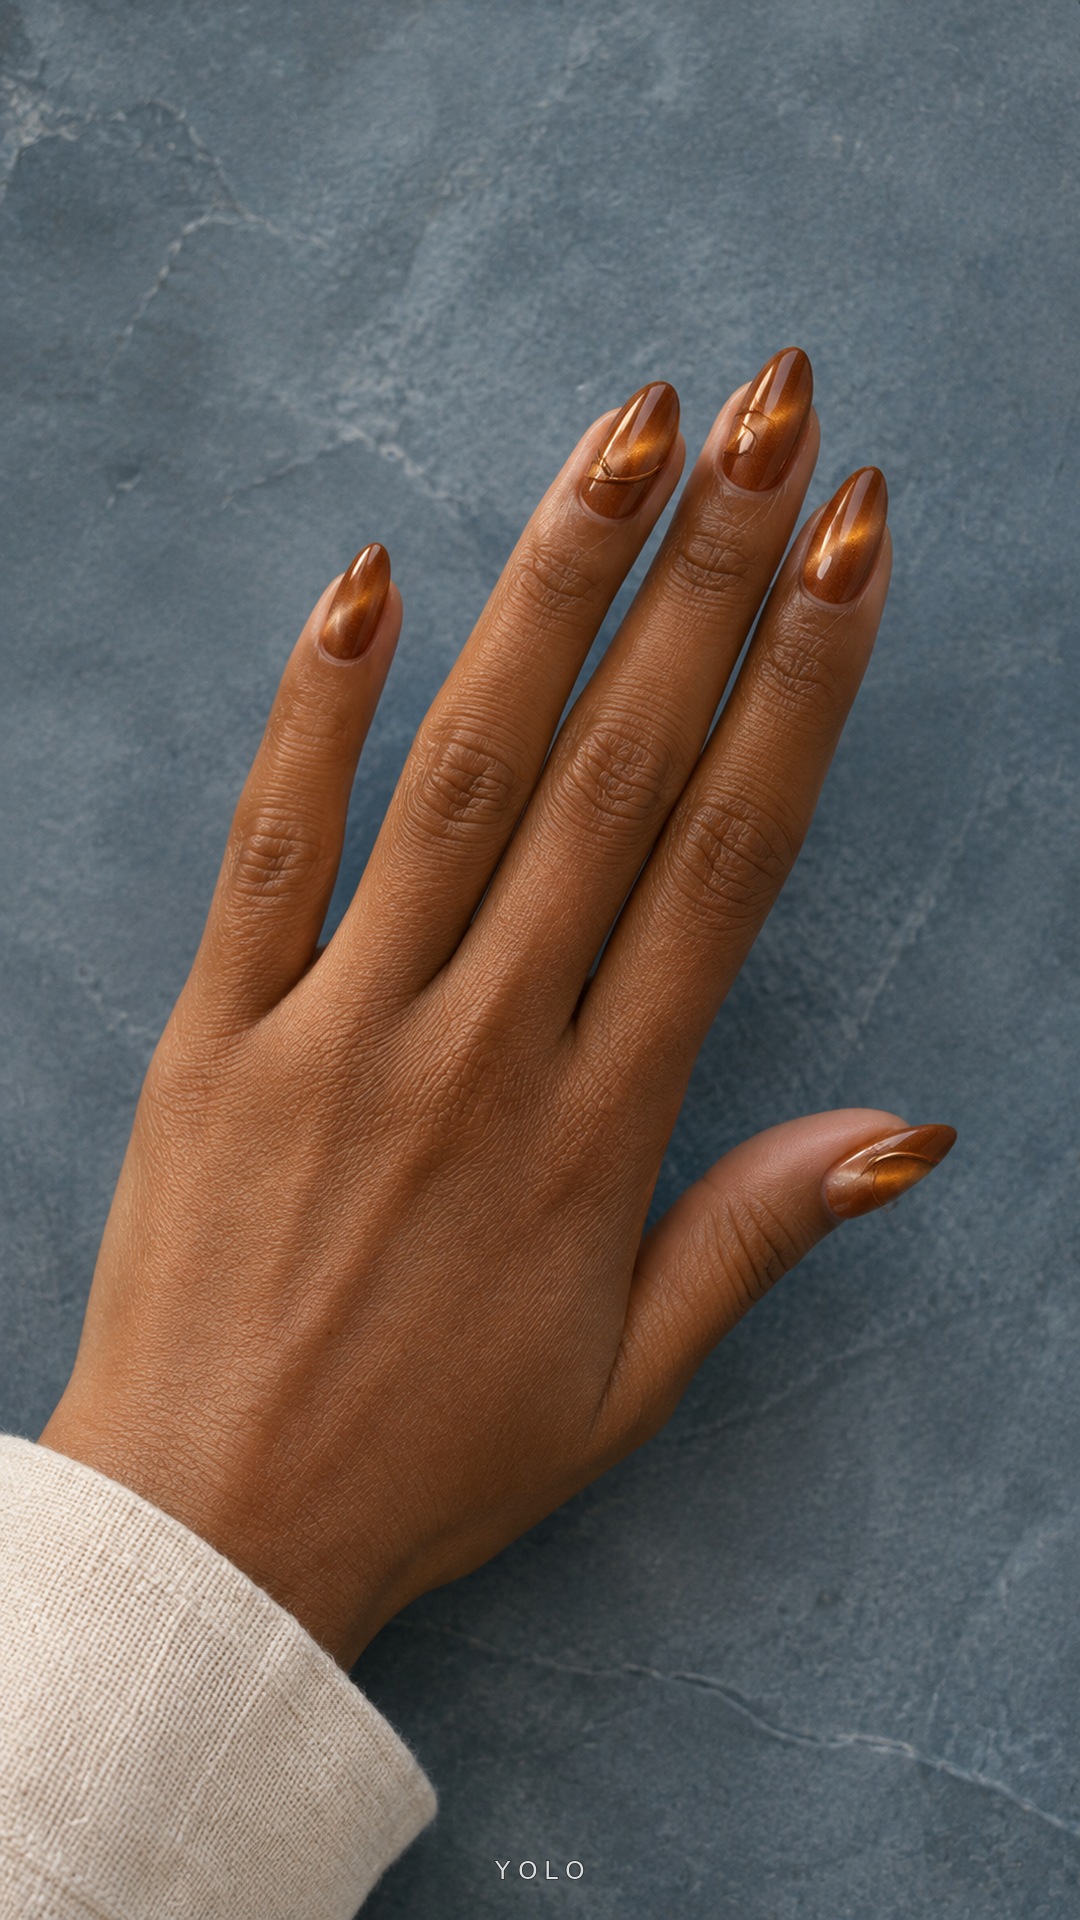
Copper and amber create a warm metallic effect across these almond nails. The brighter sweep travels over a deeper bronze base, while fine orbit lines add detail to selected accents. Keeping the linework close in color to the polish makes it visible without interrupting the luminous surface. The medium length gives the reflective bands room to change direction across each nail. This set works as a rich alternative to gold, particularly if you prefer a softer, earthier metallic shade with a glossy finish.
Make it yours: Choose thin bronze linework that remains darker than the brightest copper reflection. Leave broad sections of magnetic polish uncovered, and ask your nail artist to show the placement in angled light before adding the final decorative outlines.
8. Silver Moon Outline

Cool silver-gray polish creates a quiet, moonlit effect on these short oval nails. A concentrated reflective band gives each nail dimension, while one accent carries a small dark crescent and a few tiny dots. The simple drawing leaves the silver surface largely open, so it feels like a detail within the manicure rather than a separate theme. The compact shape keeps the metallic finish understated. Pair it with clean tailoring, charcoal knits, or a simple white shirt for a softly polished look.
Make it yours: Keep the crescent outline thin and place only a few dots around it. A tiny motif is easier to read against an open silver background, so avoid adding large stars or heavy decoration over the magnetic highlight.
9. Oat Milk Velvet
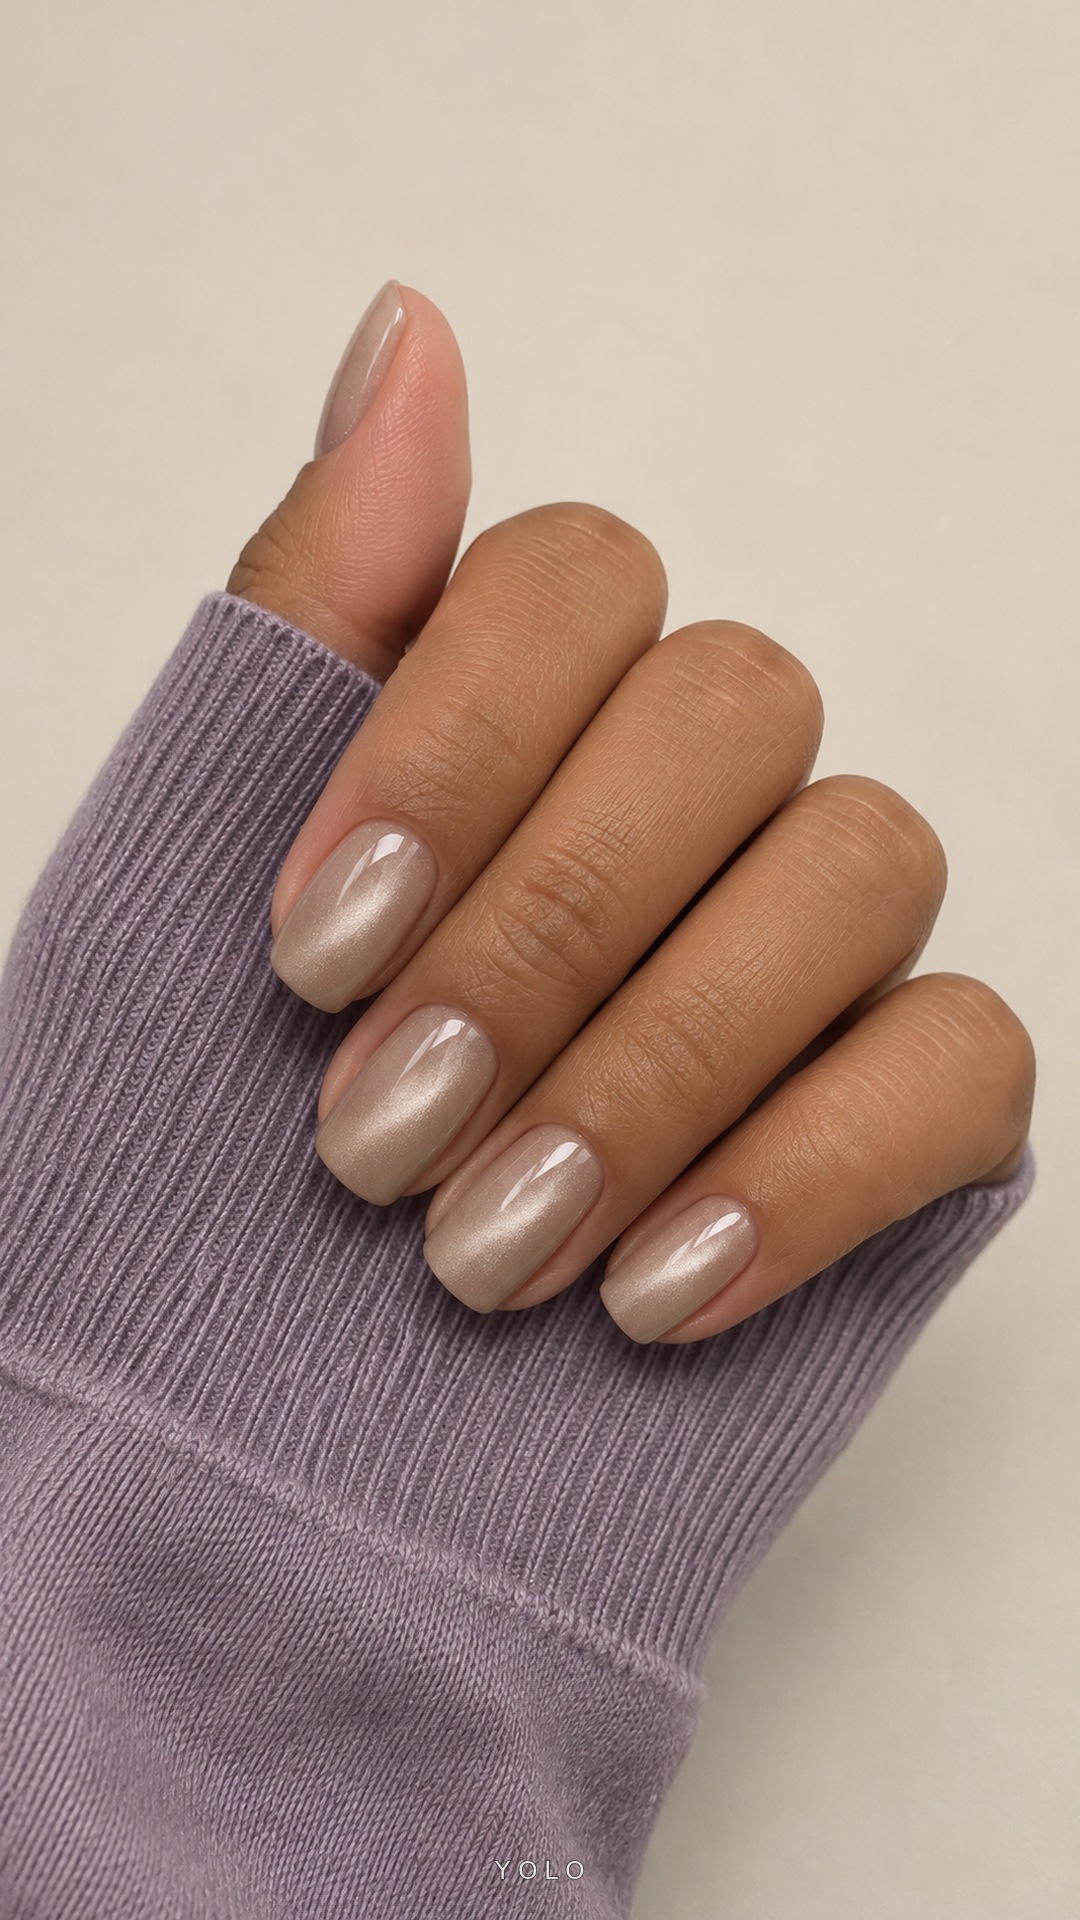
An oatmeal nude base gives this velvet finish a soft, wearable character. The fine champagne-silver sheen gathers into a gentle band through each nail, leaving slightly deeper color at the sides. There are no motifs competing with the reflective effect, so the rounded shape and tidy polish line become part of the design. This is a subtle entry point into cat-eye nails for someone who usually chooses beige or pink. It offers a little more visual depth while staying close to a neutral palette.
Make it yours: Keep the base color warm and the magnetic effect diffused if you want this quiet finish. Ask to see the polish under ordinary room light as well as a direct light, since the reflective band changes with viewing angle.
10. Pistachio Fine Mesh

Pistachio green gives these magnetic nails a fresh, slightly earthy color, with brighter bands of shimmer running through the centers. Delicate ivory lattice lines appear on two accents, mainly toward one side, leaving the reflective base visible. That open placement keeps the patterned nails connected to the plain ones. The oval shape softens the small diamond intersections and suits the gentle green palette. It is a way to combine a detailed painted motif with cat-eye polish without hiding the effect underneath.
Make it yours: Establish the magnetic finish before adding the thin lattice artwork, following the polish system's instructions. Keep the lines near one side and leave a larger clear area on each accent so the green light band remains easy to see.
11. Plum Satin Ribbons

Deep plum makes the pink reflective ribbons look especially silky in this almond manicure. Each nail has a soft band of lighter color that curves across the darker base, with a fine gold contour adding a small accent. The polish stays rich around the edges, which gives the light band its definition. No extra flowers or glitter shapes are needed here; the shifting finish supplies the detail. This palette would suit someone who likes a dark manicure with a warmer, more dimensional appearance.
Make it yours: Keep the gold contour thinner than the pink reflective band so it supports the finish rather than dividing the nail. A sample on one nail can help you choose the curve and contrast before repeating the magnetic effect.
12. Amber Tortoise Glow

Amber magnetic polish gives this tortoiseshell idea a luminous base. Golden bands show through the translucent brown, while two accent nails carry irregular darker patches. The patches vary in size and leave plenty of amber showing, so the pattern keeps its glassy quality. Short oval nails make the warm palette feel compact and polished rather than heavy. The plain nails also provide a useful contrast: they show the fine shimmer clearly and let the tortoiseshell details remain the focus of the patterned pair.
Make it yours: Keep the brown patches translucent and uneven, with a few small marks beside the larger ones. Leave gaps through the golden center instead of covering it completely; that open space lets the magnetic glow remain part of the design.
13. Lilac Pearl Fade

Nude pink fades into milky lilac at the tips of these medium oval nails, with a soft silver magnetic glow adding depth to the transition. The finish stays delicate rather than glittery, and the clear glossy reflections keep the pale colors from looking flat. With no painted motifs or metallic outlines, the manicure relies on its blend and curved light bands for interest. It is a gentle introduction to cat-eye polish if dark jewel tones feel too bold for your usual style.
Make it yours: Keep the ombre transition soft before shaping the magnetic highlight. Ask for a diffused silver glow rather than a sharp stripe, and compare the nails under the same light so the pale lilac tips feel evenly balanced.
14. Teal Peacock Feather

Deep teal cat-eye polish creates a rich background for one finely painted peacock feather. Gold lines and a small emerald center bring the accent into focus, while the other almond nails retain broad curved teal highlights. The design works because most of the hand stays simple: the magnetic finish already has movement, so a single detailed feather is enough. This is an elegant option when you want a jewel-toned manicure with a recognizable motif that still leaves plenty of luminous polish visible.
Make it yours: Place the feather on just one nail and keep its lines fine enough for the teal base to show through. Repeat the same magnetic direction on the remaining nails, allowing their natural curvature to create slight differences in reflection.
15. Garnet Gold Half Moon

Garnet polish takes on a warm red glow through the center of these softly rounded nails, leaving deeper wine-colored edges. Fine gold half-moon lines frame two cuticle areas and add a small jewelry-like detail without covering the magnetic effect. The rich palette feels polished on a modest nail length, making it a useful alternative to long red statement nails. This set gets its depth from the contrast between the darker base and the narrow bands of reflected red light.
Make it yours: Keep the gold half-moon lines very thin and leave a small, clean margin beside the cuticle. Shape the magnetic reflection before adding the outline, so the gold detail follows a finished design rather than competing with the brightest band.
16. Mocha Silk Marble

Mocha magnetic polish gives these oval nails a warm bronze reflection, while two creamy coffee accents add flowing marble wisps. The lighter strokes vary naturally, creating a softer effect than matching swirls on every nail. Solid mocha nails between the accents give the eye a place to rest and make the marbling feel intentional. This is a rich neutral manicure for someone who likes brown polish but wants more dimension, with enough contrast to show the detail without introducing a completely different color family.
Make it yours: Use a light touch for the creamy marble strokes and leave areas of mocha visible underneath. Keep the strongest marbling to two nails, then use the same warm magnetic polish across the rest of the set for continuity.
17. Ivory Opal Light
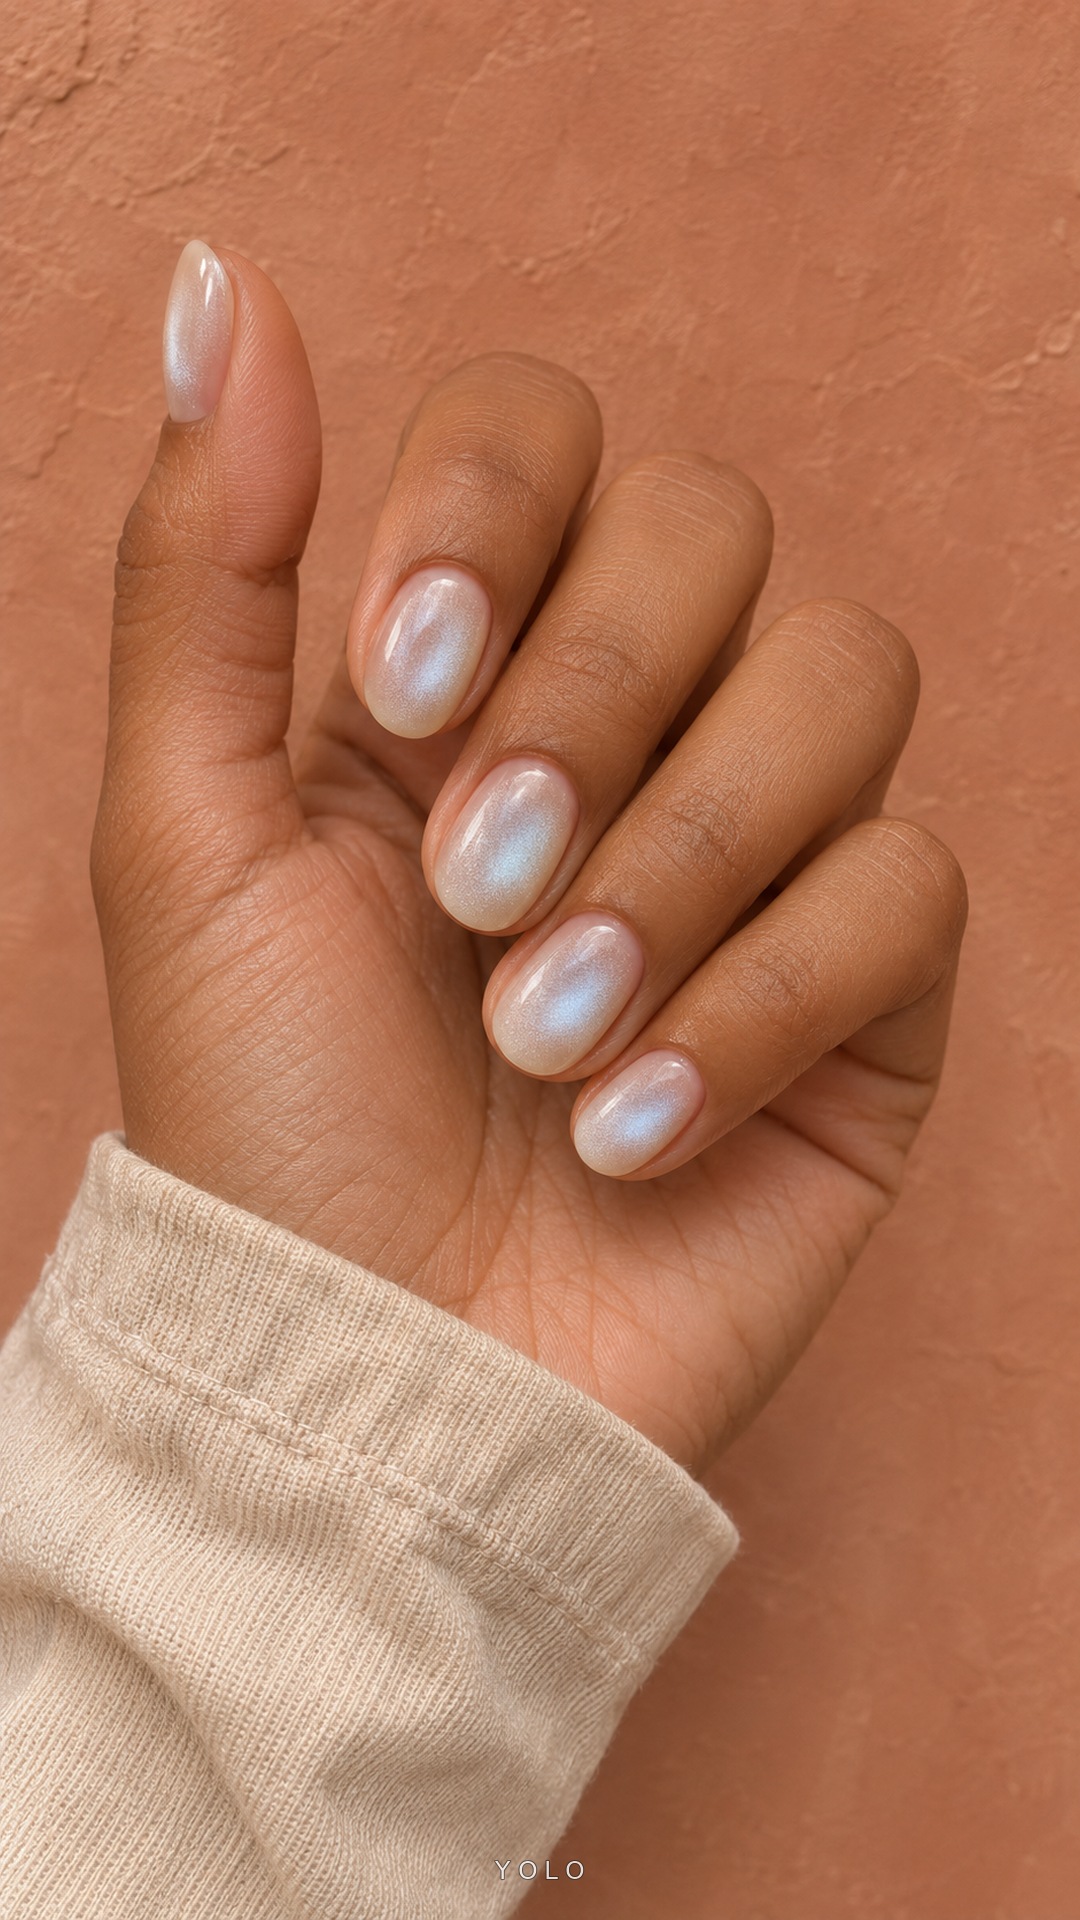
Translucent ivory makes this cat-eye manicure feel light and quietly luminous. Soft pools of silver and pale blue sit within the polish, creating an opal-like impression without gems or painted motifs. The short oval shape keeps the finish understated, allowing the reflected light to provide all the decoration. A sheer base also softens the contrast between the shimmer and the nail bed. This is a useful direction for a minimal manicure when plain ivory feels too flat but dense glitter would feel too busy.
Make it yours: Ask to see the shimmer over a sheer ivory swatch before choosing the base. Keep the magnetic highlight broad and soft, with some translucency around it, so the finish reads as a gentle light pool rather than a hard stripe.
18. Aubergine Fine Plaid
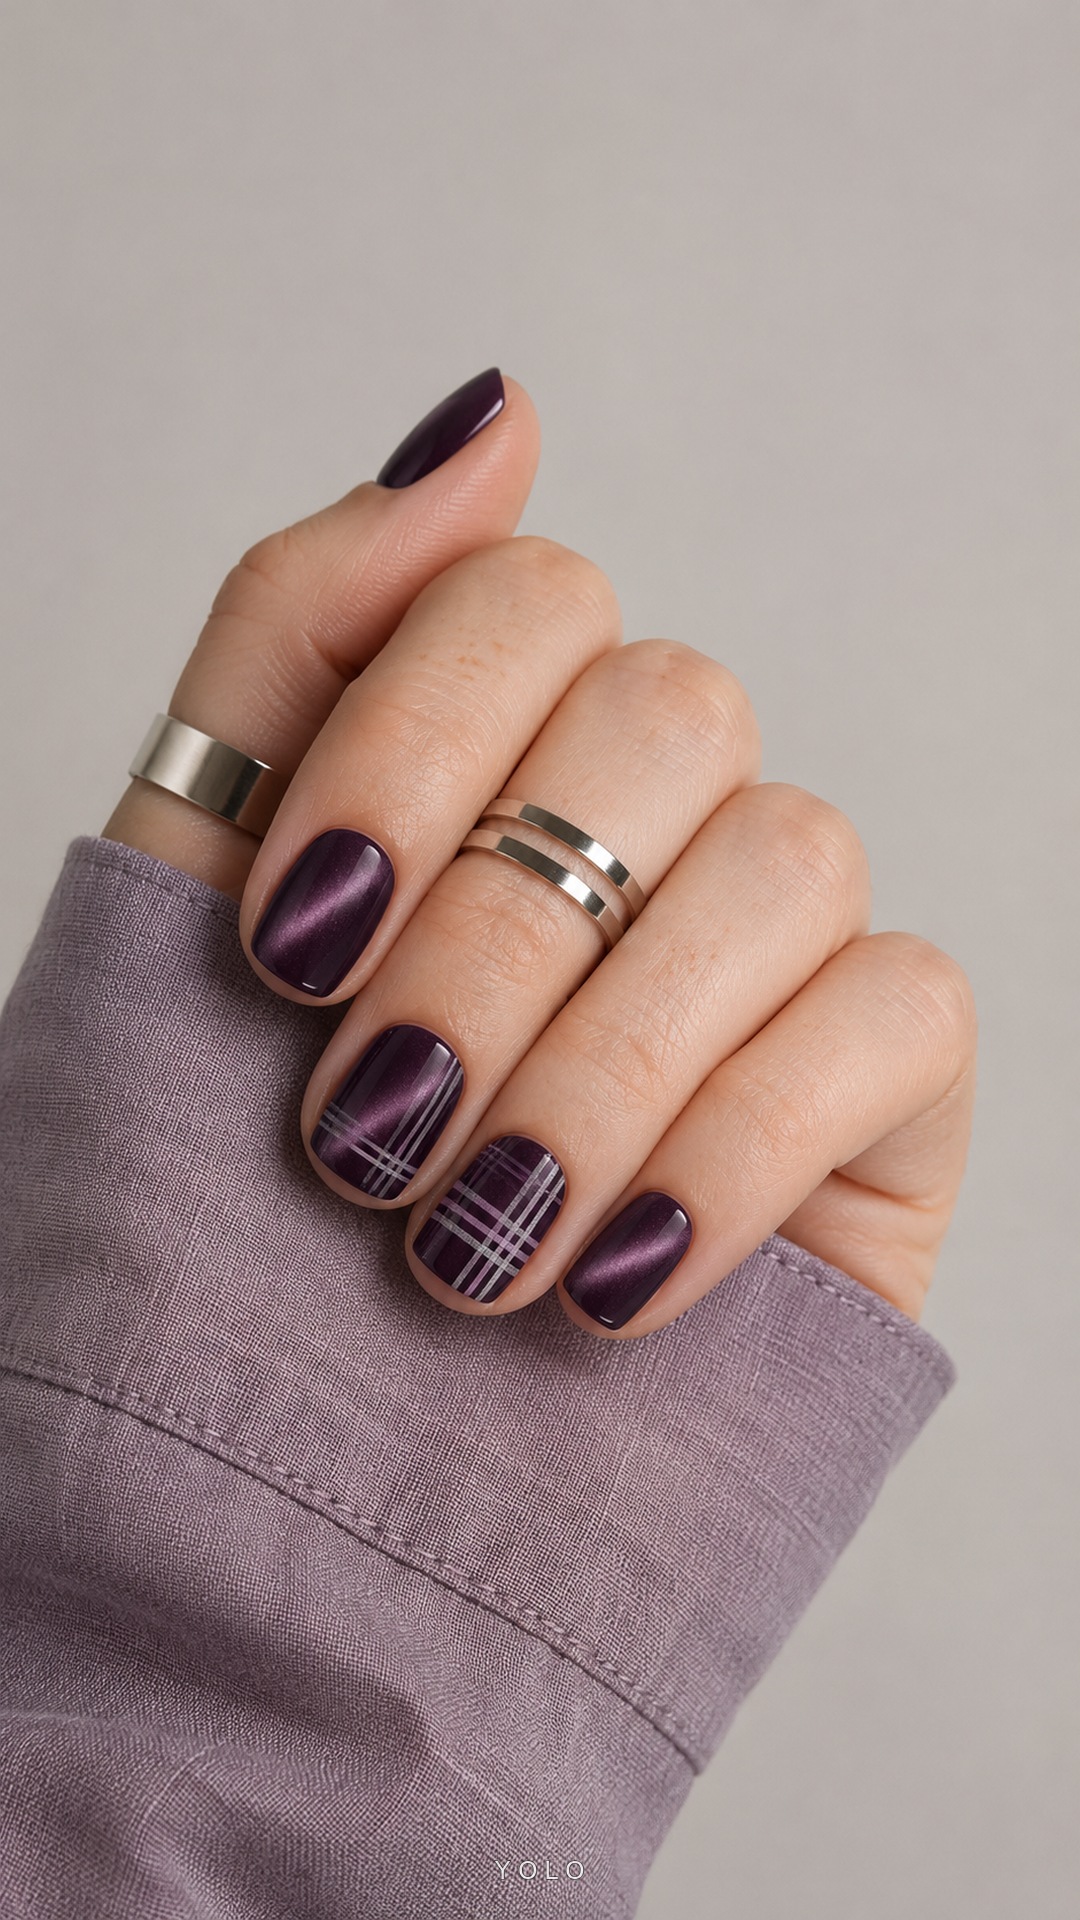
Deep aubergine gives fine magnetic shimmer a rich background, while tiny lavender and silver plaid lines add structure to two accent nails. The plain nails keep the reflective finish visible, preventing the grid from taking over the set. Short squoval shaping suits the straight linework and makes this detailed manicure feel compact. The palette stays close enough in tone to look coordinated, with silver providing a restrained lift. It is an appealing option when you enjoy patterned nails but want a darker, less playful finish.
Make it yours: Keep the plaid lines very fine and leave gaps wide enough to show the magnetic base beneath. Limit the pattern to a couple of nails, and check that the lavender remains visible against the aubergine before committing to the linework.
19. Peach Butterfly Wing

Peach magnetic polish gives these almond nails a warm glow, with a soft golden band adding depth to the color. One bronze butterfly-wing outline brings a fine decorative detail to the otherwise simple set. Keeping that illustration on a single nail allows the reflective polish to remain the main feature. The elongated curves of the wing sit comfortably beside the almond shape without needing large embellishments. This is a gentle way to combine a recognizable motif with cat-eye shimmer while keeping the palette soft.
Make it yours: Choose a fine bronze outline so the wing stays light against the peach. Ask for the golden magnetic band to remain visible beneath or beside the artwork, and keep the other nails free of additional symbols or stones.
20. Forest and Pewter Split

Forest green and pewter share each nail in a clean diagonal split, bringing two different moods of magnetic shimmer into one set. A narrow translucent divider keeps the colors distinct while preserving a light, precise edge between them. The darker green adds depth, and pewter reflects more light, so the contrast comes from both color and finish. Oval tips soften the angled pattern. This is a structured choice for a multicolor cat-eye manicure when you prefer a repeated design to several unrelated accent nails.
Make it yours: Ask for the diagonal divide to follow a consistent direction across the hand. Keep its clear gap narrow but visible, and compare the two shimmer shades together so neither side becomes so bright that it overwhelms the other.
21. Midnight Star Pinpoints

Near-black navy gives the silver magnetic bands a deep backdrop in this compact manicure. Each short rounded nail catches a narrow sweep of light, while two tiny white star details add a little celestial character. The painted stars remain small enough to leave the shifting polish visible around them. Glossy edges and a clean outline keep the finish precise without additional embellishment. Paired with a cream knit cuff and a muted blue setting, the design feels rich and understated despite the brighter silver accents.
Make it yours: Place the stars after establishing the magnetic effect, leaving the strongest light band mostly open. Keep the artwork to two nails and use very fine points so the painted details stay delicate beside the shimmer.
22. Honey Gold Contour

Warm honey gold flows across these almond nails in broad, velvety bands of light. Fine caramel contours add definition near two edges without hiding the metallic color underneath. The finish has depth rather than large glitter pieces, making the curved highlights the main feature of the manicure. A chocolate satin cuff reinforces the warm palette, while the pale stone backdrop keeps the gold clear and distinct. This is a useful option when you want a dramatic color but prefer a simple arrangement without floral or geometric artwork.
Make it yours: Choose a caramel outline only slightly deeper than the gold base. Keep it slender and limited to two nails, allowing the broader magnetic highlight to remain the main detail across the rest of the hand.
A mini-guide to magnetic manicures
Understand the effect you are requesting
Magnetic polish contains particles that respond to a magnet while the product is workable. The tool and its placement help form the visible pattern. A cat-eye line and a velvet-style effect are related approaches, but the desired result should be described clearly when you show a reference. See Cirque Colors’ explanation of magnetic polish for a manufacturer’s overview.
Check the product system before following a tutorial
Magnetic color is available in different systems. Some products are air-drying lacquer, while others are gel products with their own curing requirements. Use the application and finishing directions for the product you actually have. A method intended for one system should not be treated as a universal recipe.
Practice the placement on a tip
Before attempting a whole set, compare a diagonal line with a broader glow on practice tips. Work on one tip at a time so you can see how the pattern responds. The Cirque Colors magnetic wand instructions illustrate one lacquer-specific method; use your own product’s directions for layer thickness, timing and finishing.
Judge the finish in more than one light
Reflective polish can look more pronounced under bright photography lights than in a dim room. Move a real sample through a few ordinary lighting conditions before deciding. Emily de Molly’s magnetic polish guide explains why lighting and the drying process can affect how a lacquer pattern appears.
Leave some shimmer uncovered
A magnetic base already has a focal point. When adding a plaid line, leaf or lace edge, place it where it supports the highlight rather than hiding the entire luminous area. Keeping the artwork on one or two nails is an easy way to preserve the finish as the main feature.
Write a useful appointment brief
Specify the base color, whether you prefer a narrow band or softer glow, your nail length and the amount of artwork. If a raised detail is not important to you, request a flat painted interpretation. These choices are more useful than asking for an exact match to every reflection in one still image.
Frequently asked questions
Do cat-eye nail ideas work on short nails?
Yes. A short oval or squoval shape can show a magnetic highlight clearly. You can keep the finish as the main feature and use fewer painted details.
Are cat-eye and velvet nails exactly the same?
They are related magnetic looks, but the visible arrangement of shimmer differs. A cat-eye design often emphasizes a defined band, while a velvet look aims for a broader, softer glow.
Does every magnetic polish require a lamp?
No. There are air-drying magnetic lacquers as well as magnetic gel products. Follow the instructions for the specific product and system you use.
Will the magnetic effect look identical in every room?
No. Lighting and viewing angle affect how visible the shimmer is. A real sample viewed in ordinary light is more useful for choosing the exact finish than a single bright close-up.
Can I combine magnetic polish with painted nail art?
Yes. Keep some of the luminous surface visible and use compatible products according to their instructions. Fine outlines and limited accents can complement the magnetic finish without covering it.
For another take on this theme, explore BeautyCoded’s cat-eye nail collection.