The Best Fluffy Pancakes recipe you will fall in love with. Full of tips and tricks to help you make the best pancakes.

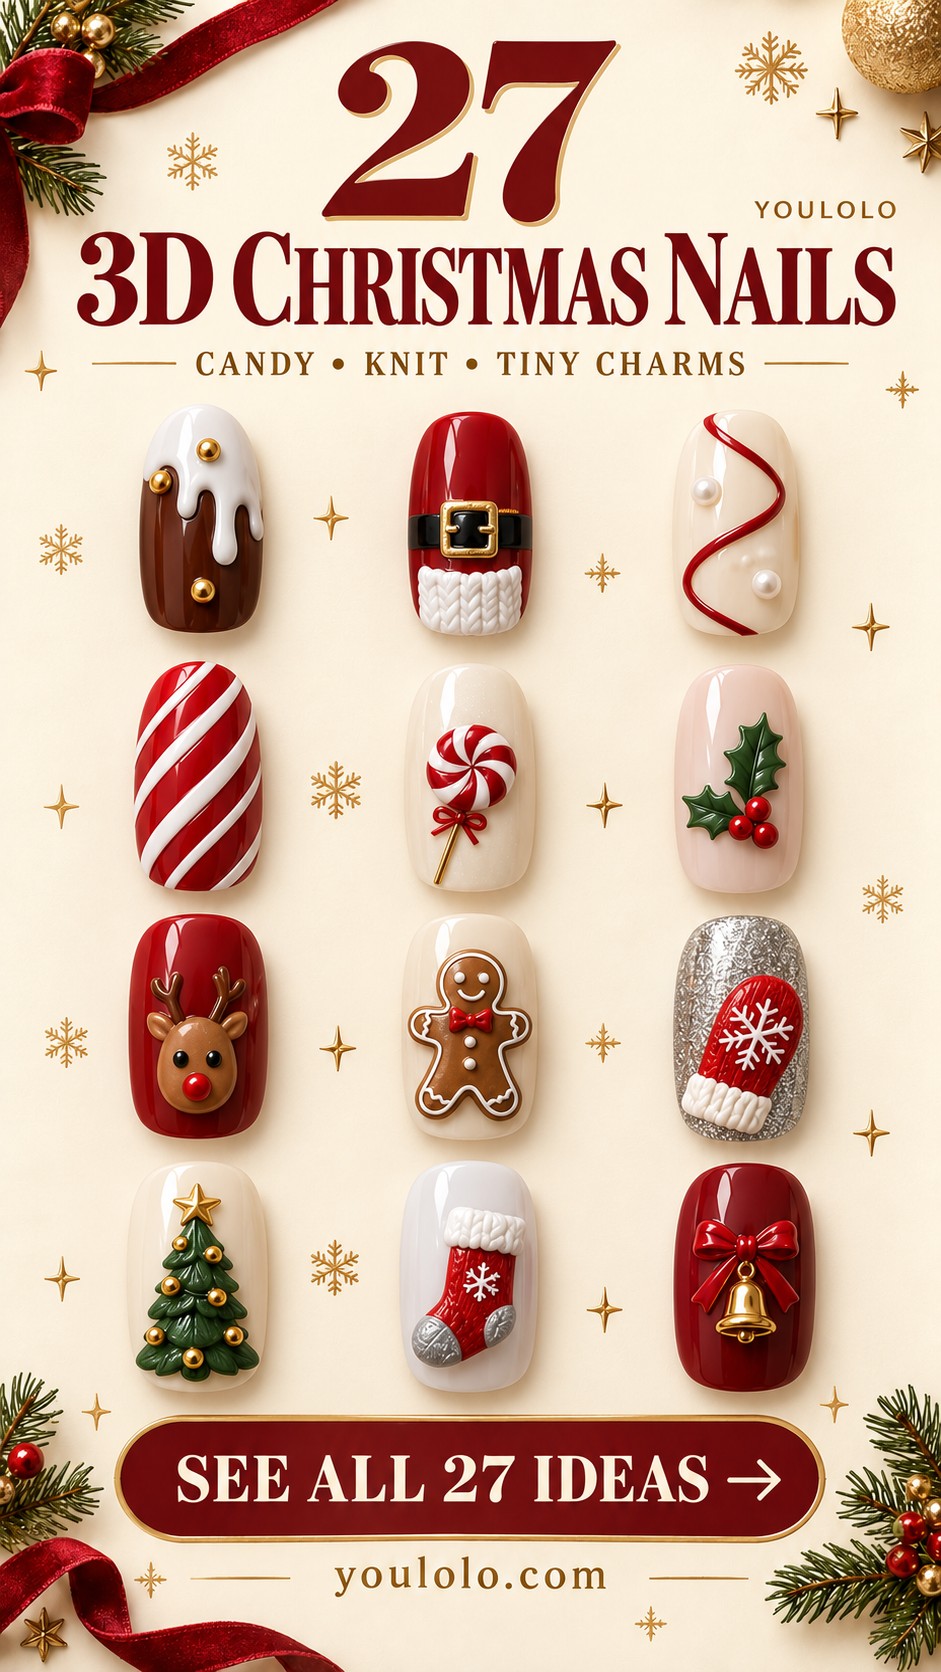
3D Christmas nails add a tactile detail to the holiday palette: a little icing edge, a knitted cuff, a raised berry or a tiny bow. The strongest sets do not need every nail to be covered in charms. One clear textured accent can change the whole manicure.
These 27 ideas combine dessert-inspired details, familiar Christmas shapes and smaller jewelry-like accents. Some use shallow relief that stays close to the nail, while others place a compact charm on a single focal finger. Painted companion nails help the raised detail stand out.
Choose the amount of texture as carefully as the color. A painted bow and a sculpted bow may share the same outline, but they feel different on the hand. Use the references to identify the shape you love, then discuss how much relief you want and which nails should carry it.
Choose your favorite direction
For subtle texture, look at icing lines, tiny snow dots or fine knit bands. For a clear character accent, try the mitten, stocking or gingerbread figure. For a more dressed-up set, choose a small bell, bow or pearl arrangement with plain glossy companions.
1. Chocolate Icing Drips
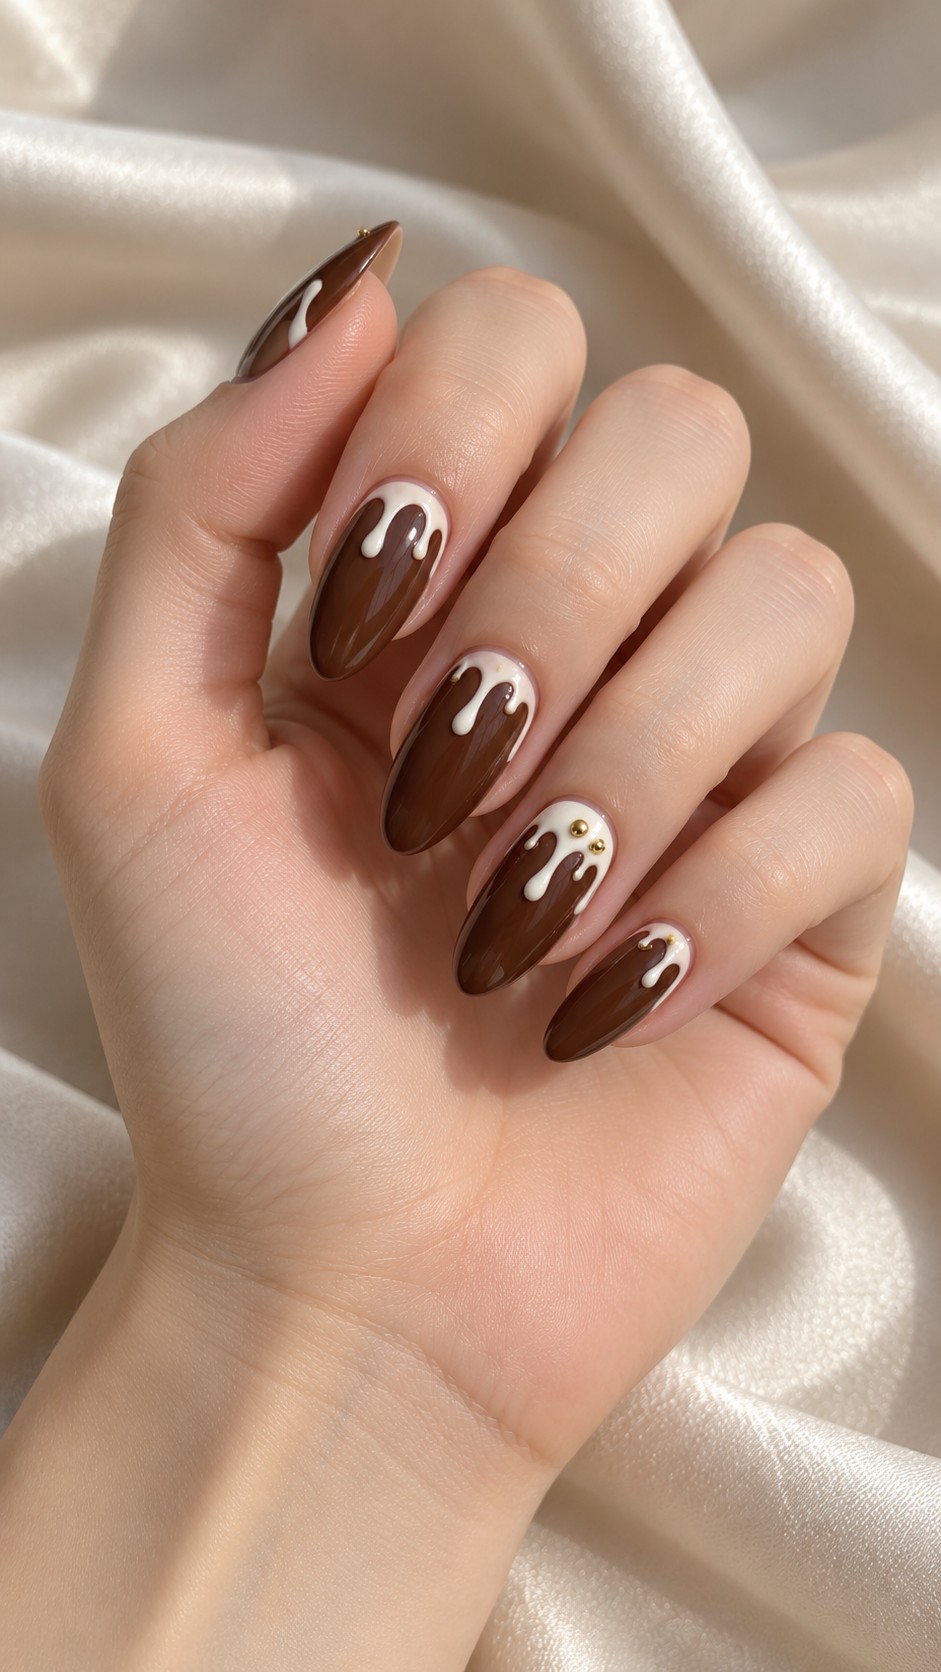
White icing drips give chocolate nails a dessert-like finish. A few gold studs add contrast without changing the main brown-and-white palette. The effect works particularly well when the drips differ slightly in length, as if icing settled naturally over the surface. Keep their relief shallow so the nail still has a smooth, controlled outline.
Placement note: Keep the drips shallow and away from the sidewalls.
2. Santa Belt and Knit Cuff
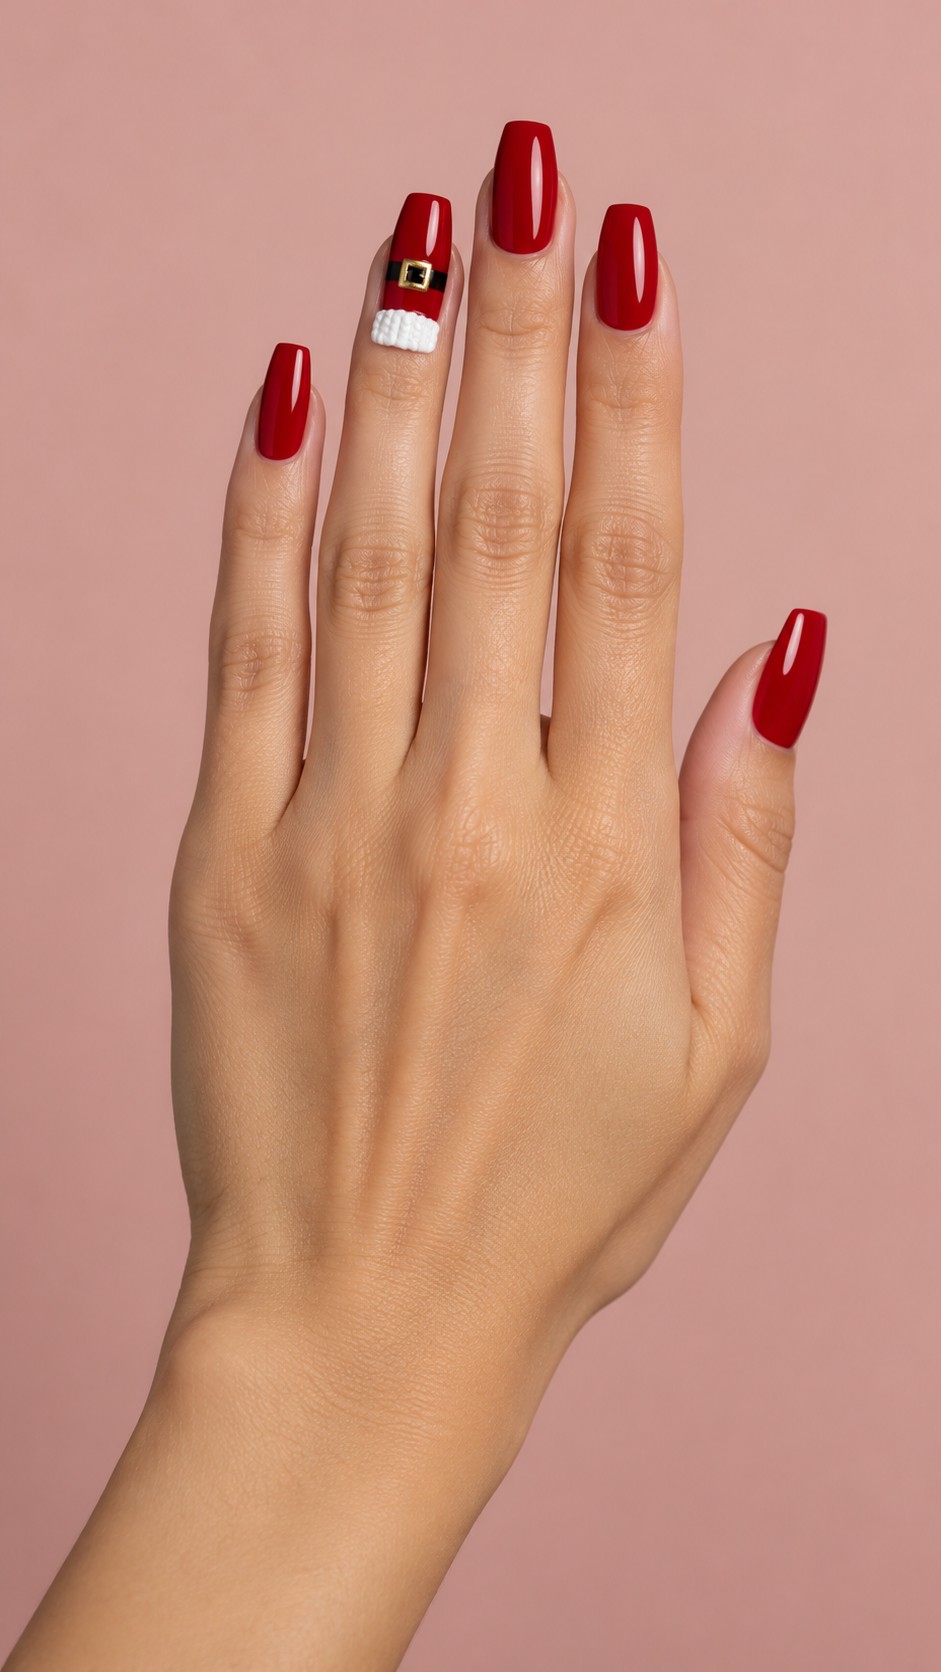
A tiny belt and knitted white cuff suggest Santa’s outfit without needing a face or figure. The red base carries most of the design, while the buckle supplies one small metallic focal point. A longer tapered shape gives the horizontal details room. Keep the cuff modest in height so it reads as texture rather than a thick band.
Placement note: Scale the buckle to the width of the accent nail.
3. Red Ribbon and Snow Pearls

The red line moves across the ivory nail like a ribbon, with white dots adding a snowy touch. Separating the two details makes the raised surface feel deliberate. The ribbon should remain fine and continuous, while the pearls sit in clear spaces around it. This is a lighter alternative to a full character charm.
Placement note: Space the pearls so the ribbon remains visible.
4. Chocolate Gold Sugar

Brown, white and gold create a warm holiday combination with a dessert-inspired feel. The white curves soften the darker base, and the gold dots act like little sugar decorations. Keep the placements asymmetric but balanced across the hand. A few well-spaced studs create more definition than a crowded line of identical dots.
Placement note: Use a few studs rather than covering every curve.
5. Raised Candy Stripes

Raised white stripes bring candy-cane color to a dramatic pointed shape. The design relies on clean spacing and a consistent line width. Let the red remain visible between the stripes so the surface does not become mostly white. If you prefer less texture, keep the same diagonal placement and ask for painted stripes instead.
Placement note: Keep each stripe evenly thin for a tidy surface.
6. Peppermint Lollipop

A little peppermint disc gives the manicure a playful candy-shop detail. The spiral needs enough contrast to remain readable at a small size, while the thin stick establishes the lollipop shape. Holly on a separate nail adds the Christmas connection. Keep the other nails pale so the red swirl has a clear focal role.
Placement note: One peppermint disc is enough for the accent.
7. Sculpted Holly Berries

The berries provide the main relief in this holly design. Fine green leaves can remain flatter, which keeps the accent lighter than a fully sculpted sprig. A milky background gives the red and green a clean frame. Three small berries are usually enough to establish the motif without making the cluster cover the whole nail.
Placement note: Keep the leaves low-profile and the berries small.
8. Snowflake Relief

Fine raised snowflakes add texture while keeping the palette crisp. Red provides the clearest contrast on white, while white relief is more subtle and depends on light and shadow. Use the two effects on different accent nails. The branches should stay delicate, with clear gaps between them so the flake does not become a heavy star.
Placement note: Use a contrasting base where the white relief needs more definition.
9. Metallic Gingerbread Silhouette

A pale metallic gingerbread silhouette changes the familiar cookie motif into a sparkling accent. The red background gives the figure a strong edge, while tiny icing details suggest its face and buttons. The silhouette can stay mostly flat, with just a little relief in those details. That keeps the design festive without requiring a large charm.
Placement note: Keep the silhouette flat except for tiny icing dots.
10. Little Reindeer Charm
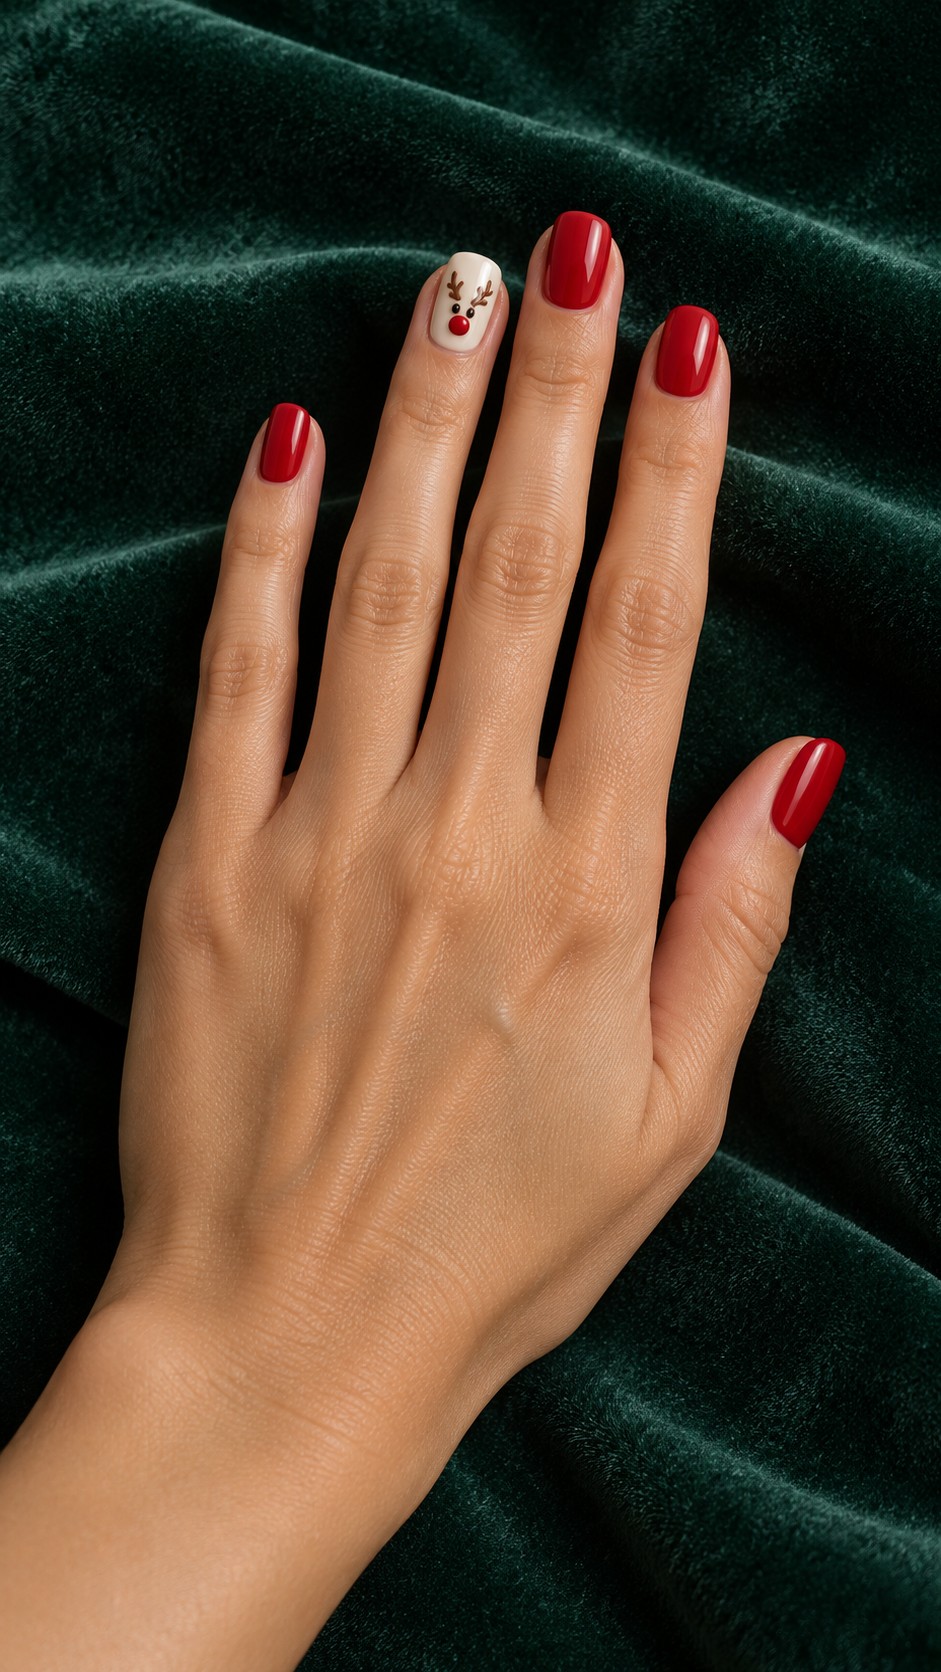
A small reindeer face brings a character element to an otherwise simple set. The red nose is the main focal point, while the antlers can remain finely painted. Keep the raised face low and compact. A cream accent gives the brown shape a clear outline, with plain red nails connecting it to the Christmas palette.
Placement note: Simplify the antlers so they do not crowd the face.
For another related direction, explore our red Christmas nails.
11. Golden Heart and Pearls
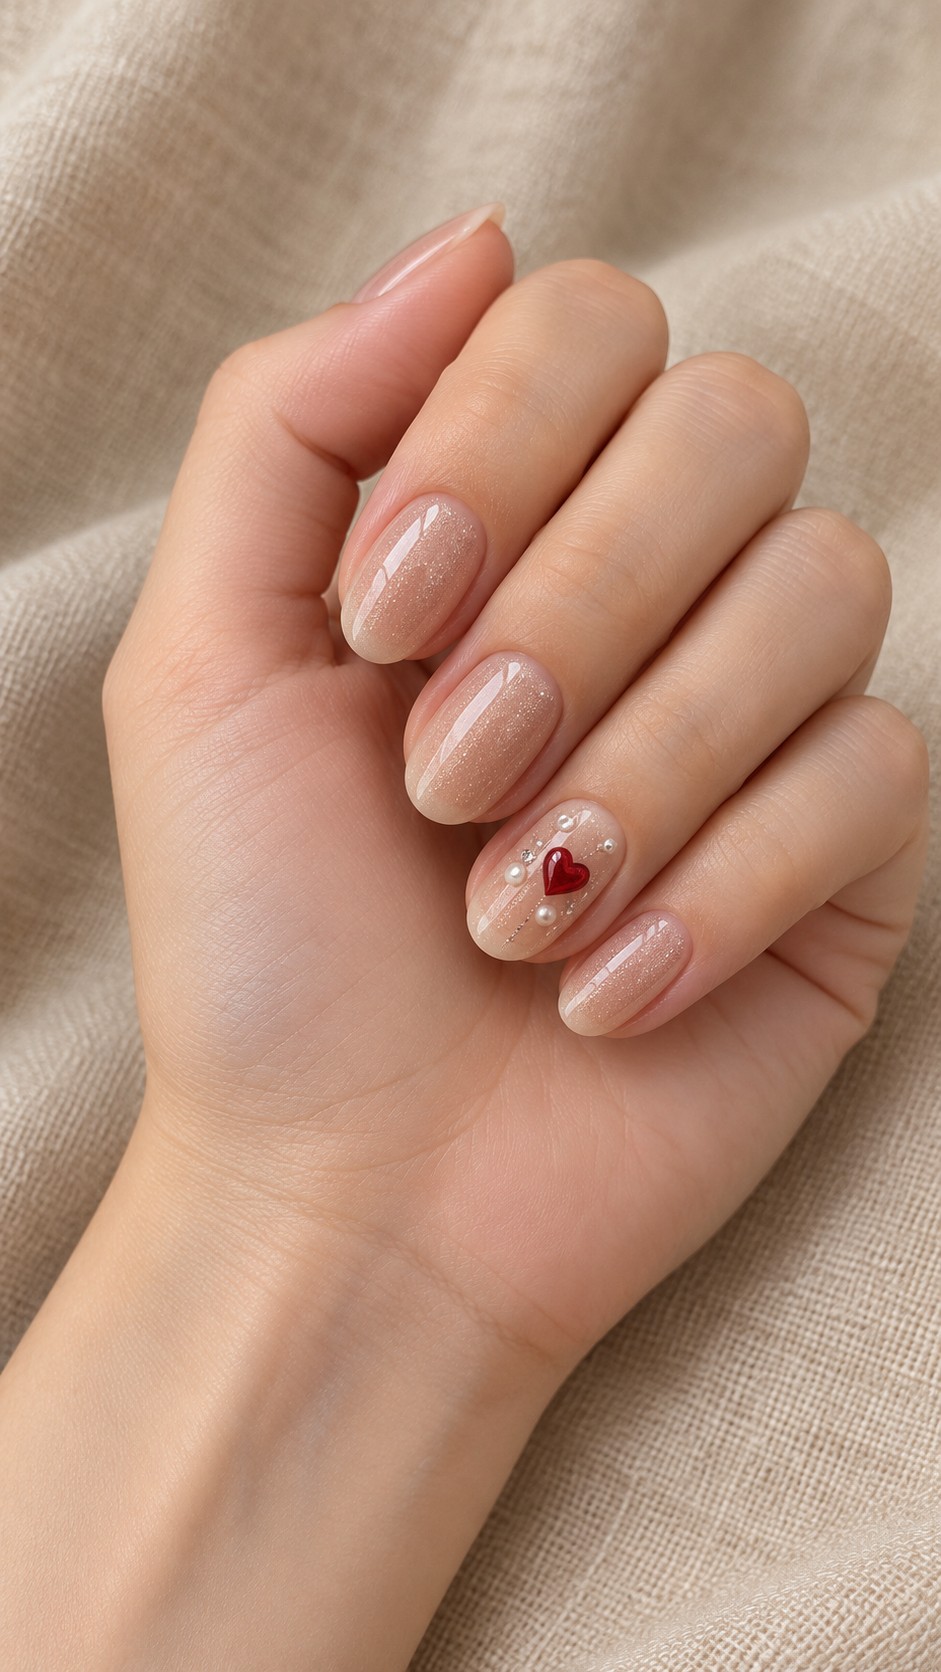
This is a jewelry-like direction for 3D Christmas nails. A tiny red heart gives the champagne base a festive note, and a few pearls or crystals add separate points of light. The open space matters as much as the embellishments. Keep the arrangement sparse so the heart remains distinct from the surrounding gems.
Placement note: Balance the heart with only a few small gems.
12. Silver Pine and Bow

A painted pine sprig gives the accent its shape, while the red bow provides the raised detail. Silver shimmer makes the set feel wintry without needing extra snowflakes. The contrast works best when the green branch remains fine and the bow stays compact. Let the neighboring nails show the silver finish on its own.
Placement note: Let the painted greenery support a single raised bow.
13. Iced Gingerbread Person

The gingerbread person brings a soft cookie shape to a cream manicure. White icing around the edges defines the figure and makes the small details visible. A shallow shape is enough to create the dimensional effect. Keep the face and buttons simple, then let the plain companion nails keep the full hand from feeling crowded.
Placement note: Choose a shallow cookie shape rather than a bulky charm.
14. Christmas Mitten Charm

A little red mitten adds a cozy shape to a silver set. The white cuff supplies the strongest textural detail, while the small knit markings can remain fine and mostly flat. A compact mitten leaves silver visible around it. That border is useful because it separates the red shape from the rest of the manicure.
Placement note: Keep the mitten flat enough that the cuff is the main texture.
15. Christmas Tree with Gold Baubles
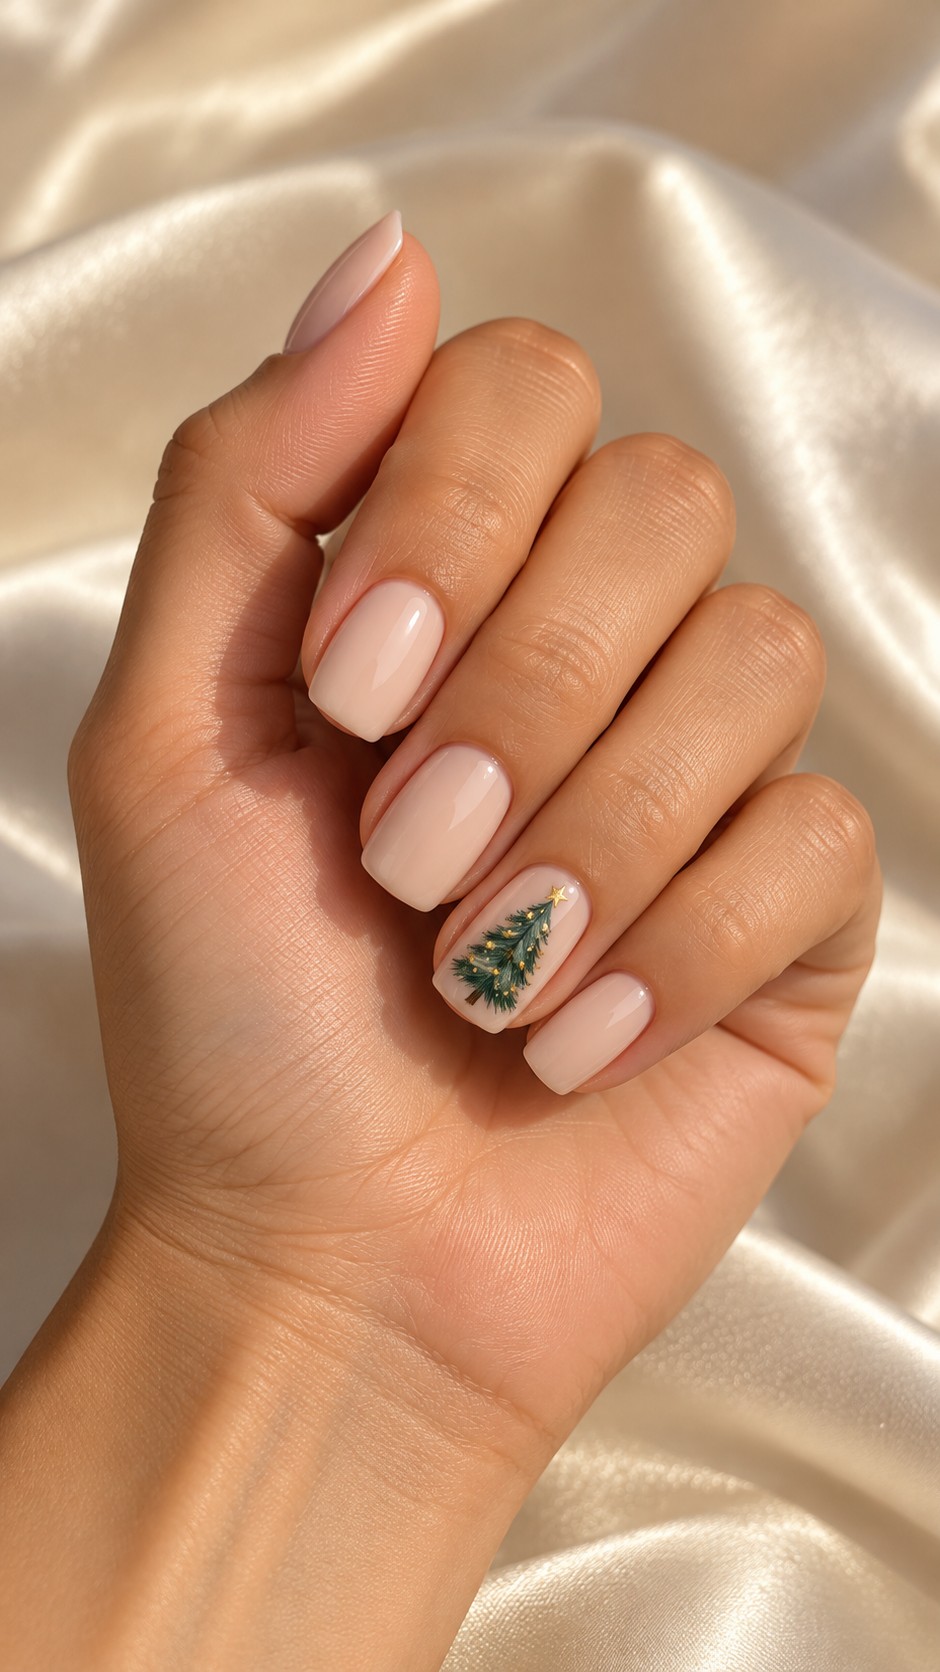
Gold baubles give the green tree small points of shine. The tree itself does not need to be thick; a low relief and a clear taper create the effect. Keep the star small enough to sit comfortably above the branches. On shorter nails, reduce the number of decorations before reducing the space around the tree.
Placement note: Use small baubles to preserve the tree shape.
16. Tiny Christmas Stocking
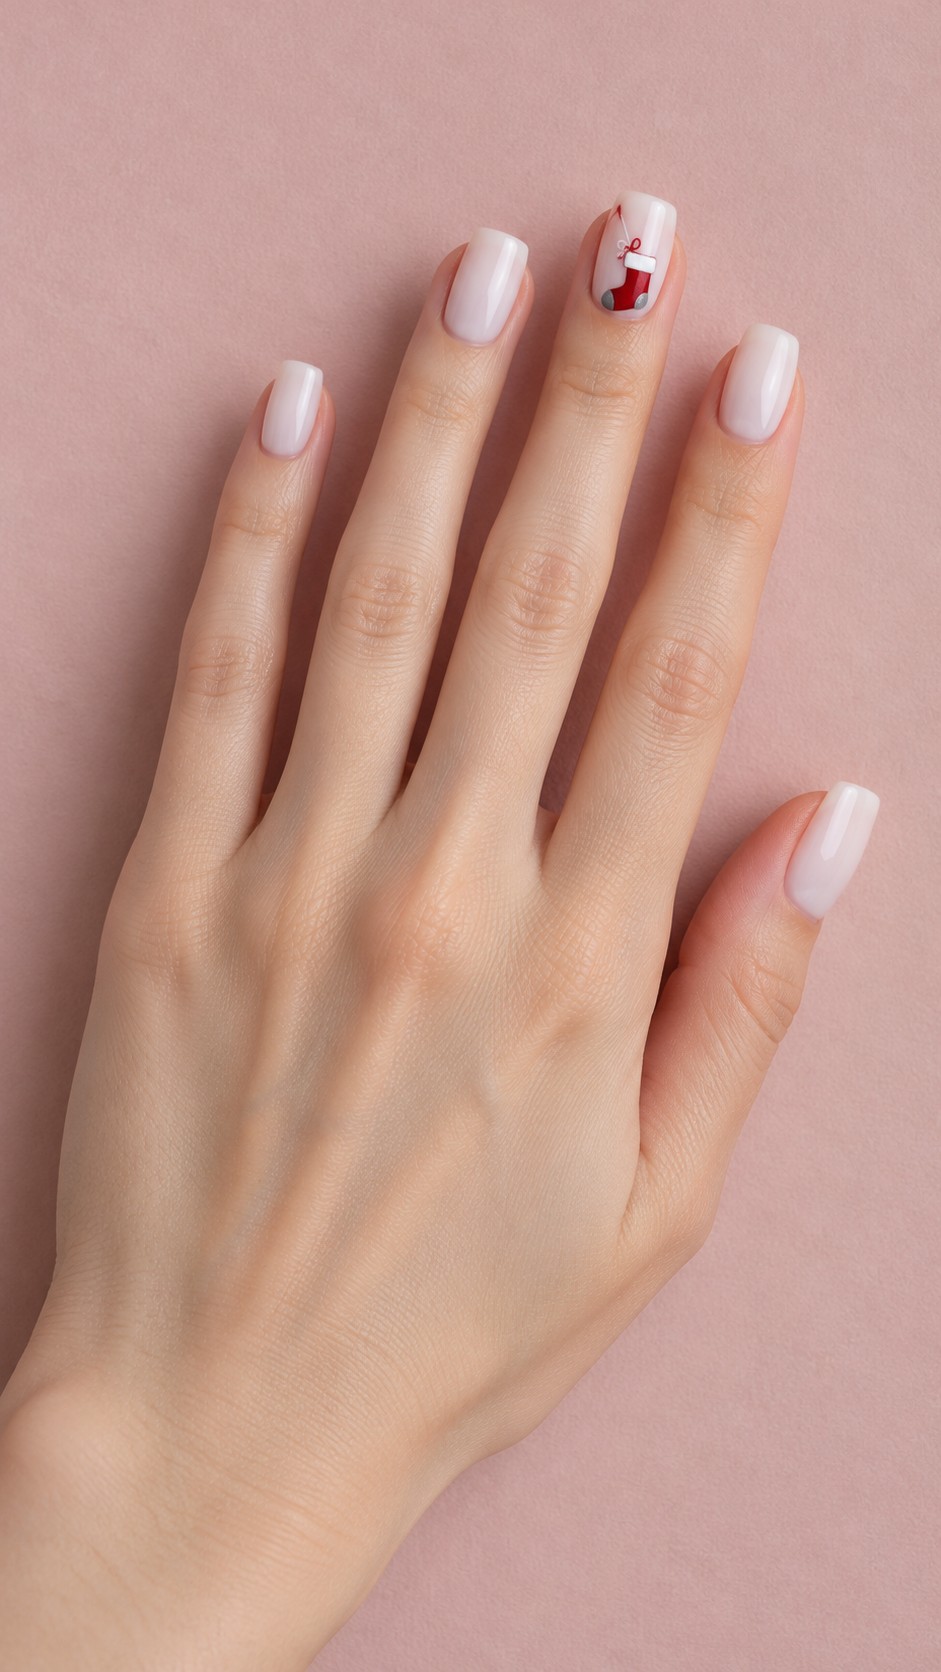
A stocking is easy to recognize through its outline and cuff. The red body creates a clear contrast against white, with the toe adding a small change of color. Let the cuff be the most textured part. The design stays cleaner when the stocking has one simple pattern rather than several tiny decorative bands.
Placement note: A simple stocking outline keeps the motif readable.
17. Red Candy Cane Pair

Two candy canes create a lively accent against a pale nail. Their stripes should follow the curves clearly, with enough space between the canes that the shapes stay separate. Red companions keep the set coordinated. If your nails are short, one cane can preserve the same mood with a less crowded composition.
Placement note: Keep a clear gap between the canes.
18. Nordic Knit Bands
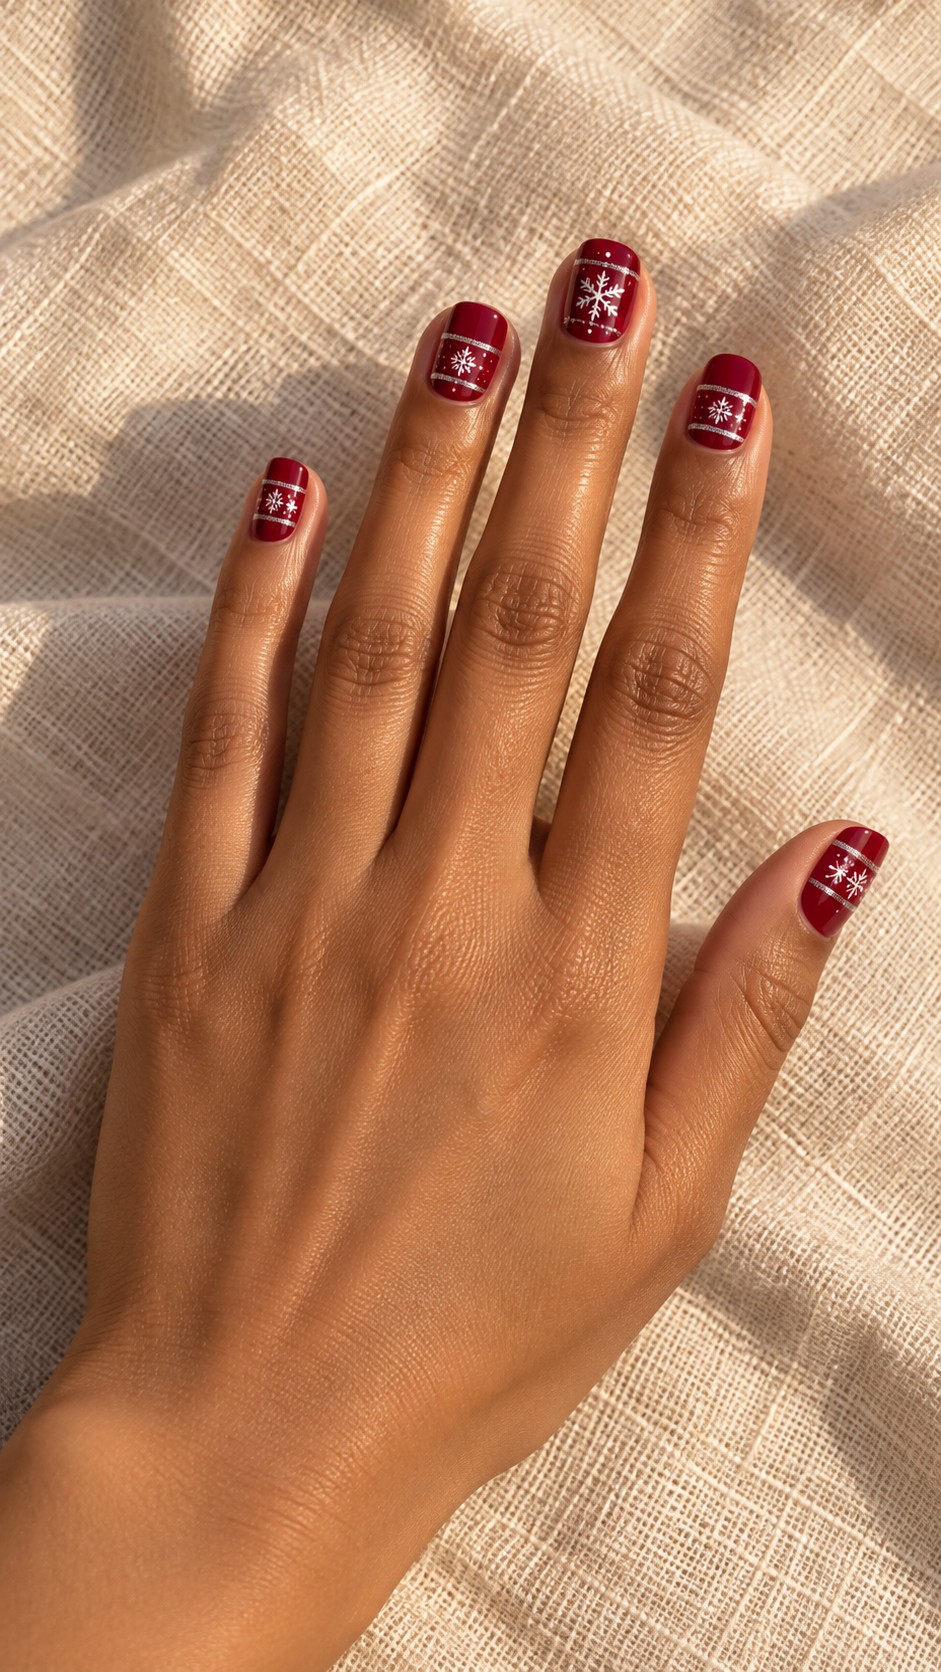
Nordic bands bring a sweater-like rhythm to glossy red nails. The repeated white motifs look most effective when they sit in clear horizontal sections, with a little red between them. Slim silver lines can separate those sections without dominating. Keep the raised portions shallow so the fine pattern remains the focus.
Placement note: Place the pattern in bands rather than covering every millimeter.
19. Green Sweater Mitten

The green mitten is a small, cozy alternative to the more common red version. White stitch marks connect it to the pale base and help the shape feel textile-inspired. A simple cuff and a few lines are enough. Leave a visible border around the mitten so the tiny thumb and main body stay easy to distinguish.
Placement note: Use a small mitten so the white border remains visible.
20. Silver Peppermint Accent
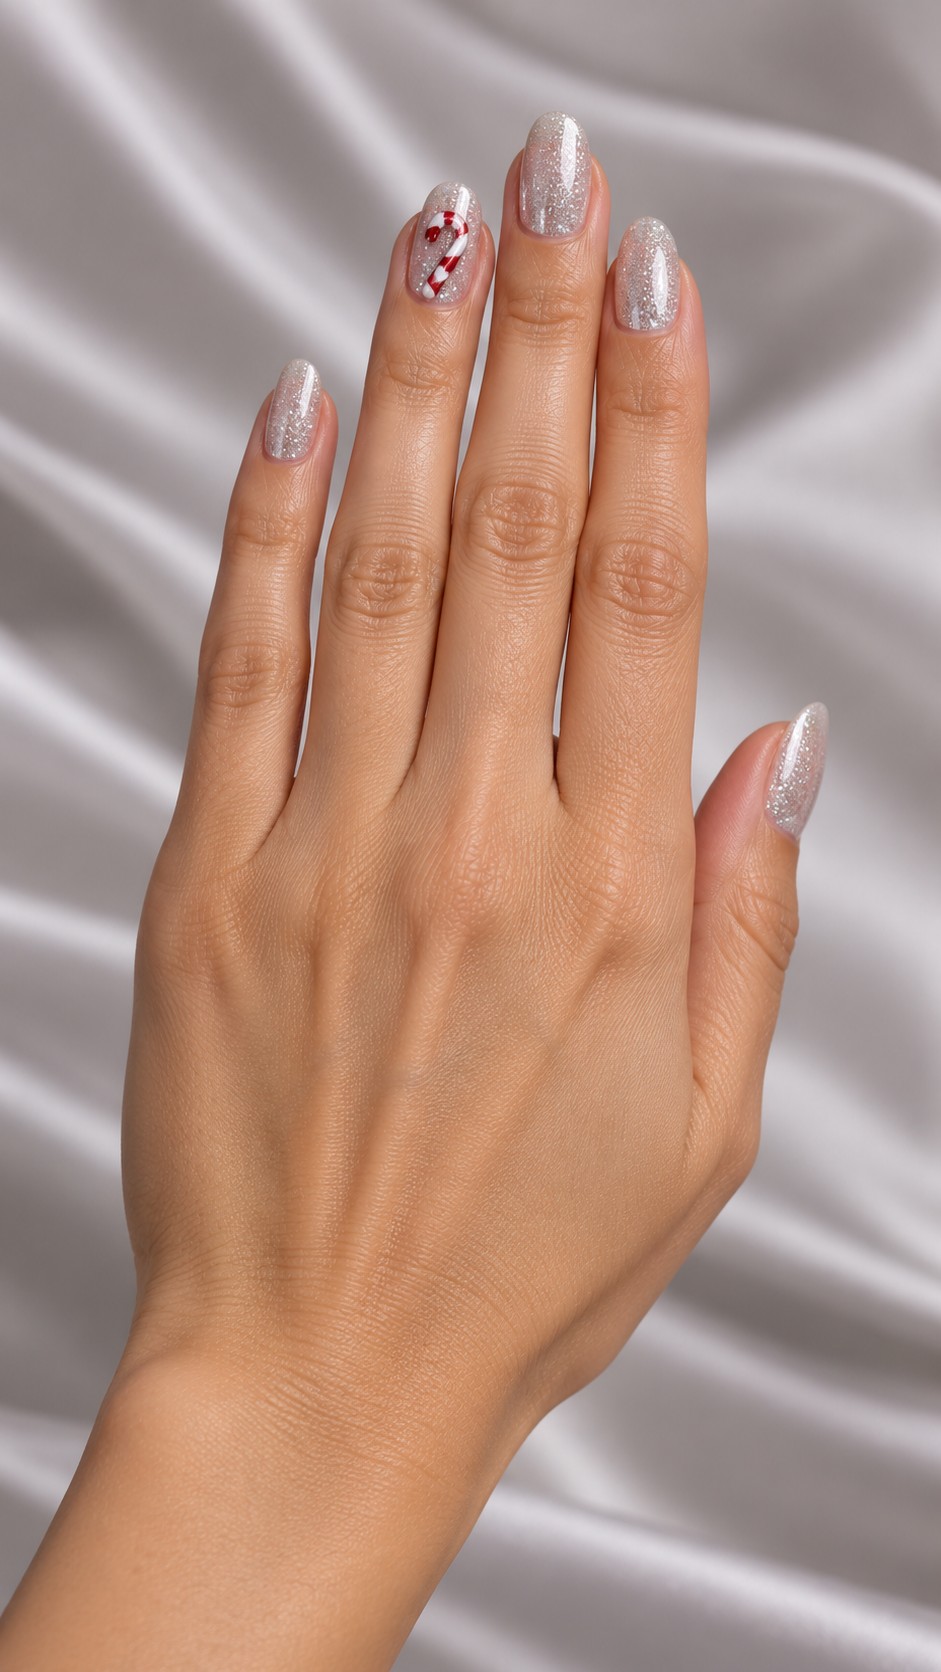
A candy cane stands out cleanly against a fine silver finish. The red-and-white striping supplies the holiday color, while the silver provides the shine. Because the background already catches light, the cane needs a simple outline. Avoid surrounding it with extra gems; the striped accent has enough contrast on its own.
Placement note: Let the silver stay fine-grained behind the cane.
For another related direction, explore our sweater nail designs.
21. Red Sugar Snowflakes

A frosted snowflake brings a different kind of texture to red nails. The pale motif can look almost sugared when the surrounding color stays smooth and glossy. Keep the texture concentrated within the snowflake. That contrast makes the design feel intentional and prevents the entire manicure from losing its polished appearance.
Placement note: Keep the texture within the motif rather than roughening the whole set.
22. Pearl Snowfall French
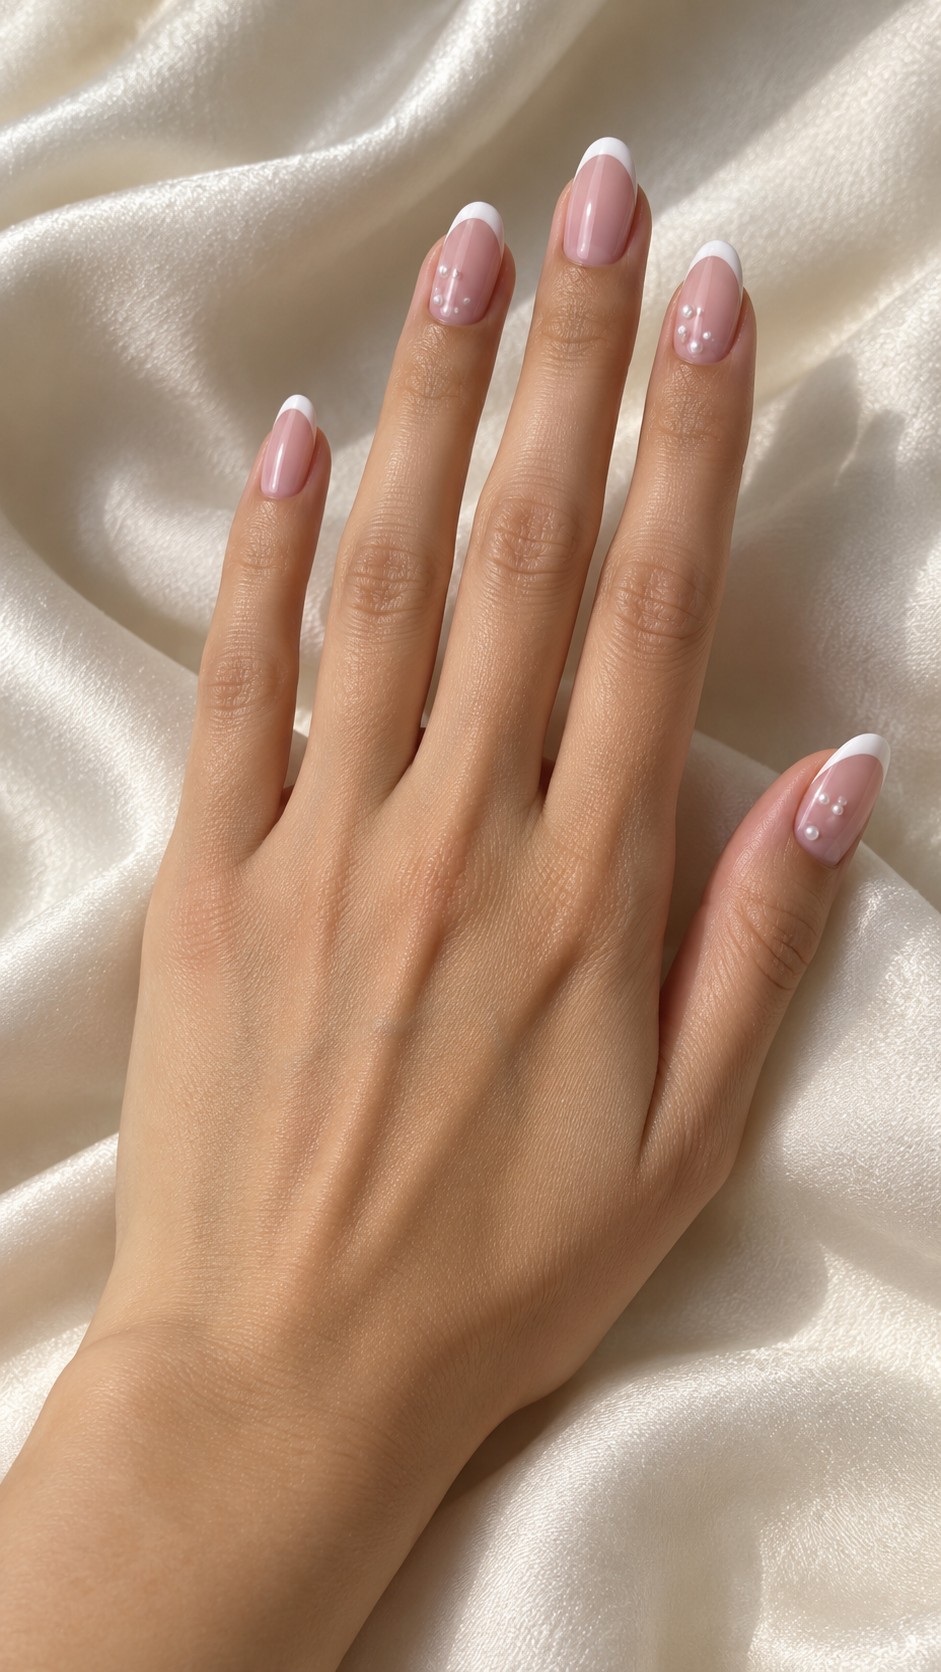
Small white pearls turn a French manicure into a snowfall-inspired set. The familiar nude-and-white structure stays visible, with the raised dots acting as light accents. Space them irregularly rather than making a rigid grid. A few dots on one or two nails can create the effect while leaving the rest of the French clean.
Placement note: Space the pearls away from the free edge.
23. Gingerbread Heart Cookie

A heart-shaped cookie gives gingerbread colors a softer silhouette. The white piped border defines the shape, and one small red dot supplies a festive accent. Keep the heart shallow so the icing remains the main texture. Plain caramel companions make the full set feel connected without repeating the cookie on every finger.
Placement note: A thin border creates the icing effect without a thick rim.
24. Christmas Pudding Accent

The pudding combines a simple brown shape with a white icing cap. Tiny holly details make the dessert reference seasonal. This is a good example of mixing painted and raised elements: the icing can provide the relief, while the leaves stay fine. Keep the accent compact and allow the cream background to frame it.
Placement note: Use the icing as the main relief and paint the smaller leaves.
25. Gold Bell and Red Bow

A small gold bell and red bow give burgundy nails a dressed-up holiday accent. The nude focal nail keeps the charm arrangement easy to see. Choose one compact cluster rather than adding separate decorations across the entire surface. The surrounding burgundy provides enough richness without needing another metallic pattern.
Placement note: Choose one compact charm arrangement.
26. Candy Cane Bow

A striped bow combines the candy-cane palette with a soft ribbon shape. The loops should stay small and the tails short enough to sit neatly on the nail. Cherry-red companions repeat the stripe color and keep the manicure cohesive. A painted version can retain the same placement if you prefer a smoother finish.
Placement note: Keep the loops small and shallow.
27. White Pom-Pom Santa Hat
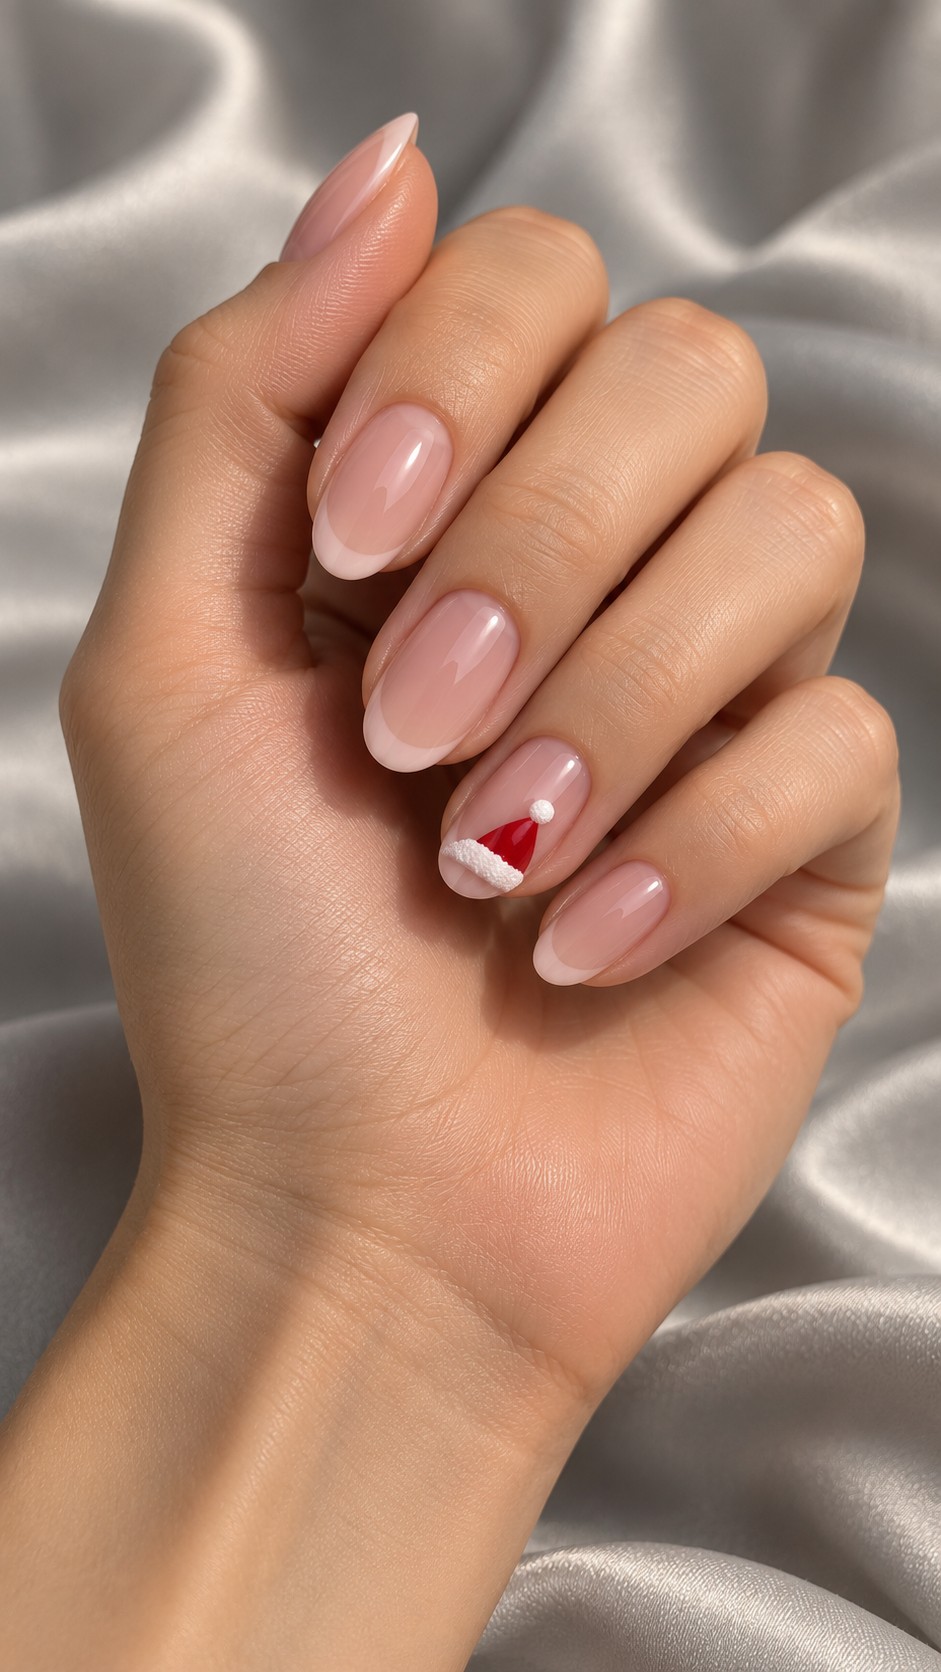
A Santa-hat tip is a playful variation on a French accent. The red triangle and white trim establish the idea, while a tiny pom-pom supplies the raised detail. Keeping the rest of the nail blush makes the shape easy to read. Limit the pom-pom’s size so it remains proportional to the tip.
Placement note: Make the pom-pom the only raised element on the tip.
Choose the right amount of dimension
Start with the silhouette of the design. A tree, cookie or stocking should remain recognizable before the extra decoration is added. Small baubles, icing dots and cuff texture can support that shape, but they should not crowd its outline.
Think about your daily routine when choosing relief. If you prefer a smooth surface, ask for a painted version of the same motif or keep the raised work to one accent. If you like charms, ask your artist to show the approximate size on your chosen nail shape before settling on the arrangement.
Keep finish and texture separate in your brief. A glossy red base can sit beside a matte knit accent, while a silver shimmer nail can support a small painted branch and raised bow. Repeating the same limited palette is often enough to make those different surfaces feel connected.
3D Christmas nails: questions and practical choices
Do 3D Christmas nails have to use large charms?
No. A narrow raised icing line, small berry or tiny pearl can create dimension. A shallow design may suit you better if you want a subtle textured accent rather than a prominent charm.
Can I adapt these designs to short nails?
Choose a compact motif such as a tiny bow, mitten, berry cluster or single candy cane. Keep the surrounding nails simple. A longer scene or several separate charms may need to be simplified so the main shape stays clear.
Can these designs be painted flat?
Many can. Candy stripes, holly, sweater patterns and bows can retain their colors and placement without relief. Tell your artist which element you want to preserve, then ask for a smooth interpretation.
Should I combine glitter and raised art?
You can, but a fine background finish usually leaves the raised shape clearer. Keep the accent simple when the base is already reflective. Plain companion nails can balance both the sparkle and the texture.
What should I confirm before booking?
Send the reference and discuss the size of the raised detail, the technique, your preferred length and the number of accents. Ask for the appointment time and price for that specific version rather than assuming every dimensional design takes the same work.
Save your favorite. Save your favorite texture and decide whether you want it painted, shallow or more sculpted. That choice is just as useful to your artist as the color palette.