The Best Fluffy Pancakes recipe you will fall in love with. Full of tips and tricks to help you make the best pancakes.



Christmas nails for beginners should feel like a fun little December project, not a test of how steady your hands are. If you love the idea of festive nails but do not fancy painting ten miniature reindeer, come sit with me: there are much easier ways to get that holiday feeling.
These 15 ideas focus on short nails, simple color choices and small details you can scale to your confidence. I have included what makes each design approachable, where a sticker can help, and the clothes I would pair it with. Start with the version you would actually enjoy wearing, even if that is just one tiny gold dot.
Simple Christmas short nails: choose your first technique
If this is your first attempt, start with solid colors, an alternating palette or one glitter accent. Dots come next; a single stripe or triangle asks for a little more control. The photos are design references, not a promise that a first attempt will look salon-perfect.
For a regular-polish version, gather your chosen colors, compatible base and top coats, and a small dotting tool or detail brush only if the design needs one. Follow the product directions and allow the base color to dry before adding art. You do not need a gel system for these ideas.
For a wider holiday palette before choosing your first design, browse our classic Christmas nail ideas.
These original AI-generated images are design references, not photographs of completed salon work or exact polish swatches. Colors and details will vary with the products and lighting.
1. Cherry Red, One Gold Dot
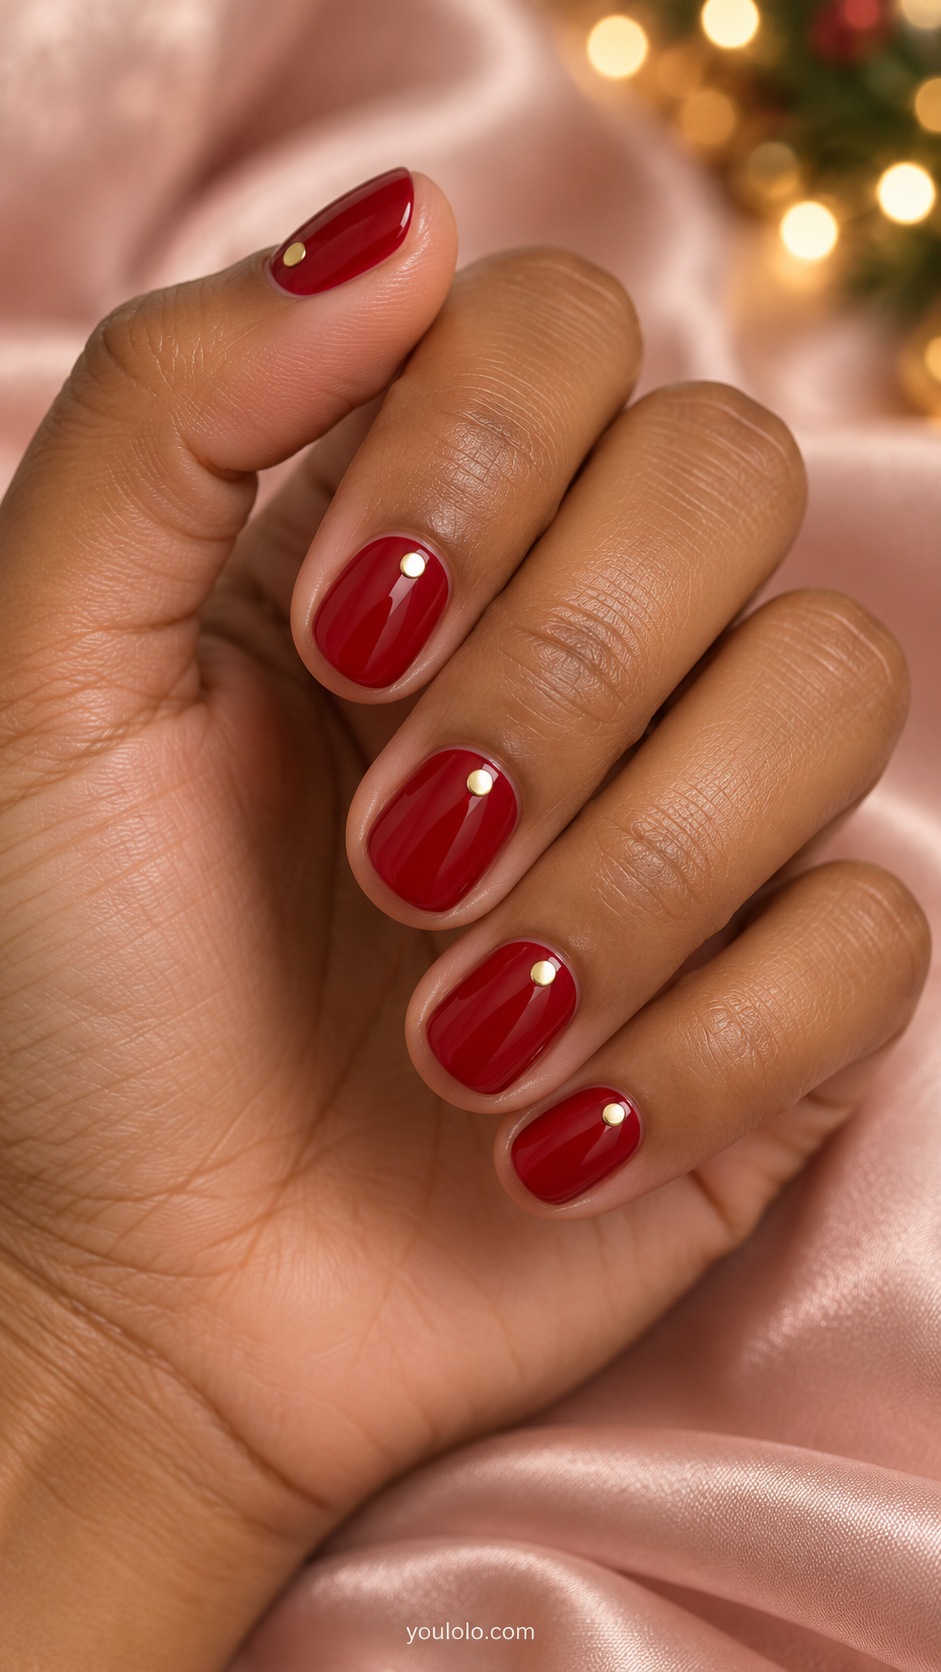
If your idea of nail art usually ends at choosing a color, start here. A cherry-red base already does most of the festive work; the tiny gold dot simply gives it a little jewelry moment. I would wear this with an oatmeal cardigan and small gold hoops for a December lunch.
For the dot, use a rounded dotting tool or the end of a bobby pin with a small amount of polish. Let the red dry first and practice on paper. One neat dot beats a crowded cluster, especially when your nails are short.
2. Snowfall on Sheer Pink
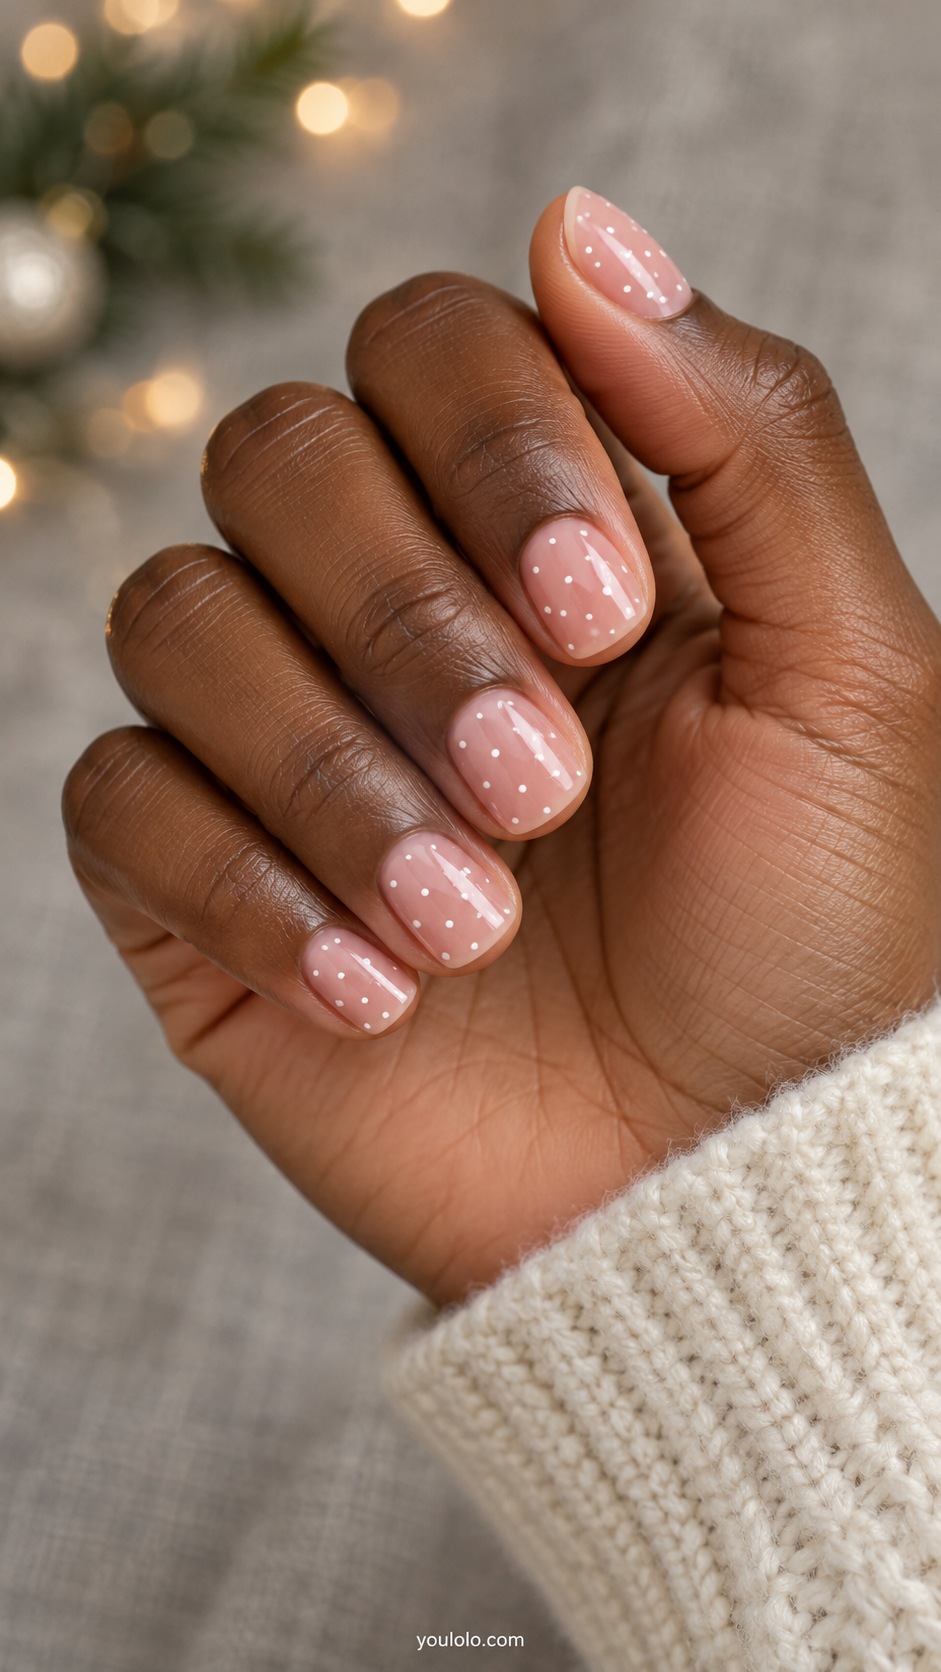
Snowfall is wonderfully forgiving because the dots do not need to match. Keep the pink base sheer enough to feel light, then scatter a few white dots with plenty of open space between them. This is the manicure I would pair with a fluffy white sweater and faded jeans when the day is more gift shopping than evening party.
Make the dots in two sizes by changing the pressure rather than buying extra tools. Avoid placing them in identical rows. Stop while the nail still looks airy; you can always add another dot, but removing one usually means starting that nail again.
3. A Single Evergreen Accent
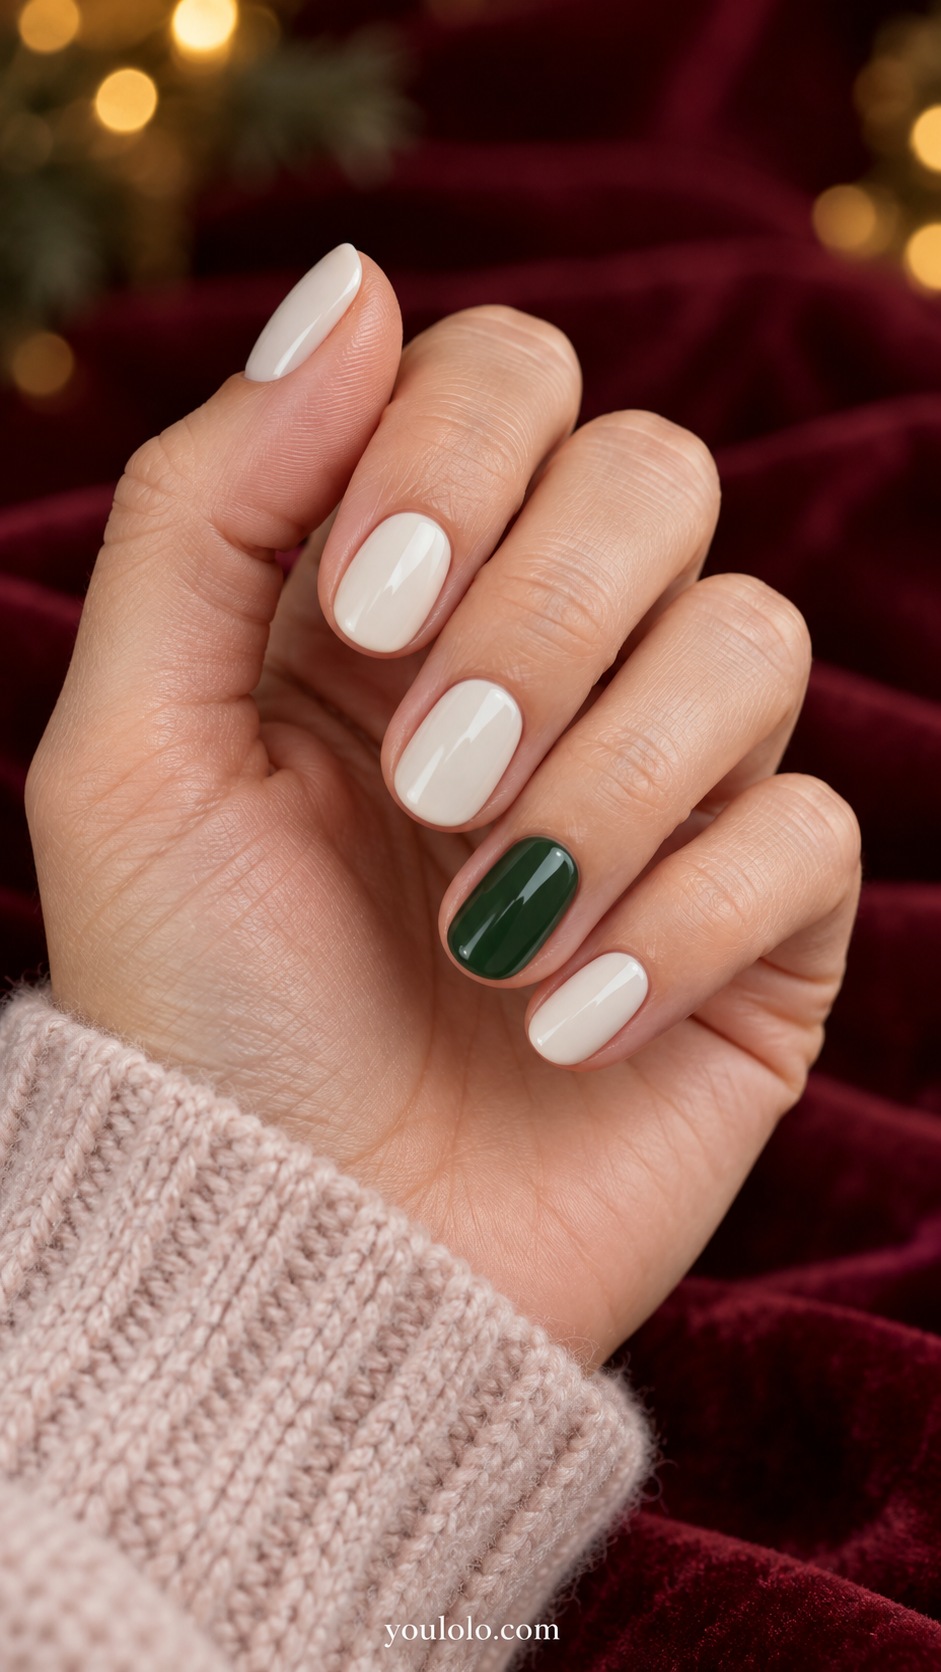
An accent nail is such a friendly first step: you get a considered palette without drawing anything. Cream keeps the set soft, while one evergreen nail makes the Christmas connection. A camel coat, a green scarf and this little color switch would make a lovely everyday combination.
Choose the accent finger before you begin so you do not accidentally paint every nail cream. If the green is very dark, check it beside the cream in daylight. I would choose a visibly green shade rather than one that disappears into black indoors.
4. Easy Candy Stripe Accent
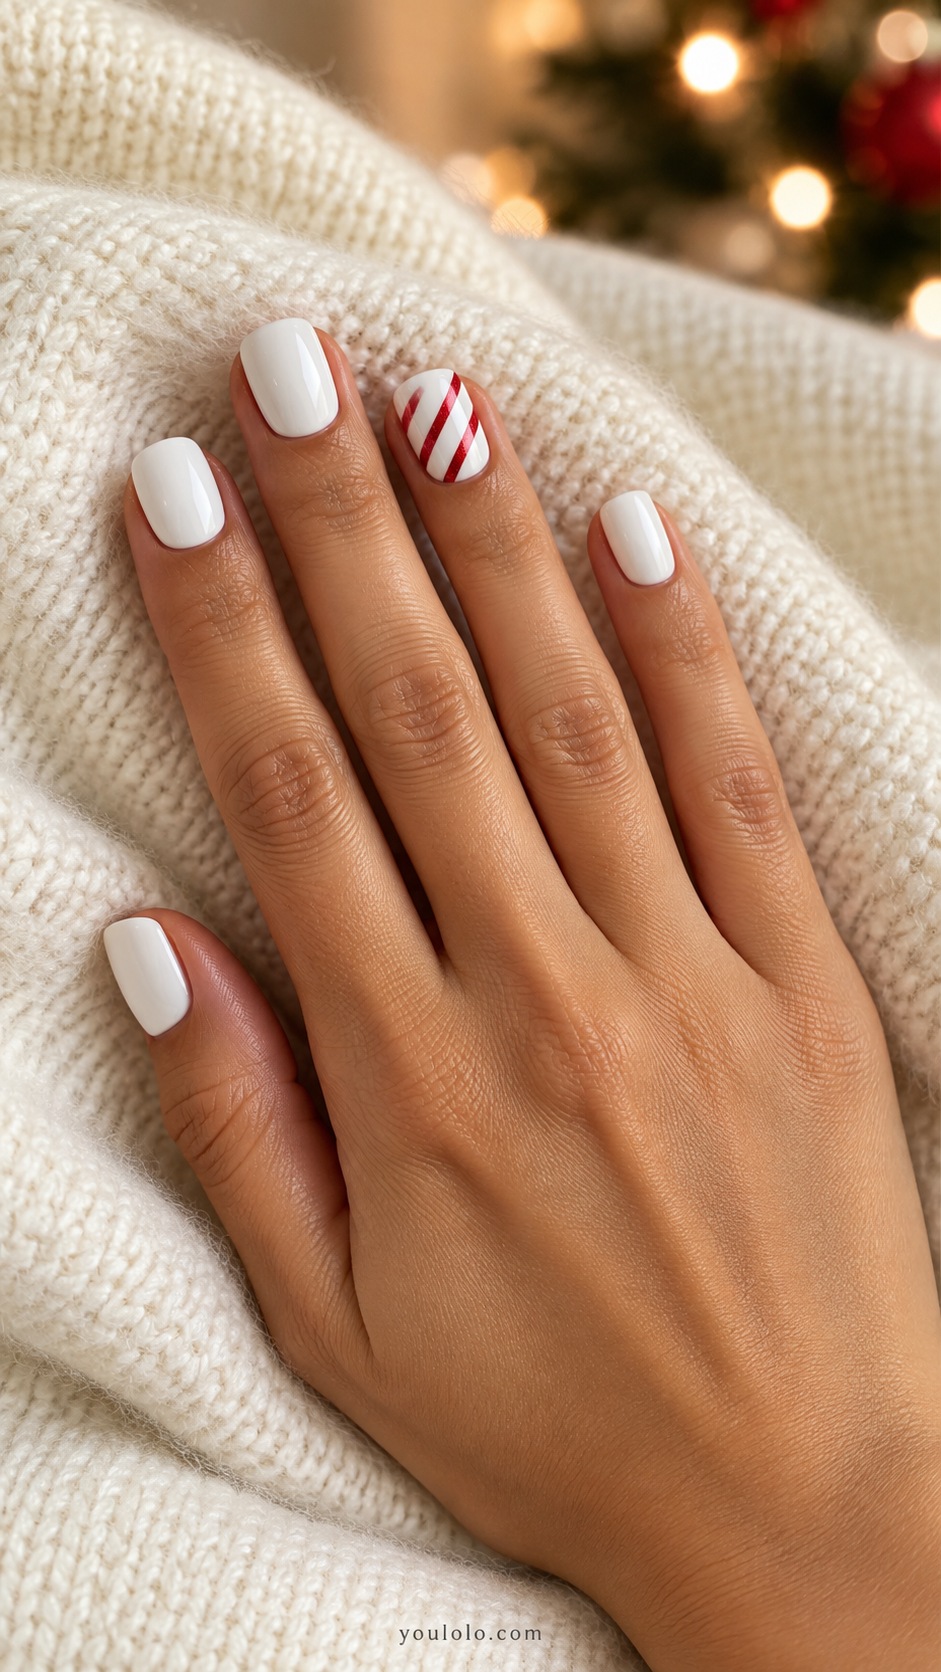
You do not need ten perfect candy-cane nails to get the idea across. One striped accent beside clean white nails looks deliberate and gives you only one little canvas to concentrate on. Add a red knit or a red hair ribbon and the whole look feels sweet without becoming a costume.
Wait until the white base is fully dry before adding three diagonal red lines with a striping brush. Leave generous white gaps. If your brush control is still developing, flat nail-art striping decals are a reasonable shortcut; follow their application instructions instead of fighting wet polish.
5. Gold Glitter at the Tips

A softly scattered glitter tip is much easier to manage than a crisp French line. Let the gold look a little irregular, as if it has landed on the end of the red nail. I like this with a black sweater dress, warm gold earrings and a bag that does not add another competing sparkle.
Wipe most of the glitter polish from the brush, then tap a little near the free edge. Add more only where you want the brightest area. The transition should stay soft, so there is no need to create a ruler-straight border across every nail.
6. Little Triangle Trees
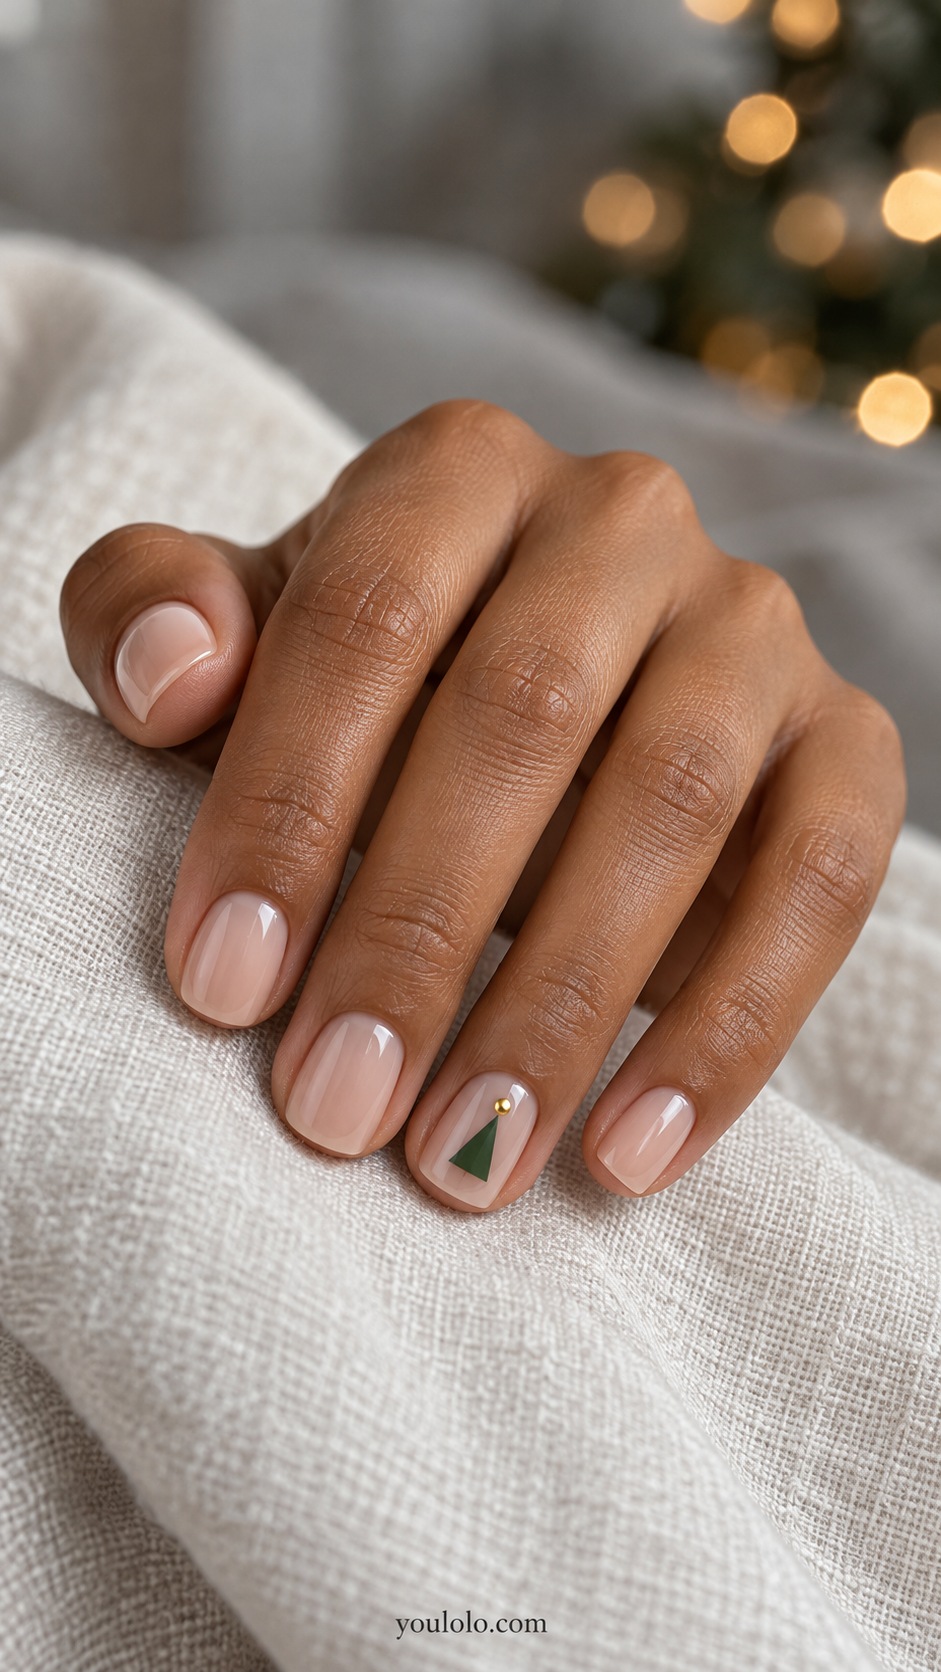
A triangle can say Christmas tree without a single complicated branch. The sheer beige base keeps this version grown-up, and the little gold dot above it supplies the finishing touch. I would choose it for a cozy dinner with a green cardigan and simple gold rings.
Paint just one tree on the ring finger. Make a small triangle with a fine brush, or use a flat triangle decal if that feels more comfortable. Keep the base narrow enough to leave clear space around the shape; an oversized tree can swallow a short nail.
7. Red and Pink Alternation
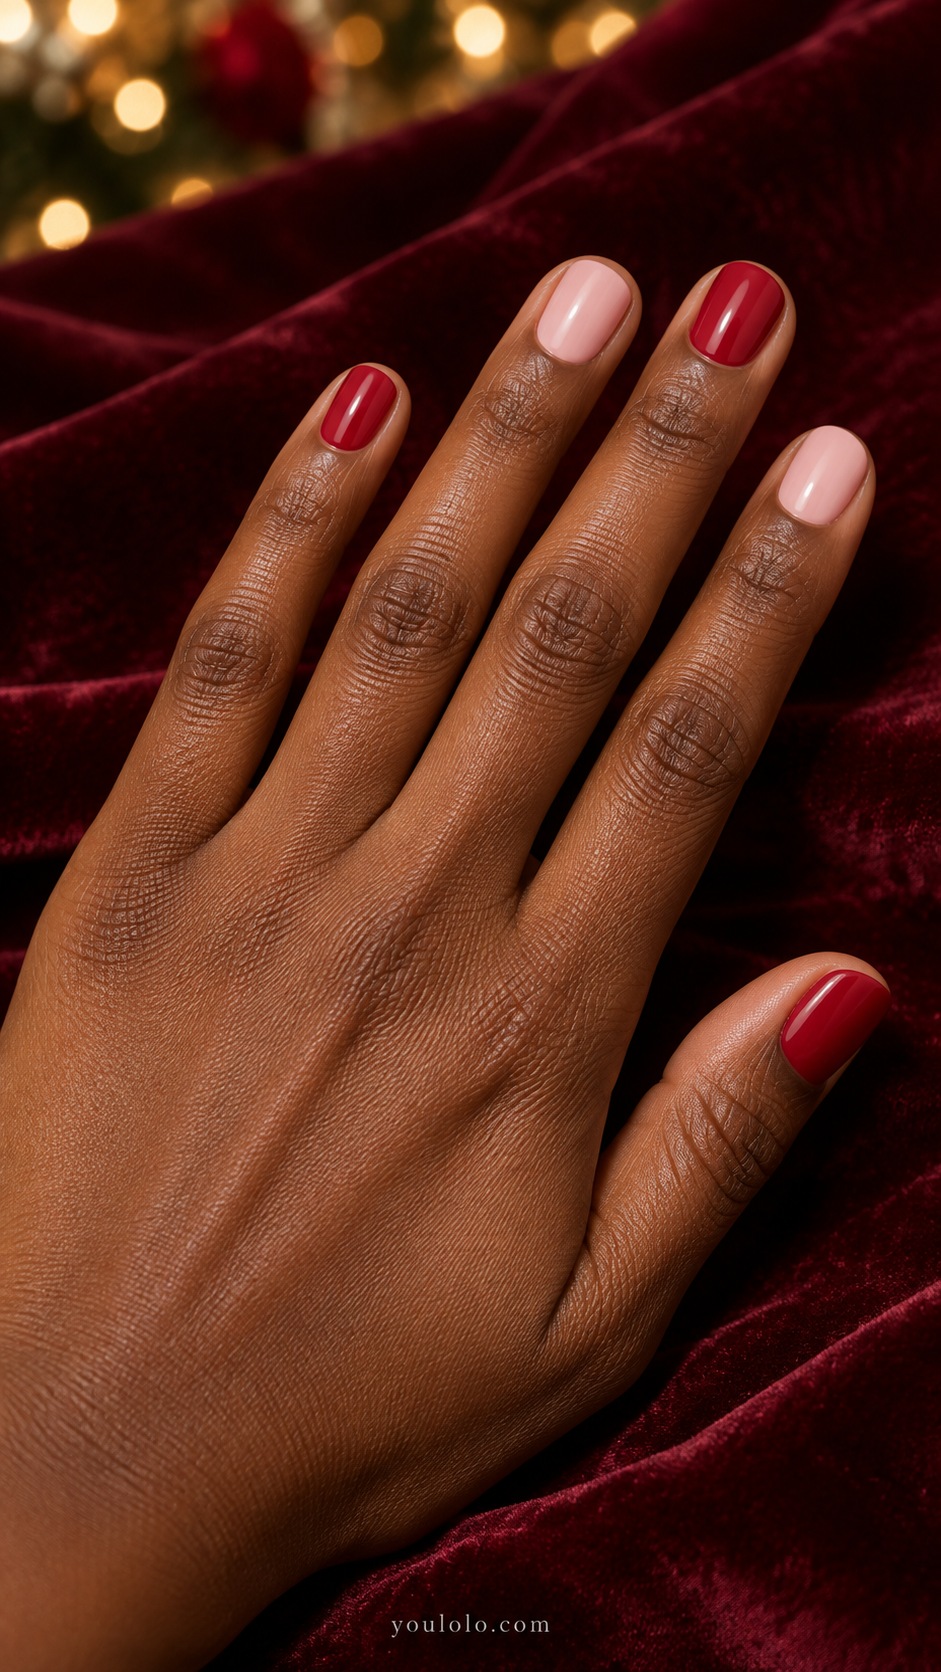
Red and pink together feel cheerful in a way that traditional red and green sometimes do not. This is a color-only manicure, so the interest comes from the rhythm across your hand. Wear it with a pale pink jumper, dark denim and a red lip if you want that lovely coordinated little detail.
Lay the two bottles out in the order you plan to use them. You can mirror the pattern on your other hand or reverse it; either choice works when it is intentional. Choose similarly opaque finishes so one color does not look unexpectedly watery beside the other.
8. Off-Center Holiday Dots
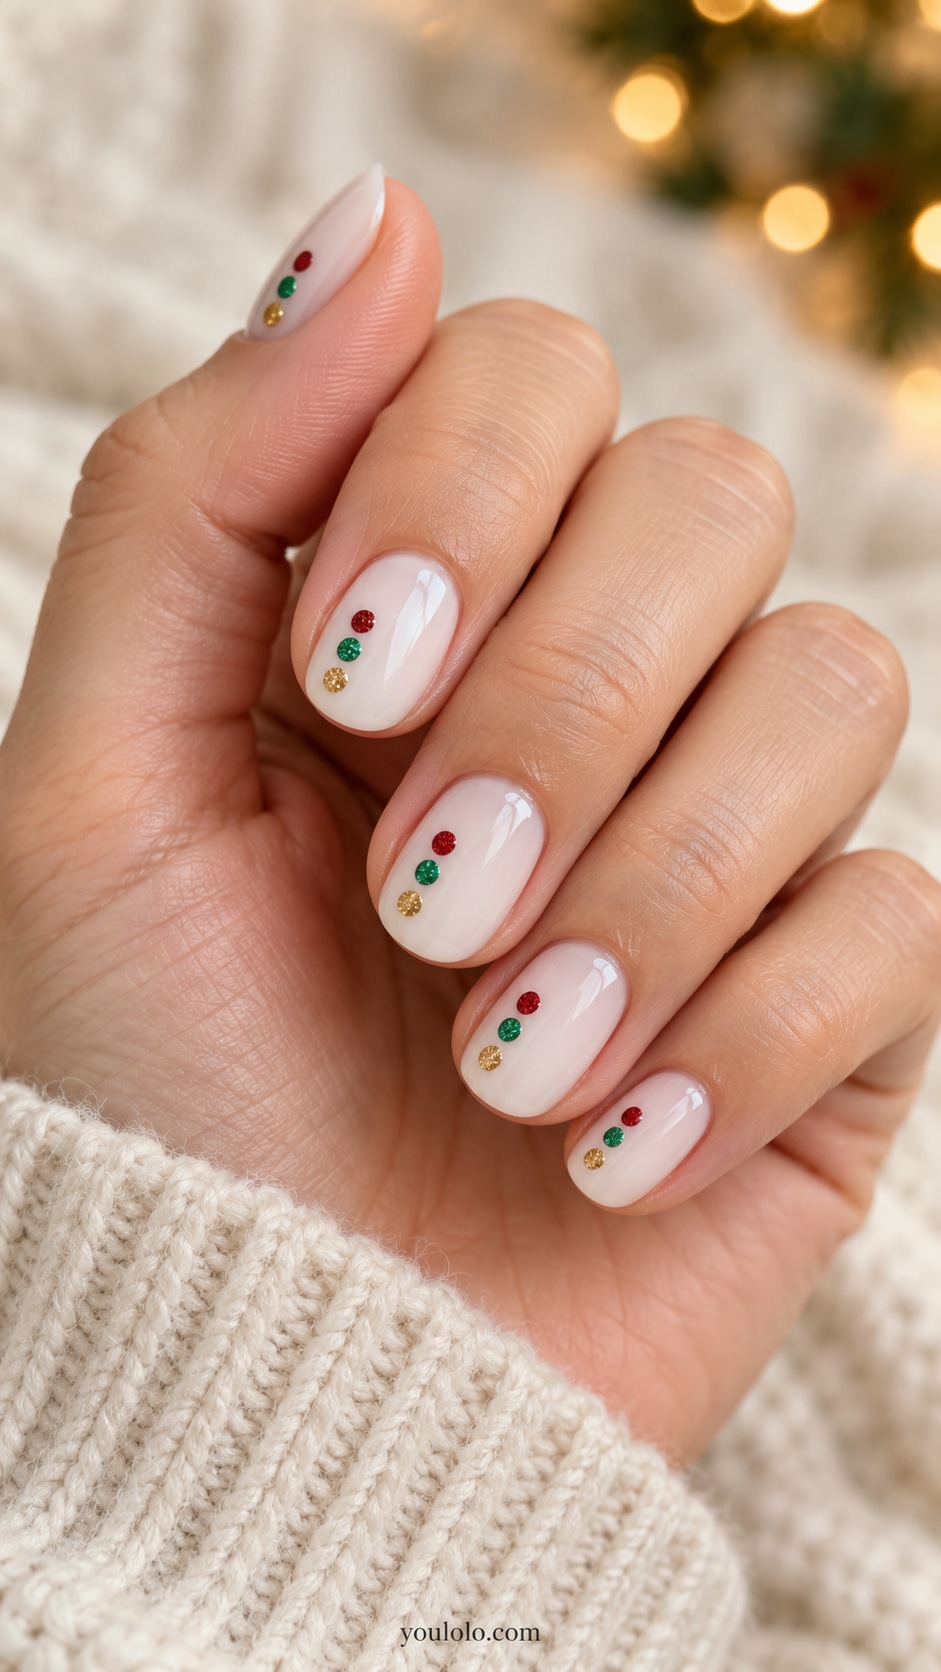
These little dots look almost like a loose strand of holiday lights, but there is no fine cable to draw. Red, green and gold make the theme clear while the white base leaves breathing room. I would keep the outfit simple here: an ivory shirt, a soft cardigan and one warm metal accessory.
Place three dots along one side of each nail rather than down the middle. Leave a small gap between them so they remain separate colors. On the tiniest nail, two dots can look better than forcing in a third; the design does not need mathematical symmetry.
9. Silver Star Stickers
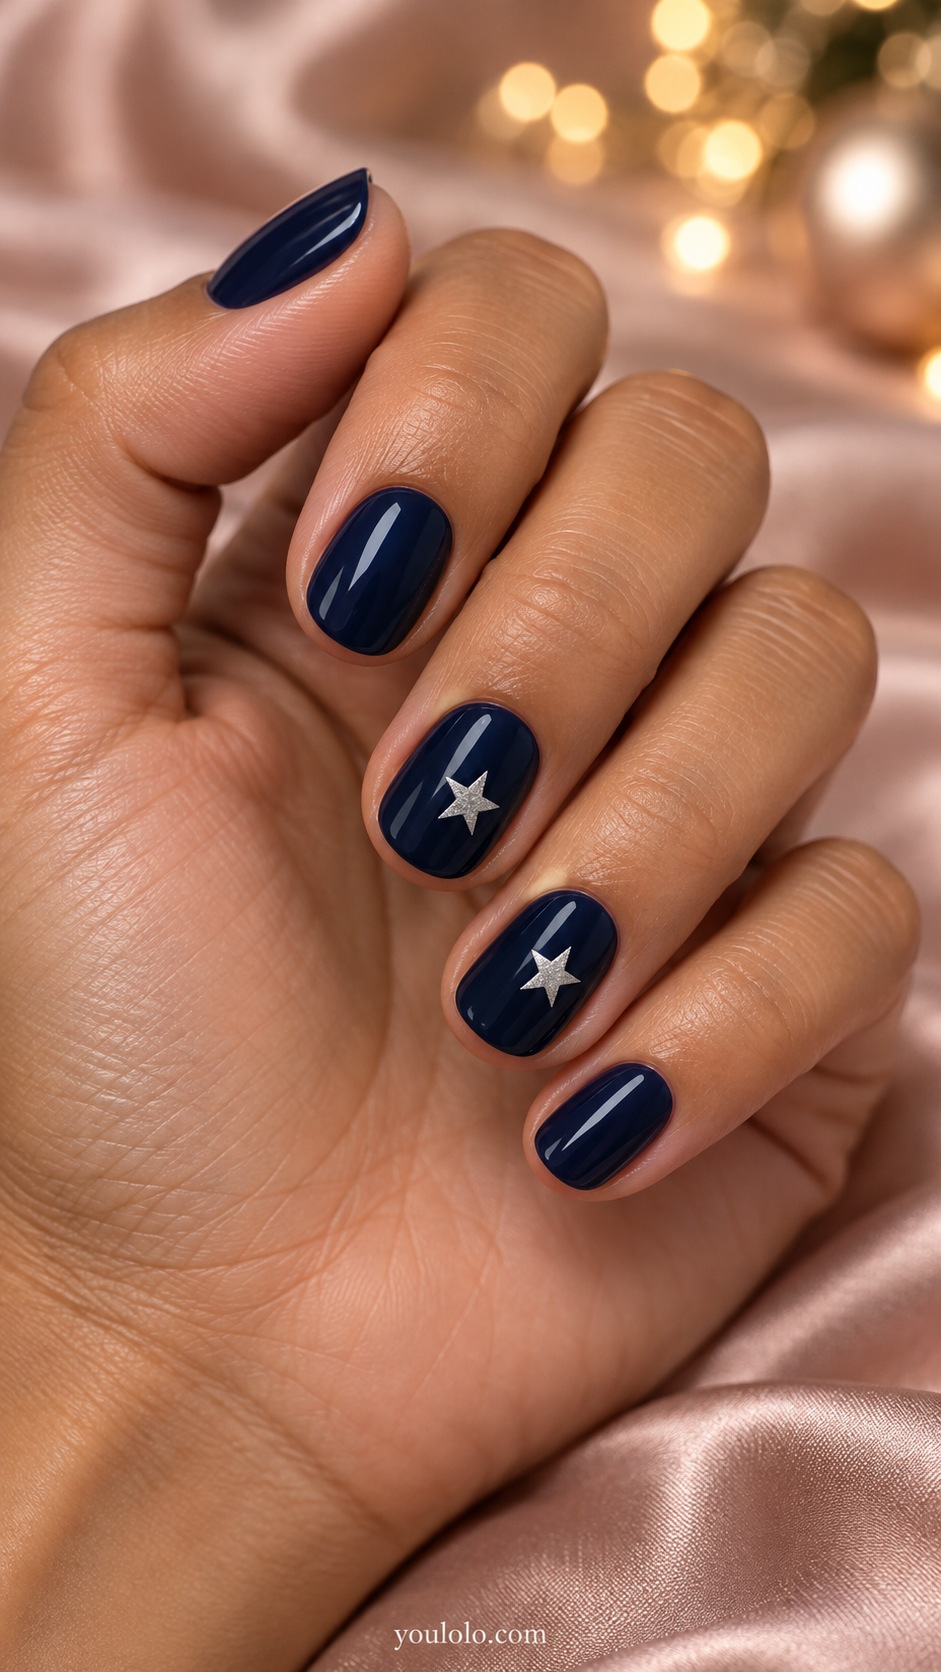
A flat star sticker is your friend when drawing points feels impossible. Midnight blue makes silver look crisp, and just two decorated nails give the manicure enough movement. This would be lovely with a navy dress or a gray knit and silver earrings for a low-key holiday gathering.
Choose stars small enough to sit fully inside the nail surface. Apply them according to the sticker instructions, then use a compatible top coat if recommended. If an edge catches, do not keep piling on decoration; a smaller flat sticker usually gives a cleaner result on short nails.
10. Abstract Green Corner
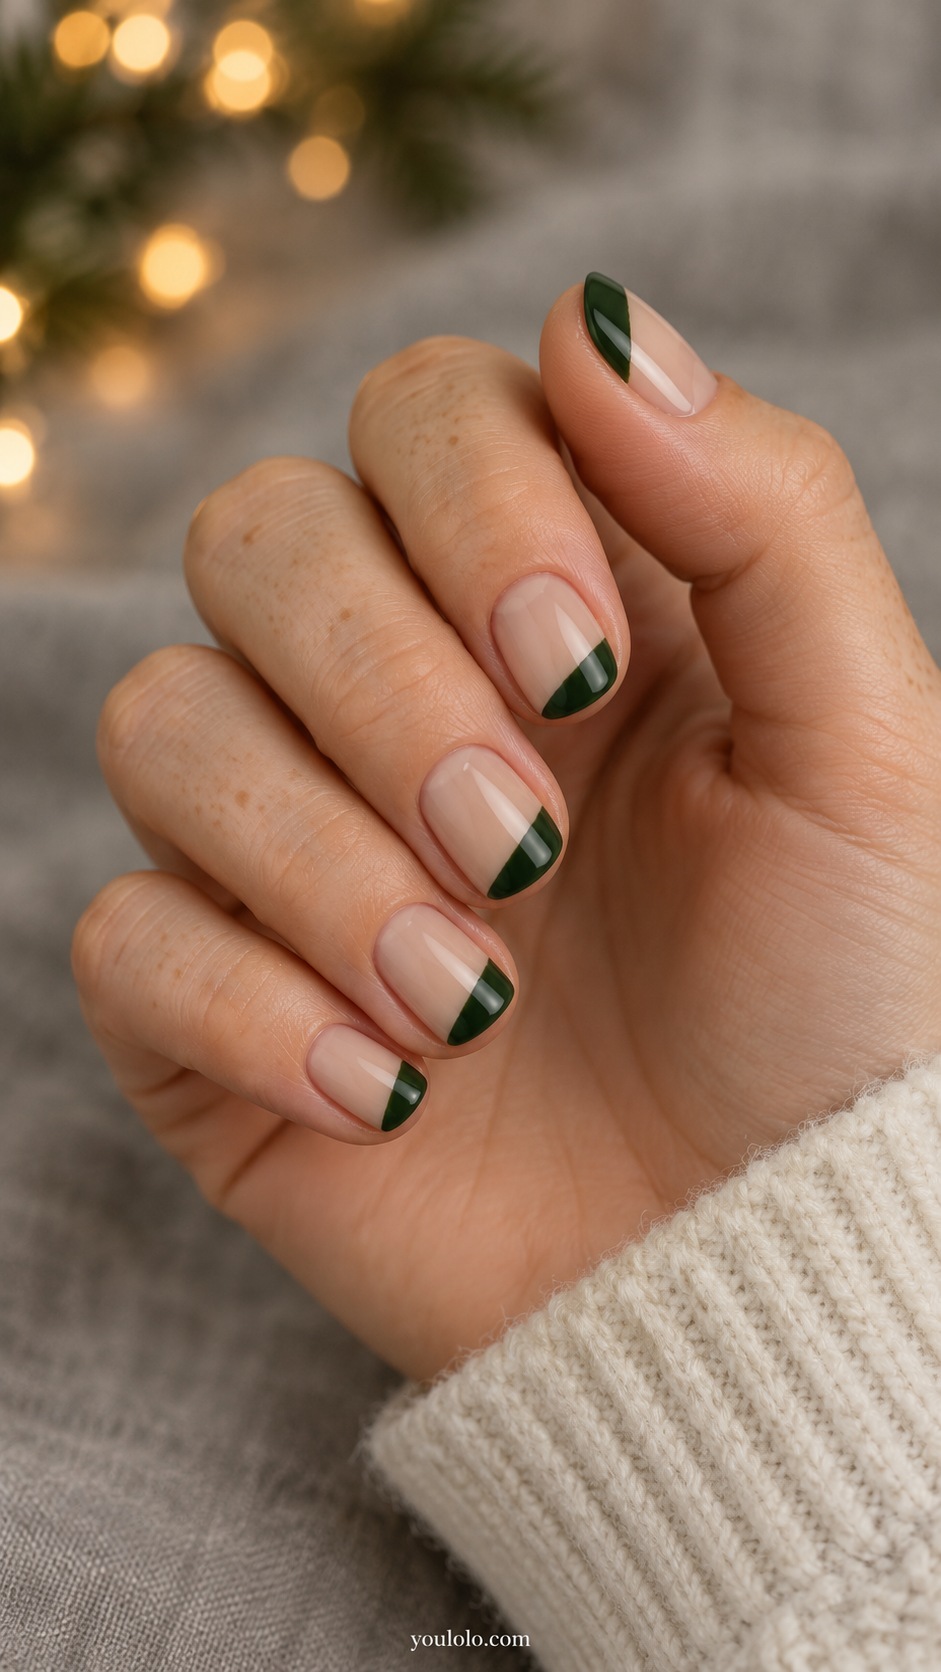
This is where abstract Christmas nails become genuinely approachable: one broad green corner, no tiny trees and no perfect outlines. The nude space makes the green feel lighter, especially on short square nails. I would pair it with cream tailoring and a dark green bag for a more modern December look.
Sweep the color diagonally across a corner with a small brush. The boundary can have a gentle irregularity; that is part of this design. Keep a similar amount of green on each finger, but do not spend the evening trying to make every curve identical.
11. Fine Red Ribbon Lines
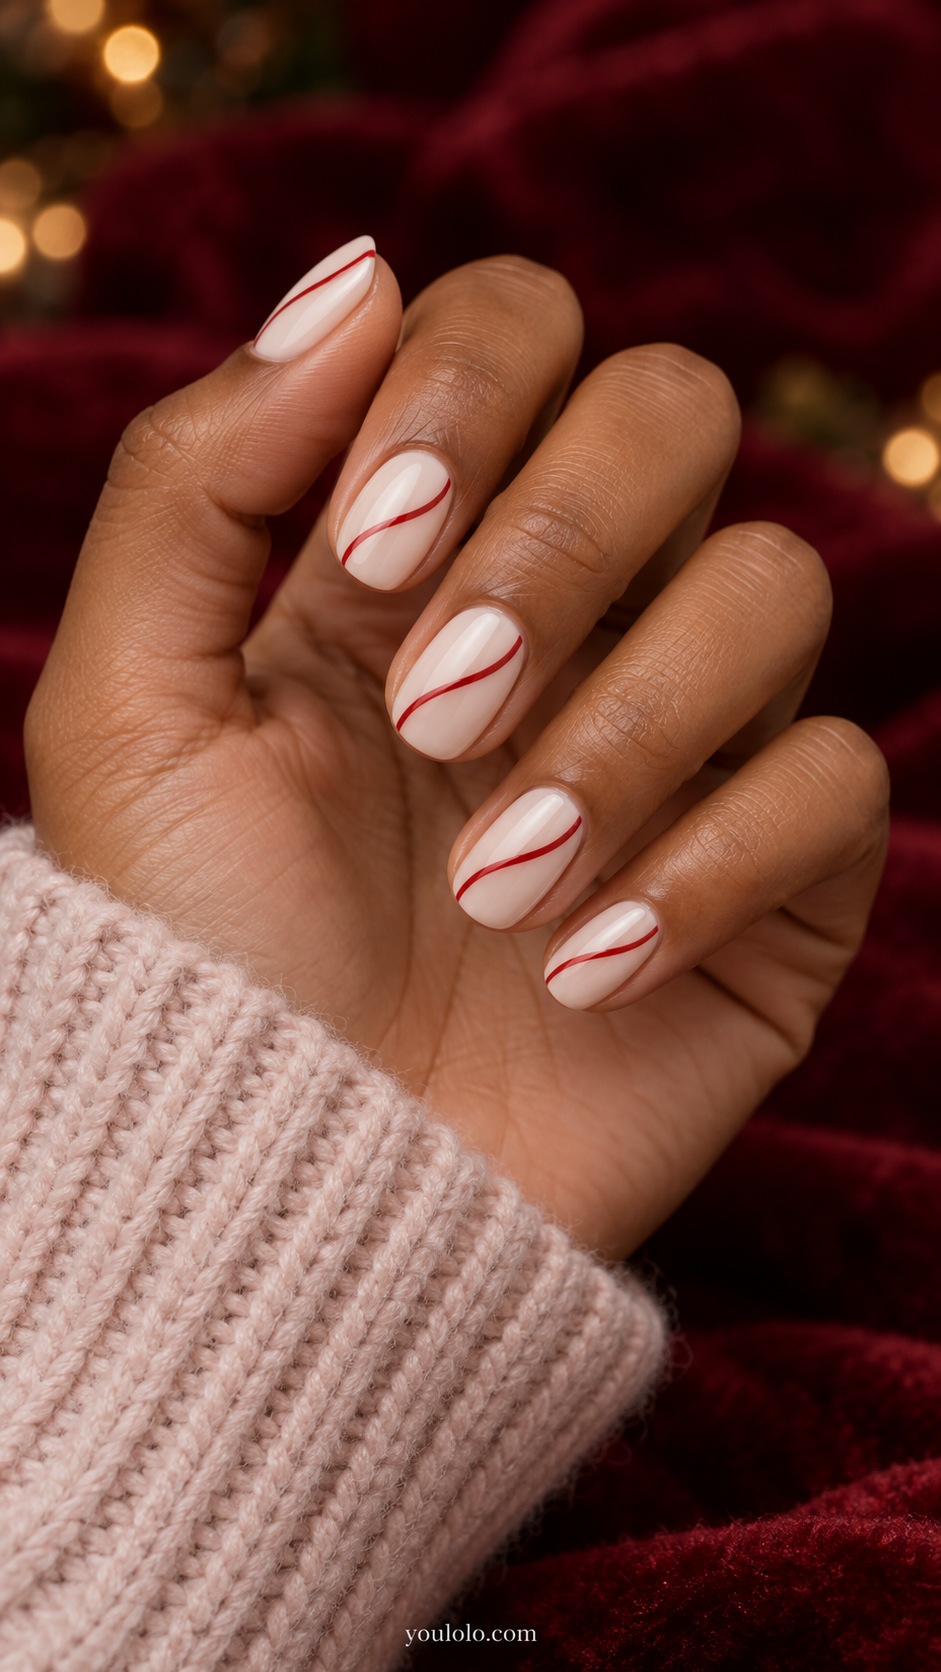
A slim red ribbon line can suggest a whole gift-wrap pattern. Against ivory, the slightly wavy stripe feels playful and easy rather than overly formal. This is my pick for someone who wants a holiday detail that still looks comfortable beside everyday clothes and a big soft scarf.
Use a striping brush with a small amount of red polish and move slowly across one diagonal. Start with one gentle wave; a second slim curve can echo the reference once you feel comfortable. If the first attempt goes wrong, simplify to one accent nail and leave the rest ivory.
12. Rose Gold Party Accent
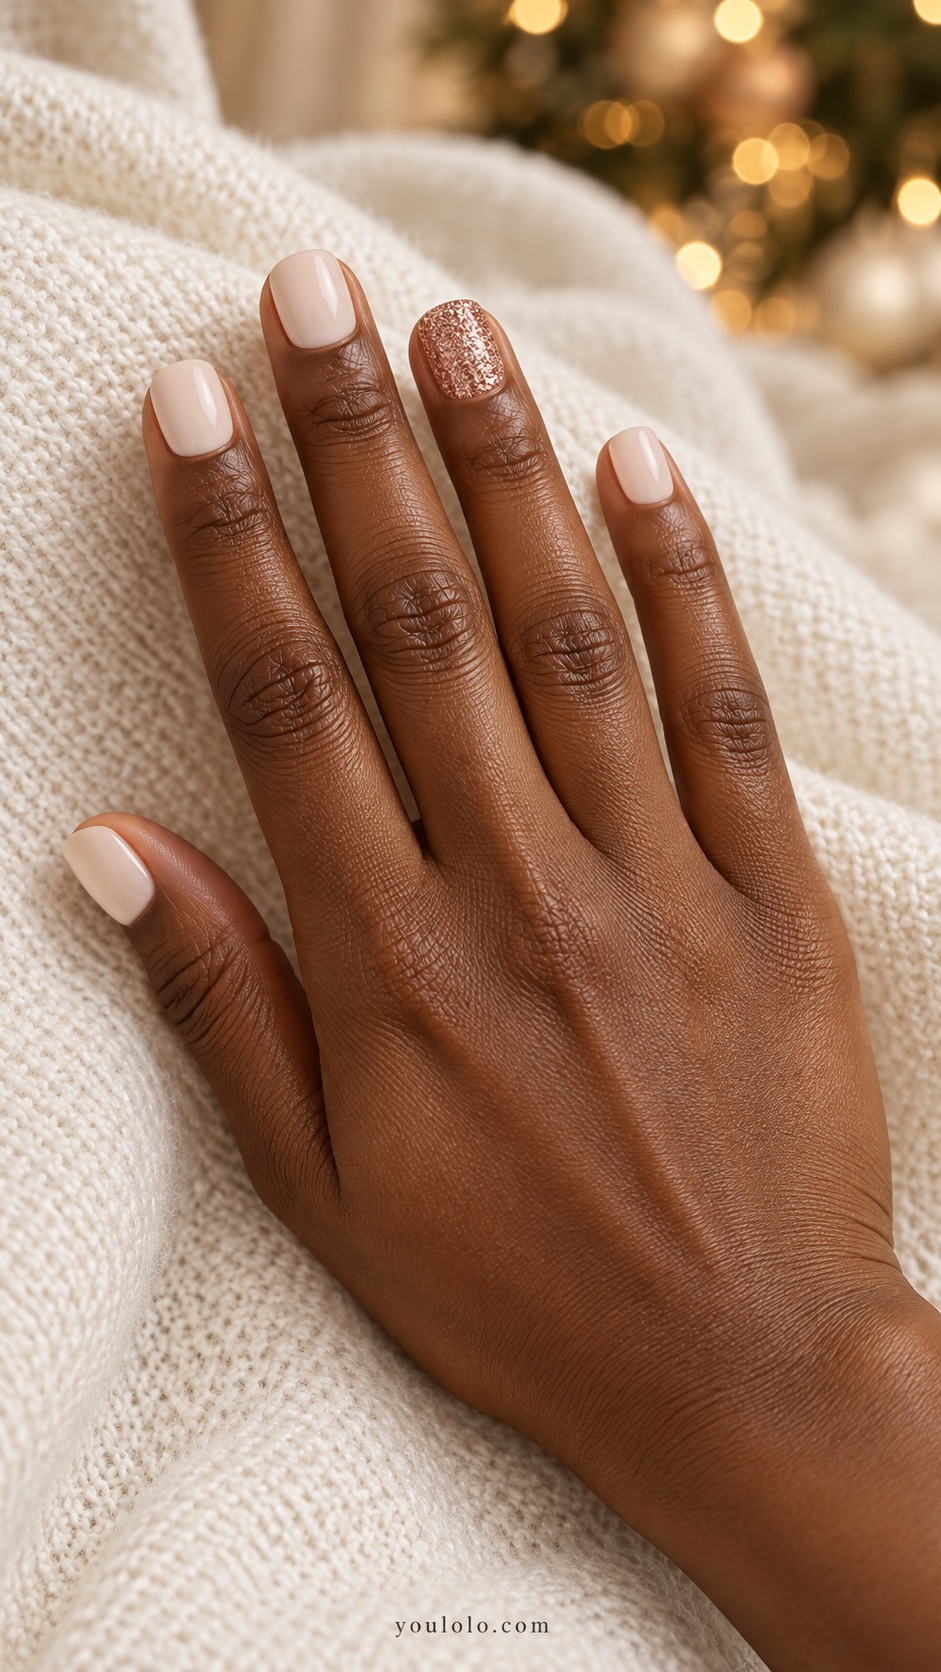
One glitter nail is a little party trick for an otherwise quiet cream manicure. Rose gold feels especially soft with blush clothes, but it also warms up a charcoal outfit beautifully. I would choose fine shimmer rather than big reflective pieces so the short shape stays smooth and understated.
Use a glitter polish designed to give the coverage you want and follow its directions. You do not need to build a thick layer just to hide every gap. A slightly translucent sparkle can look intentional, especially when all the surrounding nails are plain and creamy.
13. Red Half-Dip
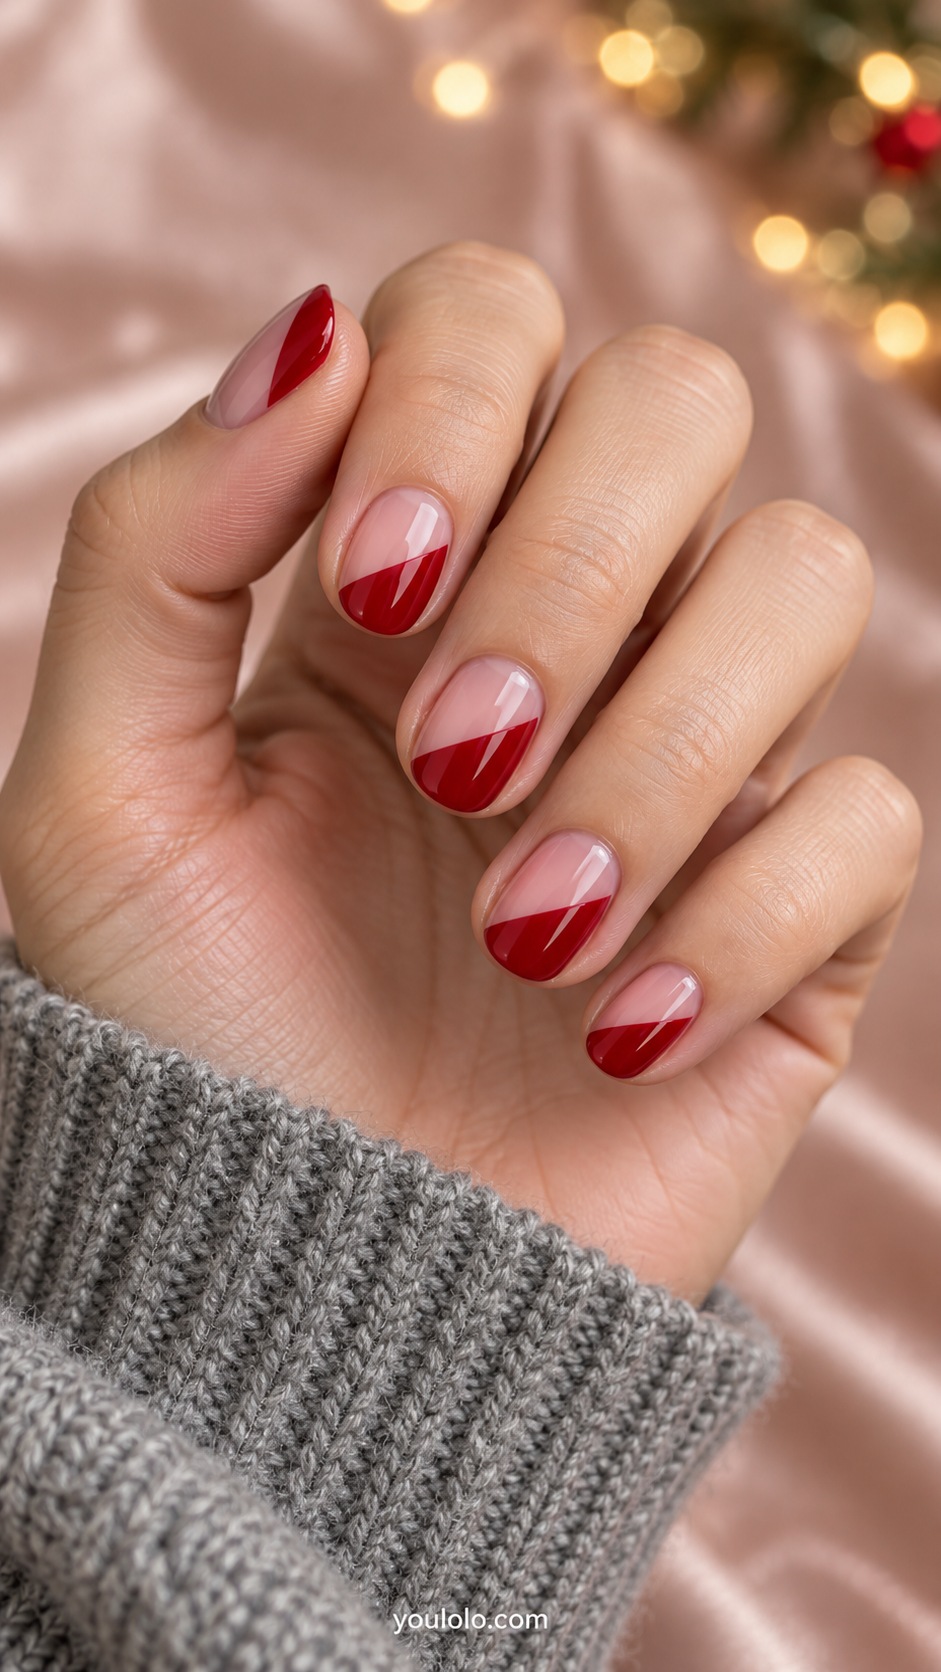
A diagonal half-dip gives you bold red without the challenge of a curved French smile. The sheer pink section keeps the result light, and the slanted edge makes a very short nail feel thoughtfully designed. Try it with a striped shirt and a red cardigan for an easy Christmas-week outfit.
Decide on the angle first and repeat that direction across the hand. Paint the red area with a small brush, leaving the pink base dry underneath. If you use nail tape as a guide, follow its instructions and make sure the base is dry enough not to lift.
14. Tiny Holly Dot Trio

Holly does not have to start with detailed leaves. Three red dots and two green dots give the suggestion in a much simpler way. The milky pink base makes this feel gentle and pretty, especially with a cream cable-knit sweater or a soft rose blouse.
Keep the entire motif on one accent nail and make the dots small. Practice the arrangement on paper before touching the manicure. The red cluster should remain distinct from the green; if everything merges into one patch, use less polish and allow more space between the dots.
15. Cozy Cranberry Skittle
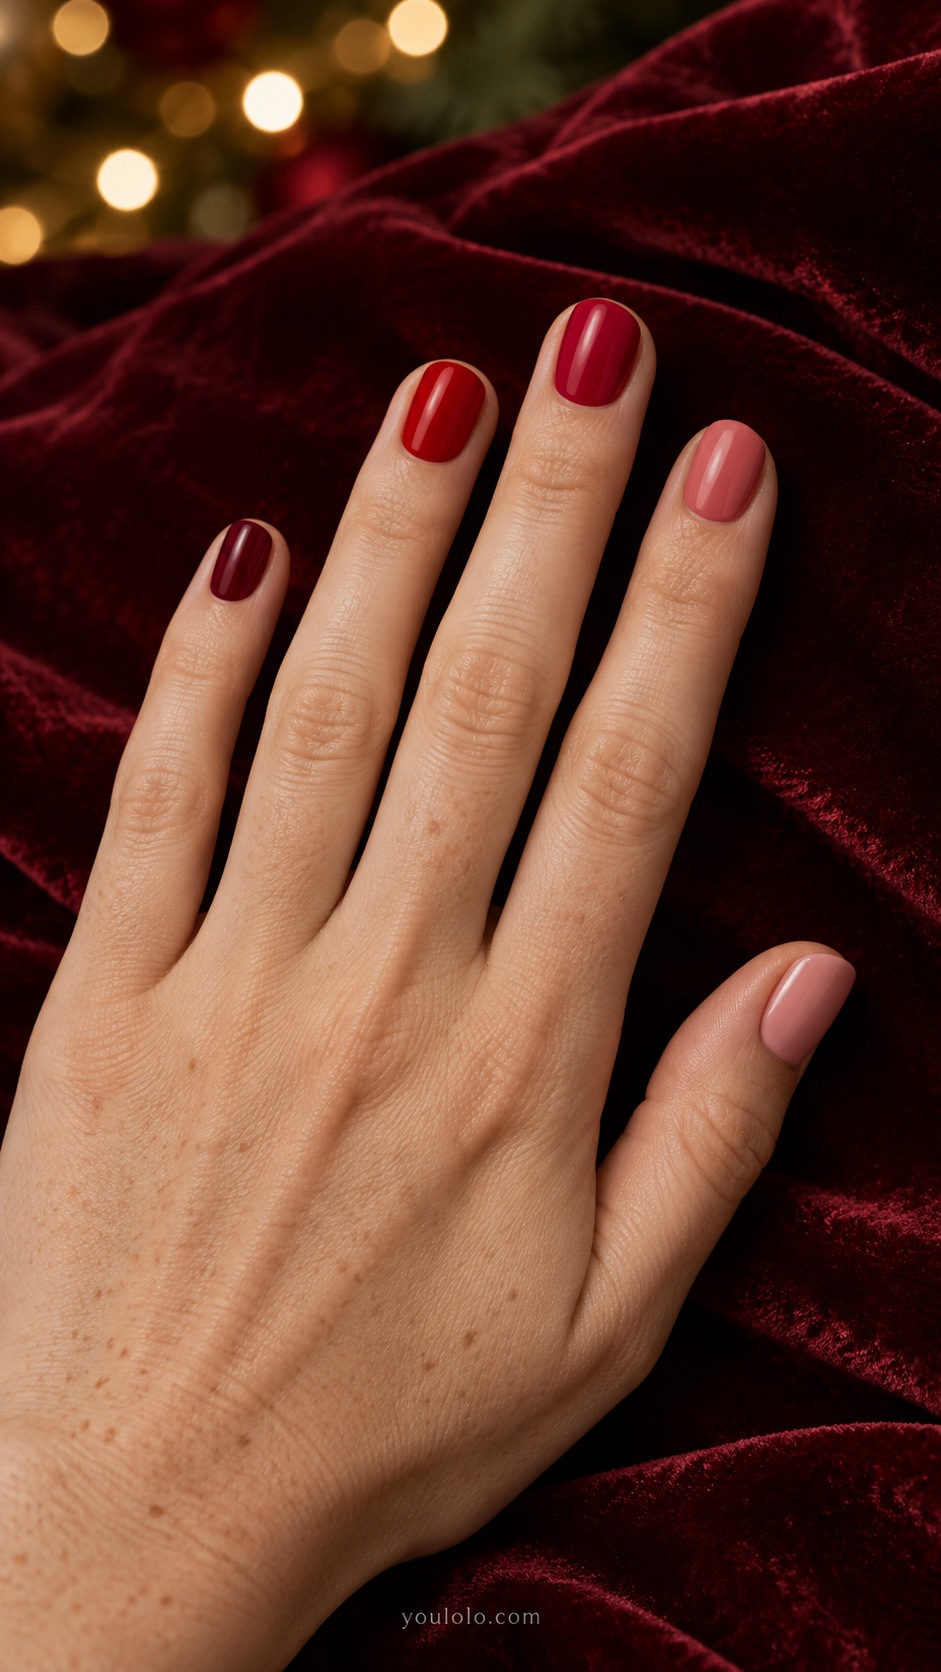
A cranberry-to-pink skittle set is an easy option when you want color but no nail-art tools at all. The shades belong to the same family, so the result feels coordinated rather than random. I would wear it with burgundy boots and a neutral coat, letting the manicure echo the darker accessory.
Line up your polishes from darkest to lightest before you begin. Similar finish and opacity matter more than perfectly even color steps. If you only own three suitable shades, repeat them intentionally across the five nails instead of buying extra bottles just to complete a gradient.
Keep abstract Christmas nails simple
Before you add another detail, look at the whole hand. A red corner, a green curve or three tiny dots can be enough. If a design feels fiddly, move it to one accent nail and keep the others solid. That is a styling choice, not a failed manicure.
My easy outfit formula would be one nail color repeated in a scarf, cardigan or pair of earrings, with the rest of the clothes kept neutral. The manicure then feels connected to what you are wearing without everything needing to match.
Christmas Nails for Beginners FAQ
What are the easiest Christmas nails for beginners?
A solid red or green manicure, alternating colors, one glitter accent or a single dot are approachable starting points. Choose one technique and keep the rest of the nails plain.
Can I do these designs with regular nail polish?
Yes. The simple color, dot and stripe ideas can be interpreted with regular polish. Use compatible products and follow their drying and application directions.
Which Christmas designs work on very short nails?
Small dots, a shallow diagonal corner, one tiny star or a single accent color leave enough open space. Reduce the amount of art rather than trying to squeeze in a smaller version of every detail.
Do I need to decorate every nail?
No. One accent nail often makes the theme clear. Plain surrounding nails can make a small detail look more deliberate.
How do I stop red stripes from smearing?
Let the base and detail layers dry as directed, then apply a compatible top coat gently without repeatedly dragging the brush over the art. Product drying times vary.
What if my two hands do not look identical?
A shared palette is enough to connect them. You can use fewer details on the hand that is harder to paint, or choose stickers for the accent nails.