
The Best Fluffy Pancakes recipe you will fall in love with. Full of tips and tricks to help you make the best pancakes.



This guide to how to braid your own hair slows the first four crossings down into separate movement and regripping stages. Start with the finished style above, then follow the numbered sections and arrows below.
Before you begin
Have a comb and a small hair elastic nearby. Gather your hair over whichever shoulder feels comfortable. The example uses the model’s left shoulder, which appears on the right side of these front-facing pictures.
Read the numbers and arrows first
- 1 — burgundy: the original left section.
- 2 — teal: the original middle section.
- 3 — gold: the original right section.
The number belongs to the hair section, not its position. After a crossing, the same section keeps its number but occupies a different place. Read left and right as they appear in the picture. An arrow shows the intended movement; the following image shows the new positions.
Every crossing goes over the current middle. These are crossings, not knots. Do not pull a section through a loop. You are working with the same three sections throughout, without adding hair from the scalp.
The first four crossings, one move at a time
Step 1: Gather and detangle
Bring the hair over one shoulder. Support the lengths with one hand while gently combing the ends with the other. Work through tangles before dividing the hair.
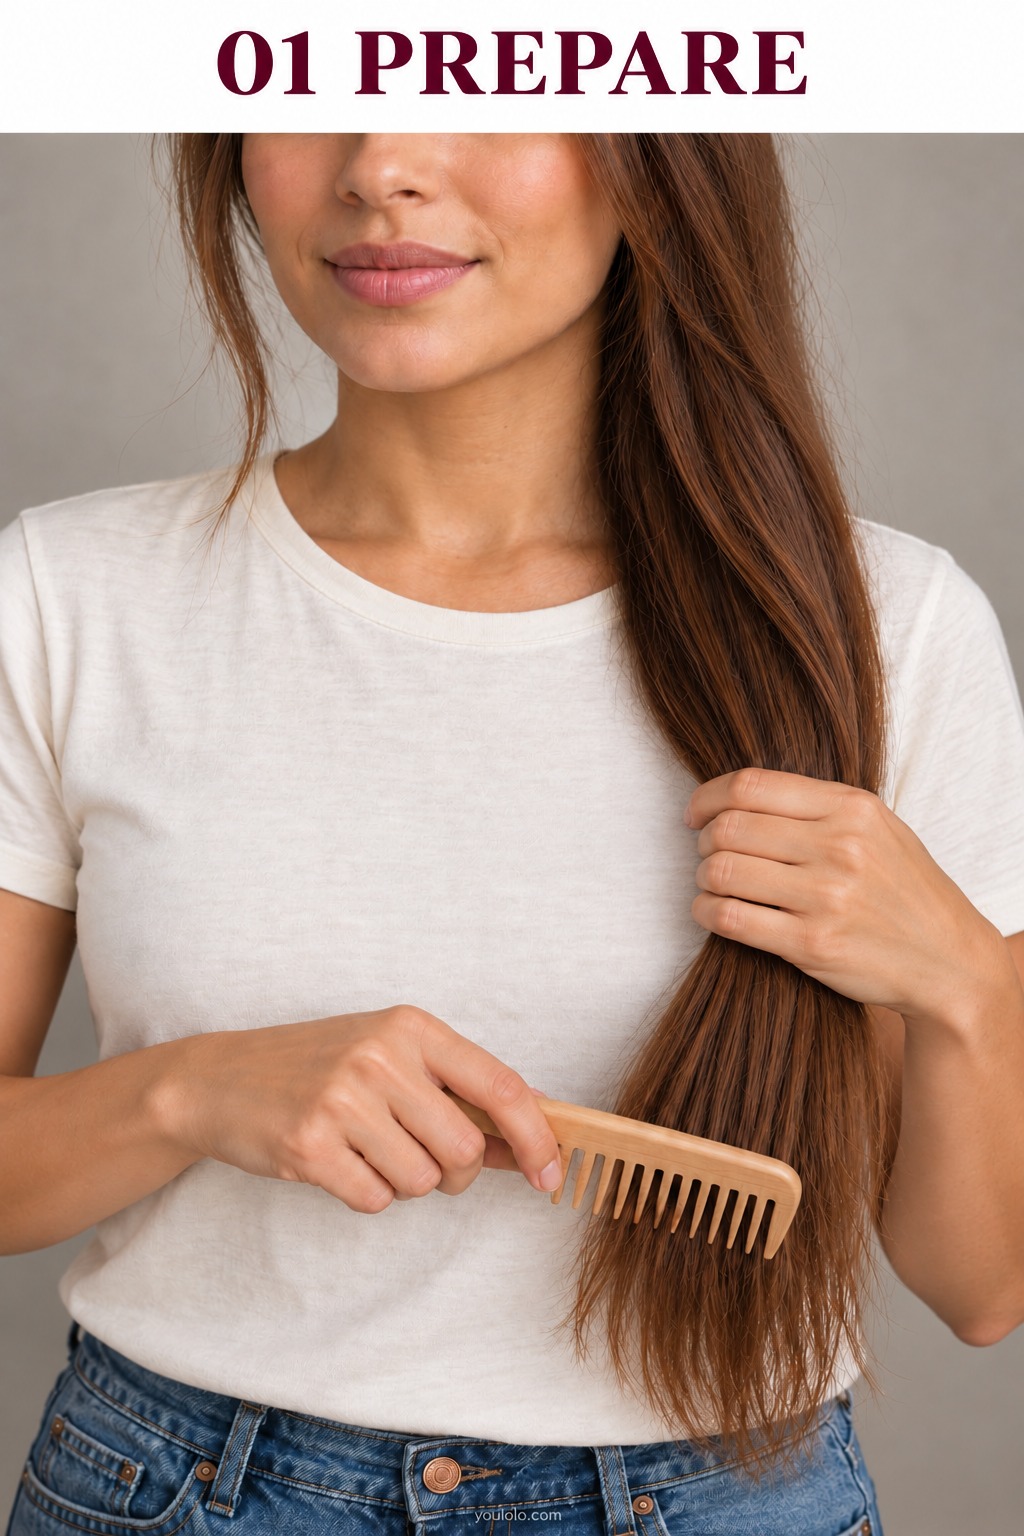
Keep the hair in front of your shoulder so you can see what your fingers are holding. Set the comb aside before the next step.
Step 2: Divide and name the three sections
Separate the hair into three similar-sized bundles. From left to right in the picture, name them 1, 2 and 3. These numbers stay with their original bundles throughout the four practice crossings.
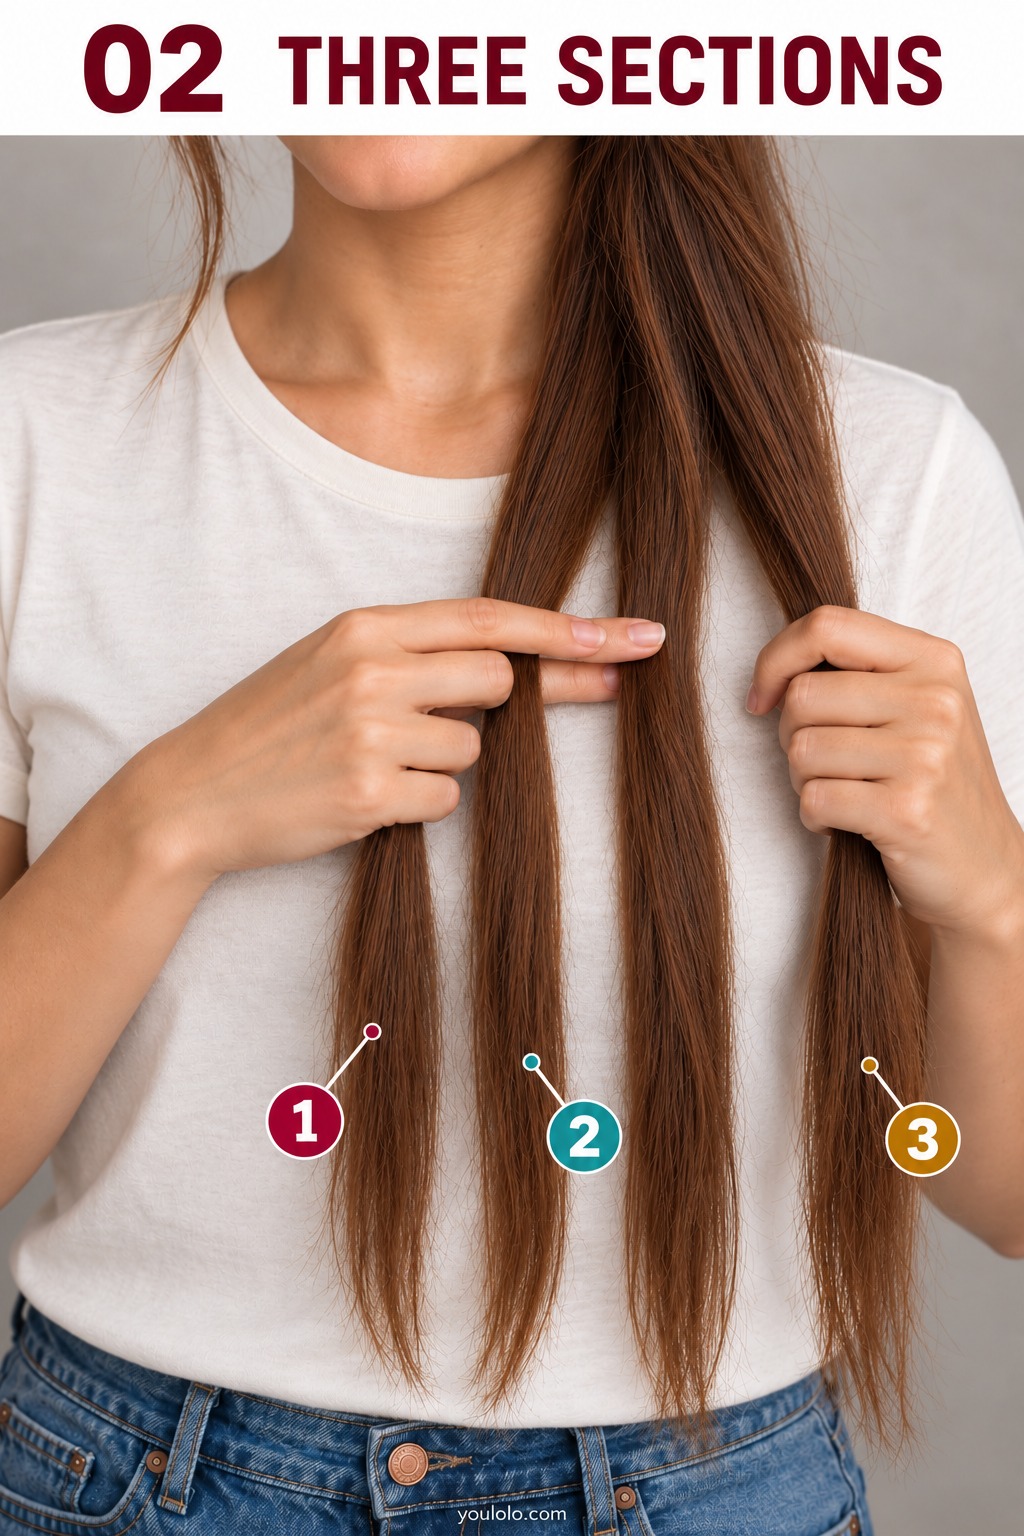
Section order, left to right: 1 · 2 · 3
The hand on the left of the picture holds two sections: keep one between the thumb and index finger, and keep the neighboring section separate with another finger. The other hand holds the third section. Use a comfortable grip that keeps the bundles apart.
Step 3: First crossing: move 3 over 2
Start with section 3, currently on the right. Follow the gold arrow toward the center. Lift 3 across the front of section 2; do not move it behind 2. Leave section 1 separate on the left.
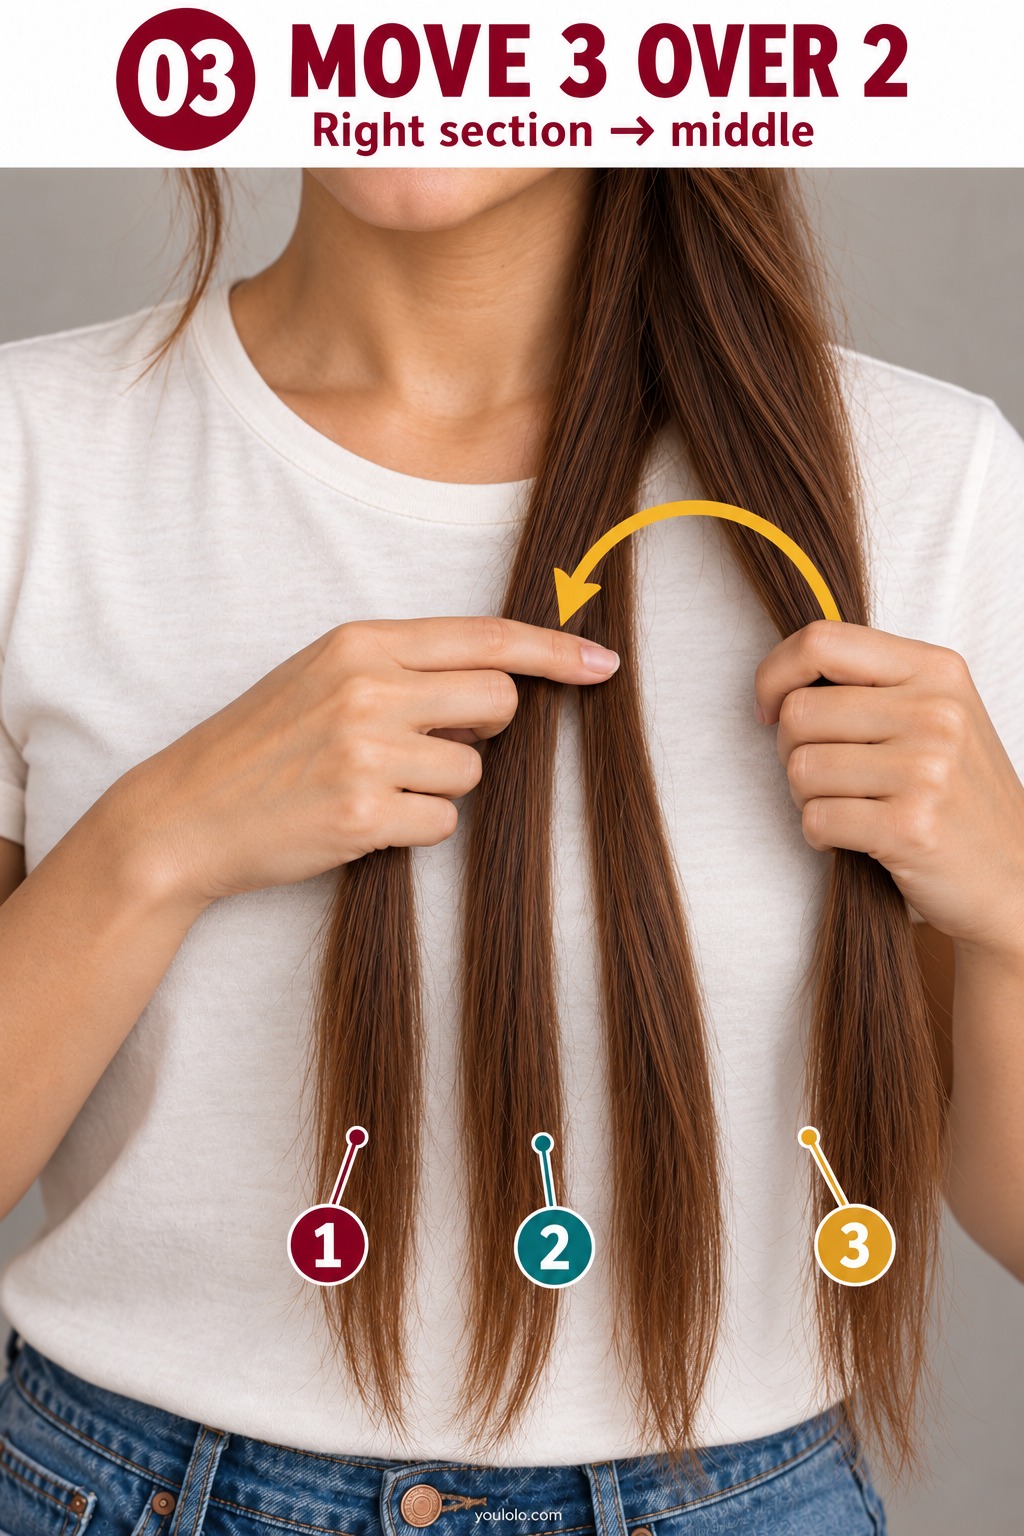
Section order, left to right: Before: 1 · 2 · 3 → After: 1 · 3 · 2
Before releasing 3, let the receiving fingers catch it. Keep hold of 2 as it moves into the vacant right-hand position. You are exchanging the positions of 3 and 2, not tying a knot.
Step 4: Pause and regrip: 1, 3, 2
Check the loose tails below the crossing. They should now read 1 on the left, 3 in the middle and 2 on the right. Section 3 is the new middle.
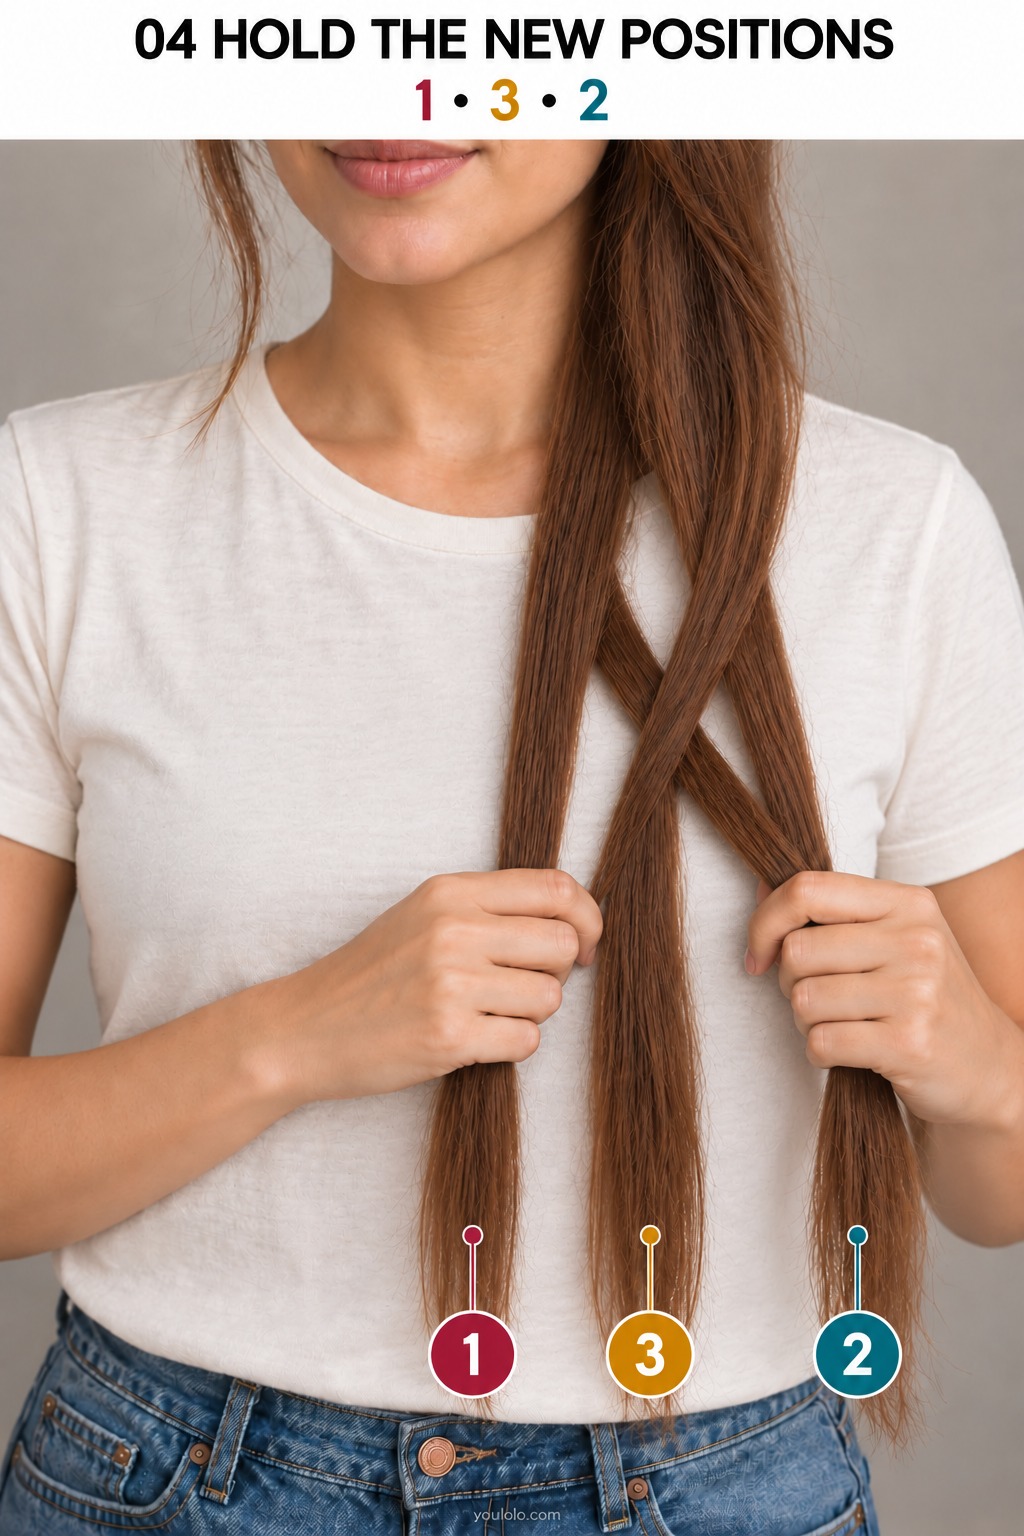
Section order, left to right: 1 · 3 · 2
Hold just below the crossing so it cannot open. Use a finger to keep the left and middle tails separate while the other hand holds the right tail. Transfer a section only when another finger has secured it; do not release all three together.
Step 5: Second crossing: move 1 over 3
Now take section 1 from the left. Follow the burgundy arrow to the center and pass 1 over section 3. Keep section 2 on the right out of this movement.
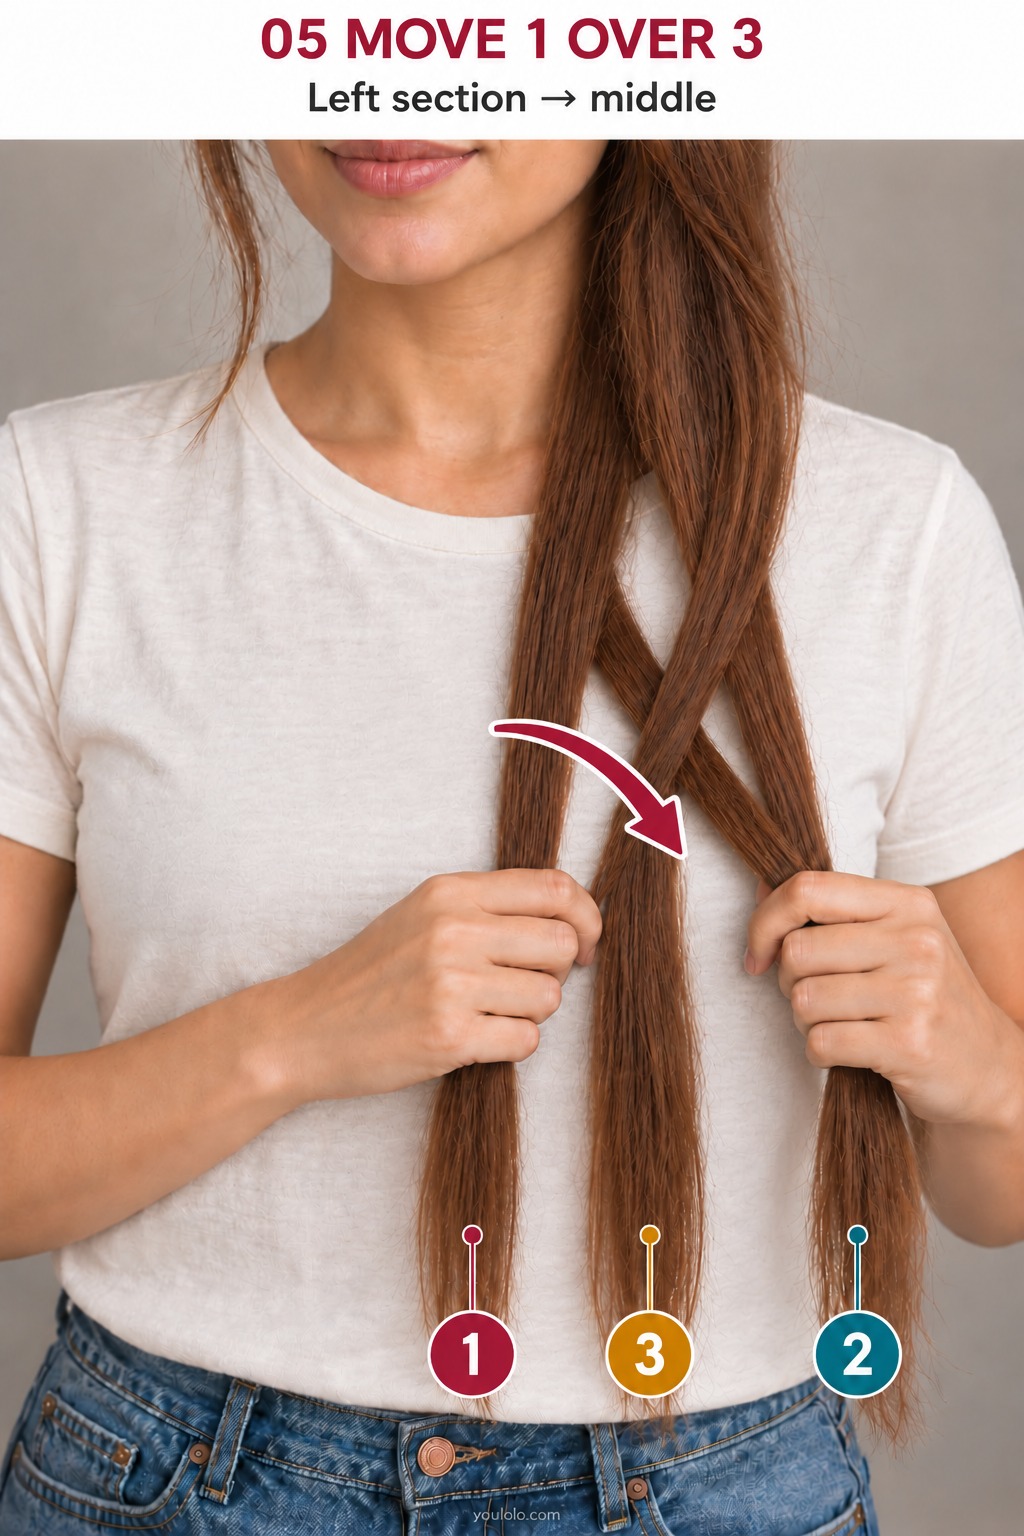
Section order, left to right: Before: 1 · 3 · 2 → After: 3 · 1 · 2
Catch 1 in the receiving fingers before letting go with the moving hand. The previous middle, section 3, takes the left position. This is the same outside-over-middle action, coming from the opposite side.
Step 6: Pause and regrip: 3, 1, 2
Find the three loose tails again: 3 is left, 1 is middle and 2 is right. You have completed one right–left pair of crossings.
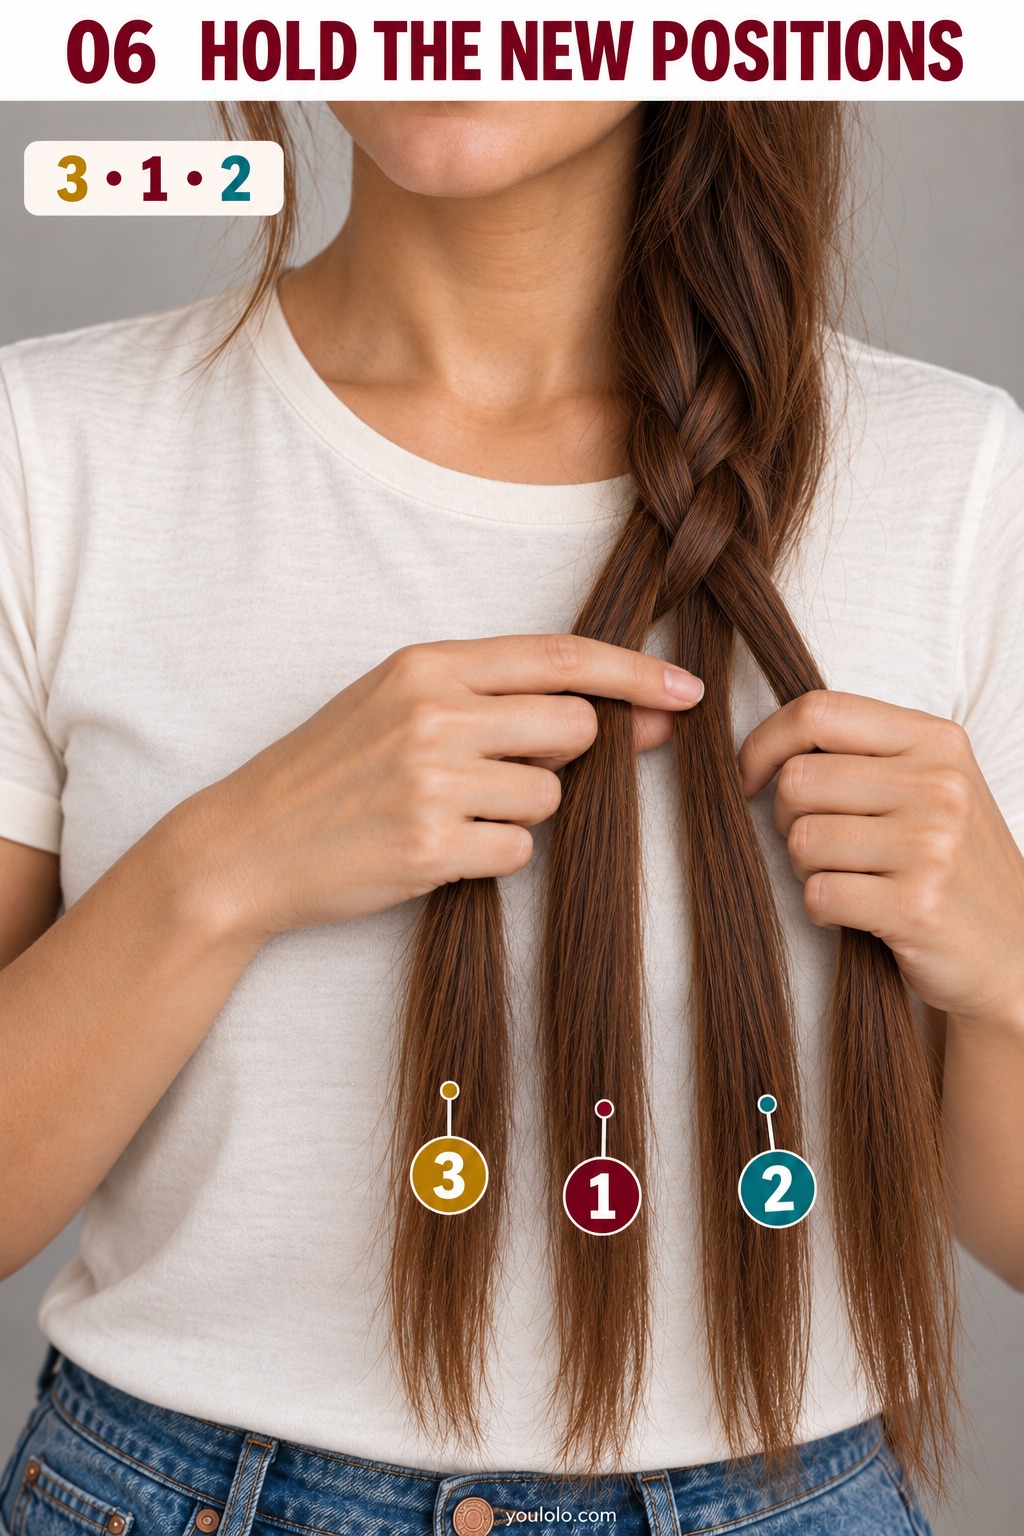
Section order, left to right: 3 · 1 · 2
Keep the new crossing between your fingers while you reset your grip below it. Gently take up slack, rather than pulling the entire braid hard. The free lengths should still be three distinct sections.
Step 7: Third crossing: move 2 over 1
The rightmost section is now number 2. Follow the teal arrow: move 2 over the current middle, number 1. Section 3 stays separate on the left.
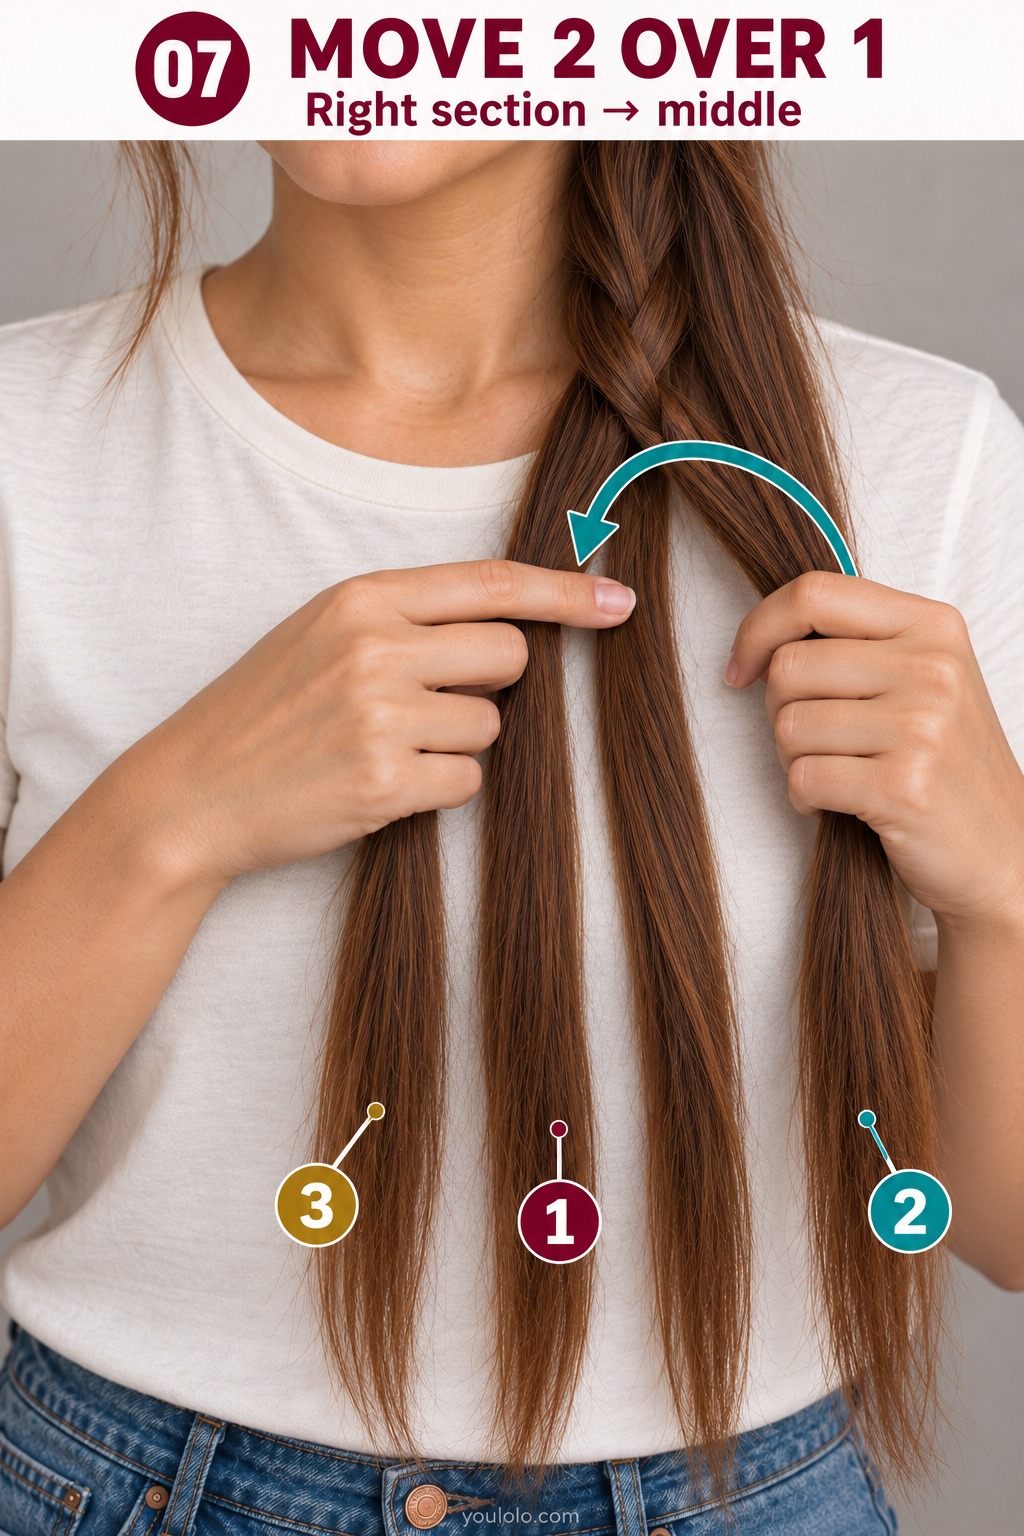
Section order, left to right: Before: 3 · 1 · 2 → After: 3 · 2 · 1
Notice that “right section” no longer means number 3. The position decides which section moves next. Receive 2 at the center, while moving 1 into the right-hand position.
Step 8: Pause and regrip: 3, 2, 1
The loose tails should read 3, 2, 1 from left to right. Hold the woven part steady and keep the tails separated with your fingers.
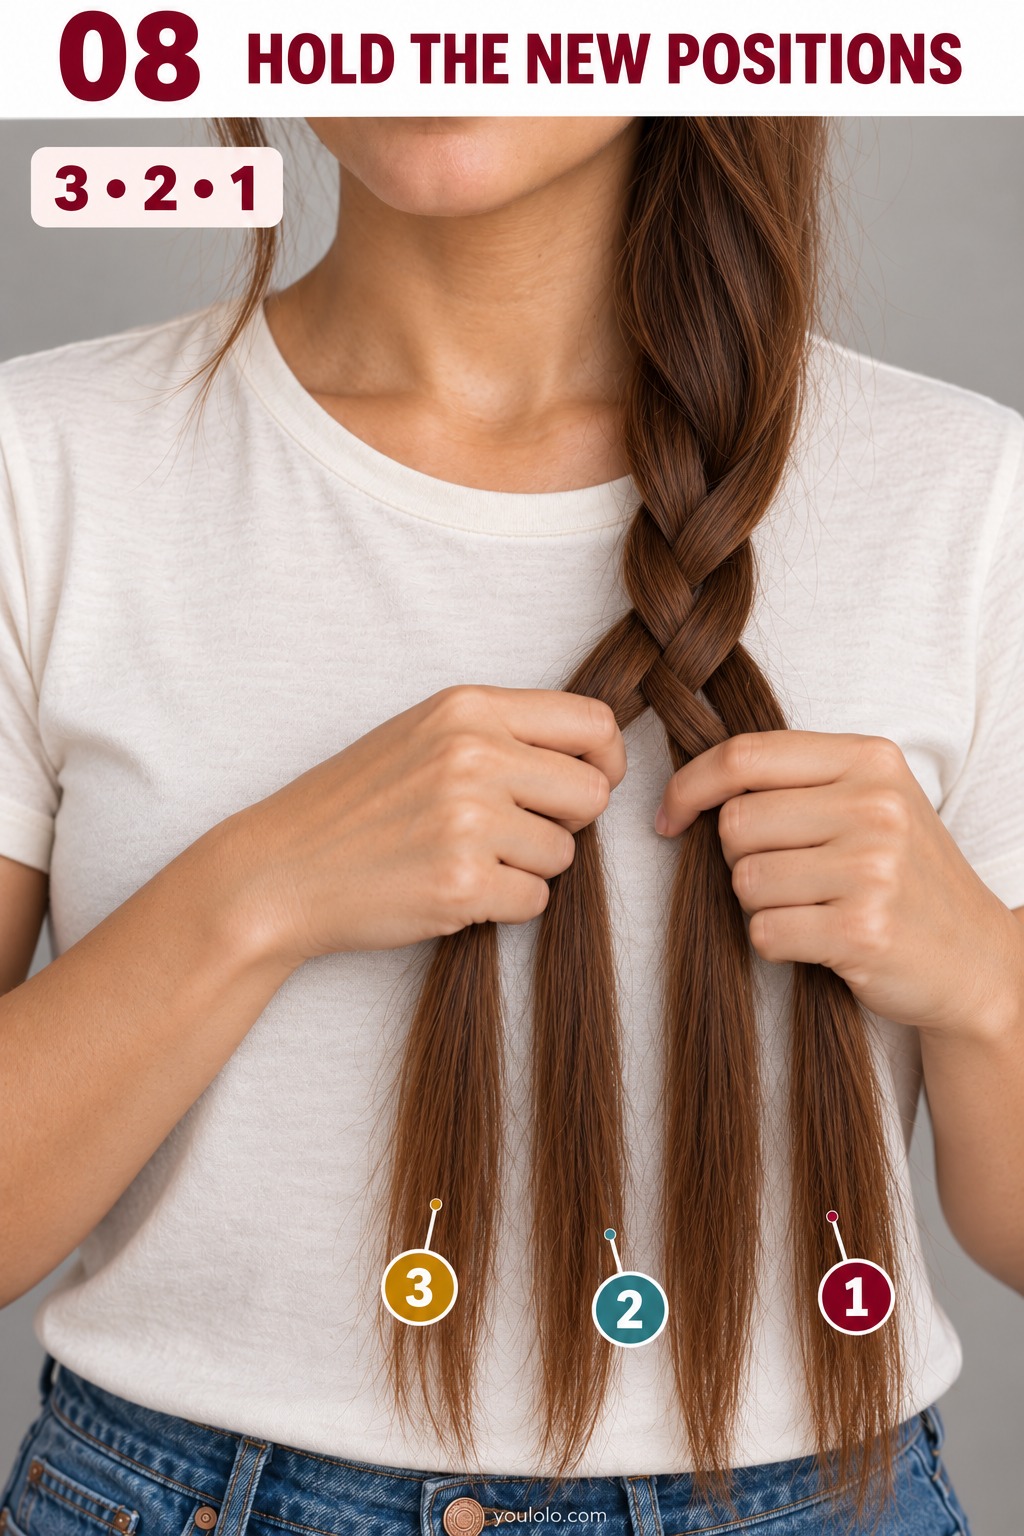
Section order, left to right: 3 · 2 · 1
If two sections have merged below your hands, stop and separate them before continuing. You should not need a third hand: one hand can hold two sections in different finger spaces while the other holds one.
Step 9: Fourth crossing: move 3 over 2
Take section 3, now on the left, and follow the gold arrow toward the center. Cross it over section 2. Leave section 1 on the right.
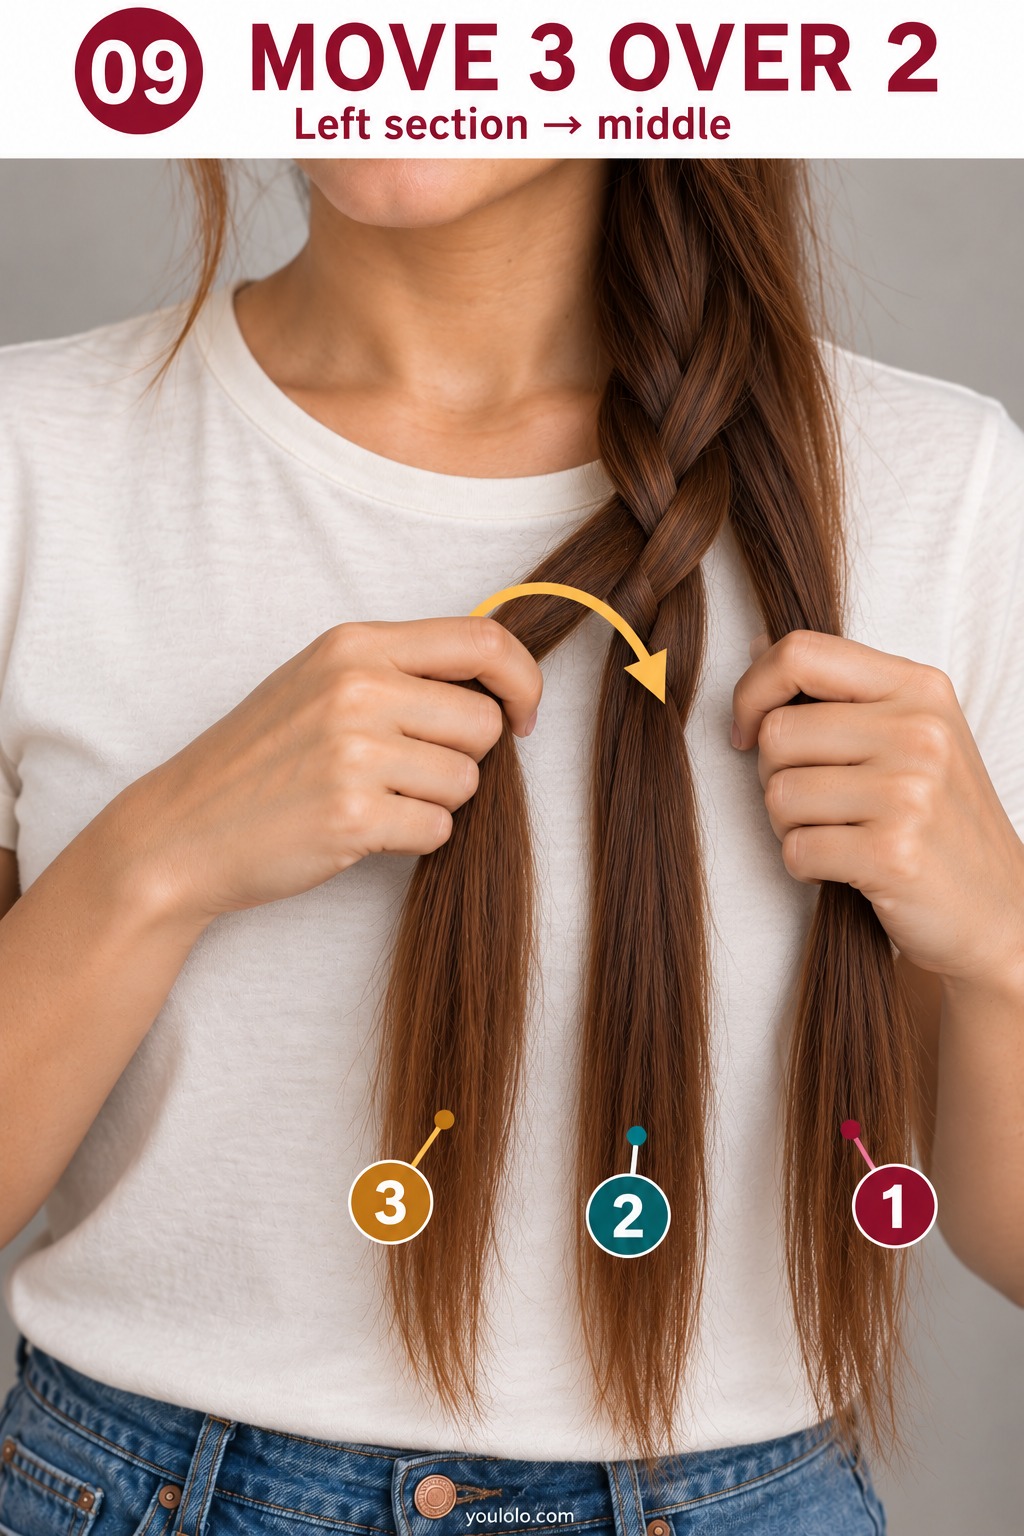
Section order, left to right: Before: 3 · 2 · 1 → After: 2 · 3 · 1
This is why the numbers stay attached to their original sections: number 3 moved from the right in the first crossing, but moves from the left here. Keep following the alternating sides, not a fixed numerical order.
Step 10: Check the new positions: 2, 3, 1
After the fourth crossing, section 2 is on the left, 3 is in the middle and 1 is on the right. Pause and check that order before continuing.
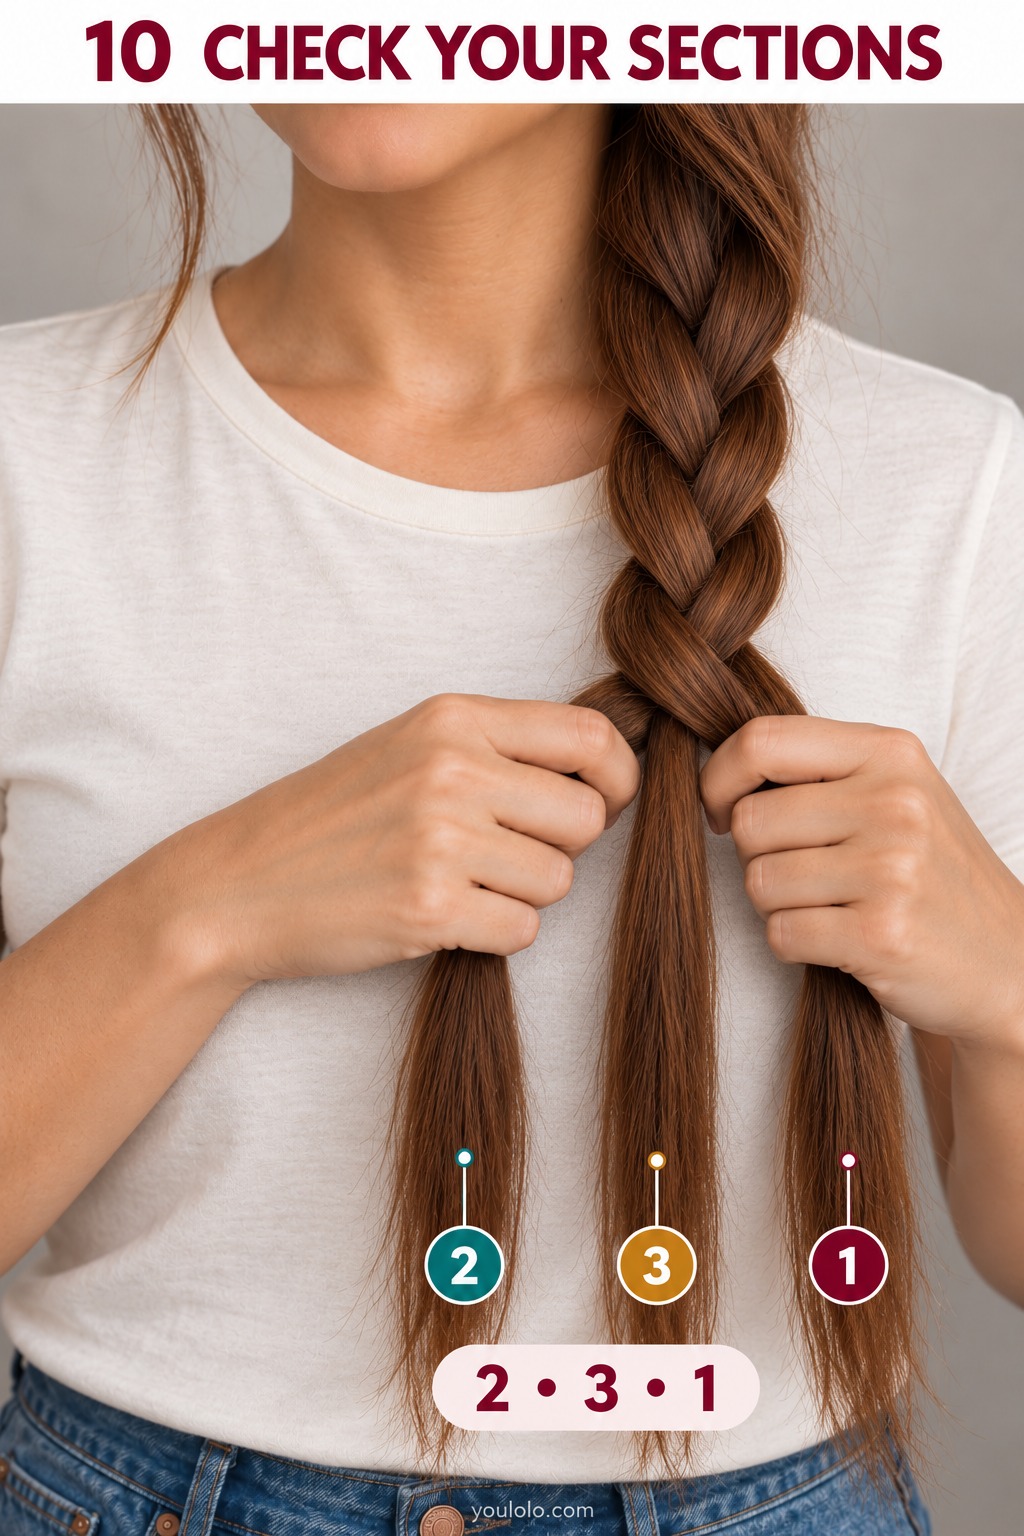
Section order, left to right: 2 · 3 · 1
Your next move would be section 1 from the right over section 3. The move after that would be section 2 from the left over section 1. Continue to transfer the moving strand into the receiving fingers before releasing it.
Step 11: Repeat the pattern down the length
Keep alternating the outside sections over the current middle. The remaining length uses exactly the same movement: right over middle, then left over middle.
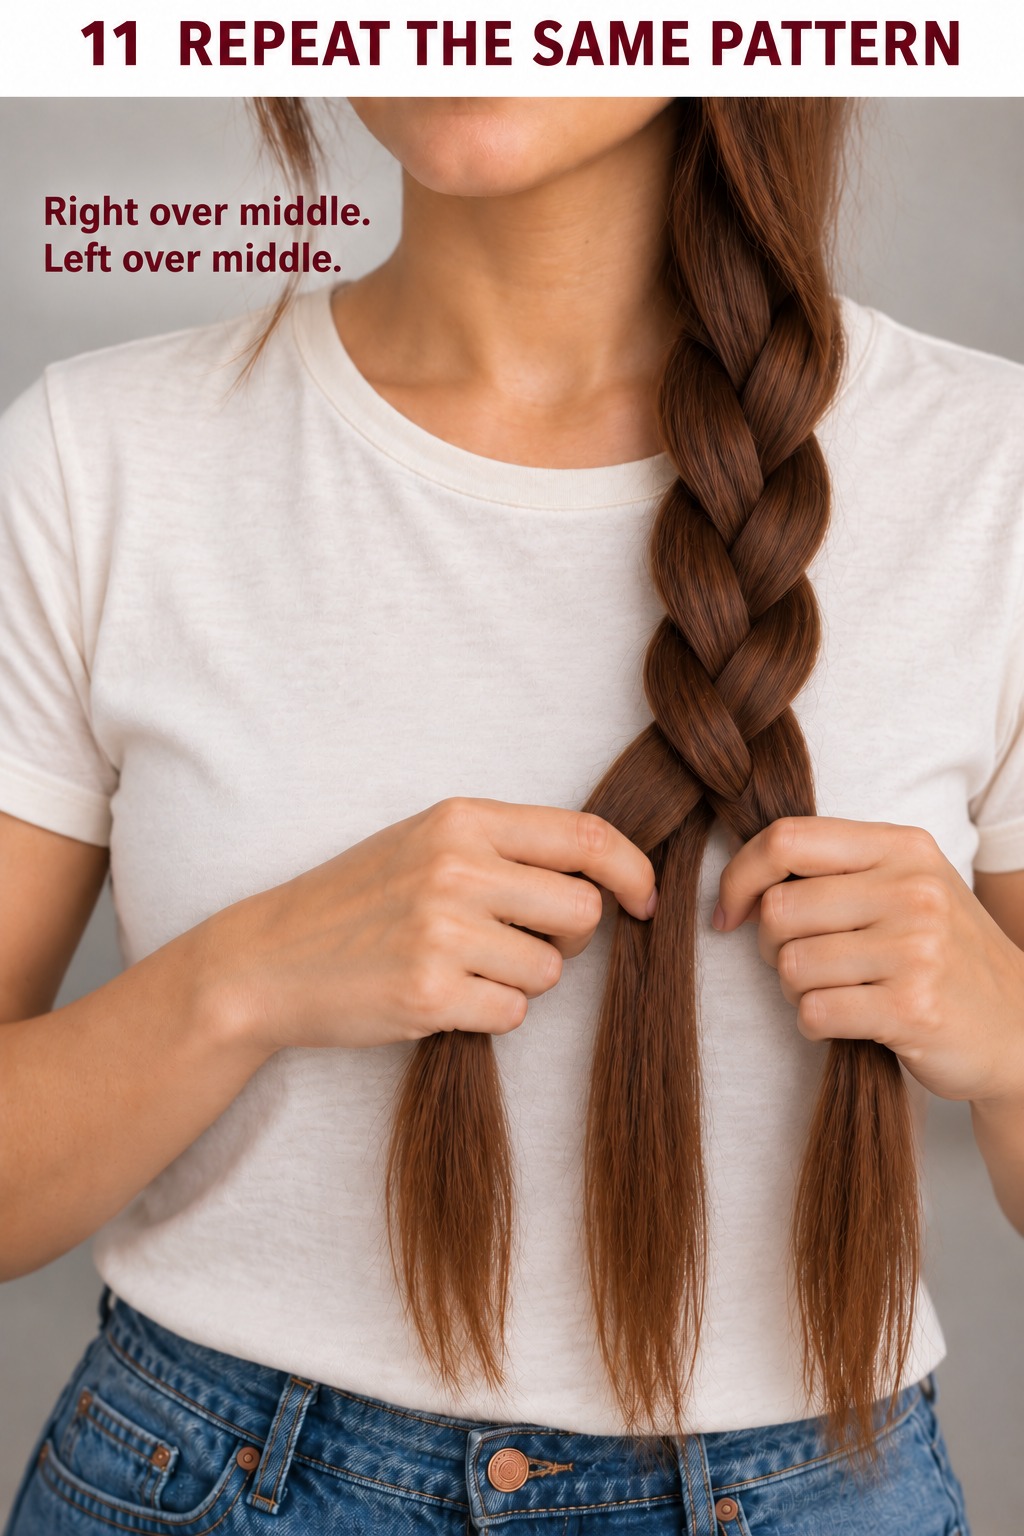
Slide your grip lower as the braid grows. If the loose ends start tangling together, hold the last crossing with one hand and separate the ends with the other. Stop before the ends become too short to handle comfortably.
Step 12: Secure the end without losing the last crossing
Hold the final crossing firmly. Gather all three loose tails together below it and wrap a small hair elastic around them until it holds the braid.
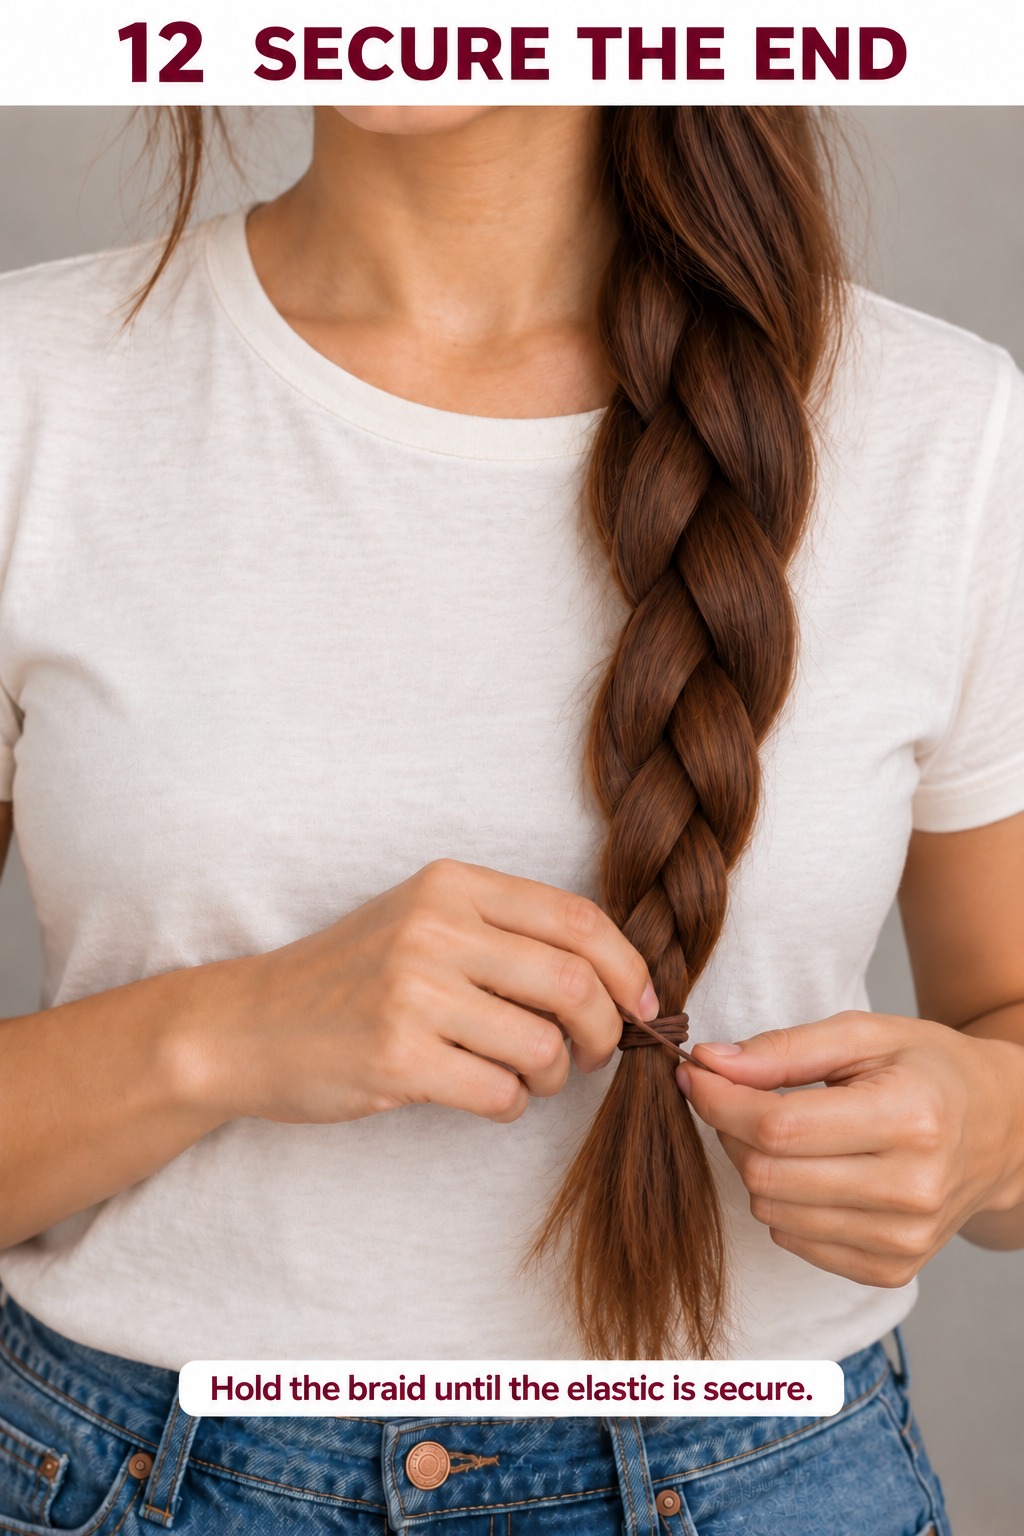
Keep a short loose tail beneath the elastic. Release your fingers gradually only after the tie is secure. Compare the finished weave with the opening picture. You have made one basic three-strand side braid.
Quick crossover reference
| Crossing | Move | New order |
|---|---|---|
| 1 | Right 3 over middle 2 | 1 · 3 · 2 |
| 2 | Left 1 over middle 3 | 3 · 1 · 2 |
| 3 | Right 2 over middle 1 | 3 · 2 · 1 |
| 4 | Left 3 over middle 2 | 2 · 3 · 1 |
Questions while you practice
Which hand should hold two sections?
That changes as you transfer the strands. Keep one section in a thumb-and-finger pinch and another in a separate finger space. The priority is to secure the incoming section before releasing it with the other hand.
What if I lose the order?
Hold the last crossing and identify the three tails below it. If you are unsure which side moved last, undo one crossing and repeat it slowly. Use the order printed below the corresponding picture to check yourself.
Should I memorize the numbers?
The numbers help you learn the transfers. Once the movement makes sense, remember the shorter rule: outside over middle, then switch sides.
Can I start on the other side?
Yes, but the numbered sequence in this guide begins on the right. Follow this sequence first, or use the same alternating movement in reverse.
Practice tip: repeat steps 3–6 a few times before attempting the full length. Learning the hand transfer makes the rest of the braid much easier to follow.
Technique reference: Everyday Hair Inspiration’s three-strand braid tutorial.