
The Best Fluffy Pancakes recipe you will fall in love with. Full of tips and tricks to help you make the best pancakes.


Polka Dot Nails are having a very good year, but the best versions do not look like someone stamped the same five circles on every finger. A dot can anchor a whole design, make a French tip feel playful, or turn a quiet neutral into a little vintage moment. I like how easily the size and spacing can change the mood: closely packed spots read graphic, while one deliberate point feels almost like jewelry.
This gallery moves through tiny black dots, blue-and-ivory contrast, a dotted French edge, butter-yellow with red spots, and a surprisingly wearable dark burgundy. Every photo shows a different individual manicure on a newly imagined woman's hand. Save the one whose spacing you actually like: 'polka dots' alone is not a specific enough salon brief.
In 2026, the dot is still appearing on short nails and alongside French tips. The useful part of this trend is that it works without extra length. If your nails are very small, ask for fewer, smaller dots instead of filling the whole plate.
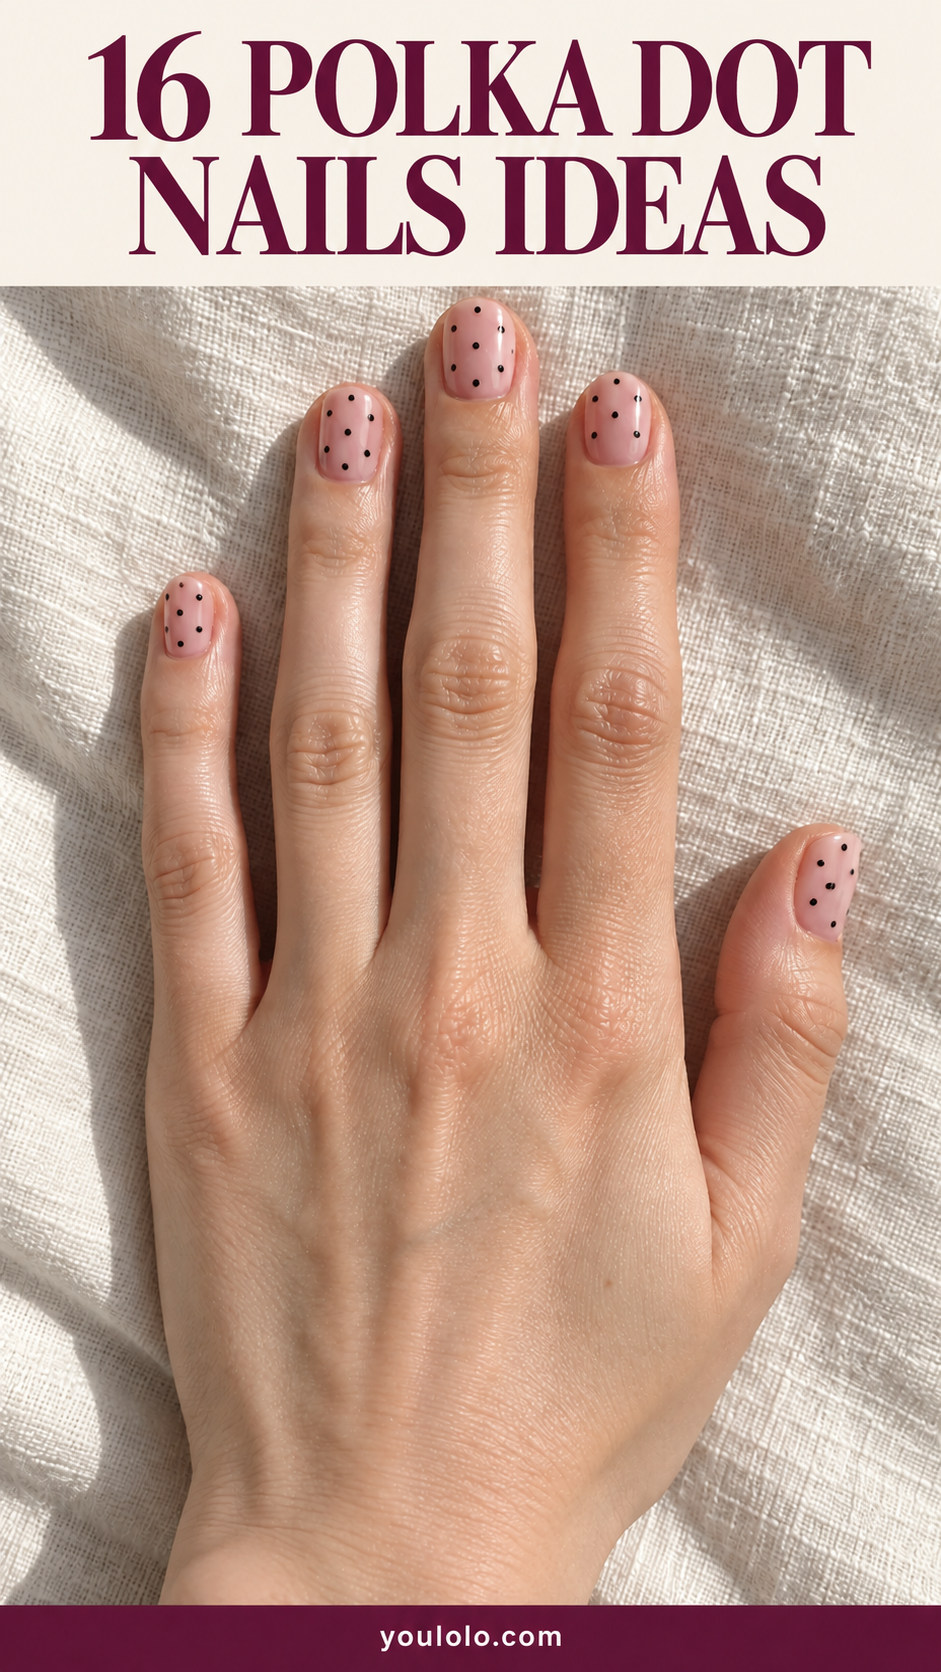
The quiet dot: sheer bases and small marks
These first references leave room around the pattern. A sheer pink or beige base makes tiny marks feel intentional, and a compact oval or squoval stops the idea from becoming costume-like. Pick one contrast color first; deciding the exact dot size with your nail artist is the next step.
1. Short oval sheer pink nails with evenly spaced tiny black polka dots on all fingers
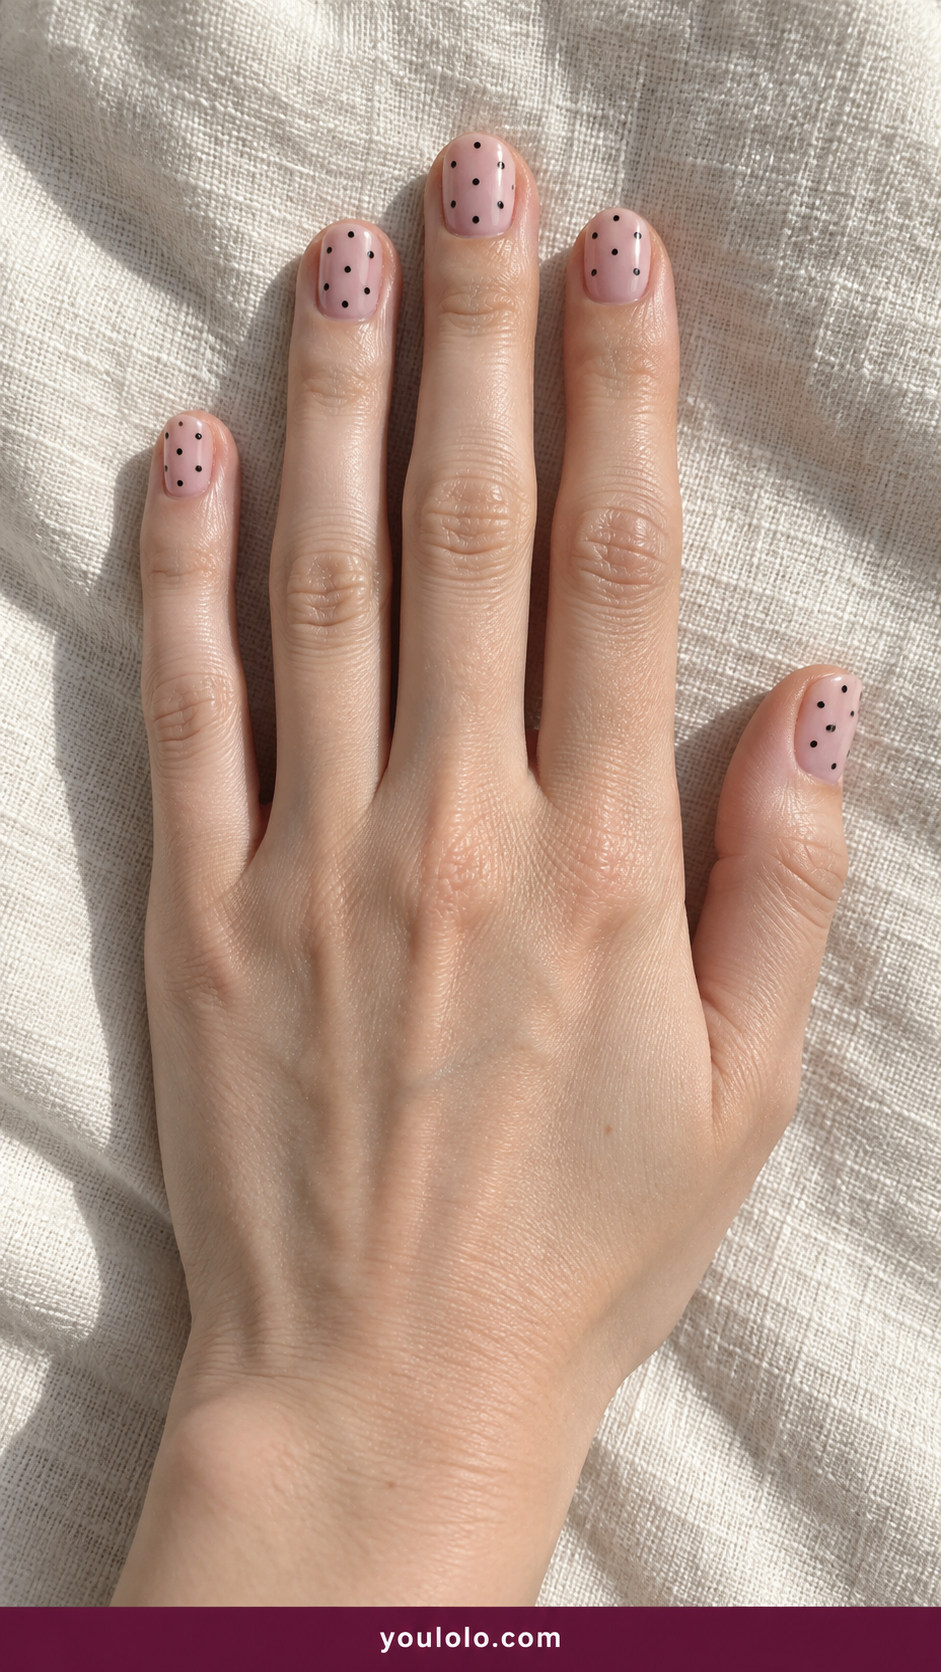
The blush base keeps the little black dots light rather than severe. Ask for regular spacing across all five nails, with a tiny border of clear pink around each sidewall.
2. Cream squoval nails with chocolate-brown polka dots concentrated on two accent nails
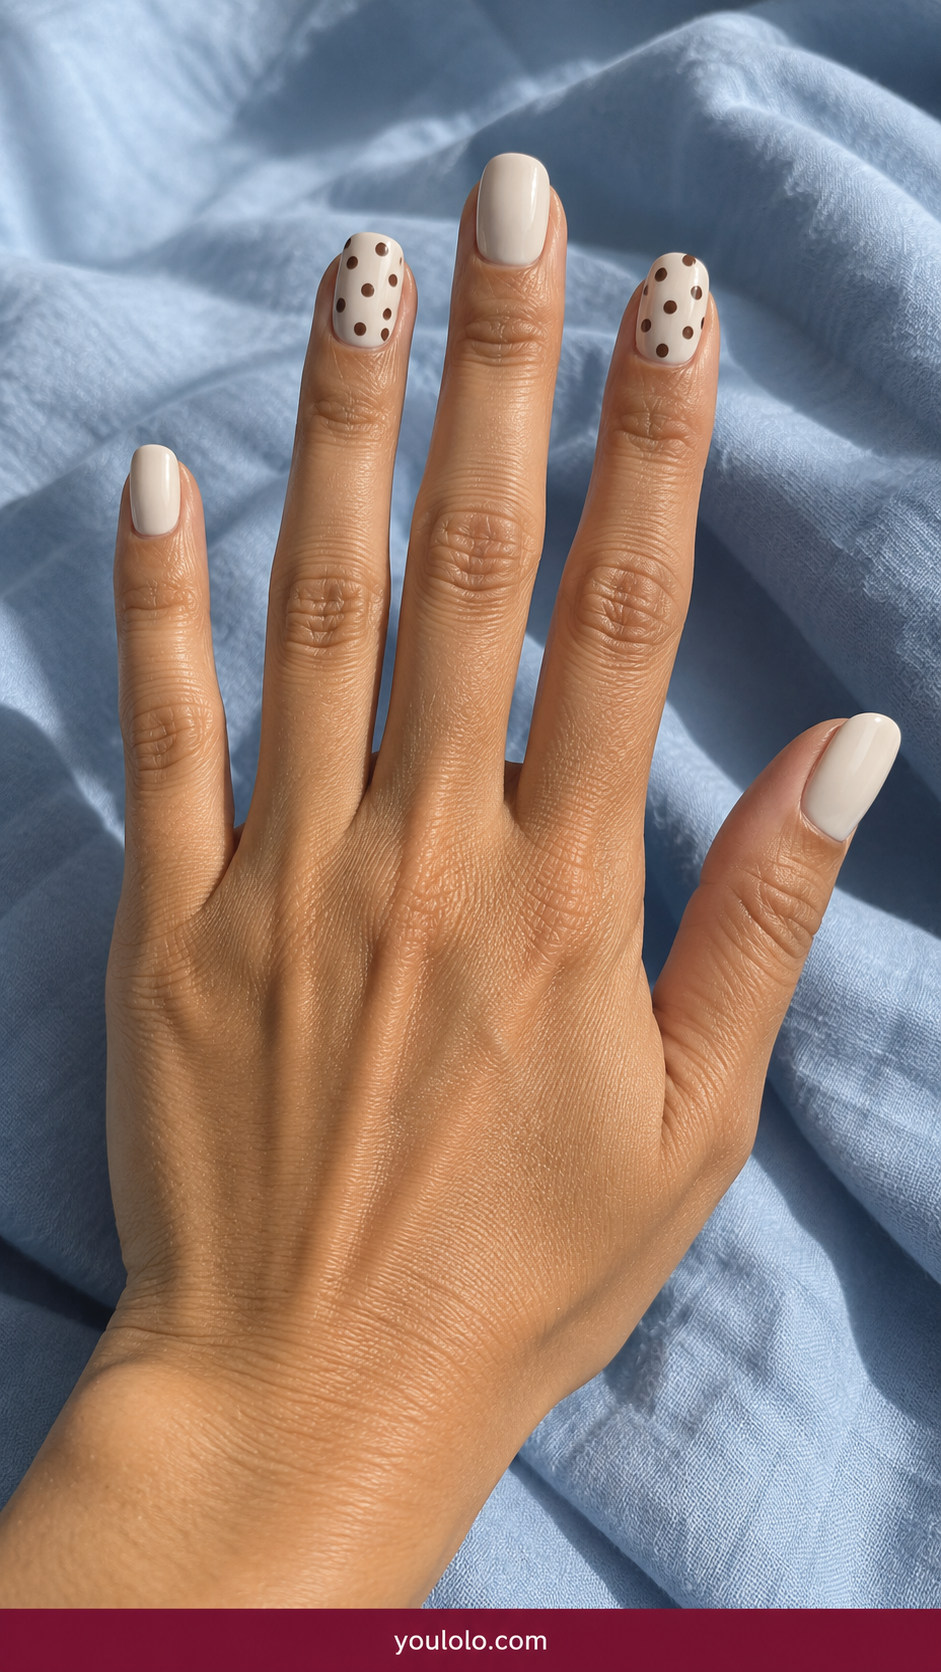
Two chocolate-spotted nails do enough work on their own. The surrounding cream nails give the pattern a pause, so it reads like a deliberate accent instead of a uniform print.
3. Short cobalt-blue nails with contrasting crisp ivory dots of two sizes
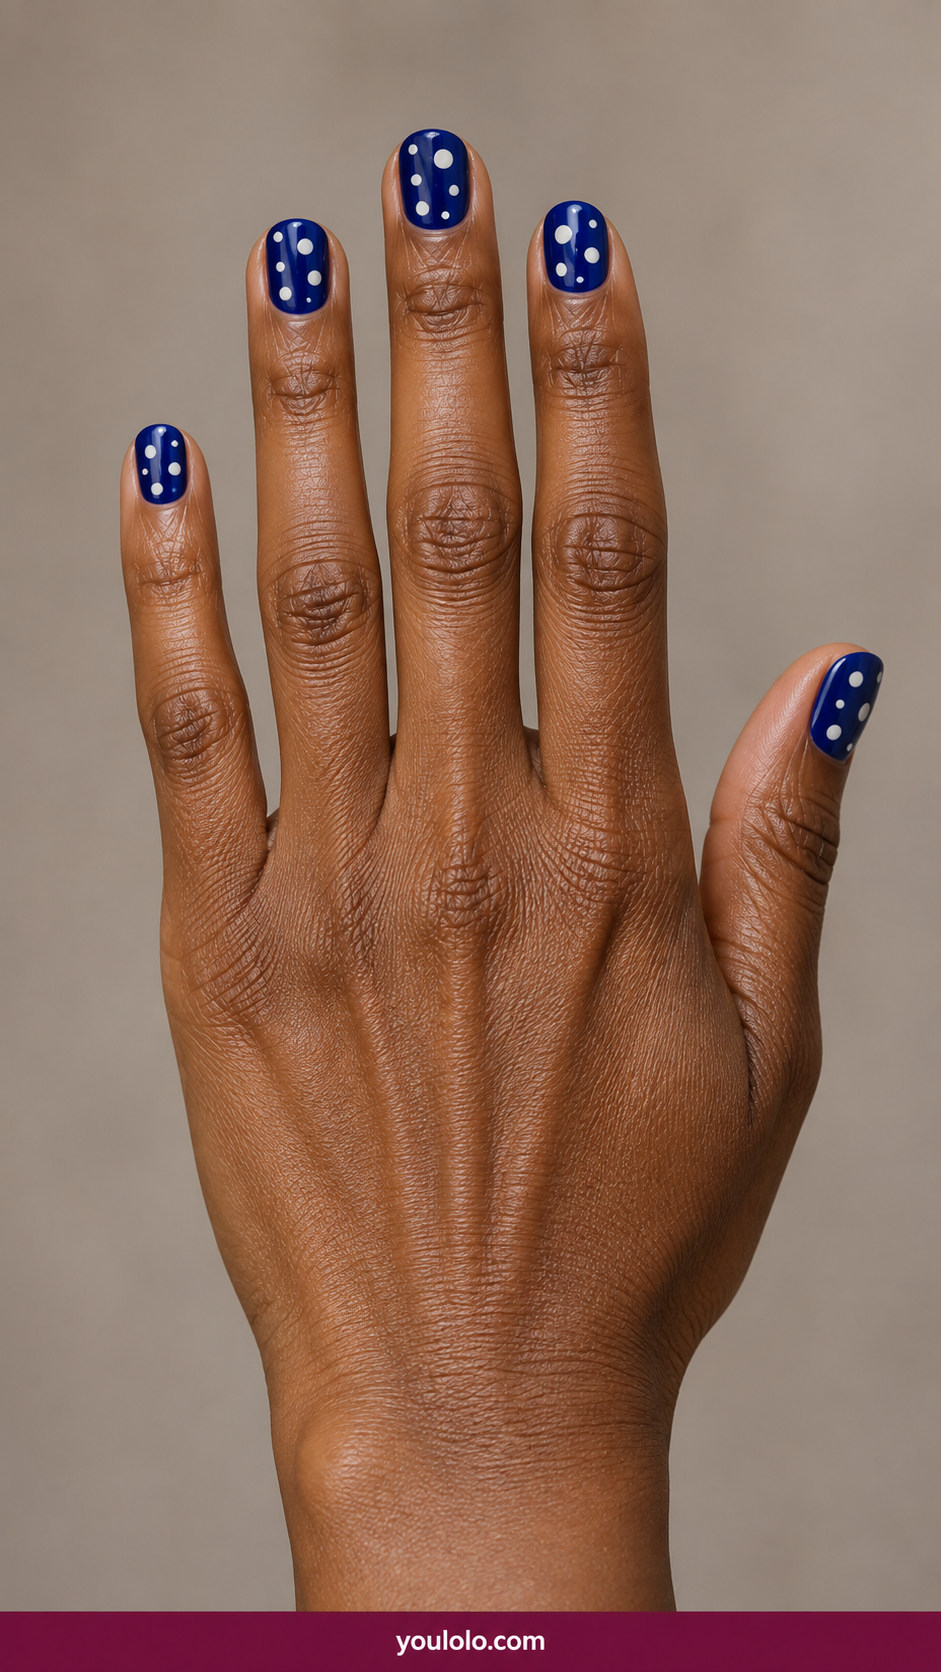
White points on cobalt create an unusually clean, high-contrast set. Varying the dot diameter adds motion while retaining enough dark blue to show the color itself.
4. Nude almond nails with a thin white French tip and three small black dots on each tip
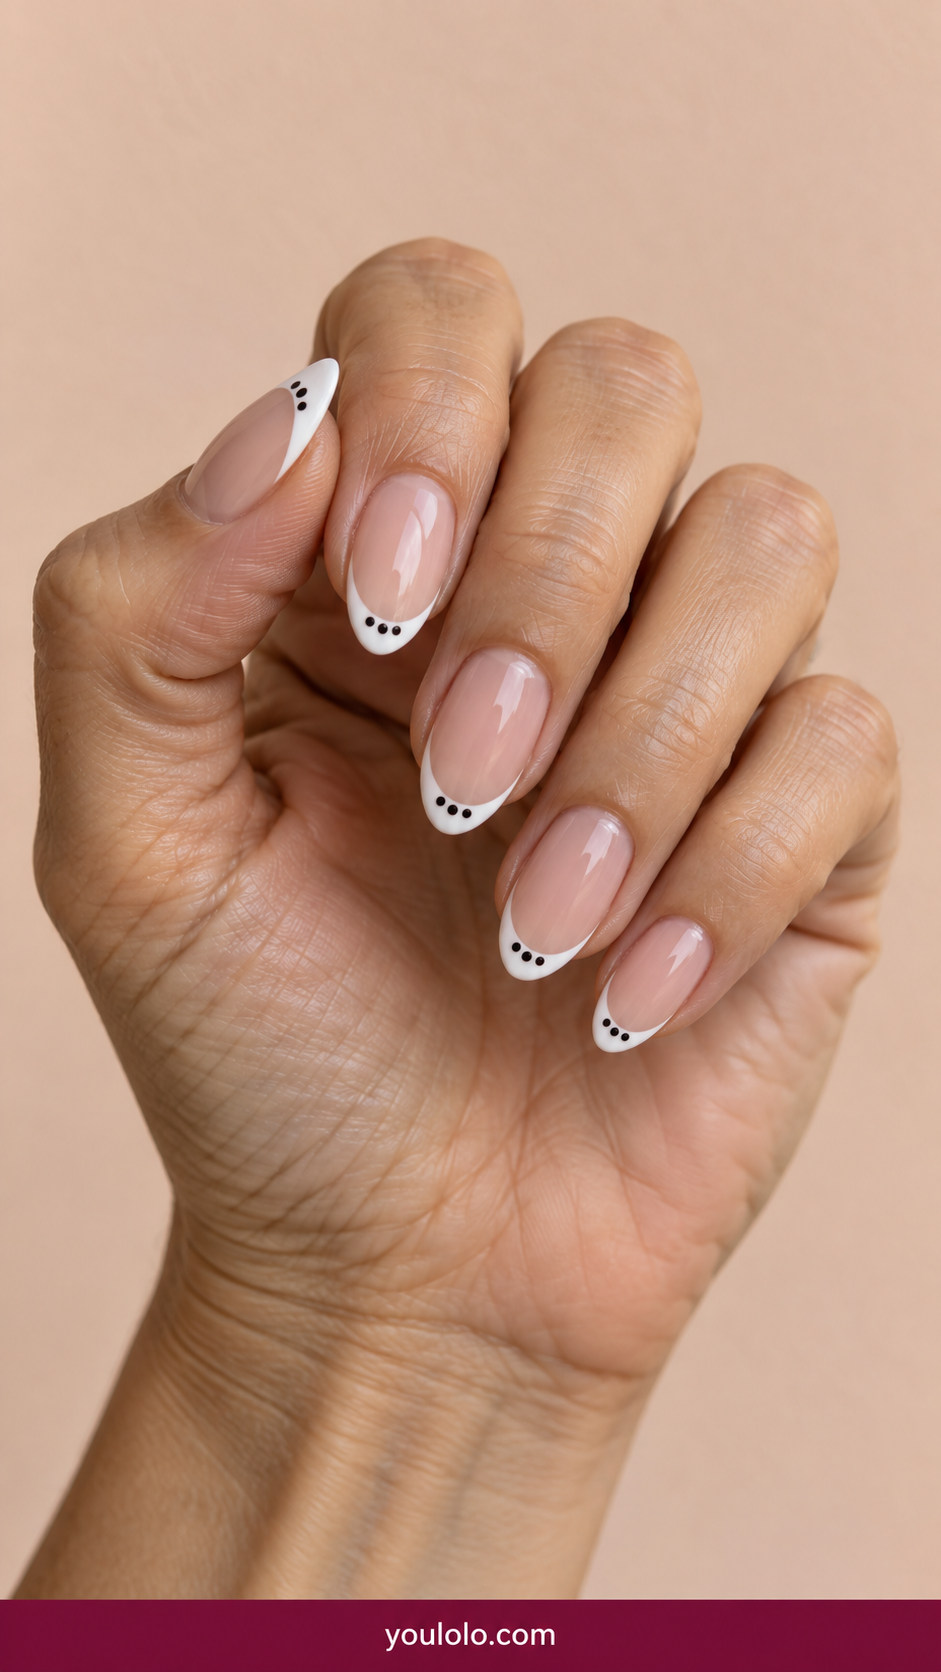
A fine white French edge acts like a narrow canvas for black dots. Keep the spots inside the painted tip; dots drifting into the nude base change the composition.
5. Butter-yellow rounded nails with small cherry-red retro dots
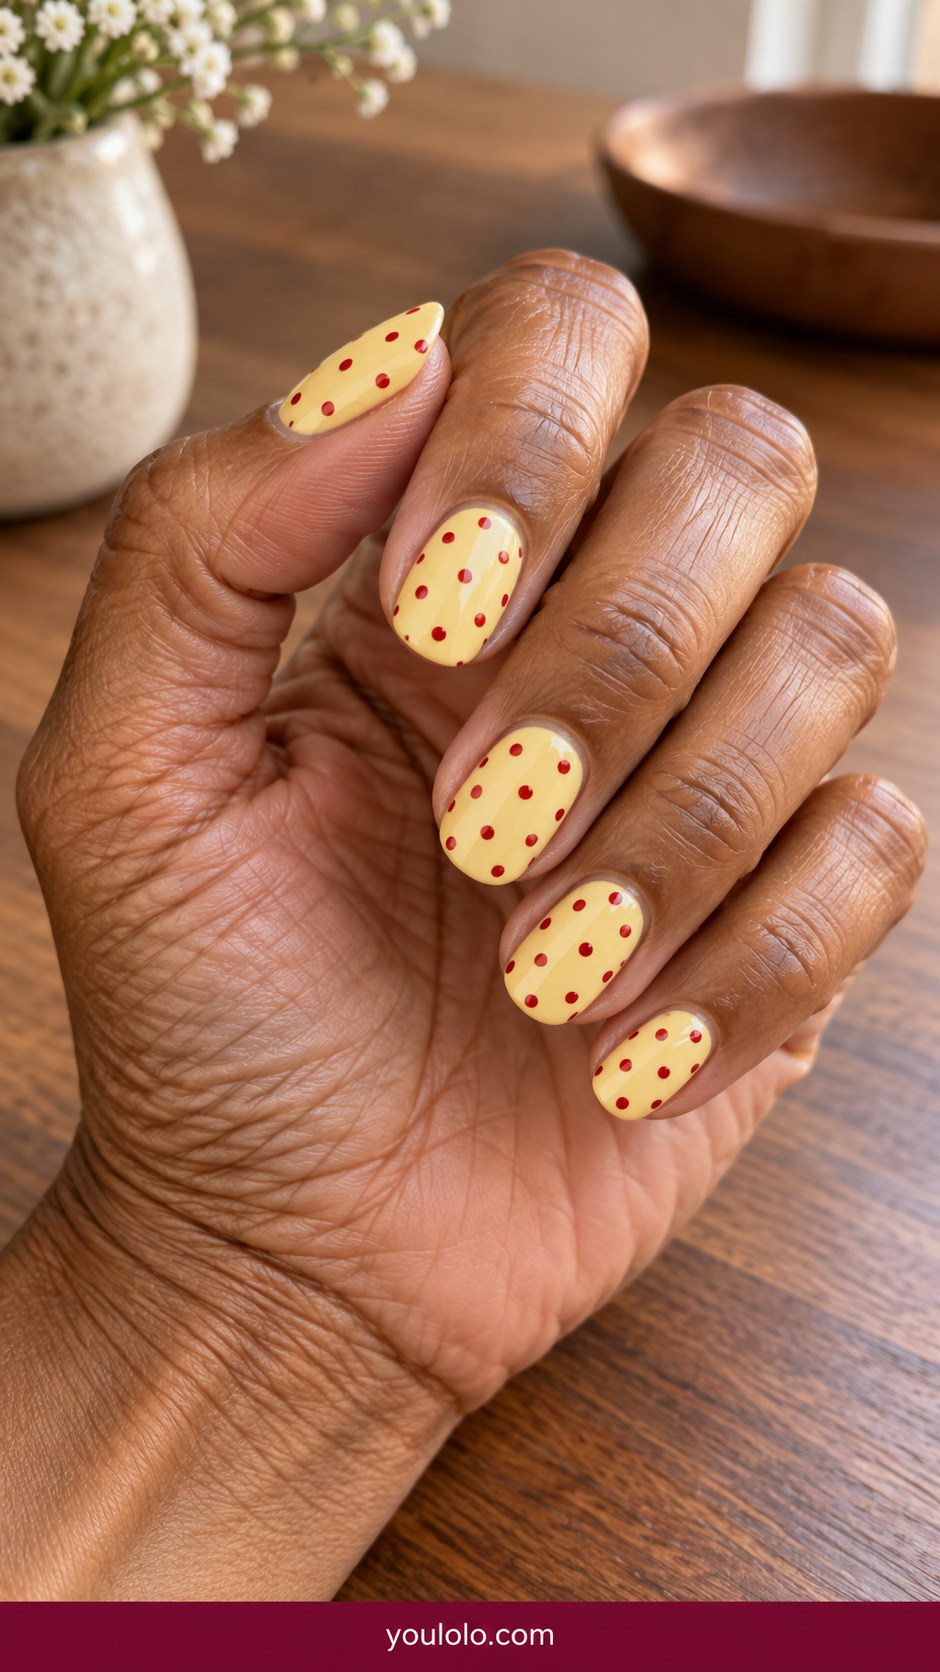
Warm butter yellow and cherry red have the feel of vintage summer fabric. The red should stay a small accent, with each yellow nail clearly visible between spots.
6. Glossy deep red nails with delicate white dots near the cuticle only
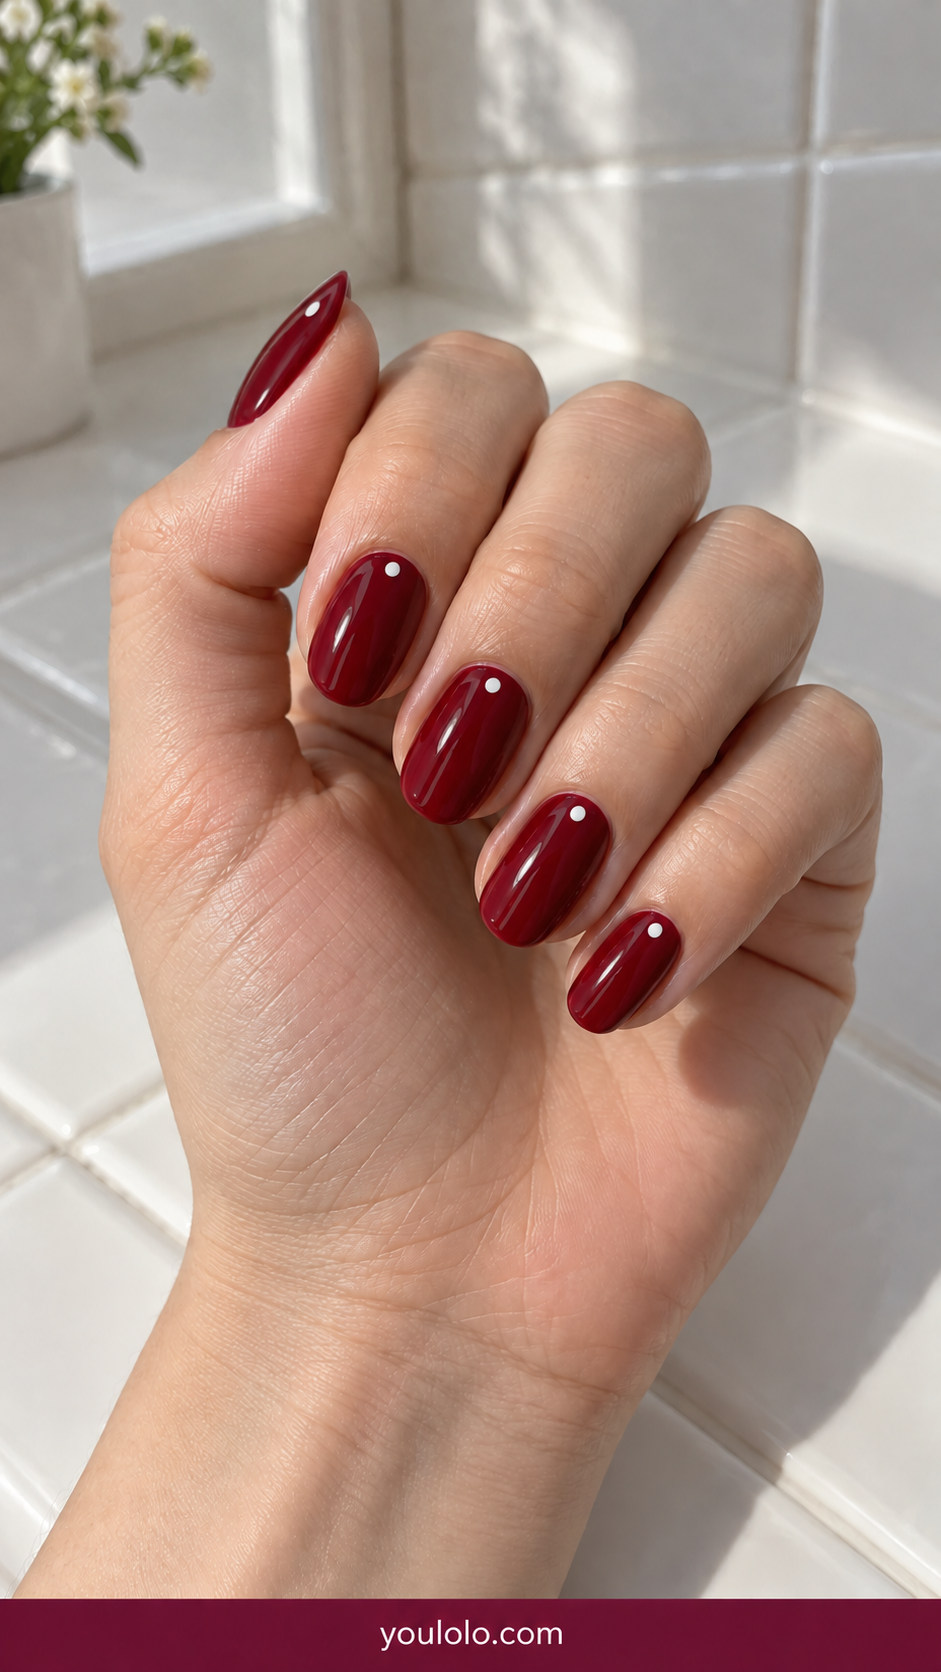
A single pale dot near each burgundy cuticle is almost as minimal as jewelry. The point should sit at a consistent distance from the nail fold, never on the skin.
Polka Dot Nails with retro color
Color changes the character of the same round mark. Cobalt and ivory feel crisp; yellow and red have a distinctly playful vintage energy. Dark polish with pale points feels dressier. Keep the rows slightly imperfect only if you want that hand-painted character—ordered spacing looks quite different.
7. Milky lilac oval nails with contrasting dark-plum dots in a diagonal line

Deep plum dots on lilac create a softer alternative to black. The diagonal placement follows the finger length and makes the oval shape feel a little longer.
8. Tan beige nails with dark espresso unevenly scattered miniature dots
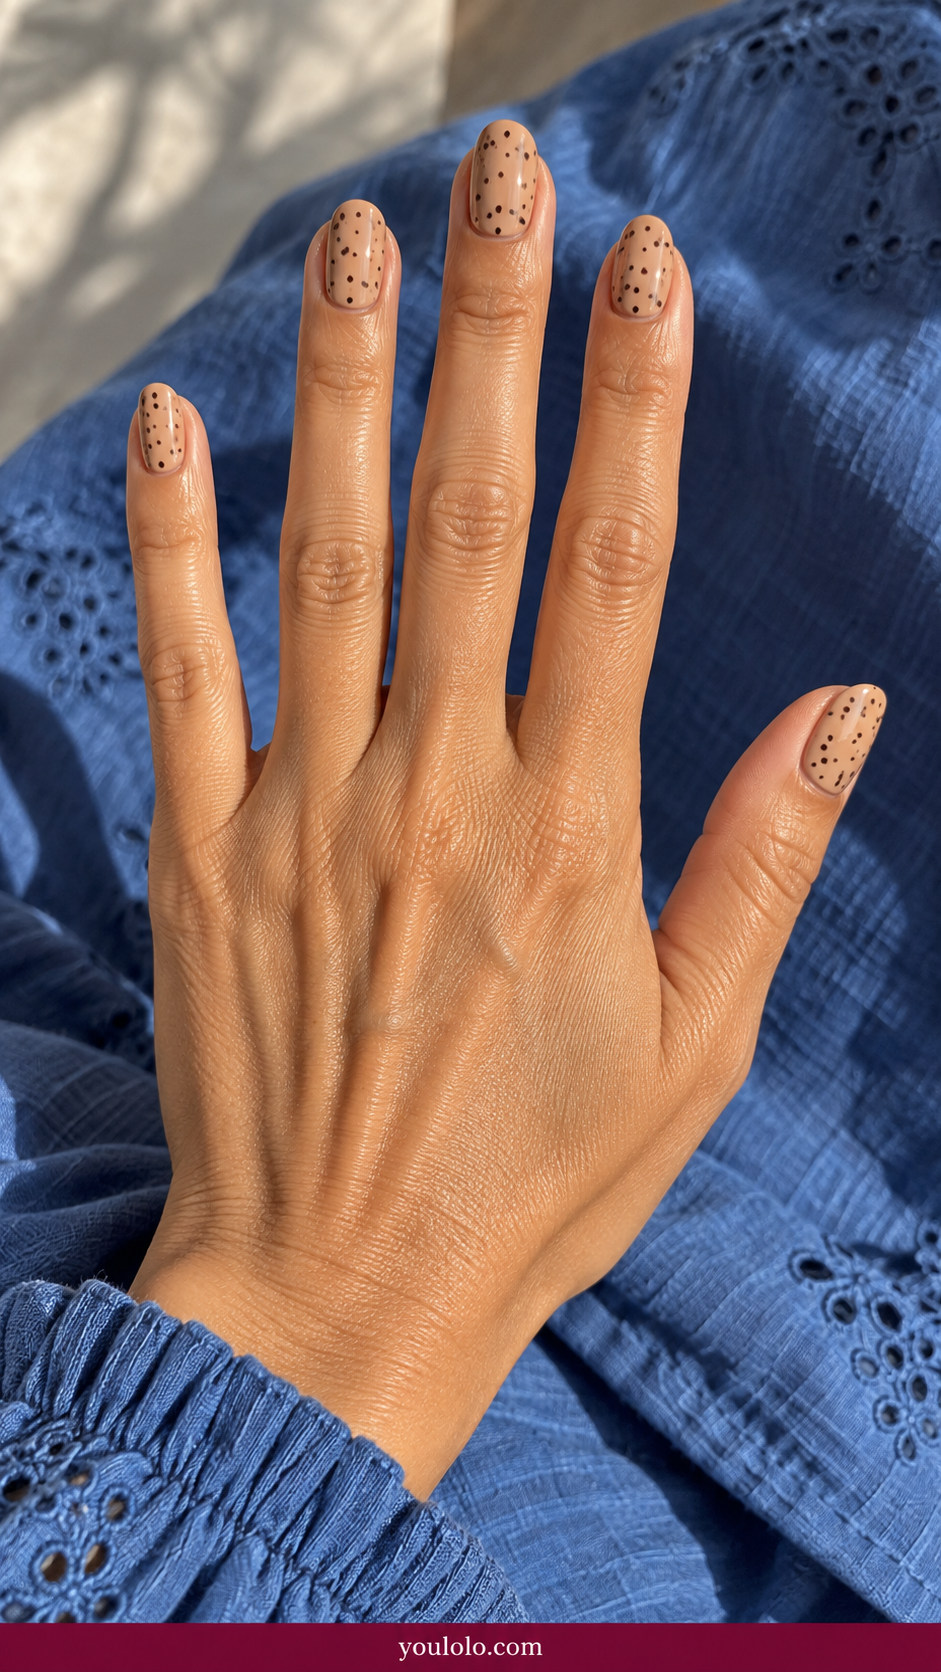
Tiny espresso specks against tan beige have a quiet, almost freckled look. Ask your artist to leave plenty of beige visible and avoid clustering all the dots at one corner.
9. Black short squoval nails with tiny bright white dotted half moons
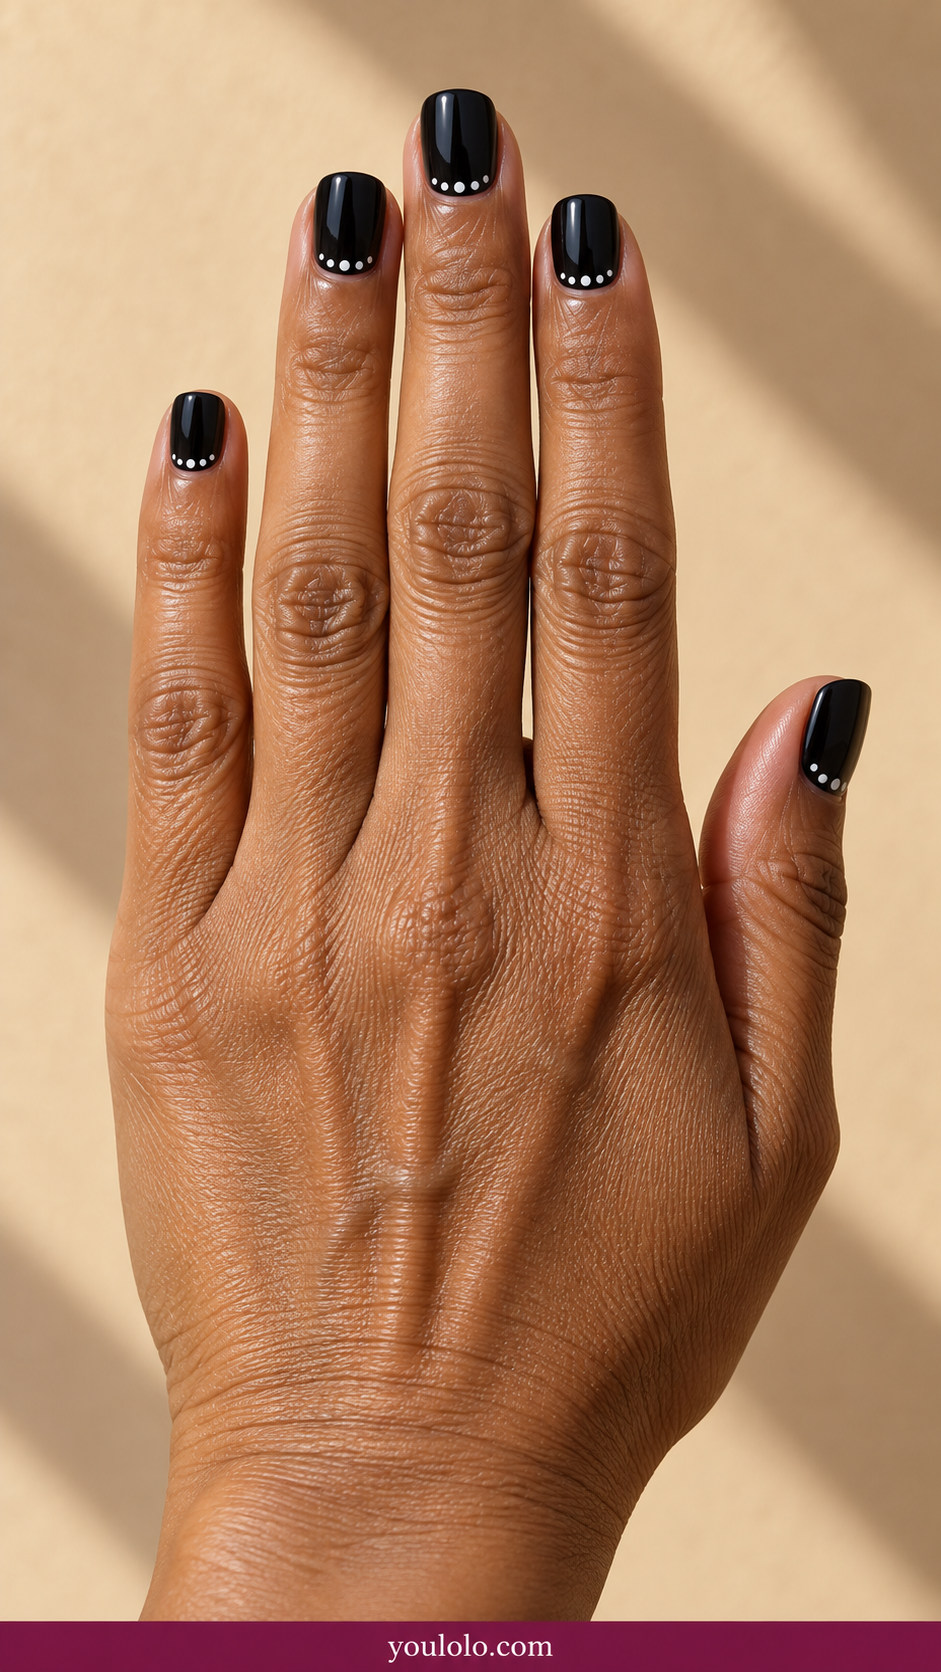
White dotted half moons brighten short black nails without a heavy full pattern. A curved row close to the base is easier to read when every black nail has an even cuticle line.
10. Soft mint nails with ivory dots and one plain mint accent nail
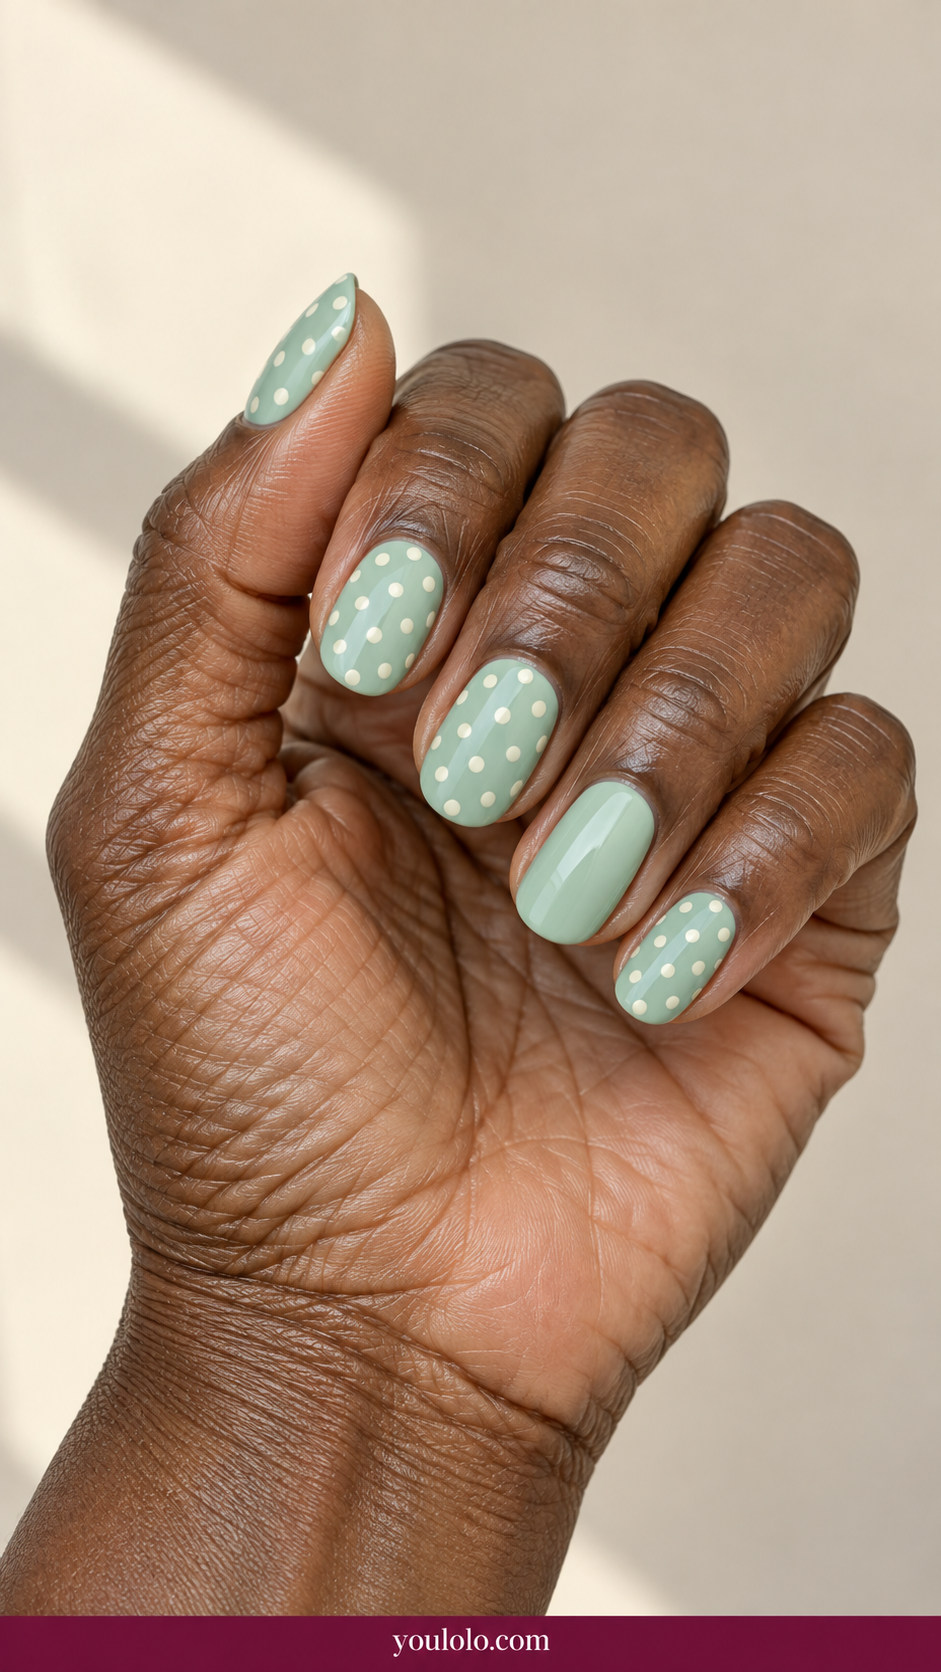
Ivory points and mint green are fresh without becoming neon. Keeping one nail plain is the little rest that makes the spotted nails look more considered.
11. Sheer nude nails with a single cobalt dot precisely centered on each nail

Here the solitary cobalt mark is the entire idea. Match the dots' size and center placement before the top coat, because there is no busy background to hide a small wobble.
French tips and single-point details
The smallest motifs often take the most care. One cobalt dot needs to be precisely centered; dots on a French tip need enough painted edge to remain readable. Finish one sample nail and check it at arm's length before repeating the layout.
12. Burgundy almond nails with restrained tiny pale blush dots along one edge
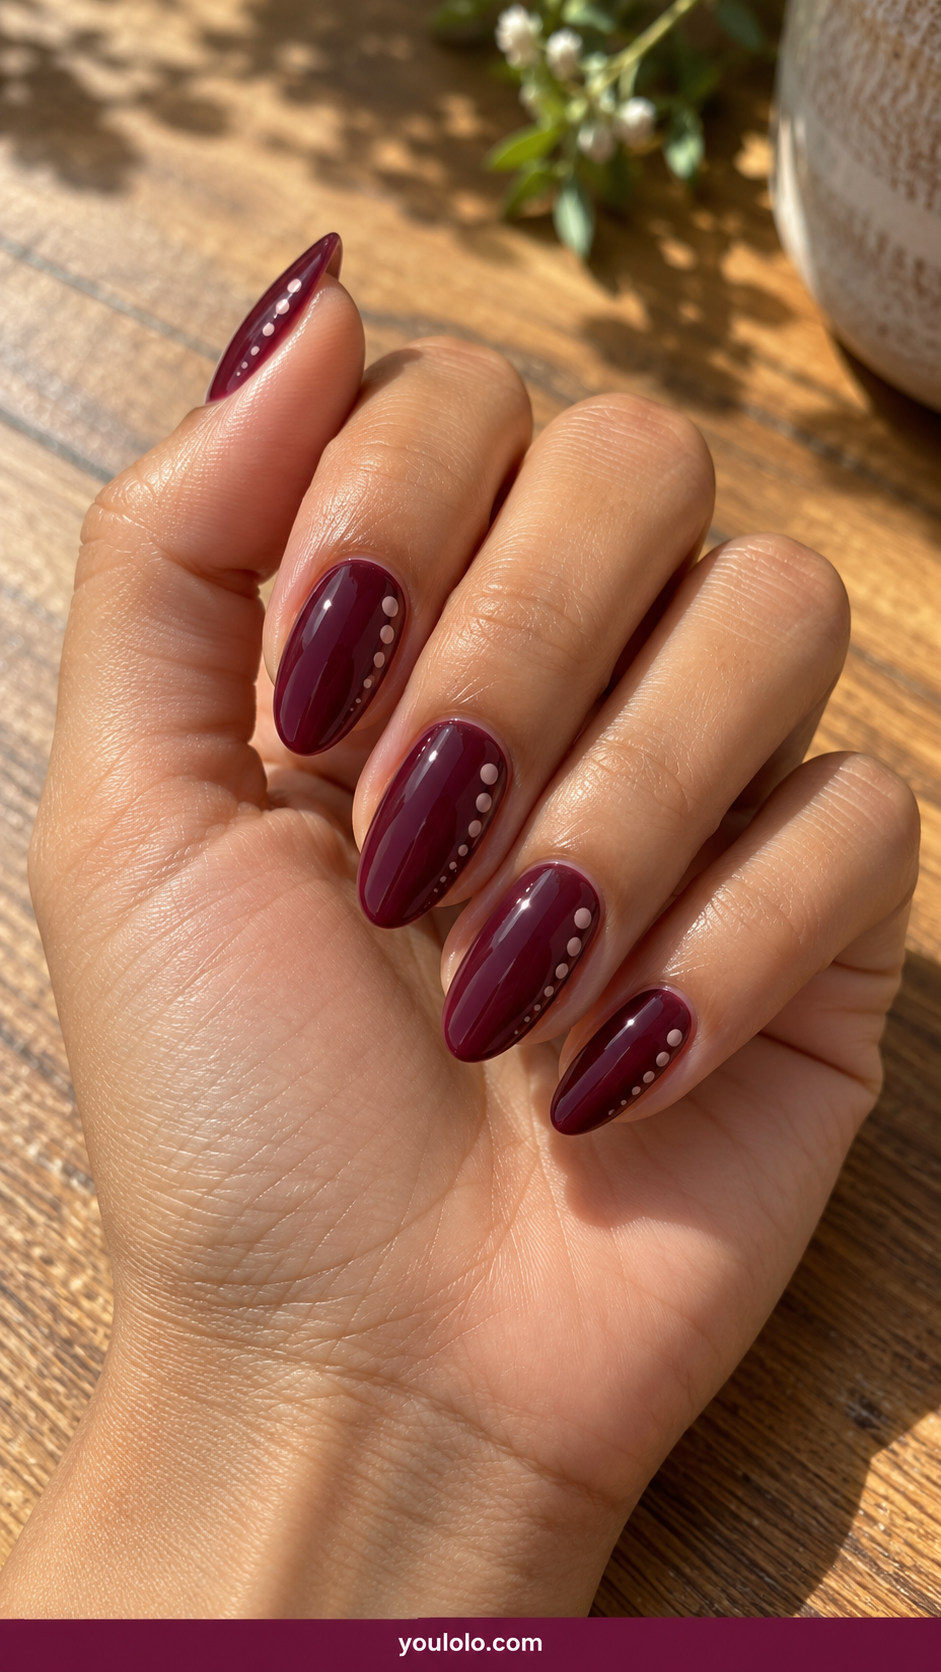
Blush pinpoints along the edge soften a wine-red almond manicure. You get the depth of burgundy and a second detail visible only when the light catches it.
13. Pale peach nails with staggered terracotta dot rows on two fingers
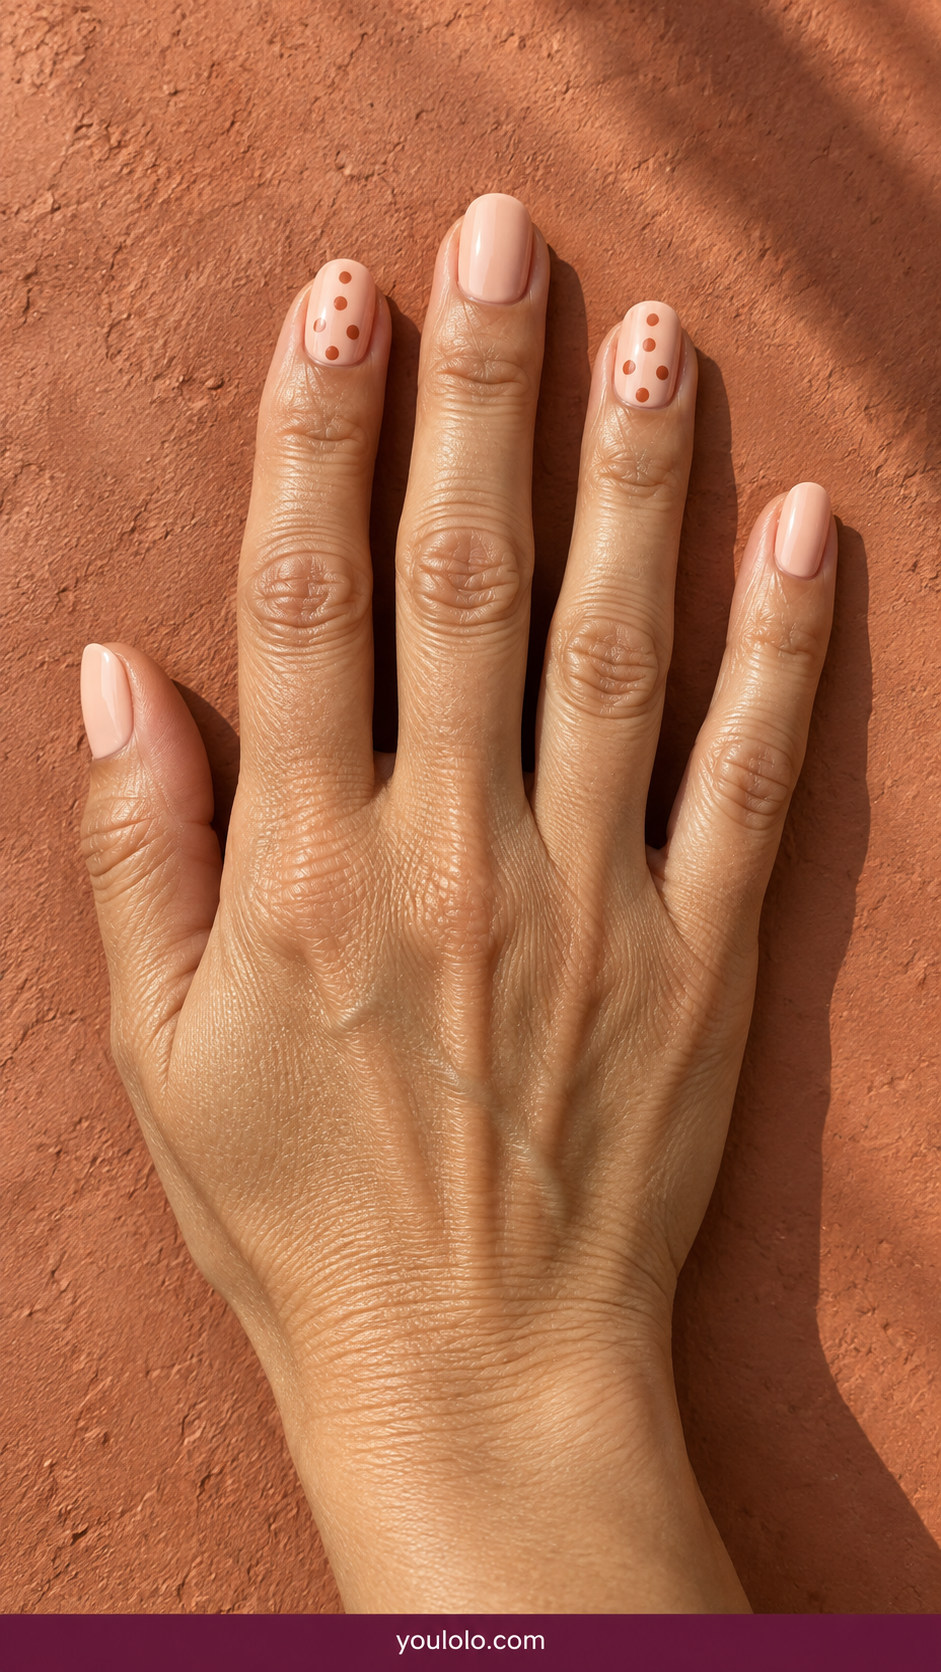
Terracotta spots warm a pale peach base. Staggering two rows prevents a rigid grid and makes the accent nails feel painted rather than mechanically printed.
14. Classic French nails with contrasting tiny polka dots only on the white tips

Dots on the white French tips add pattern where you least expect it. Keep the natural pink base clear, and scale the marks to the width of each tip.
15. Soft gray nails with two neat vertical columns of white dots
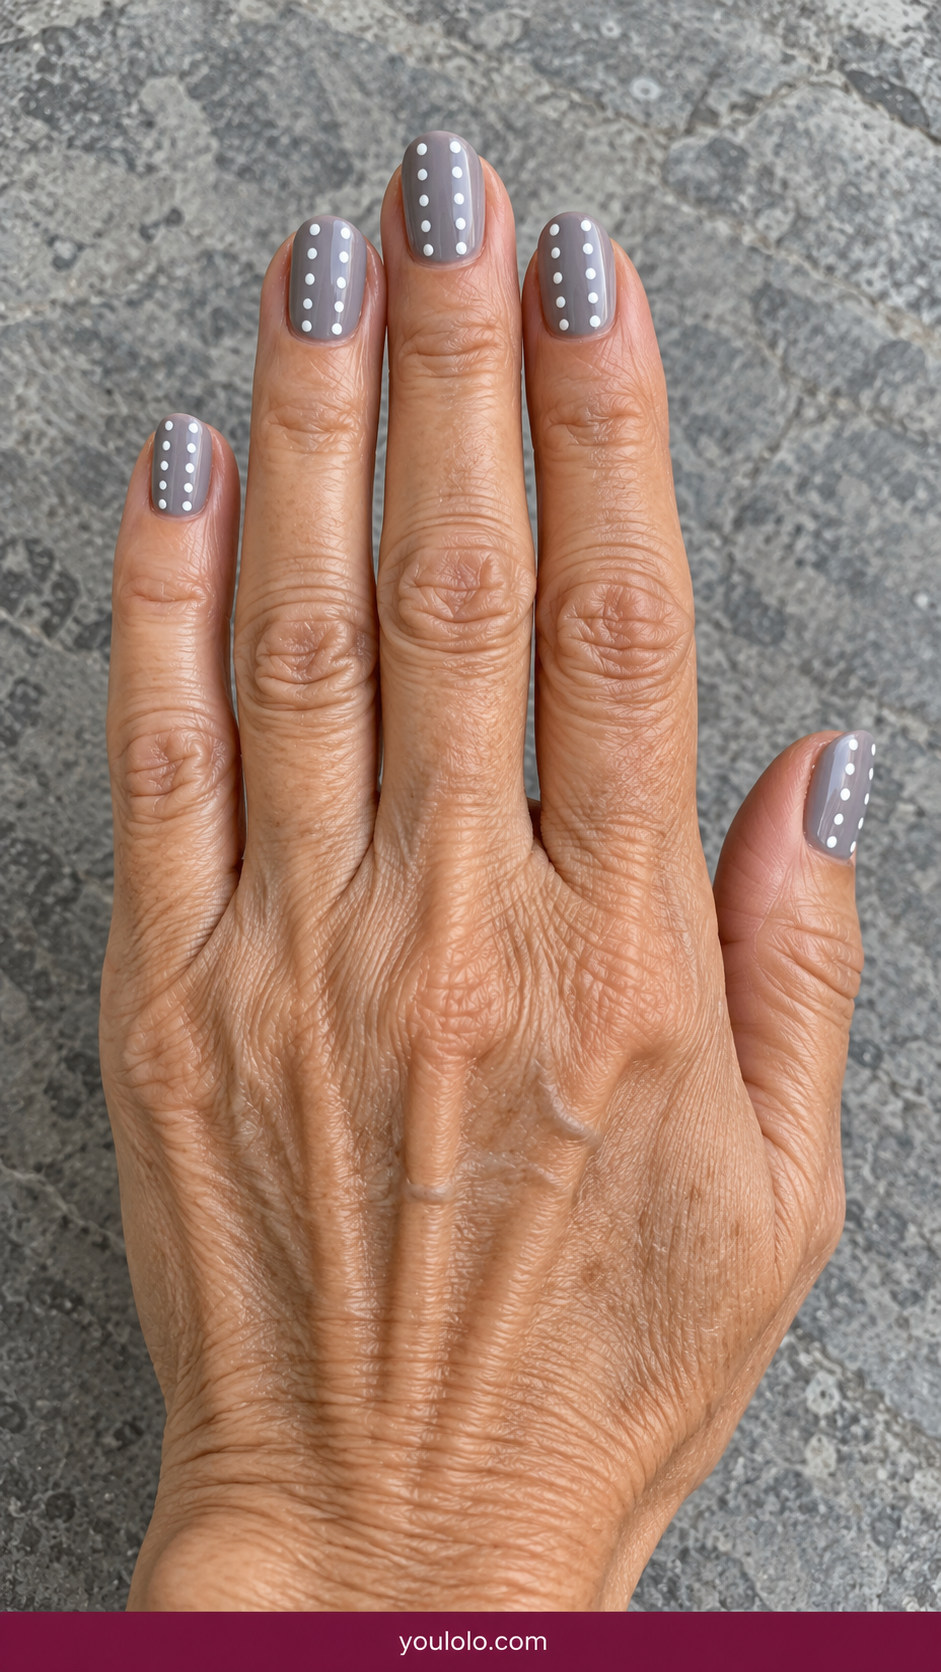
A pair of vertical dotted columns makes cool gray feel architectural. Counting the marks before painting helps keep the rhythm similar even when nail lengths vary.
16. Warm cream nails with subtle metallic gold pin-dot accents on two nails

Gold pin dots give cream nails a quieter finish than glitter. Place a few accents on two nails and leave the remaining cream glossy and unmarked.
How dot scale changes the whole manicure
Think about the dot as a unit of scale rather than a decoration. A single spot centered on a short nude nail can be noticed from across a table because nothing competes with it. Five or six pinpoints on a French tip feel like an edge treatment. A closely repeated grid becomes a print, so it makes sense to choose softer colors if you do not want the pattern to dominate. You can mark a sample nail in two sizes and look at both against your normal outfit before the rest of the set is painted.
Choosing a dot pattern for your nail shape
Short round nails have a small center and curved sides; three spaced spots or one tiny cuticle point fit well. A squoval gives a little more horizontal room for orderly rows. On almond nails, a diagonal trail can visually follow the taper. None of these is a strict rule. The practical check is whether the last dot is uncomfortably close to the skin or free edge, where the design may look cramped. Leave a small border even if you are asking for a dense pattern.
A salon brief worth saving
Tell your artist the base color, dot color, approximate diameter and placement, and how many nails carry the pattern. 'Black dots on sheer pink, small and evenly spaced on all five' is a much clearer request than 'cute dot nails.' For the burgundy look, specify just one pale point near each cuticle. For the French look, specify dots only inside the white edge. Those small differences are why the photographs in this collection should not be treated as interchangeable.
Making the pattern last
A smooth base and complete drying or curing between color and dots help preserve the circles. The artist should let each dot settle before sealing it and avoid dragging the top-coat brush through wet pigment. At home, a dotting tool makes placement easier than a large polish brush, but a small practice row on paper can help you decide pressure and spacing first. If one nail chips, repairing a single patterned accent can be more straightforward than repainting a whole printed set.
How to choose and request polka dot nails
A dotting tool gives the most repeatable circle, but the pressure matters: a heavy dab makes a raised blob. Place the dots on fully dry color, begin with the center row when using a grid, then finish with top coat after the points settle.
Short nails need editing rather than a smaller copy of a long-nail pattern. Three spaced spots, a dotted crescent, or one accent nail can be clearer than twenty miniature marks. Sheer bases forgive grow-out; opaque navy and burgundy make the cuticle line more noticeable.
Try pairing your dot color with one detail you already wear: a white shirt, brown bag, blue denim, or gold earrings. That often makes a playful manicure feel naturally part of your wardrobe.
Polka Dot Nails: questions people ask
Are polka dot nails still trendy?
Yes. Recent 2026 nail coverage includes very small dots and polka-dot French tips. Their appeal is adaptable rather than tied to one exact color: a single point, a two-nail accent and a full retro set all read differently.
Are polka dots out of style in 2026?
No. For a current-looking version, reduce the scale or combine the dots with a narrow French tip. A neat cream-and-brown palette also makes the pattern feel less nostalgic than a full rainbow set.
What are polka dot nails?
They are manicures built around round painted spots. A nail artist can place one point or an ordered repeat with a dotting tool; the base, point size and spacing determine the finished style.
Can polka dots work on short nails?
Absolutely. Short nails often look best with a few tiny, evenly spaced spots or one contrasting cuticle dot. Leave visible space around the artwork so the nail shape remains clear.
A final thought before you book
Save one full-hand photo and one close-up that best explains your favorite polka dot nails idea. Show the artist both the colors and the placement you care about. A shade or shape can be adapted to your own nail beds; the distinctive detail should stay visible once your hand is resting naturally.
For further reading on current nail designs and the technique: Allure and Vogue.




[…] 16 Polka Dot Nails Ideas: Tiny Details, Big Personality […]
[…] 16 Polka Dot Nails Ideas: Tiny Details, Big Personality […]