The Best Fluffy Pancakes recipe you will fall in love with. Full of tips and tricks to help you make the best pancakes.


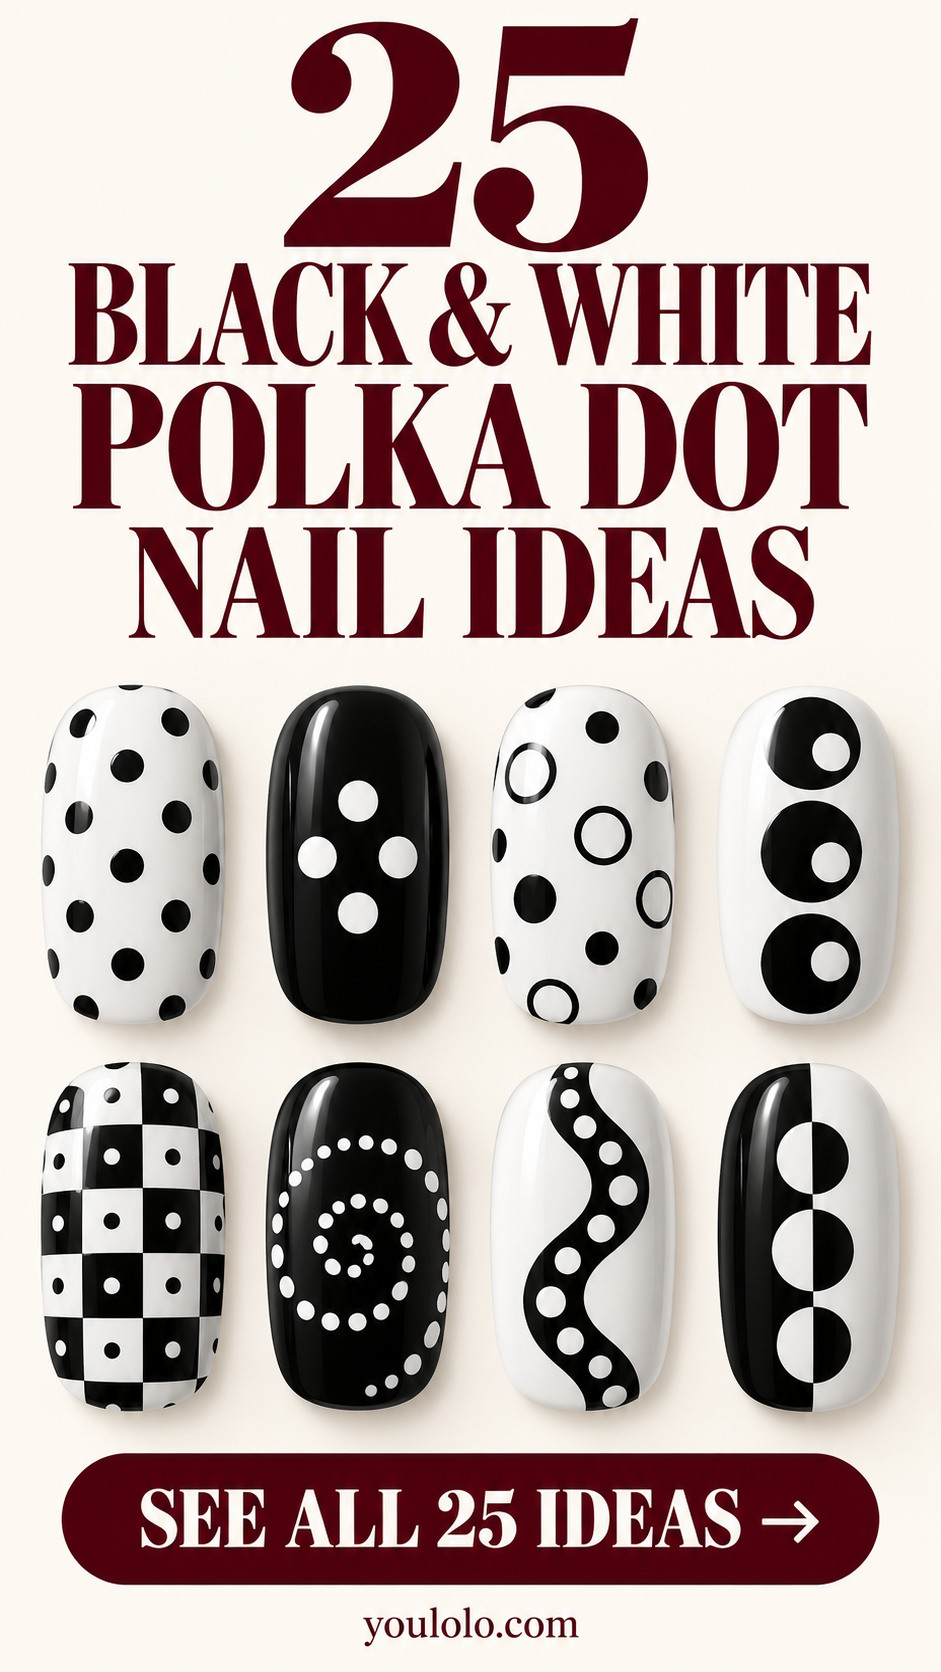
Black and white polka dot nails can feel playful, tailored or surprisingly graphic. The difference is in the arrangement: a few centered circles give a very different result from a dense stippled fade, a dotted spiral or spots crossing a black-and-white seam.
These 25 designs explore spacing, scale and shape within a restrained monochrome palette. There are short, wearable sets alongside more detailed optical layouts. Choose the pattern you like first, then use the salon brief to adapt its density and placement to your nail length.
Black and White Polka Dot Nails: Shape and Spacing
1. The Crisp Offset Dot
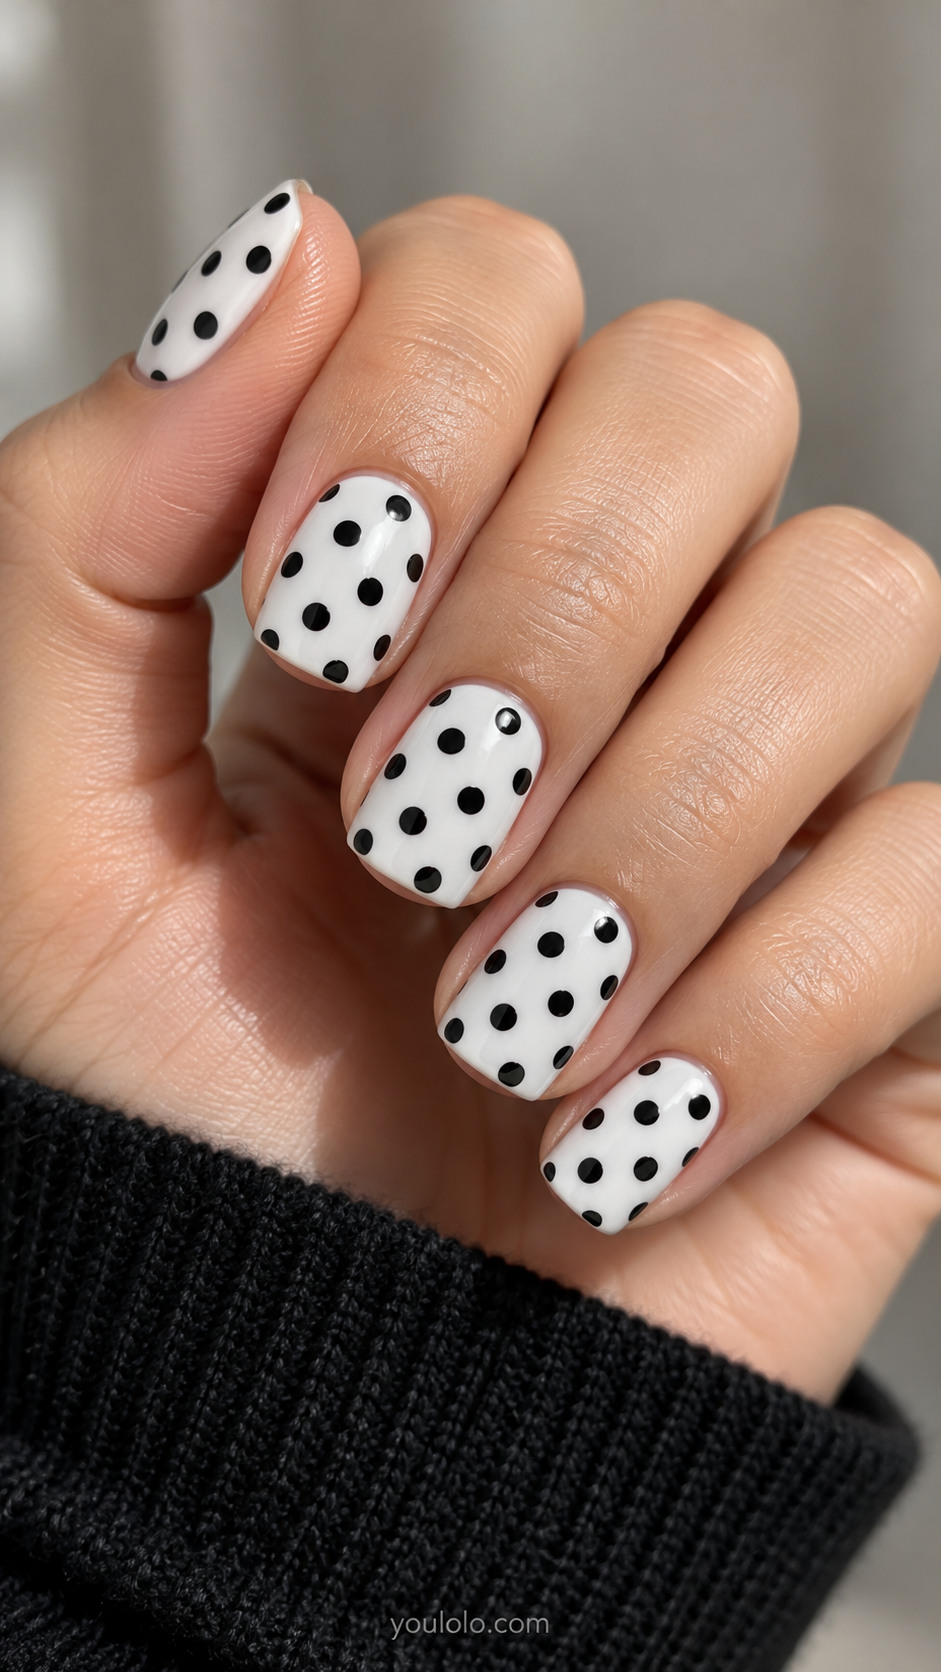
A bright white base makes every dot visible, so the spacing matters as much as the color. Offset rows feel softer than a strict square grid and follow a short squoval shape comfortably. Keep a small margin around the cuticle and sidewalls. This is the reference point for the collection: simple circles, clean edges and enough white space to keep the pattern light.
Salon brief: Short squoval white nails with medium black round polka dots in evenly spaced offset rows.
2. Domino Dots
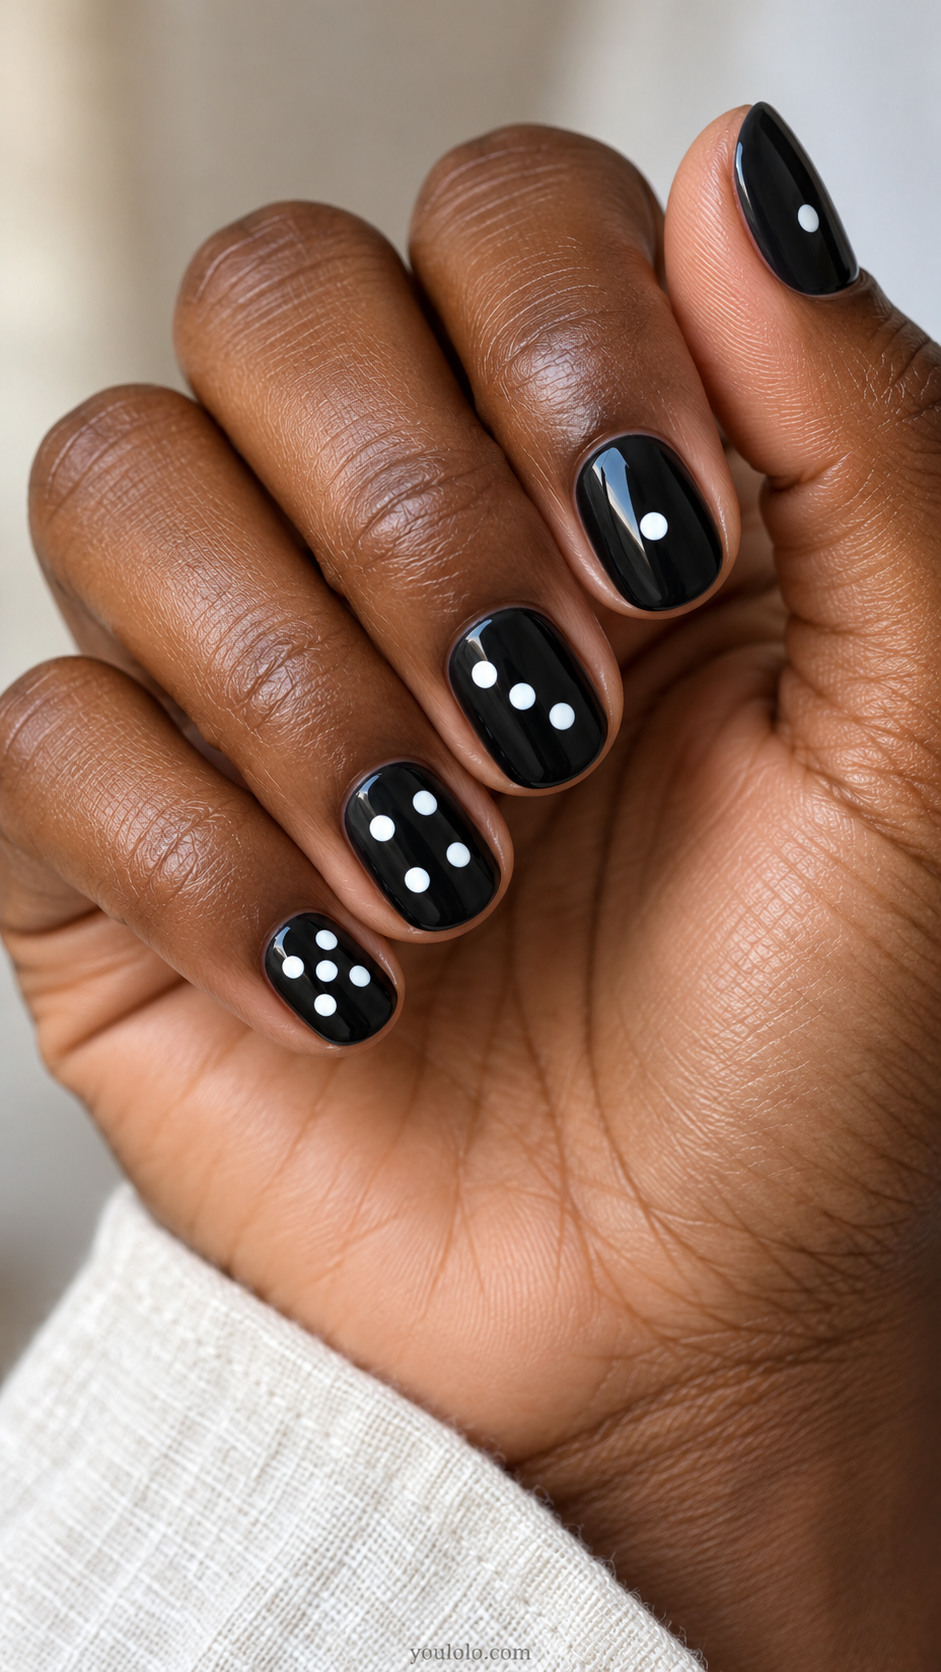
Changing the dot count across the hand gives this short set a playful rhythm. The circles are arranged like domino pips, with plenty of black visible around them. Keeping the dots the same diameter makes the variation feel intentional. Ask for the arrangement to be centered on each nail rather than squeezed toward the tip, especially on the narrower little finger.
Salon brief: Short round glossy black nails with white dots arranged in domino-style groups of one, three, four and five.
3. Open Rings Meet Solid Dots
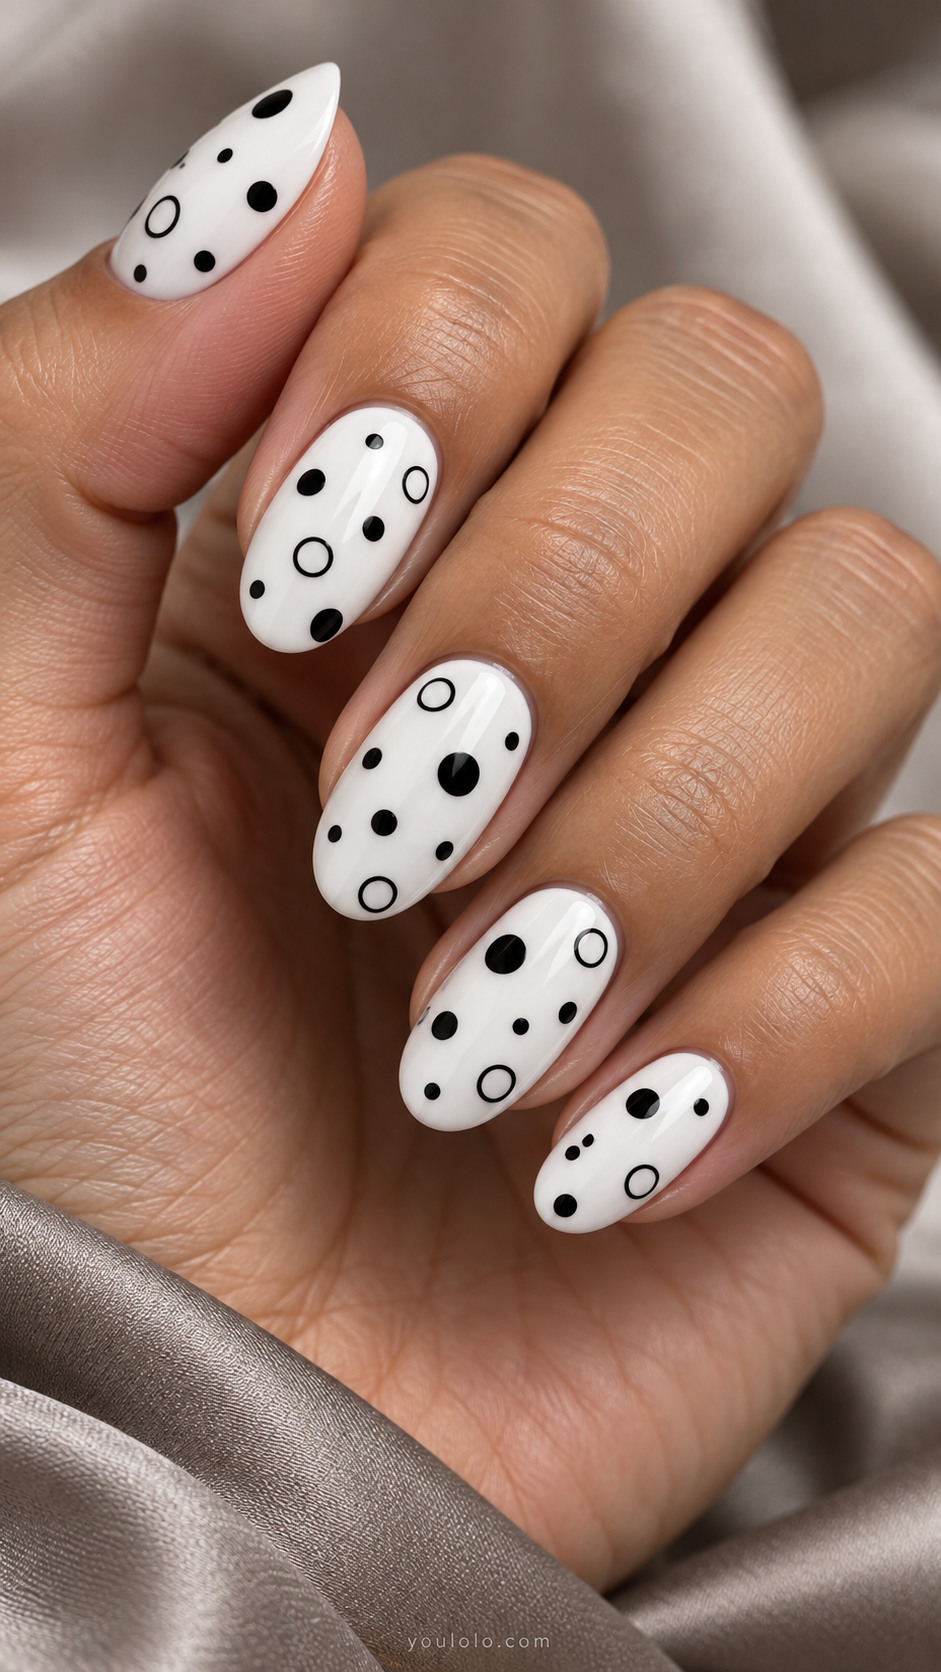
Solid dots carry visual weight; open rings leave more air. Mixing them in related sizes creates a subtle optical contrast without adding another color. Keep the outlines fine and the spacing generous so the rings remain clearly separate from the filled circles. An oval shape suits this softer arrangement, and a smooth glossy finish helps the small outlines stay crisp.
Salon brief: Medium oval white nails with scattered black solid circles alternating thin black open circle outlines, generous spacing.
4. Off-Center Bullseyes
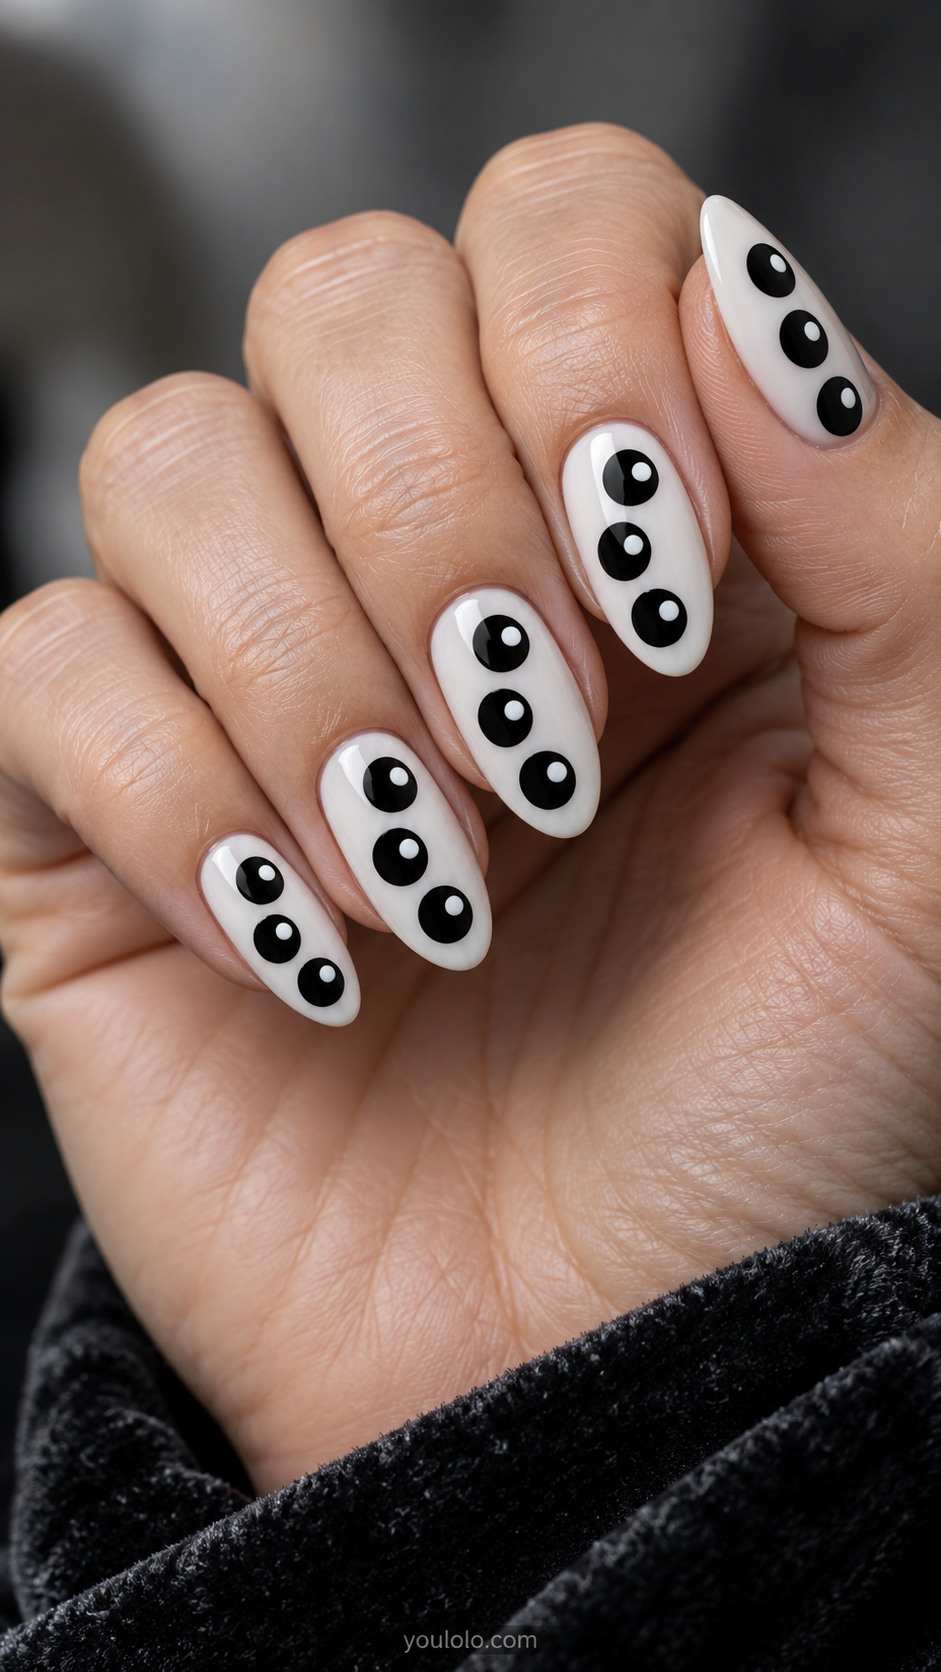
A small white dot placed just off center inside a larger black circle changes an ordinary spot into a graphic bullseye. The slight offset gives the pattern movement, while repeating that direction keeps it coherent. Use only a few large circles on each nail. This design benefits from medium length because the nested shapes need breathing room to read clearly.
Salon brief: Medium almond milky white nails with three large black circles per nail each containing small white dot offset toward one side, flat paint.
5. Cropped Jumbo Circles
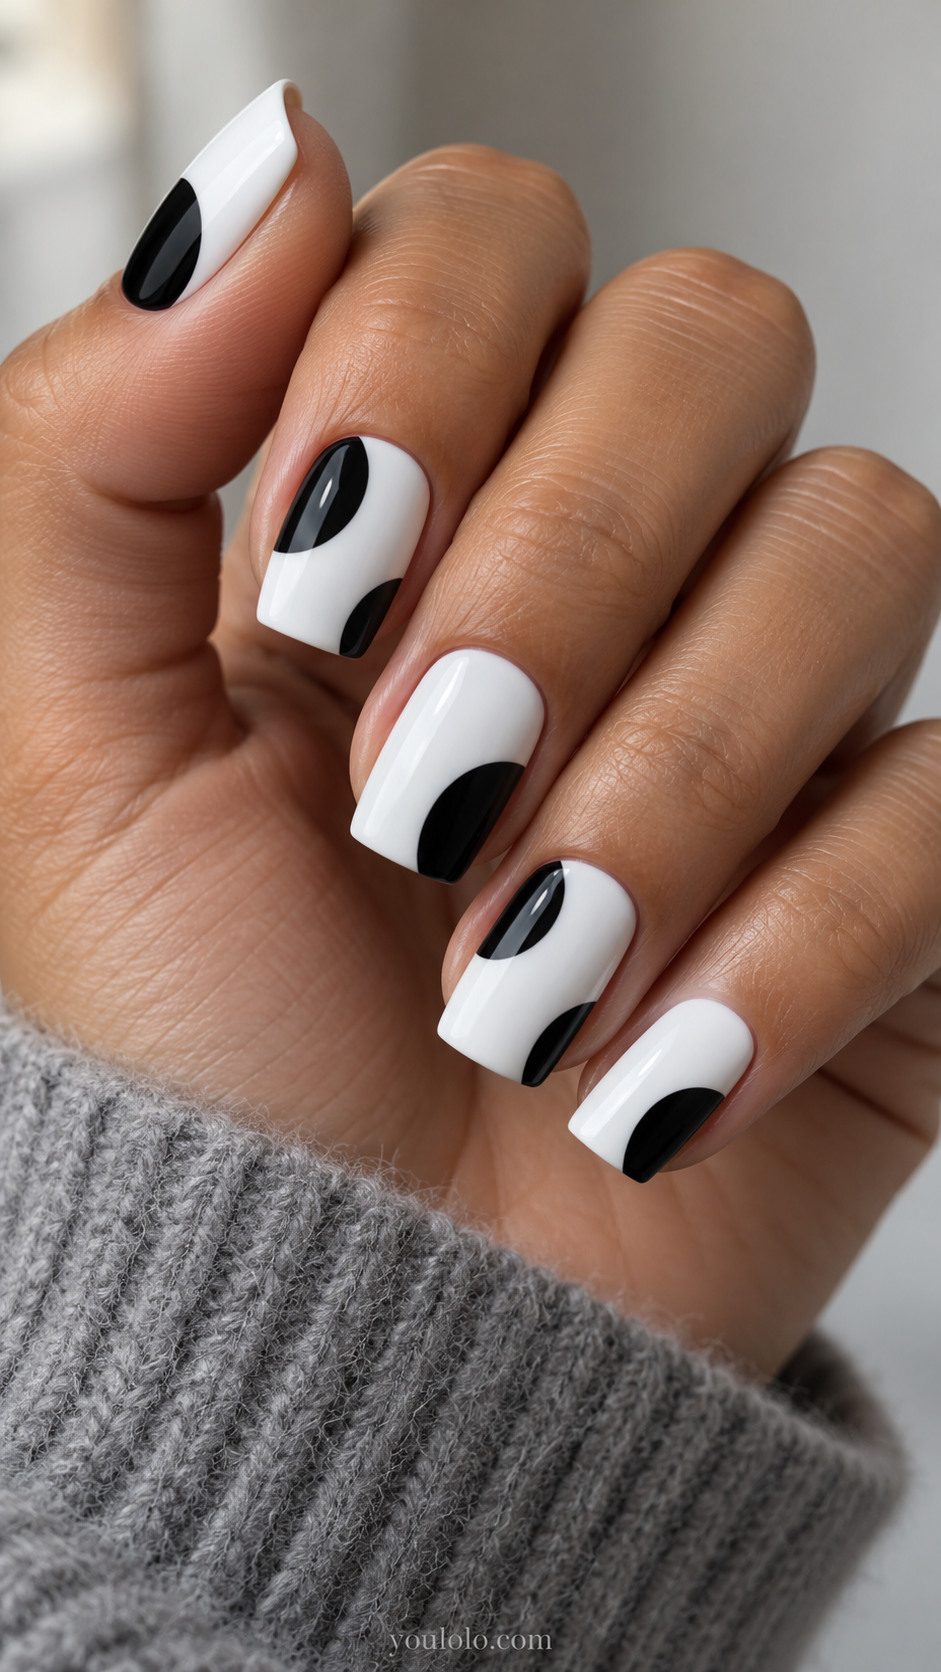
Letting large circles run beyond the nail edges creates a bold cropped print. You do not need to see a complete spot for the pattern to feel deliberate. Keep a visible strip of white between the black shapes so the manicure retains its dot identity instead of becoming an abstract solid block. Square tips make the oversized curves particularly striking.
Salon brief: Medium square white nails with two enormous black circles partially cropped at opposite side edges, white center gap, clean geometric.
Dot Arrangements with an Optical Rhythm
6. Dotted Checker Squares
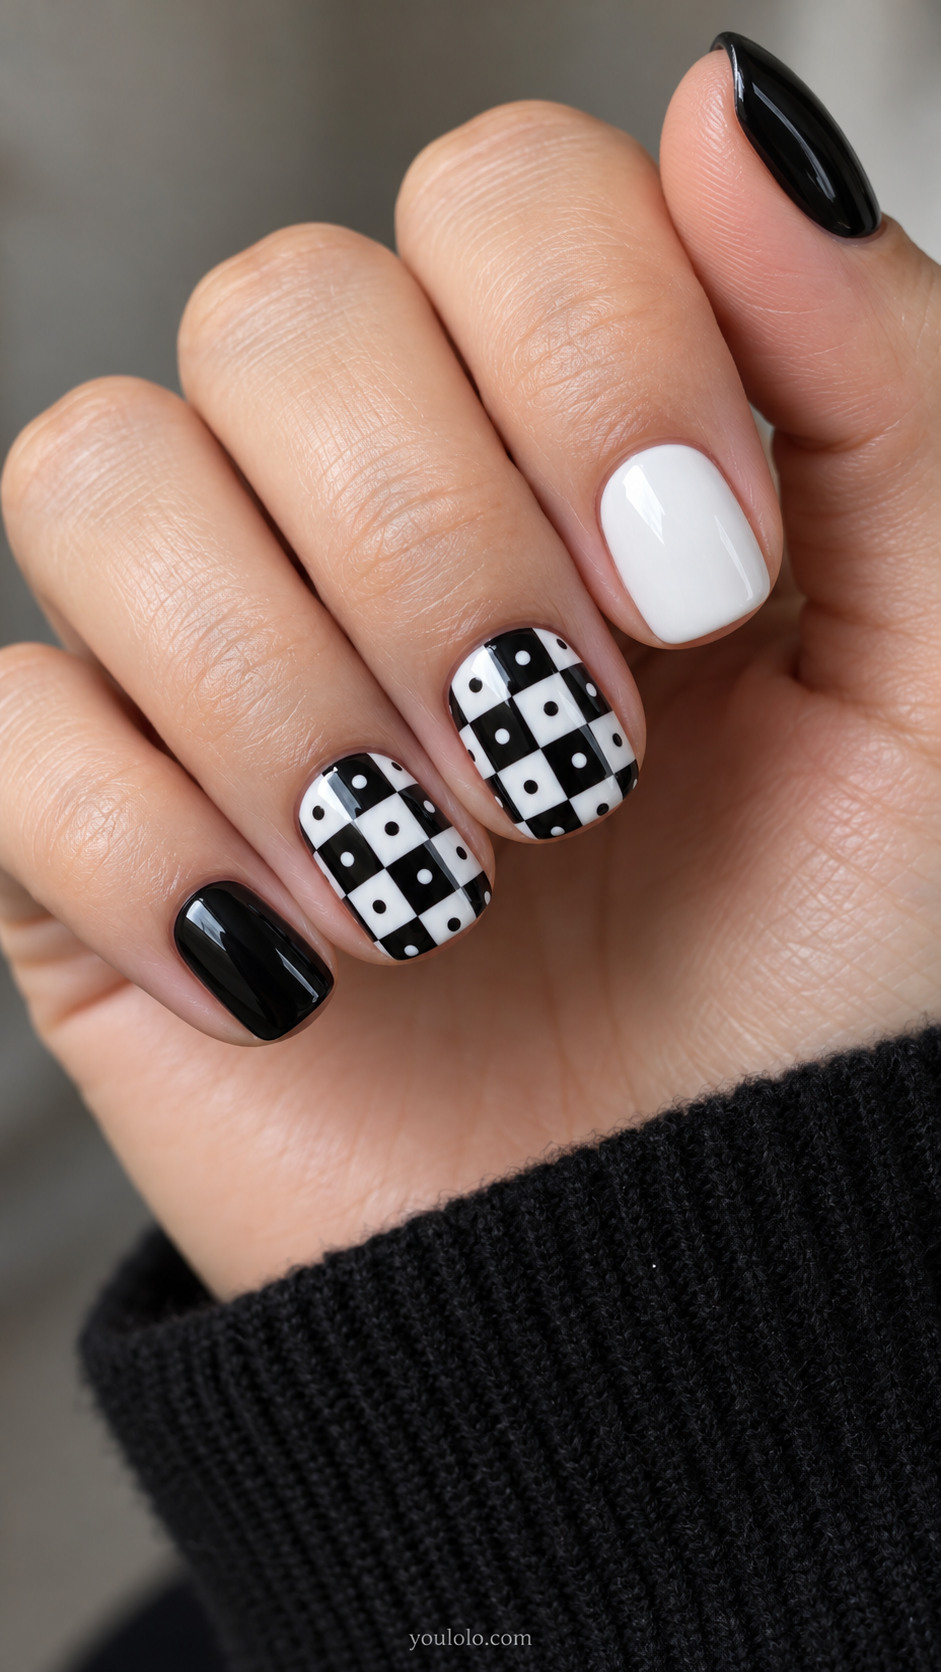
Two checked accents turn the dot into a small optical surprise. Each black square carries a white spot, and each white square holds a black one. The remaining solid nails give the busy pattern breathing room. Keep the squares broad and the circles small enough to sit comfortably inside them. A short squoval shape makes this graphic combination easy to wear.
Salon brief: Short squoval nails with black-and-white checkerboards on two accent nails, each square containing one opposite-color dot. Other nails solid black or white.
7. A Pinwheel of Circles
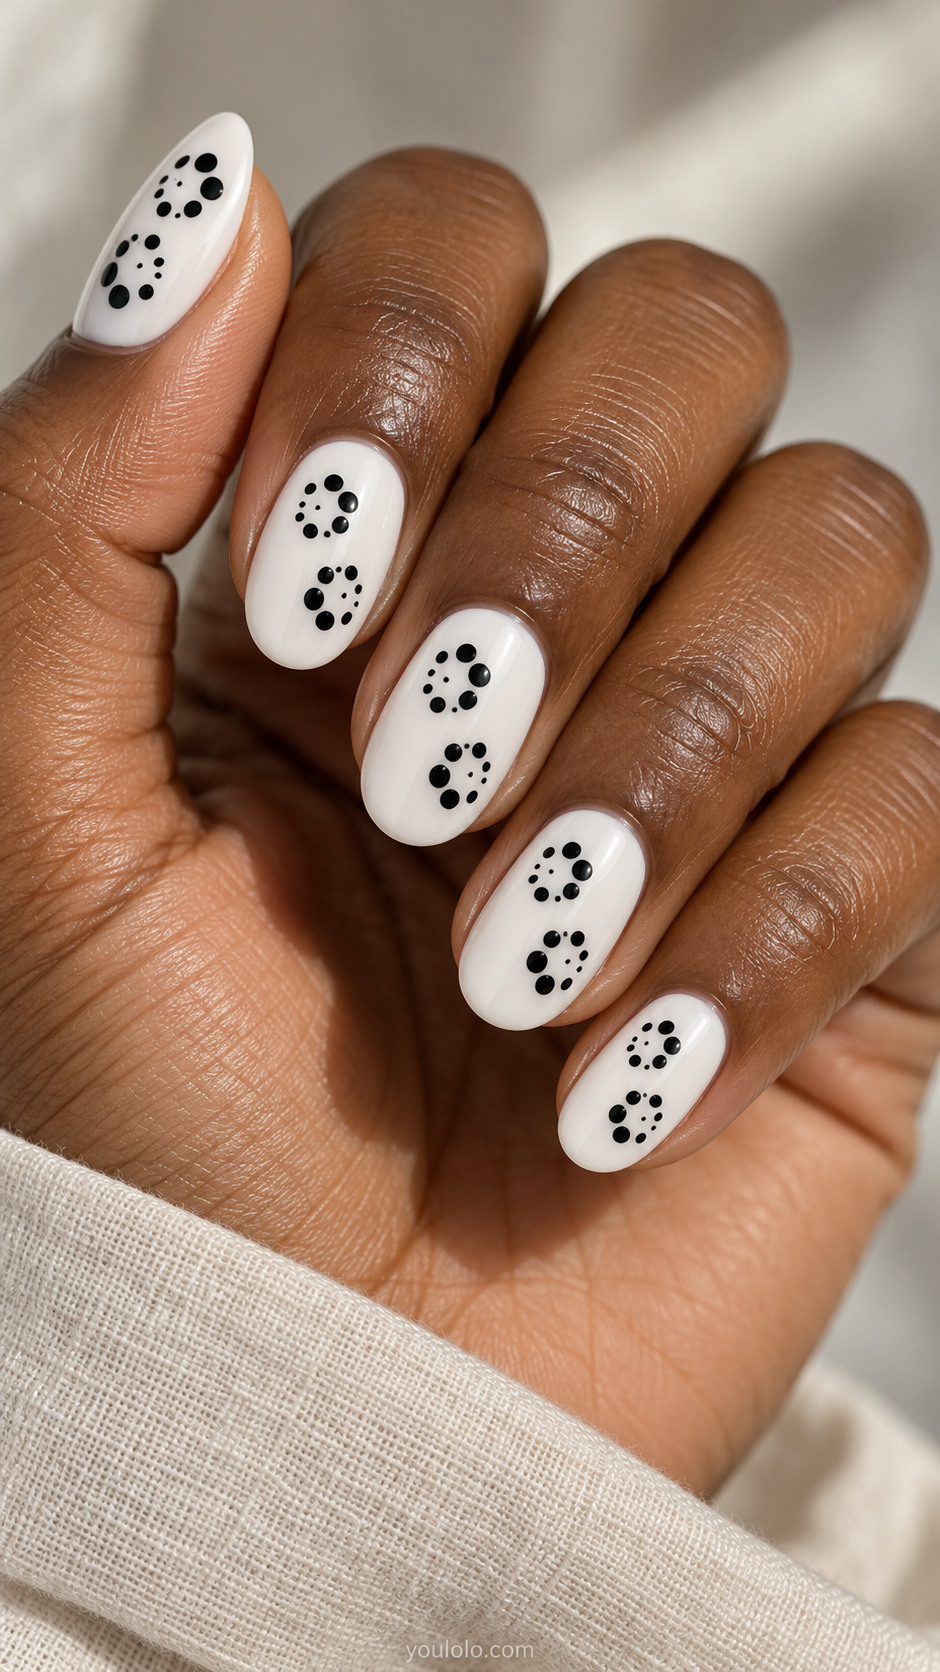
Small groups of graduated circles create a turning, pinwheel-like movement. Leave the center of each group empty and avoid joining the dots; that separation keeps the design graphic rather than floral. Two clusters are enough on a medium nail. Vary their position slightly from finger to finger while preserving their size, so the set feels lively without losing its structure.
Salon brief: White oval nails with two pinwheel-like circular groups of graduated black dots, open centers and space between the groups.
8. Tapered Dot Fans
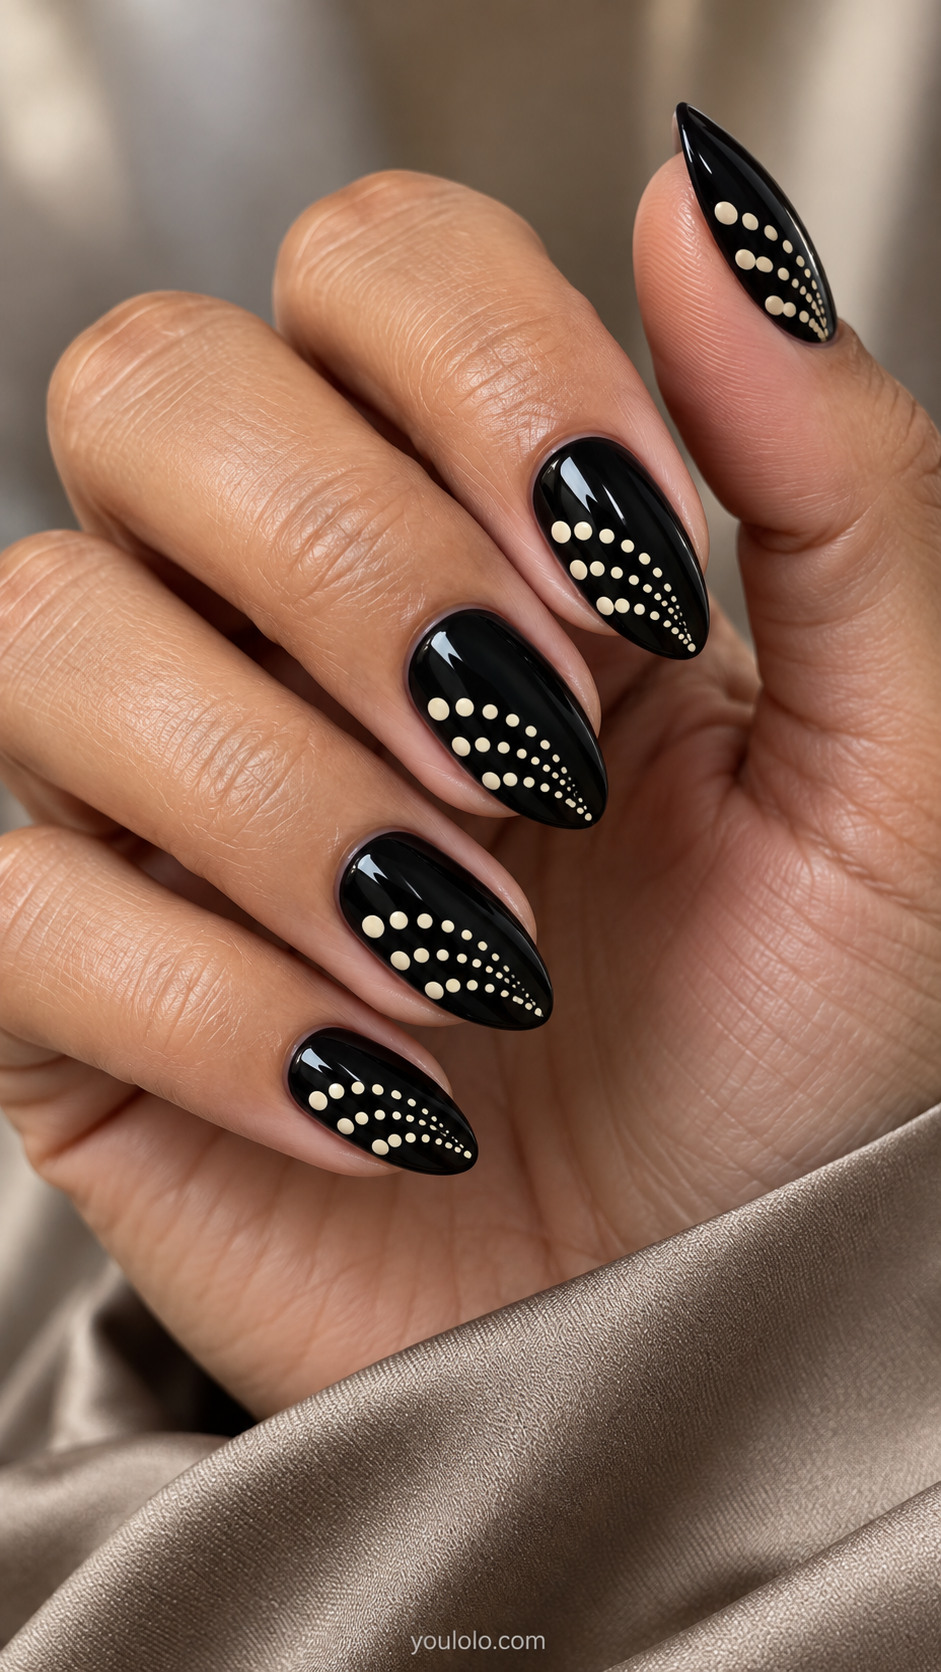
Three tapering rows of ivory dots fan across a glossy black base. The circles become smaller as the paths converge, giving the design a subtle sense of movement. Keep the black area between the rows open so the pattern stays delicate. An almond outline supports the pointed arrangement, and the dots should remain flat and smooth rather than built up into raised beads.
Salon brief: Glossy black almond nails with three tapered ivory dot rows converging toward one side of the tip.
9. A Soft Stipple Fade
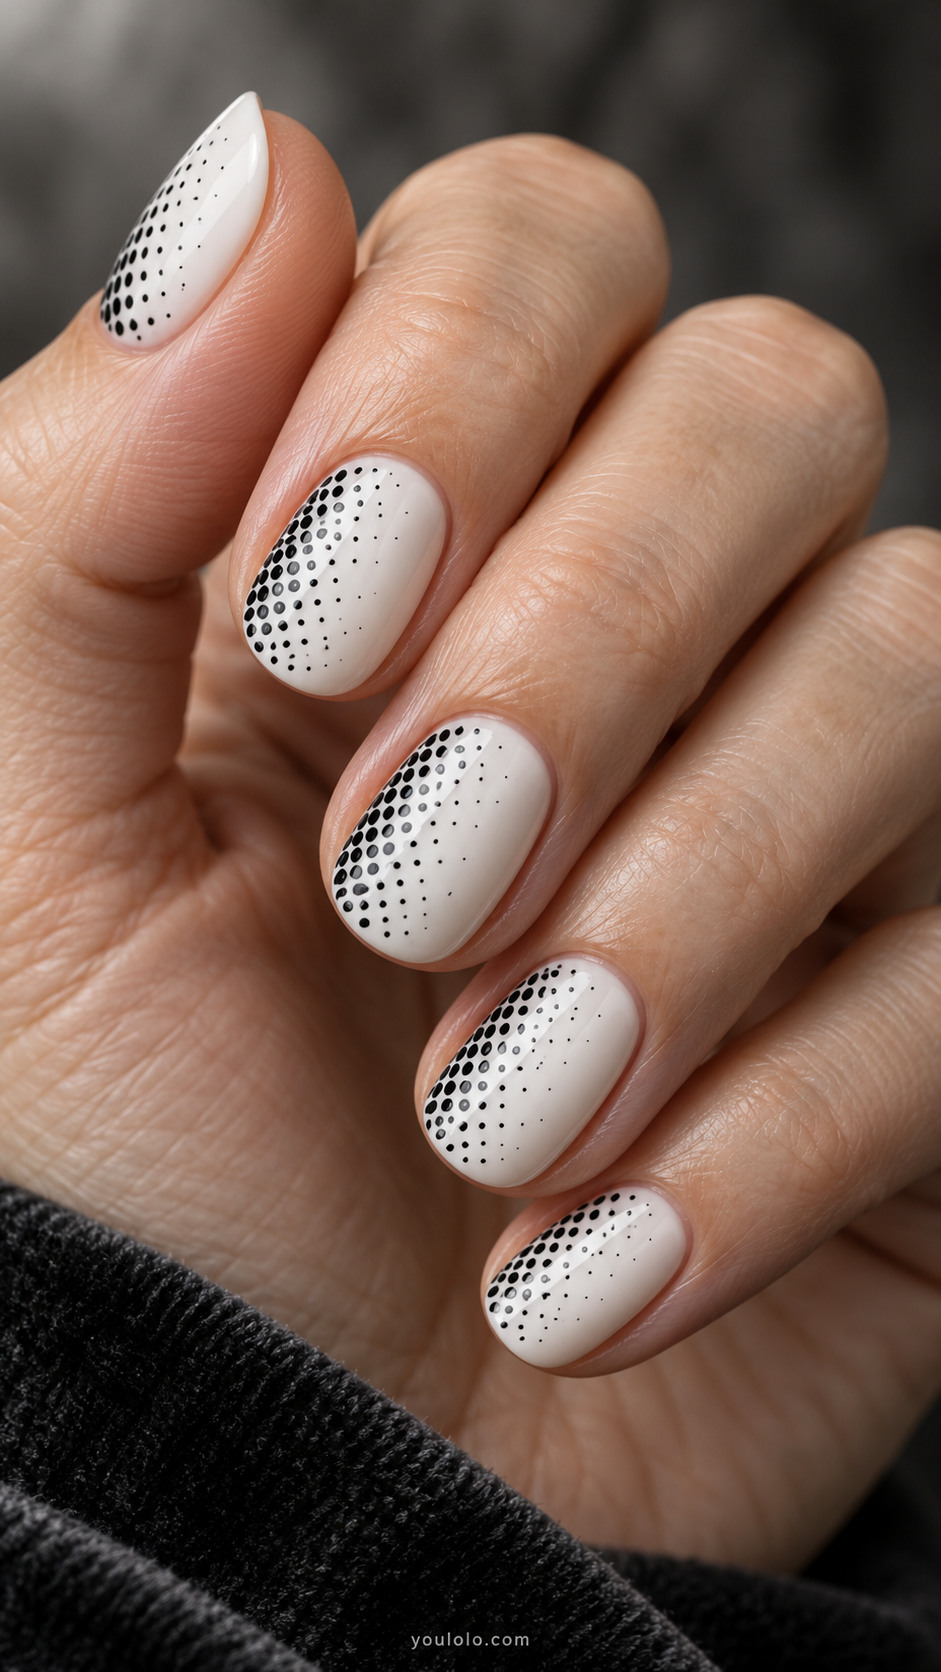
A sideways fade changes the concentration of dots instead of the polish color. One edge is densely stippled, and the spots become farther apart as they move across the white base. Keep the dots tiny and individually visible near the open side. This works on short nails because the gradient travels across their width rather than relying on extra length.
Salon brief: Short oval white nails with tiny black dots extremely dense at one sidewall fading sparsely toward opposite sidewall, sideways halftone gradient.
10. Concentric Dot Arcs
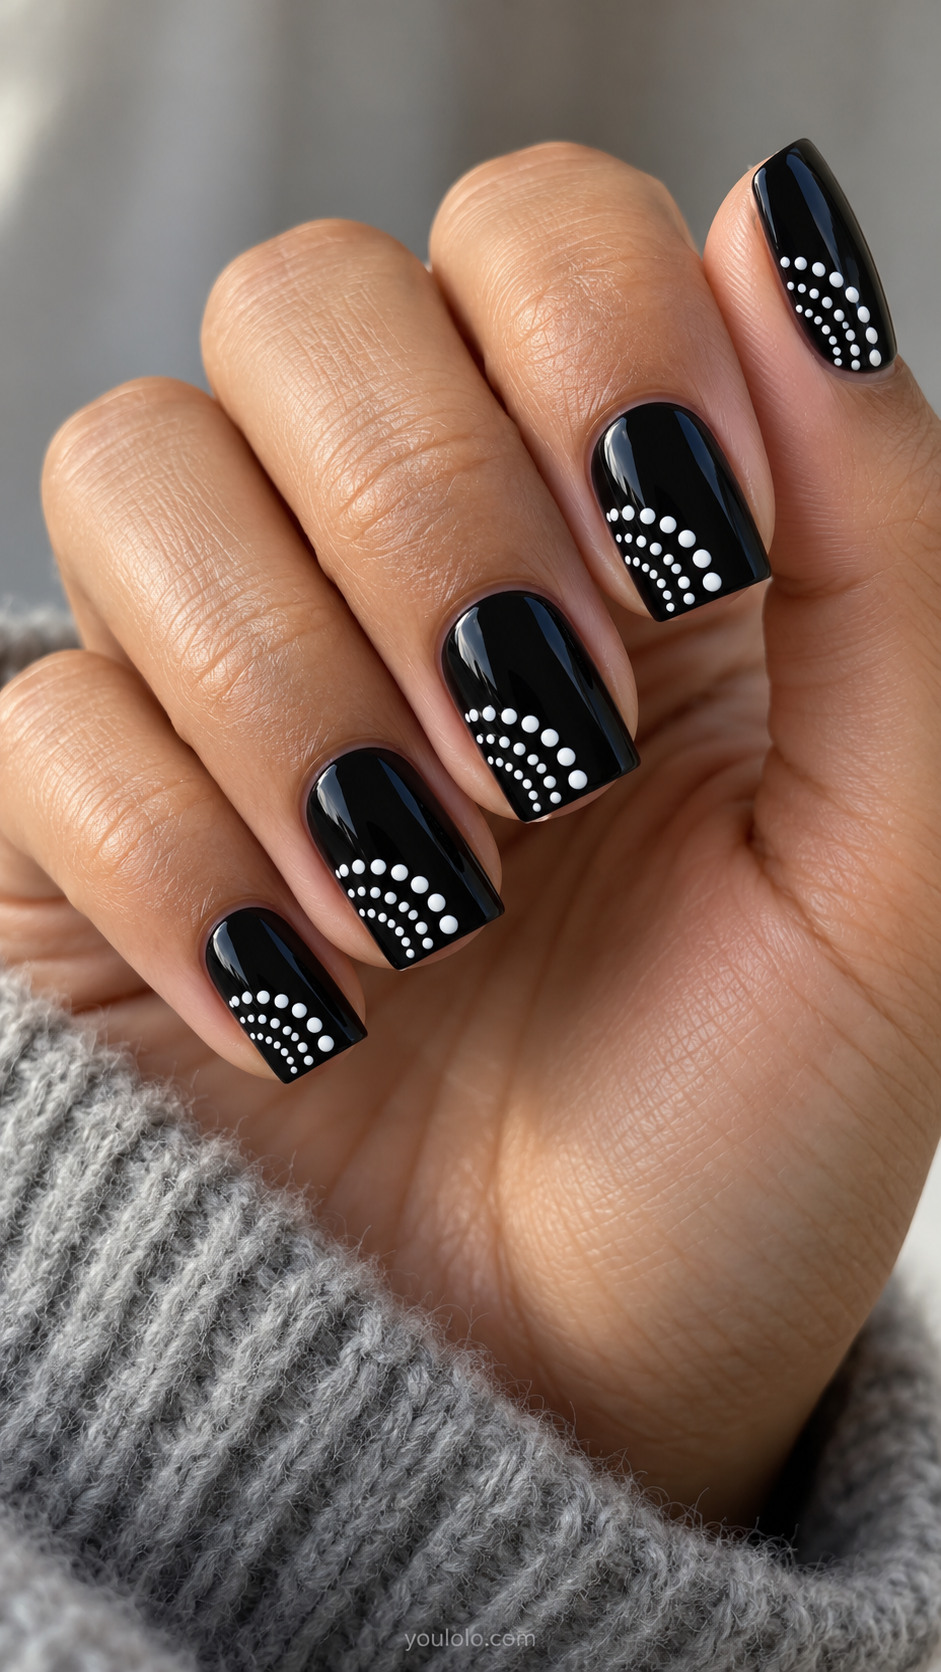
Three nested arcs give the dots a clear architectural arrangement. The open black area is part of the composition, so resist adding more spots simply to fill it. Begin the arcs from the same corner on each nail for a coordinated set. Medium square nails frame the curves neatly, creating a contrast between the straight free edge and the rounded dotted paths.
Salon brief: Medium square black nails with three nested quarter-circle arcs of uniform white dots from lower left corner, empty black elsewhere.
Patterned Insets and Graphic Boundaries
11. The Dotted Chevron Inset
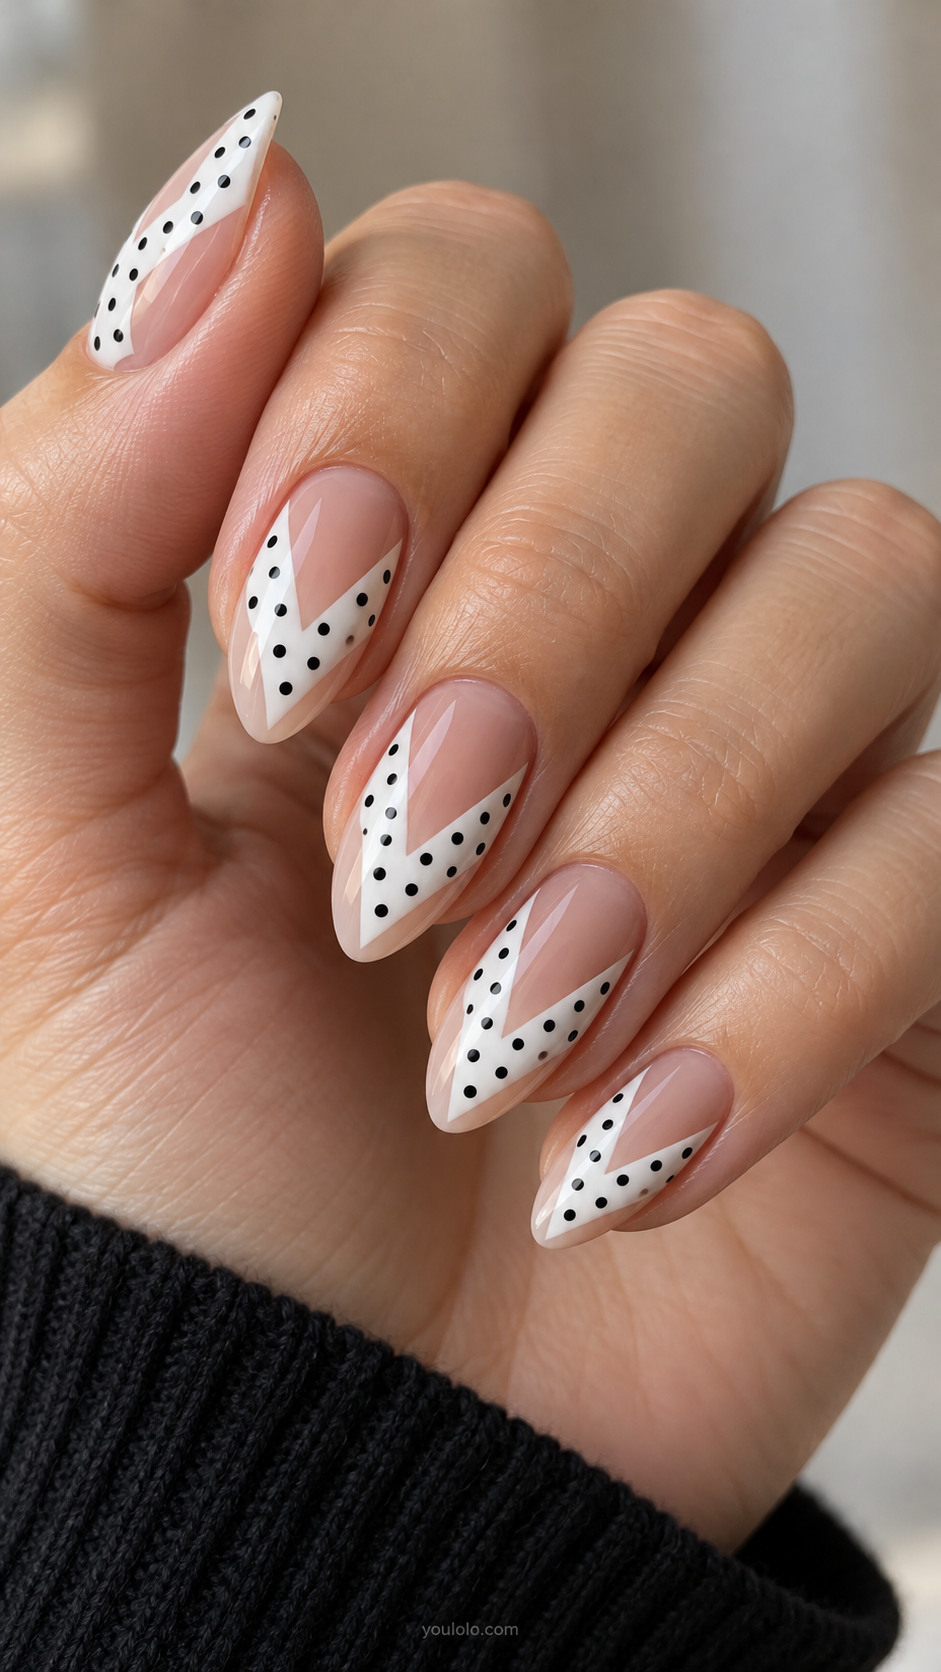
A white chevron contains the dots in a sharply defined shape. Nude space around the inset keeps the pattern light, and the angular boundary gives it a different character from a full printed nail. Make the white area wide enough for several complete dots. The black circles should remain round even near the edges, with any cropped ones following the boundary cleanly.
Salon brief: Medium almond nude nails with broad opaque white V chevron inset centered, inside white shape black small polka dots, nude exposed around all edges.
12. Twin Rosette Accents
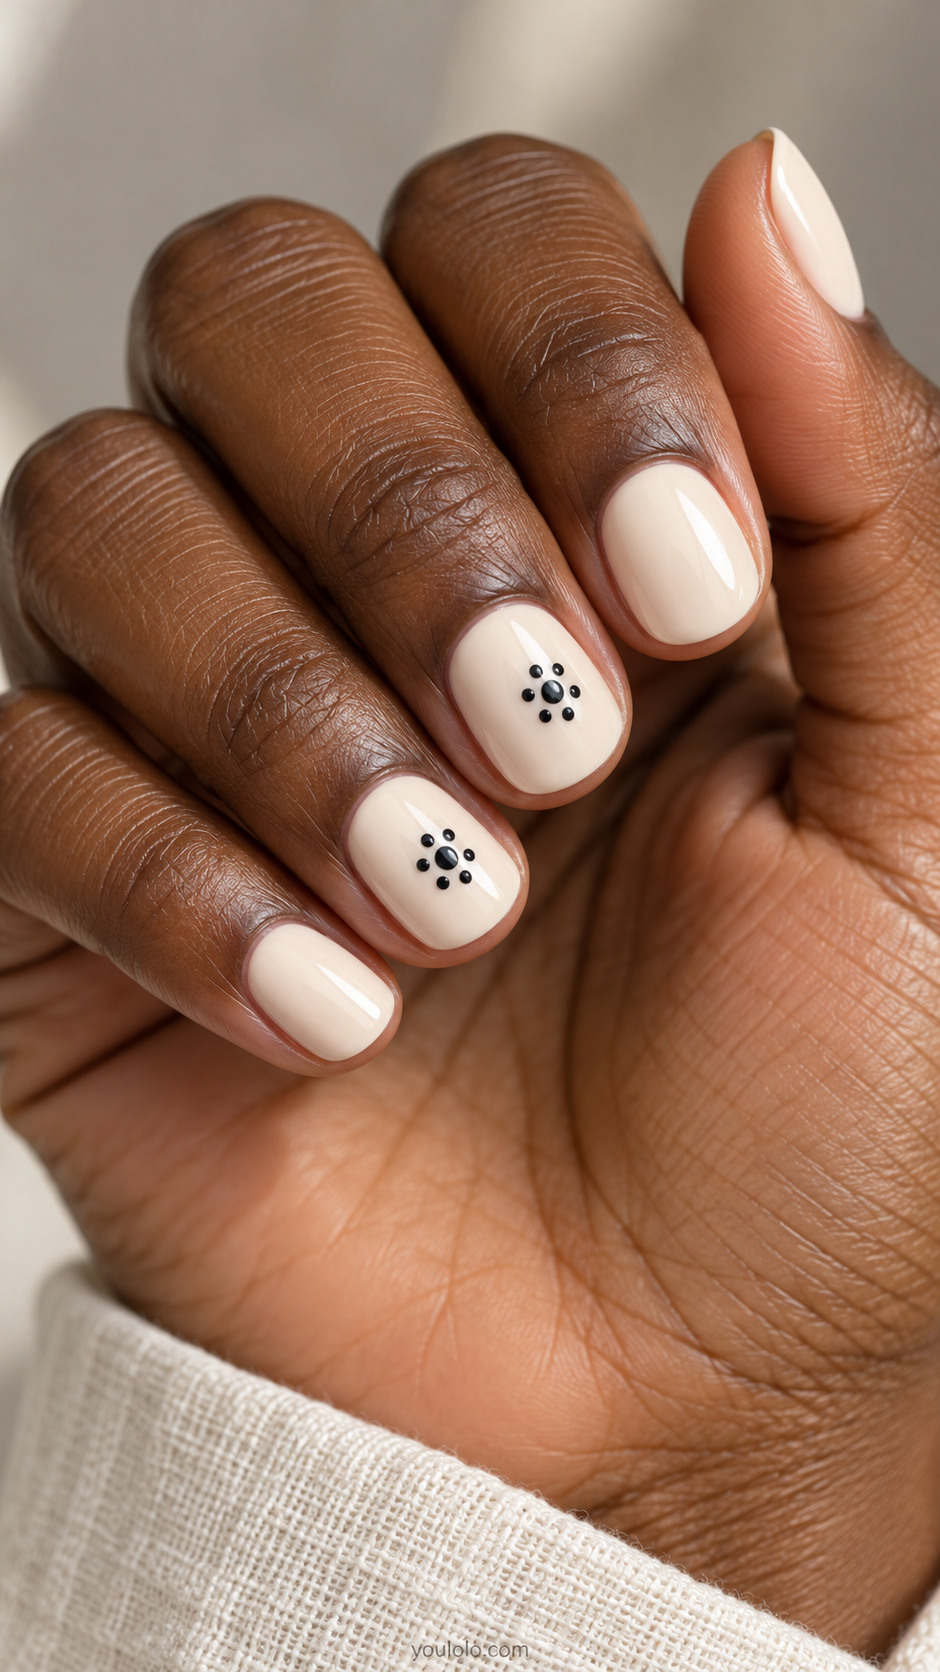
Two neighboring nails each carry one compact dot rosette, while the rest stay plain ivory. A larger central circle is surrounded by six smaller spots, with visible space between them. The restrained placement gives this short set a softer, ornamental feel. Keep the clusters centered and the surrounding polish clean so the small arrangement remains readable at normal viewing distance.
Salon brief: Short ivory nails with one small black dot rosette on each of the middle and ring nails. Other nails plain ivory.
13. A Dotted Wave Ribbon
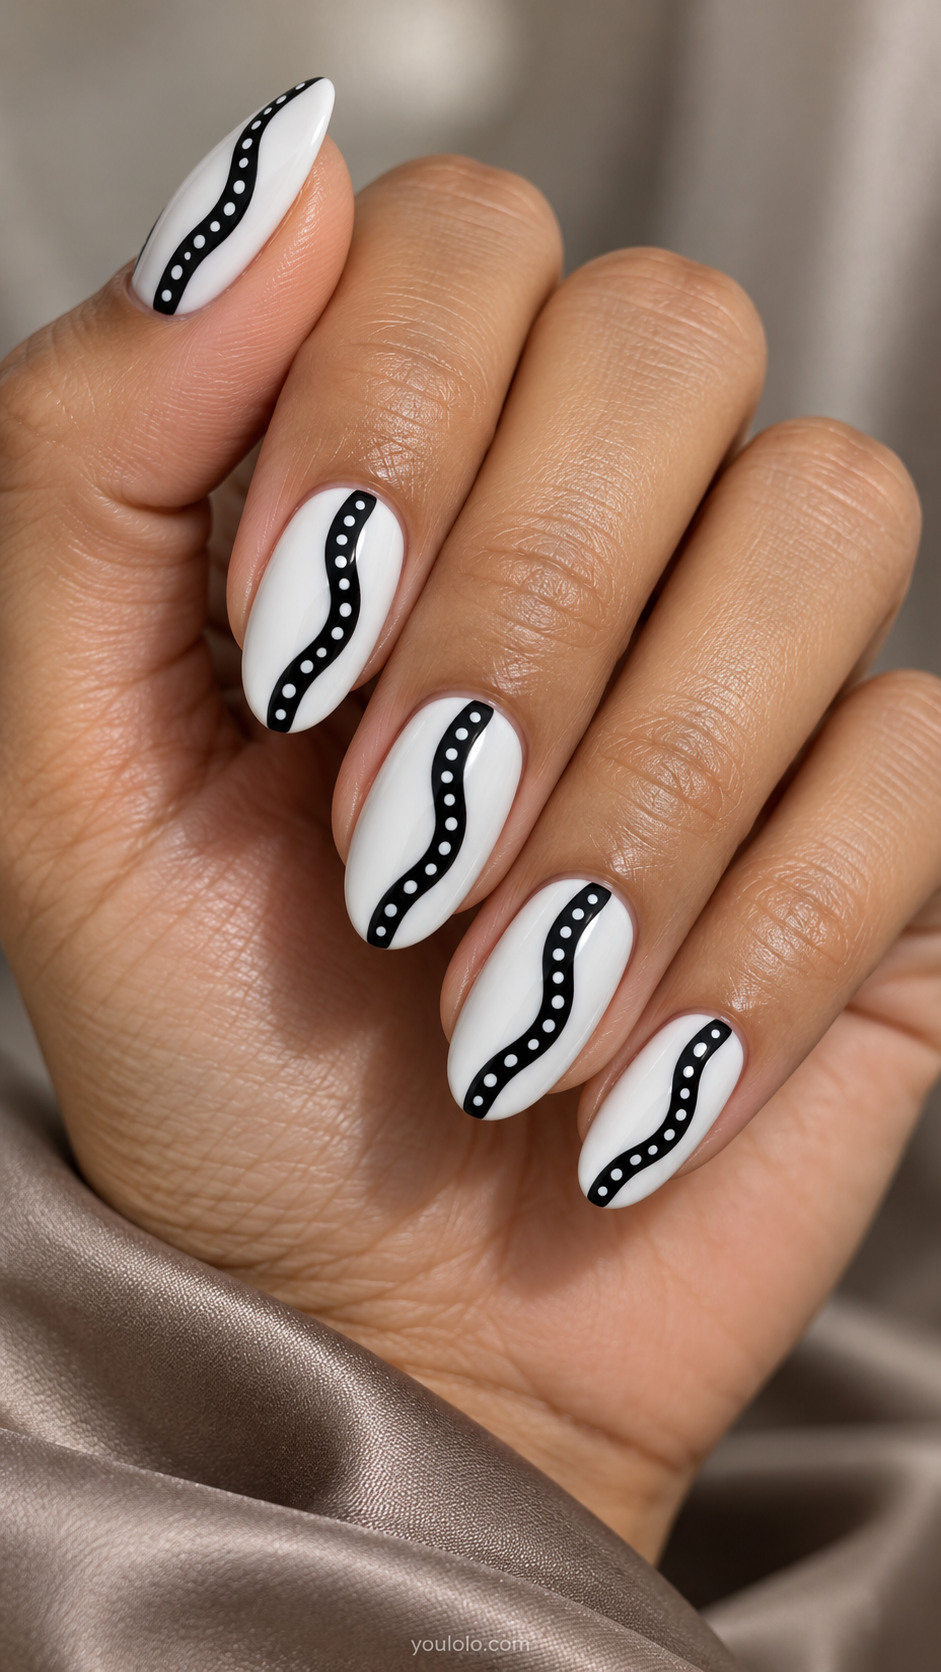
A gently wavy black ribbon gives the dotted print a flowing outline. Tiny white spots stay inside the dark shape, leaving the white edges completely clean. Keep the ribbon broad through its bends so the dots do not become crowded. The result feels more fluid than a straight panel, and a medium oval nail gives the curve enough room to travel.
Salon brief: Medium oval white nails with black wavy ribbon running lengthwise center, ribbon filled with evenly spaced tiny white dots; white borders clear.
14. The Inverted Seam
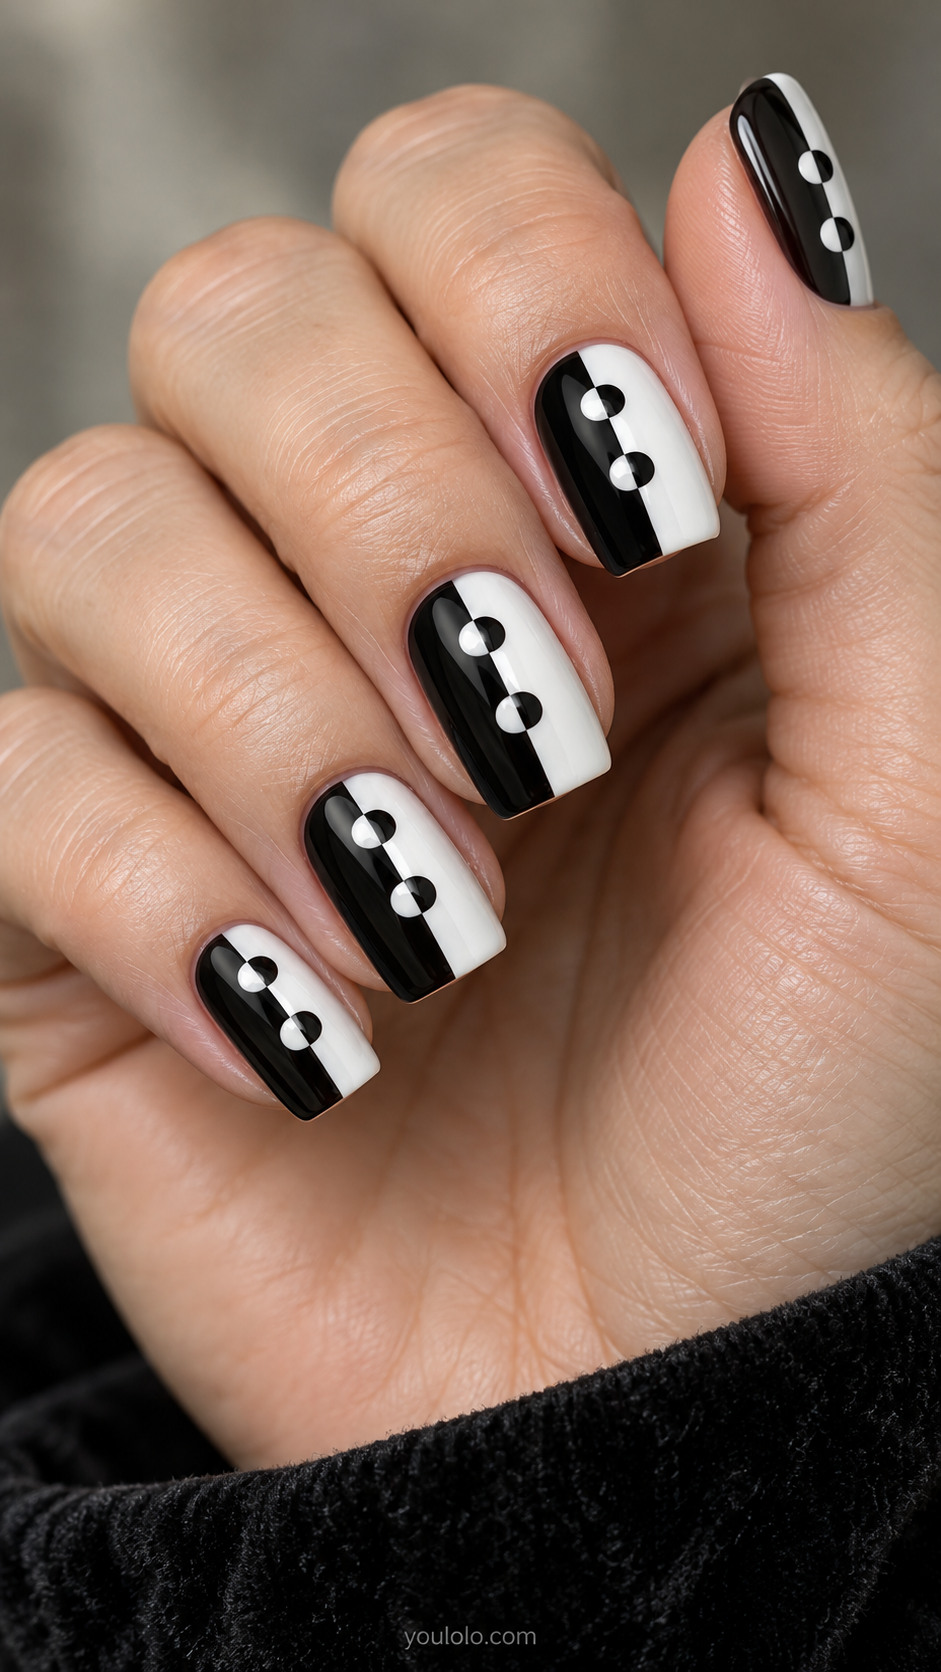
The dots cross the central seam and reverse color as they pass over it. That simple inversion makes a precise optical detail, so this is a design to explain carefully with the image. Keep the circles centered directly on the boundary rather than floating beside it. A square shape and a straight seam support the geometry without needing any additional decoration.
Salon brief: Medium square nails split vertically black and white, dots straddle seam as perfect circles half white on black side half black on white side.
15. Dot Rows with a Missing Beat
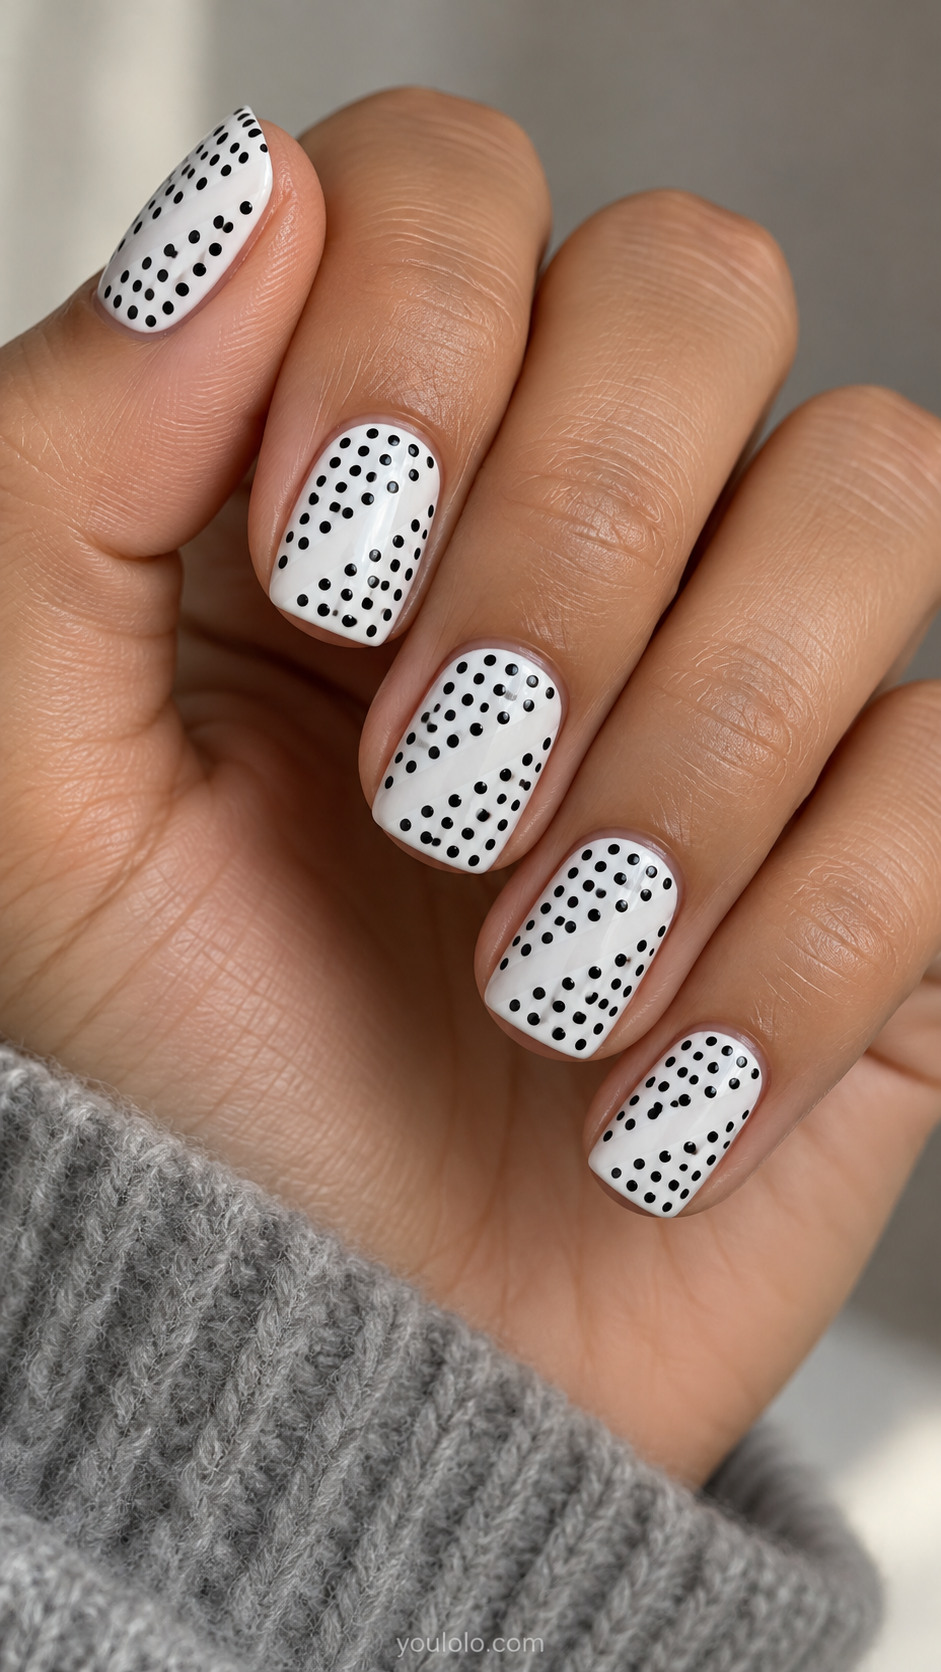
A missing diagonal row creates the design here. The surrounding spots remain small and evenly spaced, while the empty path cuts through the grid without a painted stripe. Keep the channel the width of one dot row so it looks deliberate. This is a quiet way to add structure to short square nails while still keeping the overall impression of a classic polka print.
Salon brief: Short square white nails with neat grid of small black dots, a deliberate empty diagonal row missing through middle creating blank diagonal channel.
16. Black Dots Under a White Veil
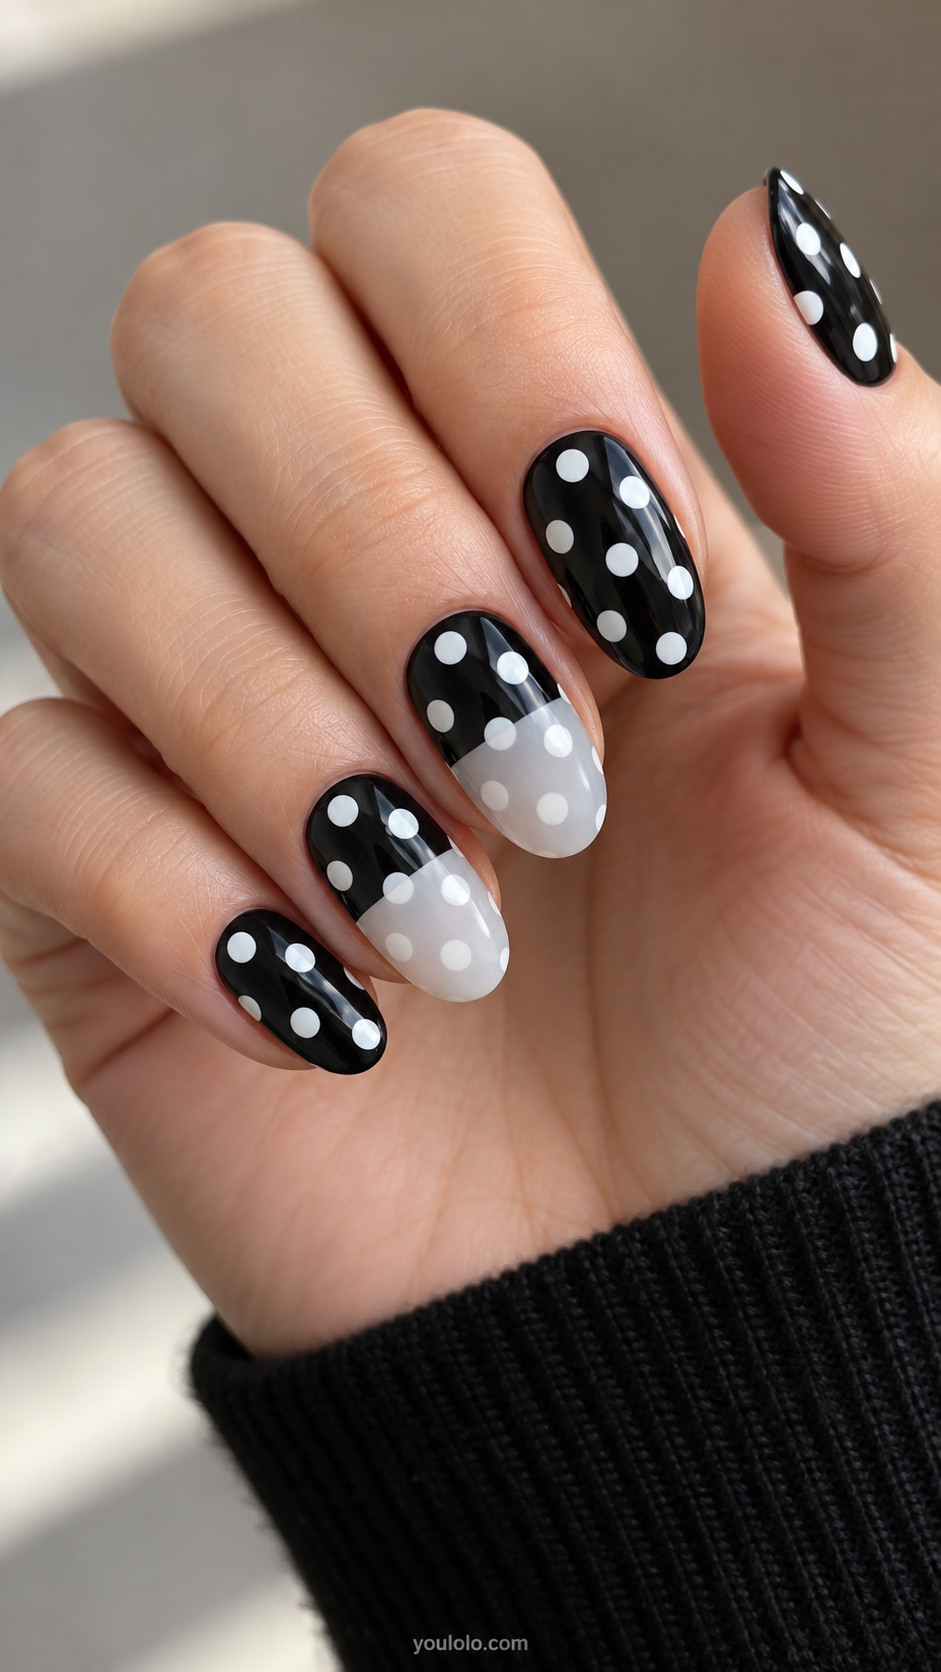
A translucent milky panel softens part of the dotted pattern on two accent nails. The white circles remain visible underneath, but their contrast changes across the boundary. Keep the other nails clear and crisp so the veiled section has something to compare with. Ask for a sheer overlay rather than an opaque block; hiding the dots entirely would lose the layered effect.
Salon brief: Medium oval nails black base with large white dots, middle and ring nails translucent milky white veil over lower half softening dots there with clear straight boundary.
Dotted Panels, Spirals and Layered Shapes
17. A Pair of Dotted Ovals
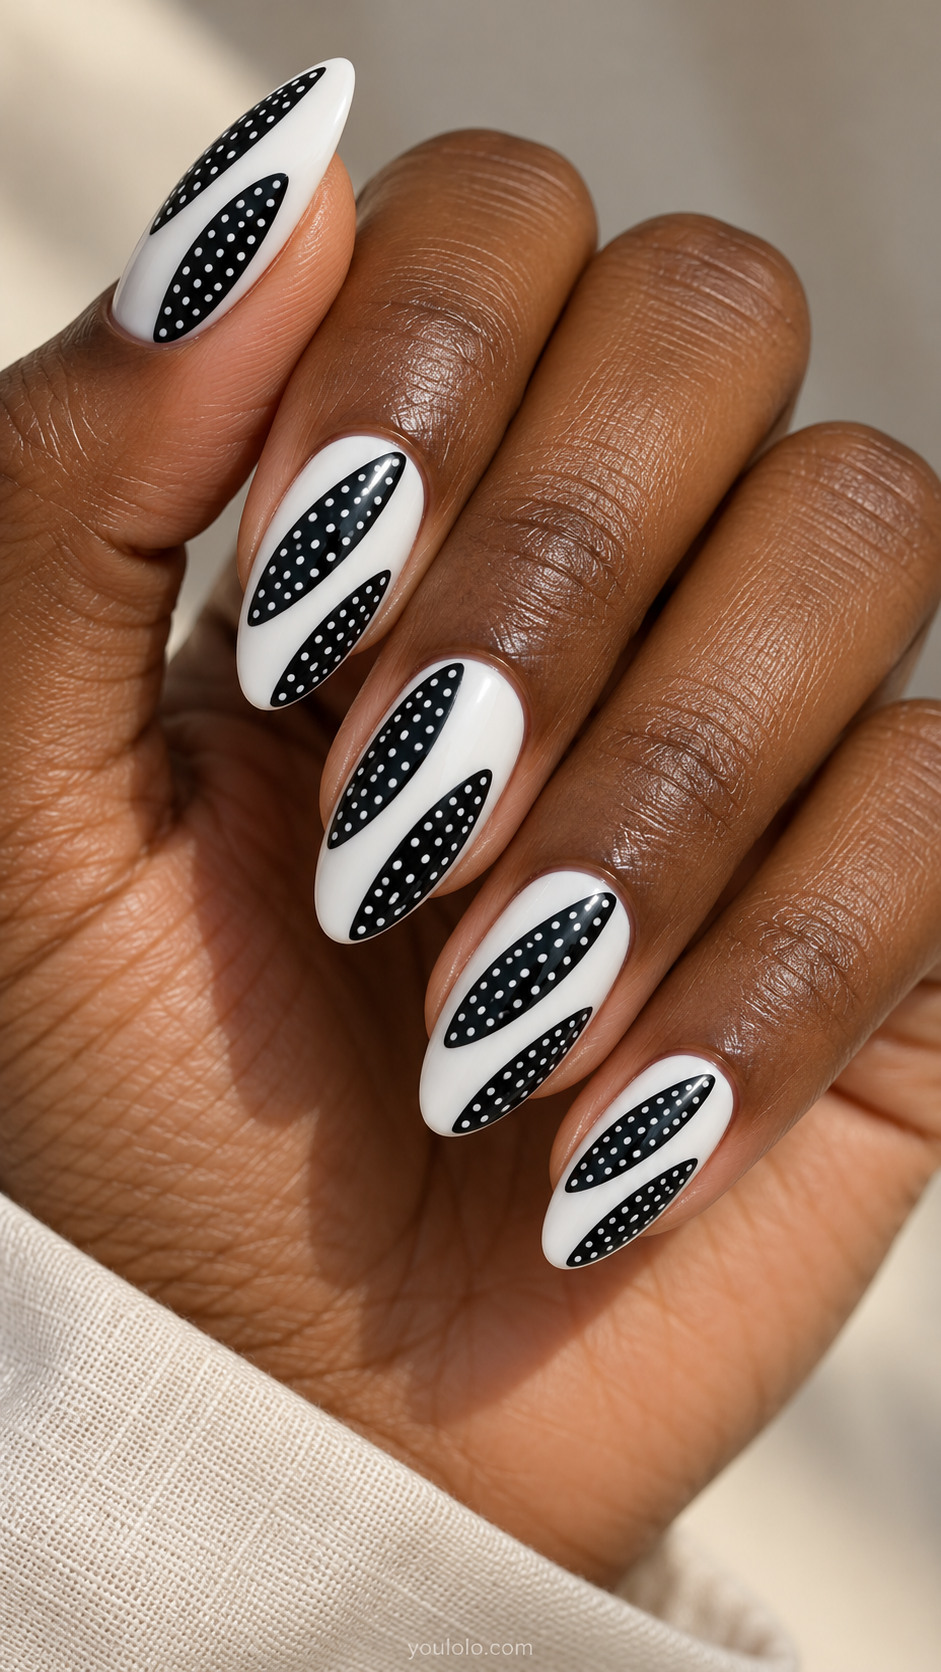
Two narrow dotted ovals create a compact island layout. Their diagonal placement gives the set movement, while the white gap prevents the dark shapes from merging. Keep the internal spots much smaller than the ovals themselves. Medium almond nails suit the elongated composition, and the outline should remain smooth so the little dots provide the only texture in the design.
Salon brief: Medium almond white nails with two elongated narrow black oval islands placed diagonally each filled tiny white dots, separated by white gap.
18. Dots Between Fine Parallel Lines
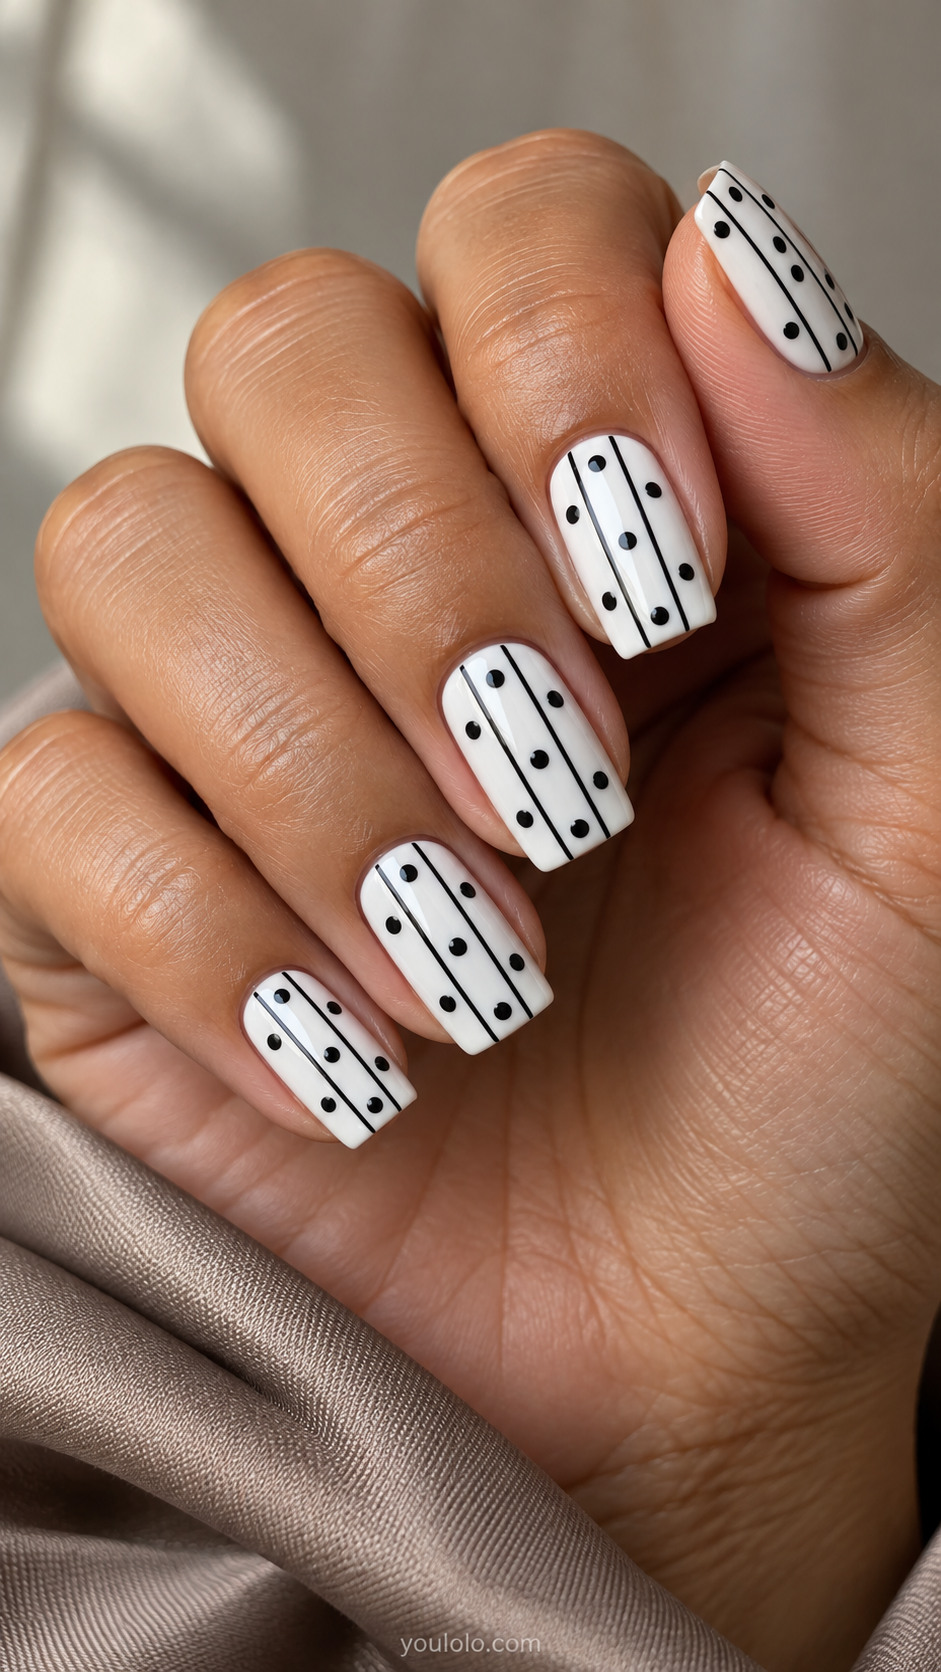
Fine parallel lines organize the spots into narrow lanes. The dots alternate their height from lane to lane, avoiding the stiffness of a perfectly aligned grid. Keep the lines much thinner than the circles so they act as structure rather than taking over the manicure. A white base and medium square shape make the arrangement clear, with no need for extra accent colors.
Salon brief: Medium square white nails with three parallel fine black vertical lines, black dots between lines in alternating staggered positions, no cross lines.
19. A Spiral Made of Dots

A loose spiral gives a single line of dots a sense of movement. The circles gradually shrink toward the center, but the path should stay open enough to follow easily. Keep a generous black margin around the spiral rather than filling the whole nail. This is a more detailed option that still uses only one simple mark repeated in a controlled way.
Salon brief: Medium oval black nails each one loose white dotted spiral with dots gradually shrinking toward center, generous black margins.
20. White Dots in Black Petal Panels

Opposing teardrop panels create a balanced dotted silhouette on a nude base. Their points move in different directions, giving the manicure a little tension without making it busy. Keep the panels separate and fill them with small, evenly spaced white dots. The nude gap should remain clearly visible. This shape works especially well on almond nails, where the tapered outline supports the design.
Salon brief: Medium almond nude nails with two large flat black teardrop panels facing opposite directions, tiny white polka dots inside, clear nude gap, not flowers.
21. A Dotted Envelope Fold
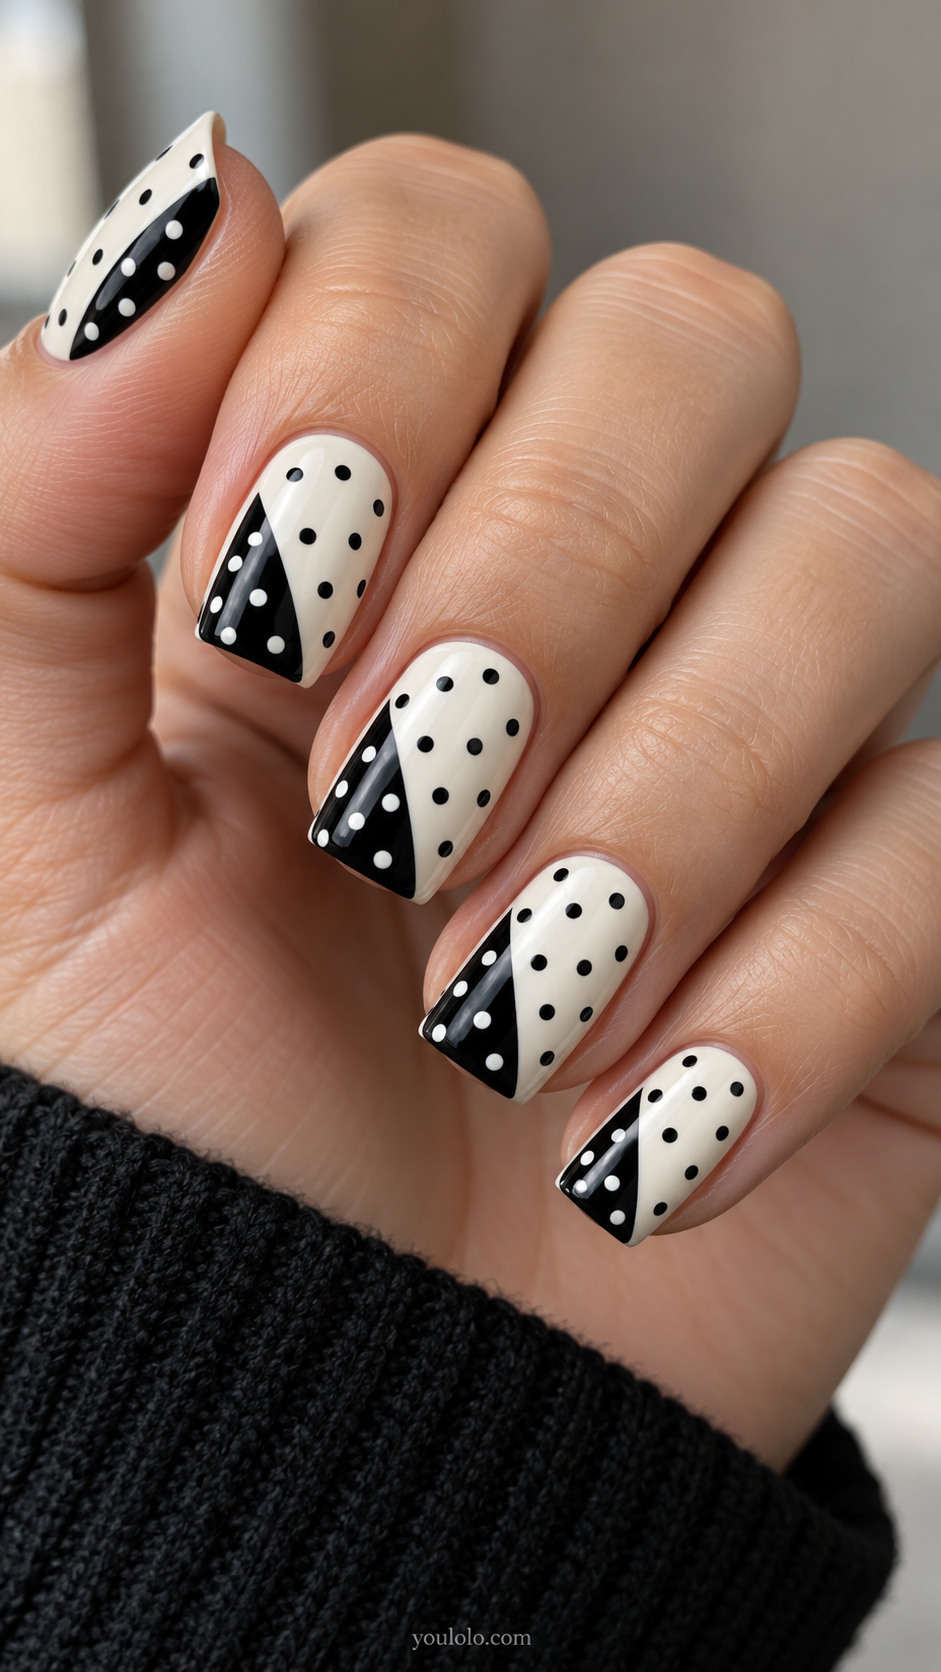
A triangular fold divides the nail into two printed surfaces. The dots reverse from black to white across that boundary, making the design feel like layered paper or fabric. Use the same dot diameter on both sides so the change comes from the background, not a second pattern. A clean diagonal edge is essential, and square tips give the folded shape a clear endpoint.
Salon brief: Medium square ivory nails with black triangular fold shape entering from free edge one side, white dots on black triangle and black dots on remaining ivory, same scale.
Small Clusters and Considered Finishing Details
22. Dot Clusters with Breathing Room
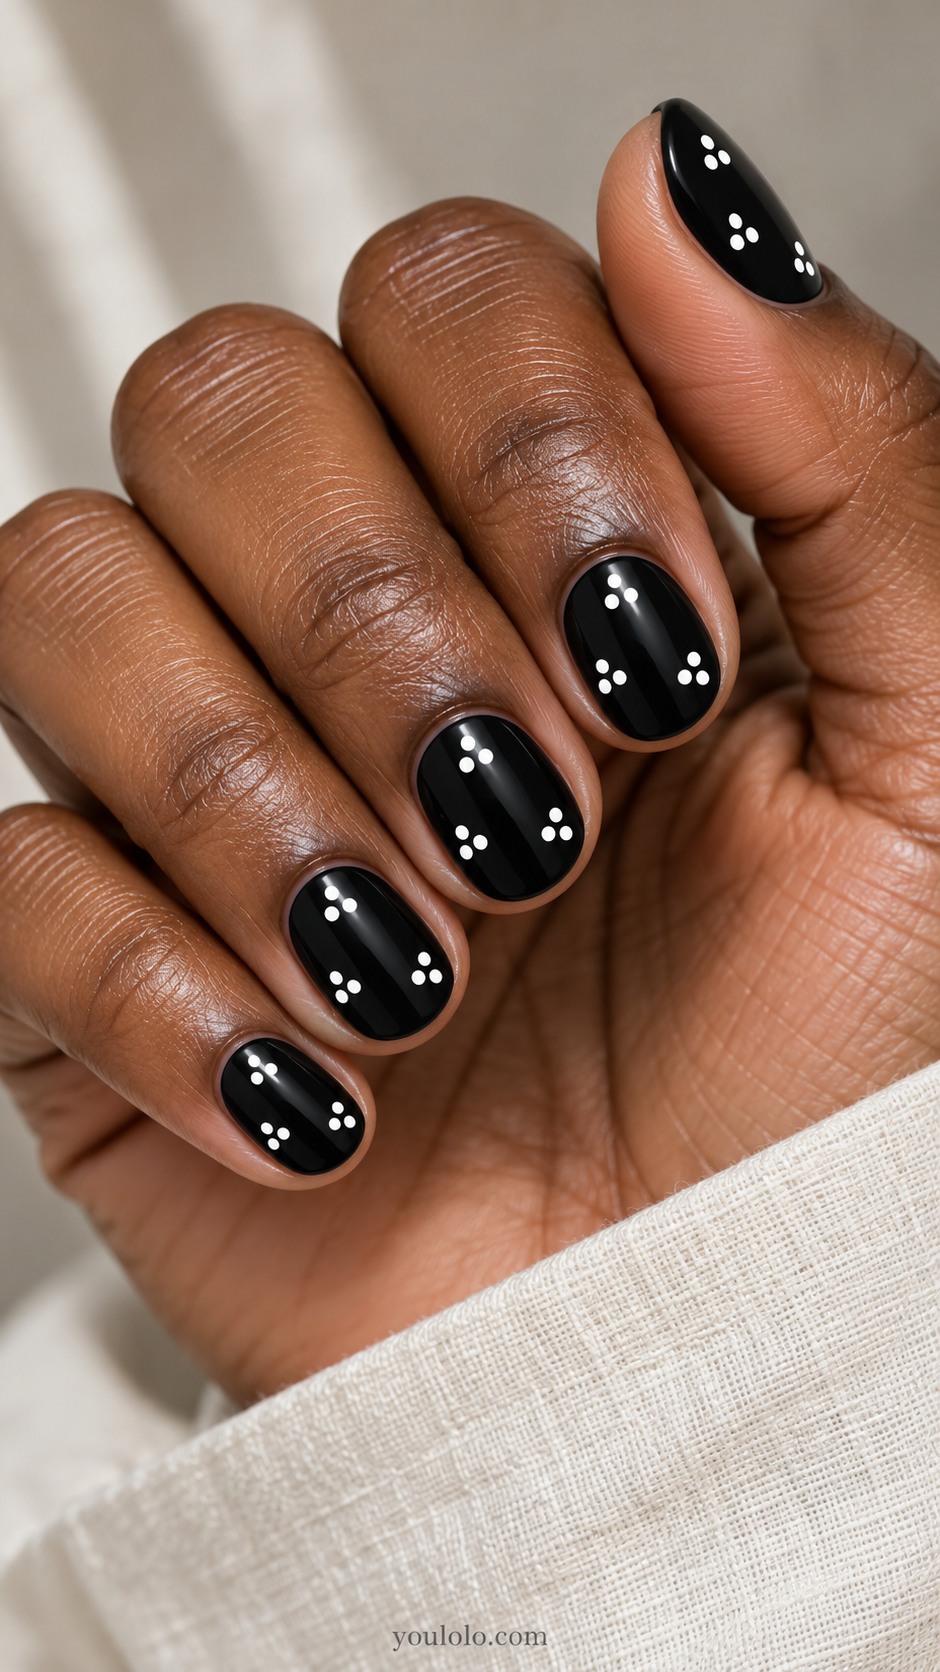
Three-dot clusters create a grouped rhythm instead of an all-over print. The empty black spaces between the triangles keep the manicure from feeling crowded. Use the same spot size throughout, and allow the clusters to sit at slightly different angles. This is a compact design for short oval nails, with enough definition to be noticed without requiring long tips or additional details.
Salon brief: Short oval black nails with three separate groups of three white dots each arranged triangle, large empty spaces between groups.
23. A Dotted Frame and Center Spot
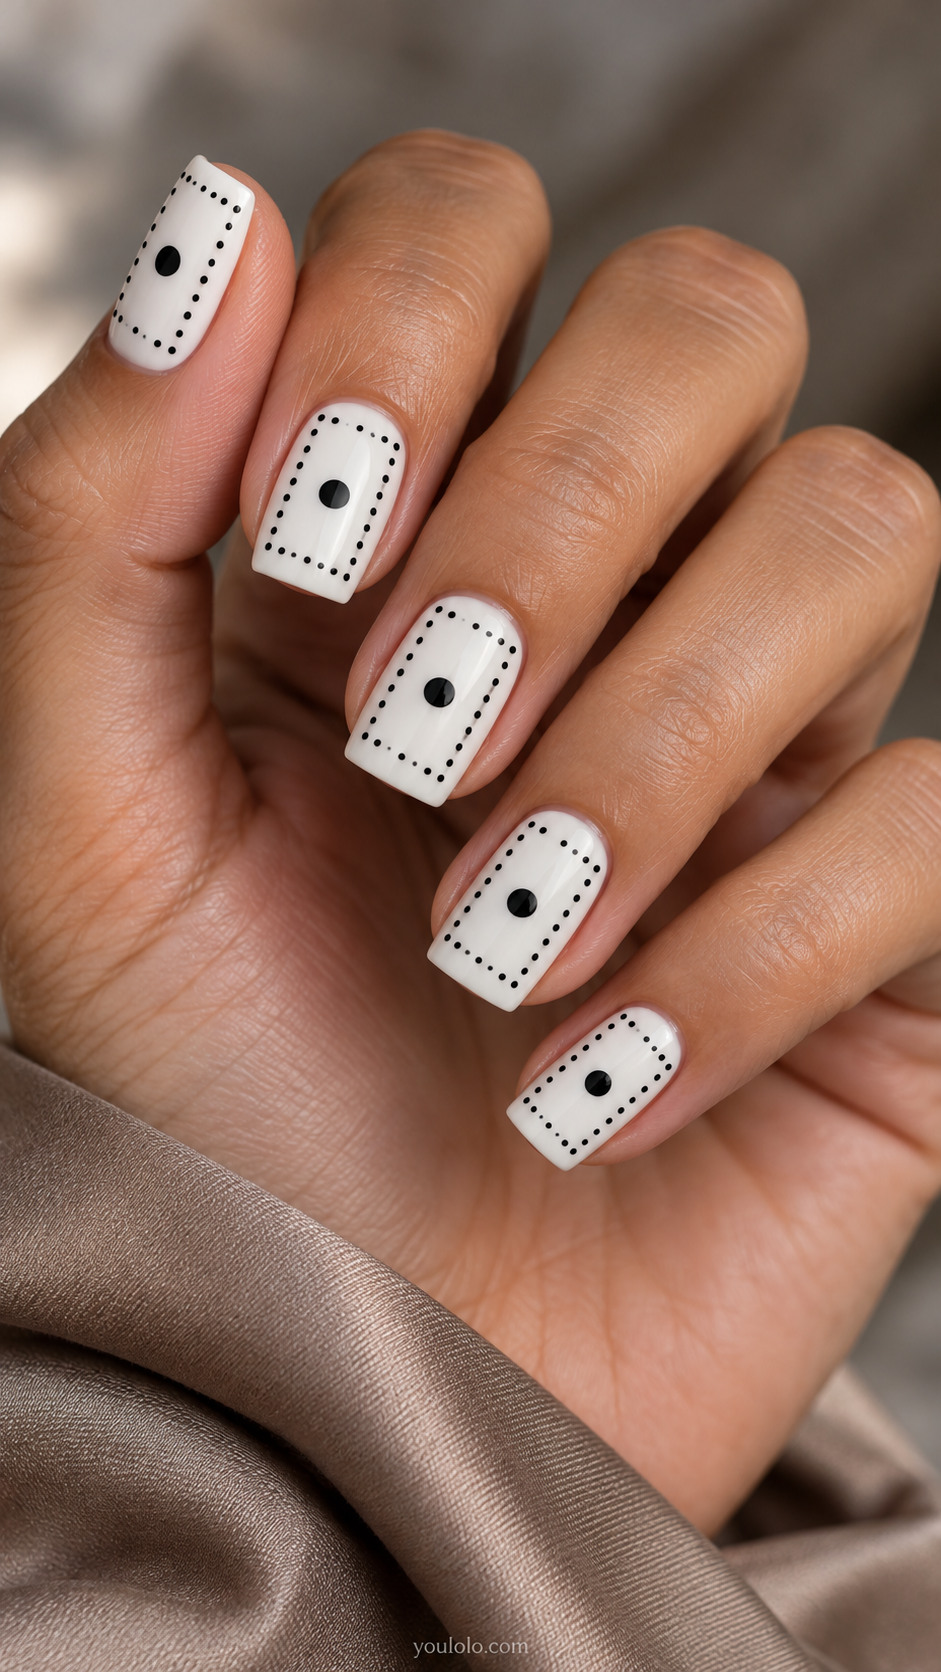
A fine dotted frame surrounds one larger central circle. The gaps between the tiny border dots keep it lighter than a continuous painted outline. Keep the center spot large enough to hold attention, with plenty of white around it. The square nail shape supports the frame naturally. This is a precise, graphic option rather than a scattered polka print.
Salon brief: White square nails with a fine black dotted rectangular border and one larger black dot centered inside.
24. Dot Sizes in Vertical Lanes
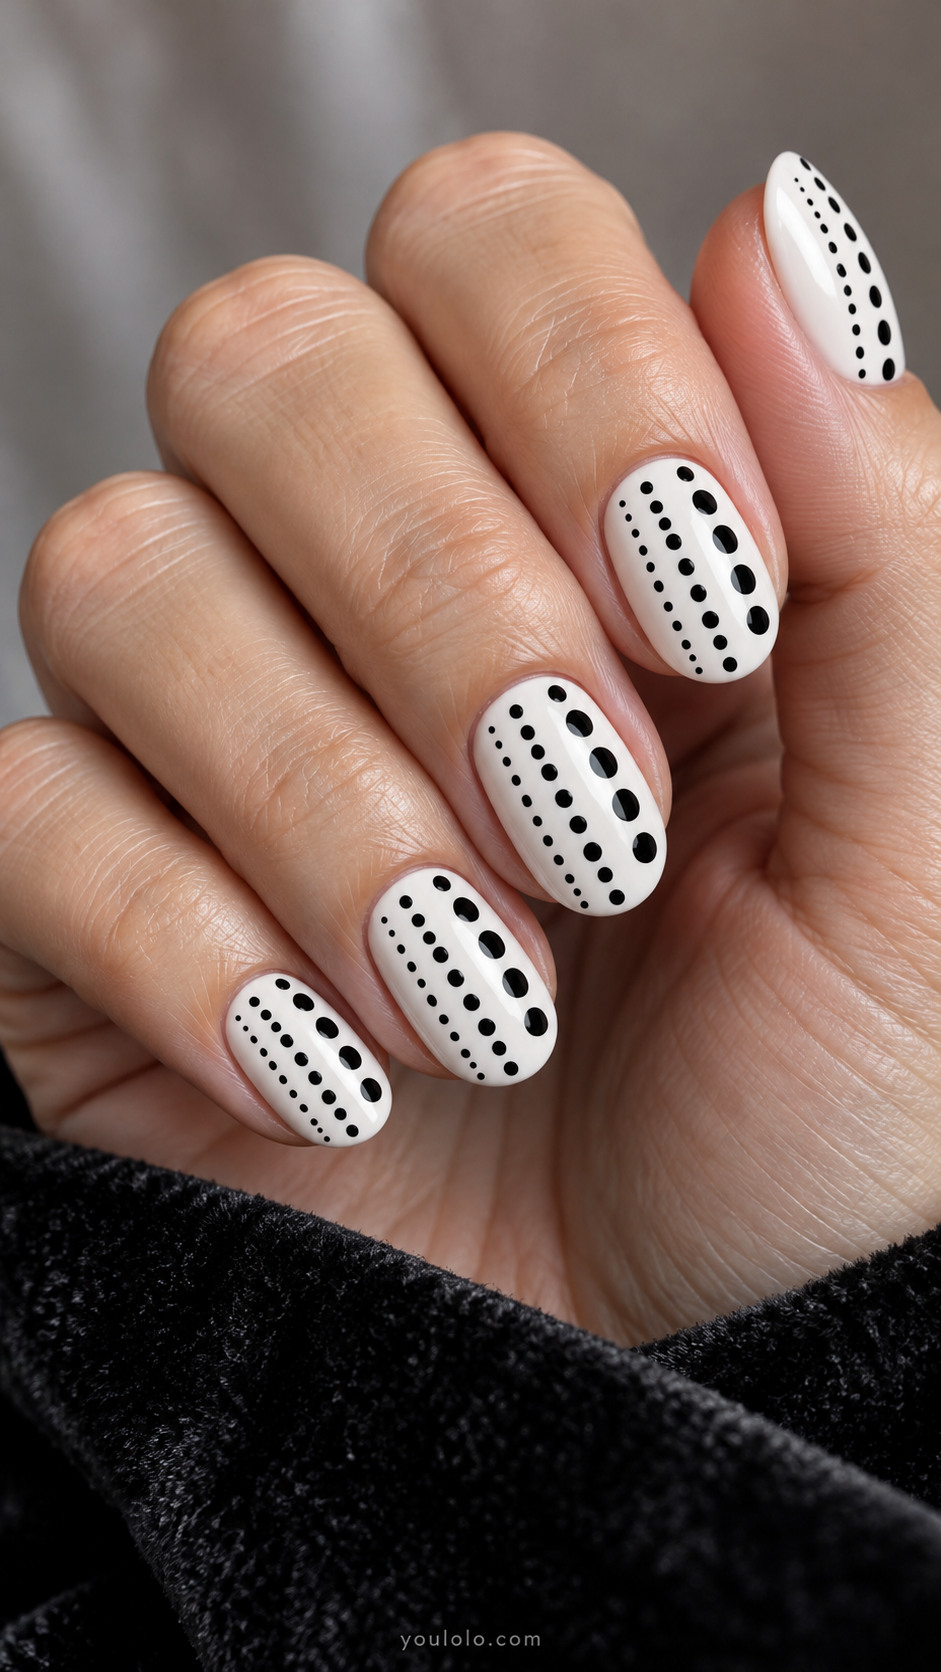
Three lanes compare dot sizes within one nail. Tiny spots form a dense line on one side, medium circles sit in the center and larger dots create a slower rhythm on the other. Keep each lane straight and give them clear space between. The arrangement feels intentional because the size changes in steps, making this a useful alternative to a random mix of large and small spots.
Salon brief: Medium oval white nails with three vertical lanes of black dots, left tiny densely spaced, center medium, right large sparsely spaced, all same deep black.
25. A Monochrome Patchwork Finale
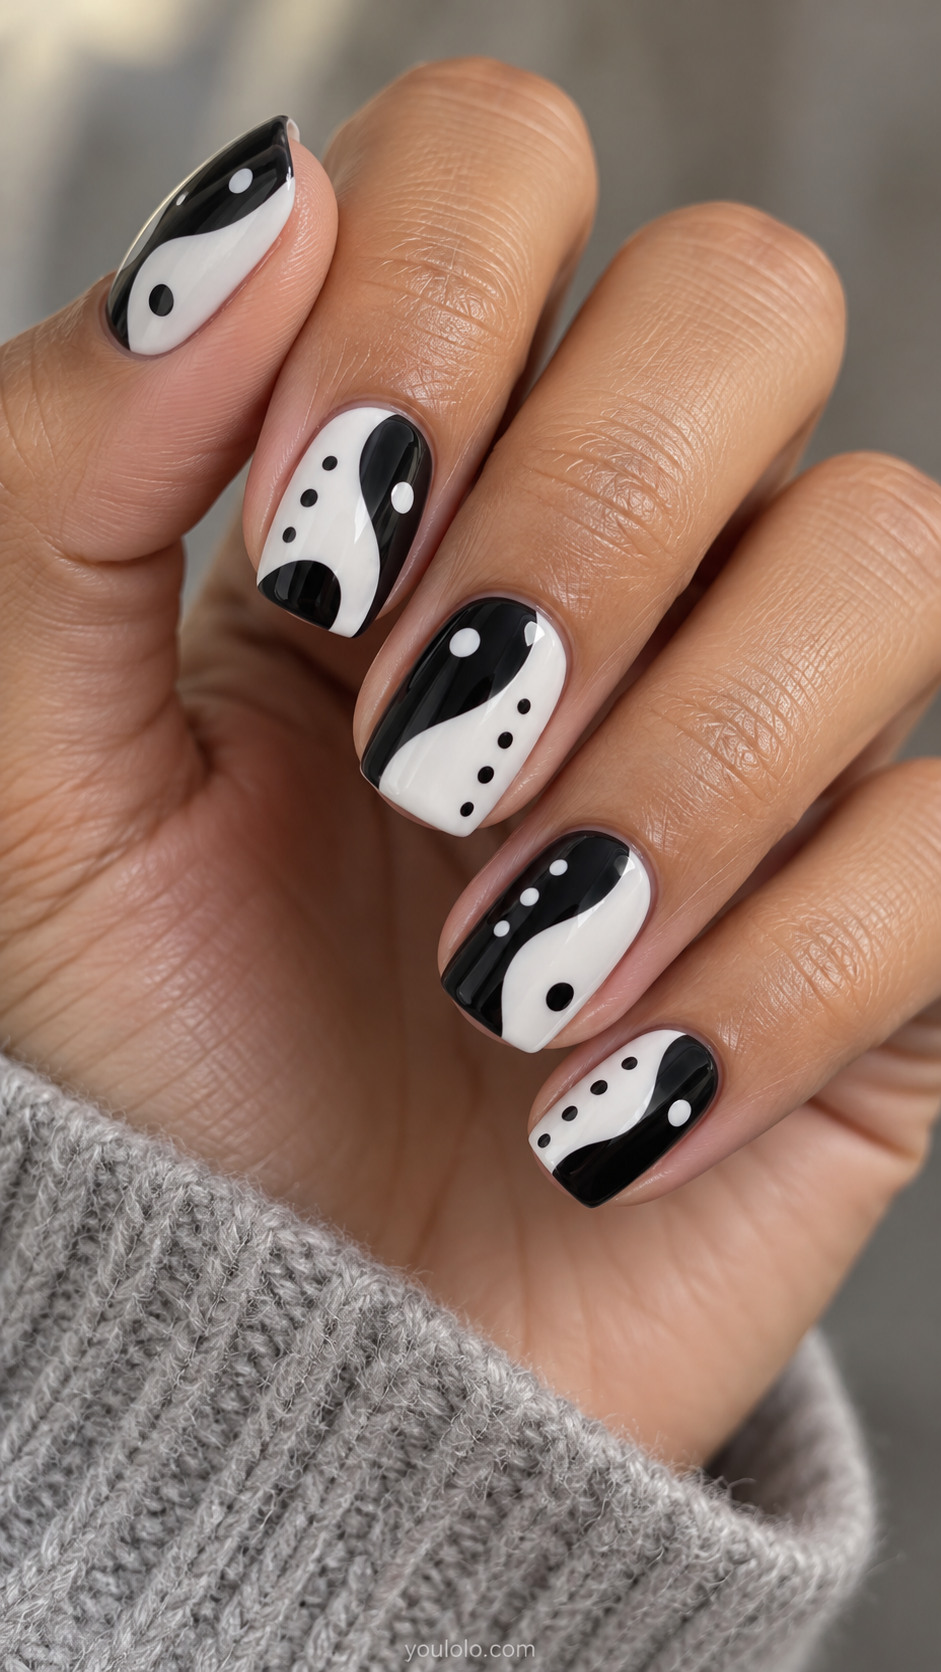
Broad curved black-and-white fields bring the collection together in a mixed monochrome print. Sparse contrasting dots vary in number across the hand, with open areas giving the eye a resting point. Keep the curves broad and the palette consistent. A medium squoval shape is enough for the composition; adding extra small sections would make the design harder to read rather than more interesting.
Salon brief: Medium squoval nails with broad flowing black-and-white fields and sparse opposite-color dots, varying their placement between fingers.
How to Choose Your Black and White Dot Pattern
Start with the amount of contrast you want. A white base with widely spaced black circles feels bright and open. A black base with white details feels more graphic. Nude space can soften a larger patterned shape without adding another strong color.
Match the Dot Scale to the Available Space
A short nail can carry large circles beautifully, but it may only need a few of them. Tiny dots allow more intricate paths and clusters, although they demand careful spacing. If a design includes an inset shape, judge the dot size against that shape rather than the full nail.
Decide Which Detail Is Essential
For the inverted seam, the color reversal is the defining feature. For a dotted spiral, the open curve matters more than the exact number of spots. For a stipple fade, the change in density matters most. Naming that feature helps your artist adapt the design without losing what attracted you to it.
A Clear Salon Brief
Bring one main reference and specify your preferred length, shape, base color and finish. Then point out the placement of the dots and the empty areas you want to preserve. If you prefer a softer contrast, ask to compare ivory with bright white before committing. For complex nested circles or narrow outlines, a sample nail can make the choice easier.
Black and White Polka Dot Nails: Frequently Asked Questions
Do polka dots work on short nails?
Yes. A few centered dots, small triangular clusters or a clean offset pattern work well on short nails. You do not need to fit the same number of dots on every finger. Preserve the spacing and overall rhythm instead of crowding a narrow nail.
How can a dotted manicure look more elegant?
Limit the palette, keep the circles clean and leave deliberate empty space. A consistent dot size usually feels calmer than a random mixture. Choose one special arrangement, such as open rings or a central seam, rather than adding several unrelated motifs to the same nail.
Should the dots be perfectly identical?
They should look intentional rather than mechanically identical. A classic repeat benefits from a consistent diameter, while a spiral or halftone design may deliberately change sizes. The important distinction is between planned variation and accidental crowding.
Can I use ivory instead of bright white?
Yes. Ivory gives the contrast a softer feel and pairs naturally with warm nude space. Bright white makes fine black lines and dots look especially crisp. Check the colors together on a sample because a sheer ivory may produce a different effect from an opaque one.
Which nail shapes suit black and white dots?
Round and oval shapes soften the graphic contrast. Square and squoval shapes frame grids, seams and cropped circles neatly. Almond nails give elongated panels and curved paths more room. Choose a comfortable shape first, then adjust the pattern to its outline.
Can these designs be painted with regular nail polish?
Many simple dotted arrangements can be made with regular polish and a dotting tool. More intricate outlines, layered shapes or tiny repeated marks require steadier placement. Use products according to their instructions and allow the underlying layer to set before adding details, so the circles stay clean.
How do I avoid a crowded result?
Choose fewer dots or enlarge the empty spaces between them. Keep margins around the cuticle and sides, particularly on short nails. If a patterned panel becomes too narrow for readable dots, simplify the panel shape or reserve it for an accent nail.
Save the Arrangement, Not Just the Colors
When you choose a favorite, note whether it is the spacing, the contrast or the curved outline that makes it work. That detail is what to preserve when the manicure is adapted to your own nails.