The Best Fluffy Pancakes recipe you will fall in love with. Full of tips and tricks to help you make the best pancakes.



Brown polka dot nails can be quiet. That is the part I like most: one coffee-colored dot on a sheer nail feels completely different from large cream circles on caramel. You can borrow the playfulness of the print without committing to the loudest version of it.
Before choosing a reference, I would decide on three things: the size of the dots, how closely they sit together and how much contrast you want. Those choices matter more than adding a bow or another accent. A simple dot pattern looks considered when its spacing feels right.
These 21 ideas range from minimal details to full prints and dotted French tips. Each includes a way I would wear it and a small adjustment that can keep the pattern clear on your own nail length.
Image note: these are original AI-generated visualizations of wearable manicure concepts, not photographs of completed salon work. Use them as a style brief and adapt the details with your nail artist.
The detail that makes a dot pattern work
Spacing is the first thing I would check. Leave enough background visible to distinguish each circle, and do not force the same dot count onto every nail. A thumb has more room than a little finger. It is the overall rhythm that should match, not a rigid numerical pattern.
A dotting tool is used in OPI’s Dotticure tutorial, while Nailster’s Brown Polka Look shows a brown-and-pink version of the print. Follow the instructions for your own polish system; gel curing steps from one brand are not universal.
Classic dots and clear color contrasts
1. Cream Dots on Cocoa
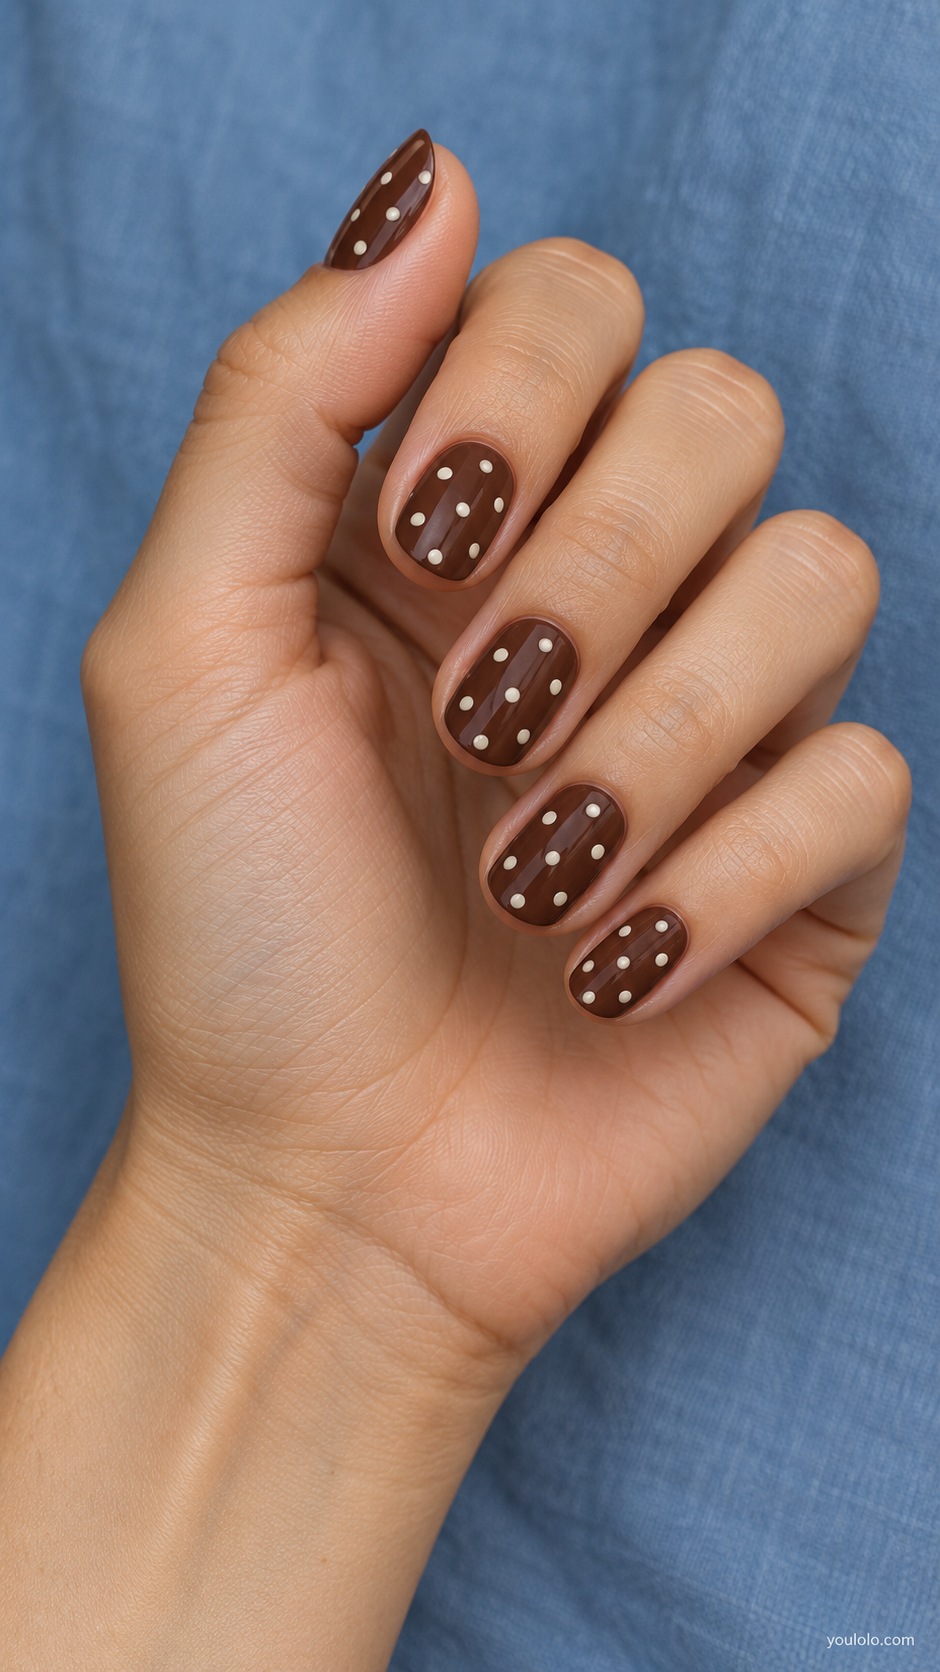
Small ivory dots on cocoa are the version I would choose first. The contrast is clear without feeling as stark as black and white, and short ovals keep the pattern approachable. I would wear it with a cream sweater and dark denim.
Leave a little space between the dots. A neat rhythm with some brown showing is more appealing here than covering every available corner.
2. Chocolate Dots on Ivory
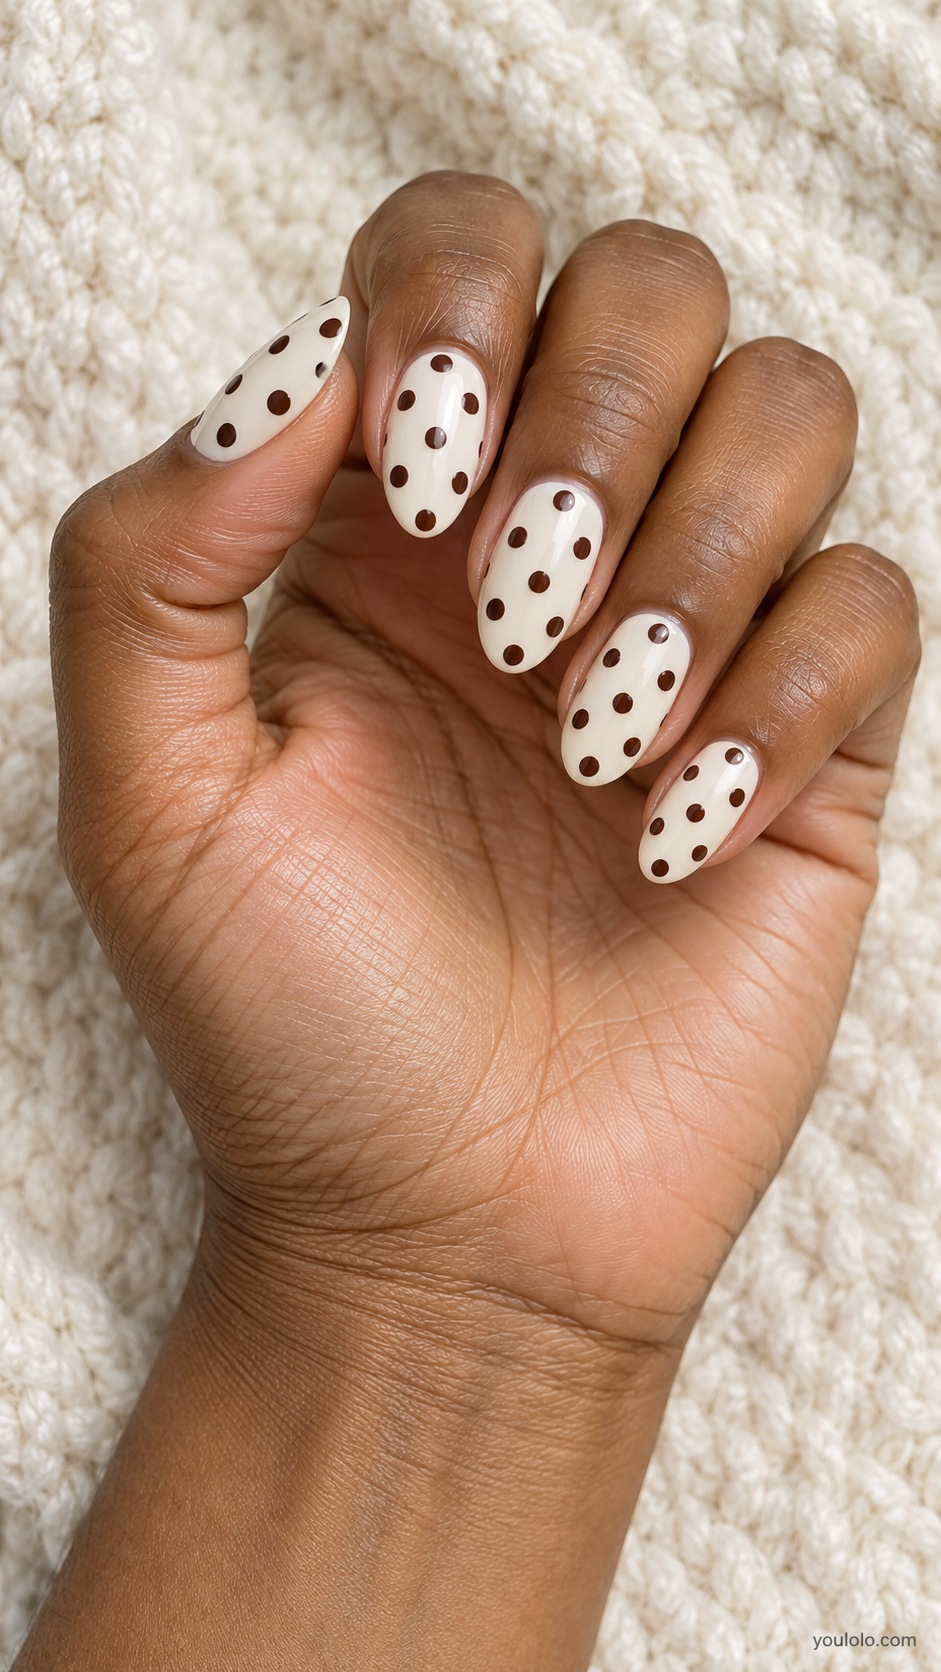
Chocolate dots on ivory turn the same color family into a much lighter manicure. I like medium almonds with a plain tan dress or a white shirt and brown trousers. The pale base makes the print easy to notice.
Choose medium dots rather than tiny specks if you want a clear polka-dot look. The marks should be round and deliberate, not irregular like a stone effect.
3. Latte Micro Dots
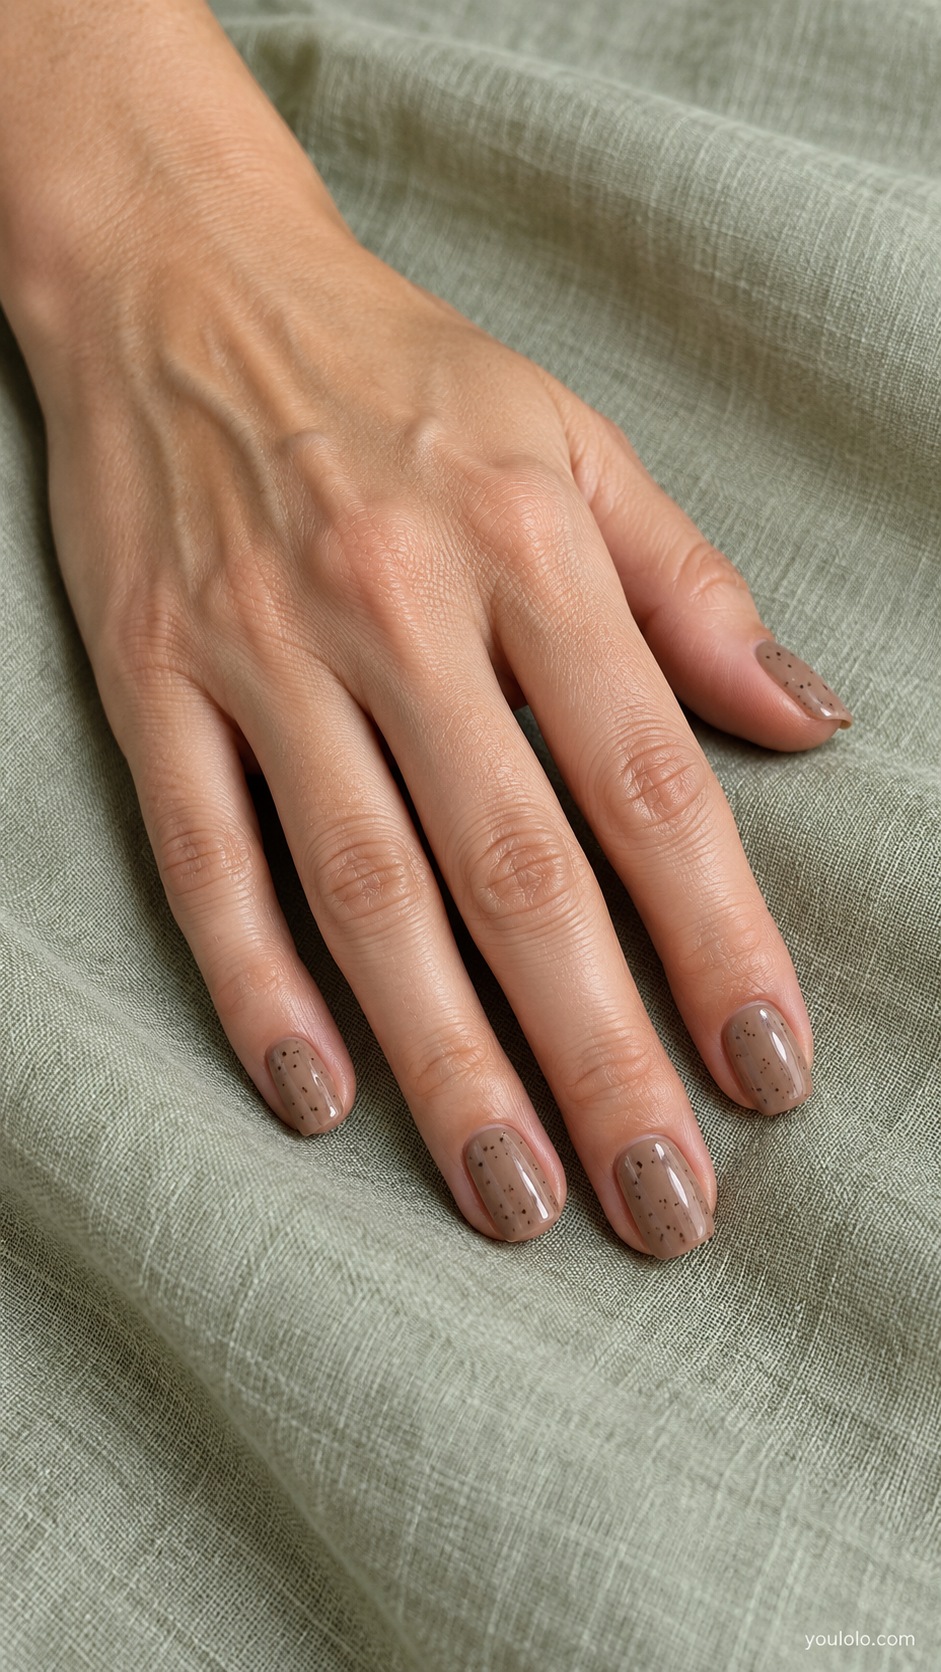
Latte with sparse coffee micro dots is the quiet option. From a distance it still reads as a neutral manicure; close up, you see the little pattern. I would wear it with gray tailoring and a simple watch.
Ask for a low density of dots. Small does not automatically mean subtle if there are dozens of them packed onto every nail.
4. Caramel Oversized Dots
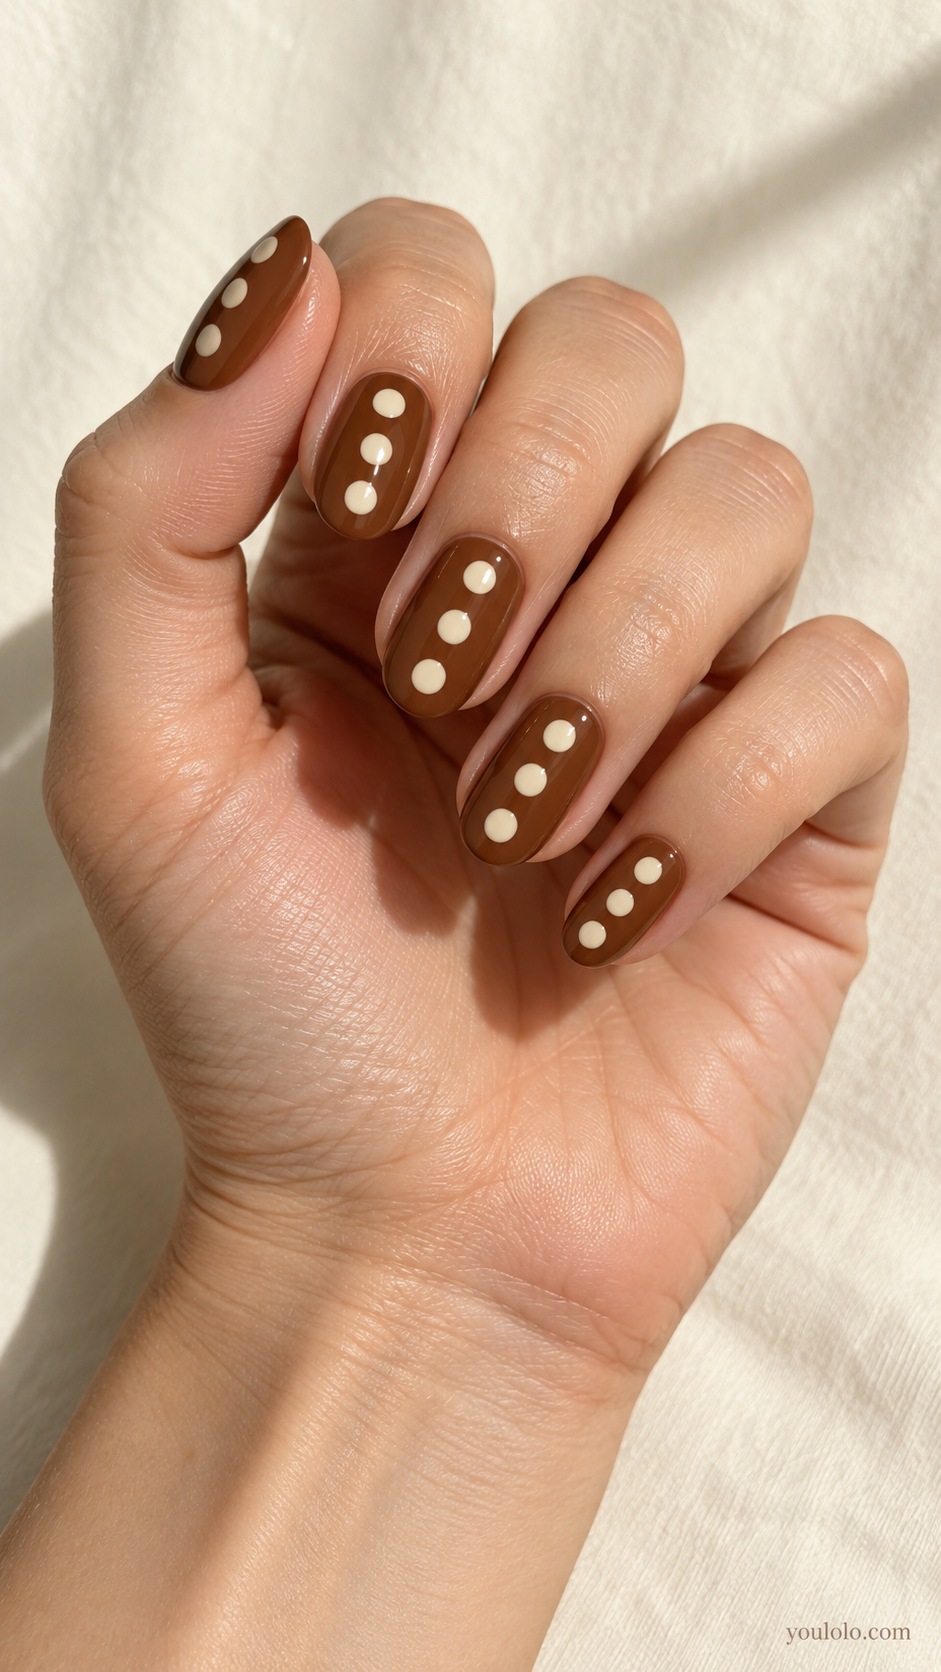
Three large cream dots on caramel give the pattern a playful scale. I like this with an unpatterned black top and jeans, so the nails supply the fun. Oval nails leave room for the larger circles.
Place the biggest dot first, then balance the others around it. A few partial circles at an edge can look natural, but the design should not feel crowded.
5. Brown Polka French
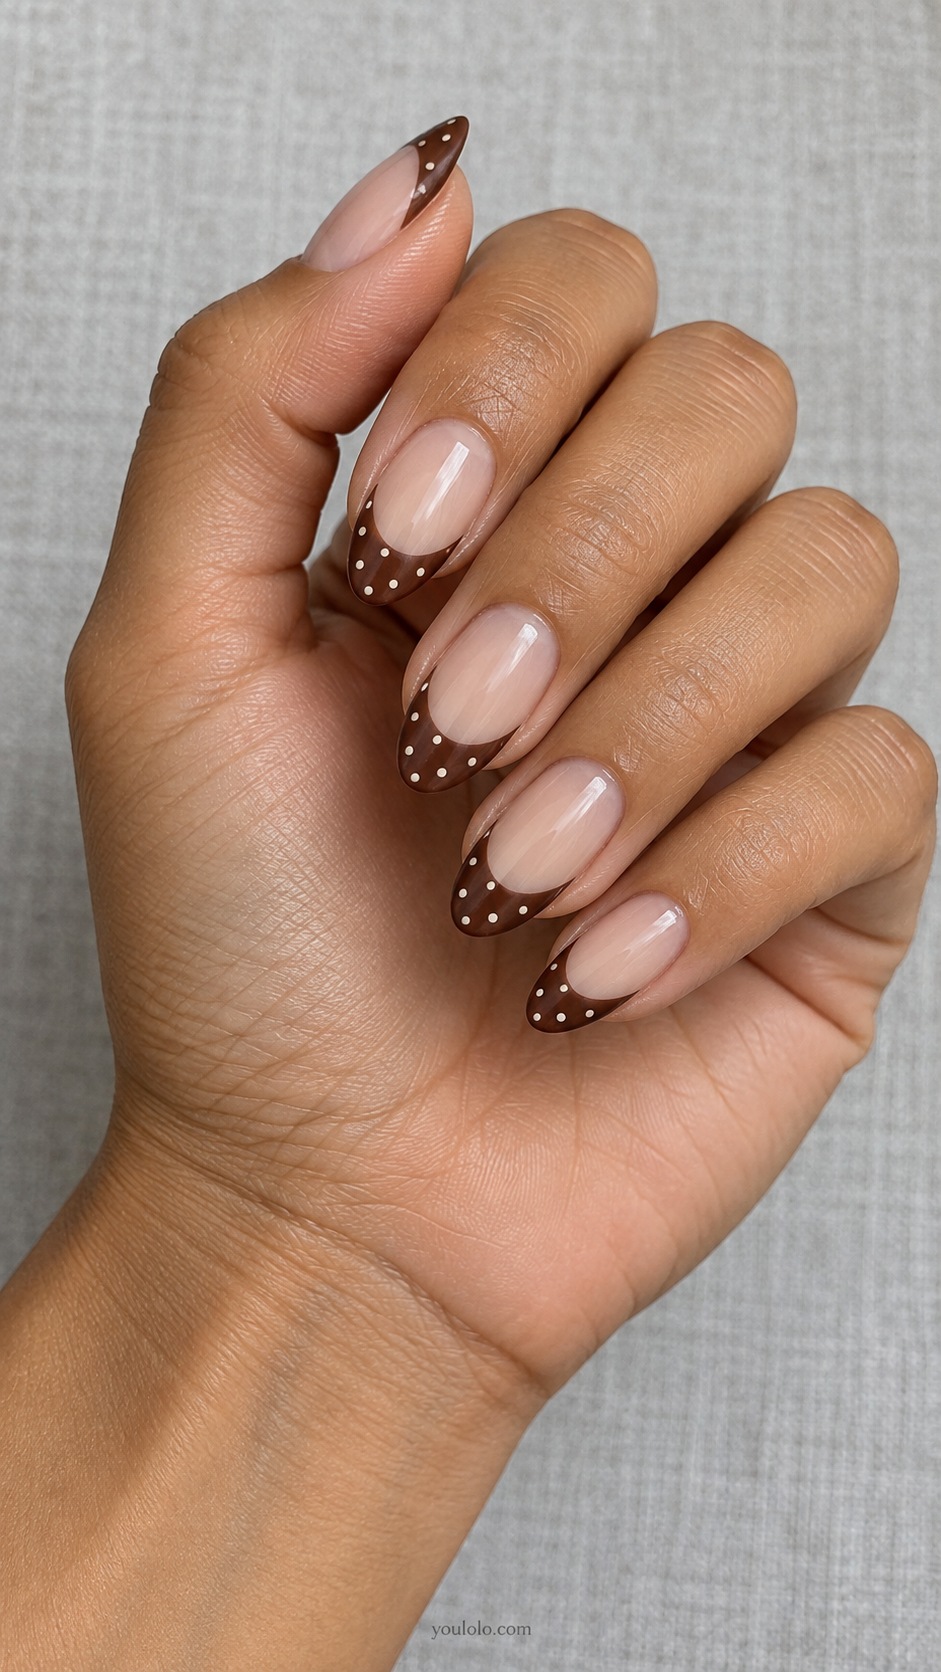
Dots confined to brown French tips combine a print with plenty of sheer space. I would wear this with a cream blouse and brown loafers. The almond shape helps the dotted band follow a soft curve.
Keep the dots small enough to fit within the tip while staying recognizable. If the tip is very narrow, a plain French may be clearer than trying to squeeze in a full pattern.
Inverted colors and softer palettes
6. Reverse Dot Accent
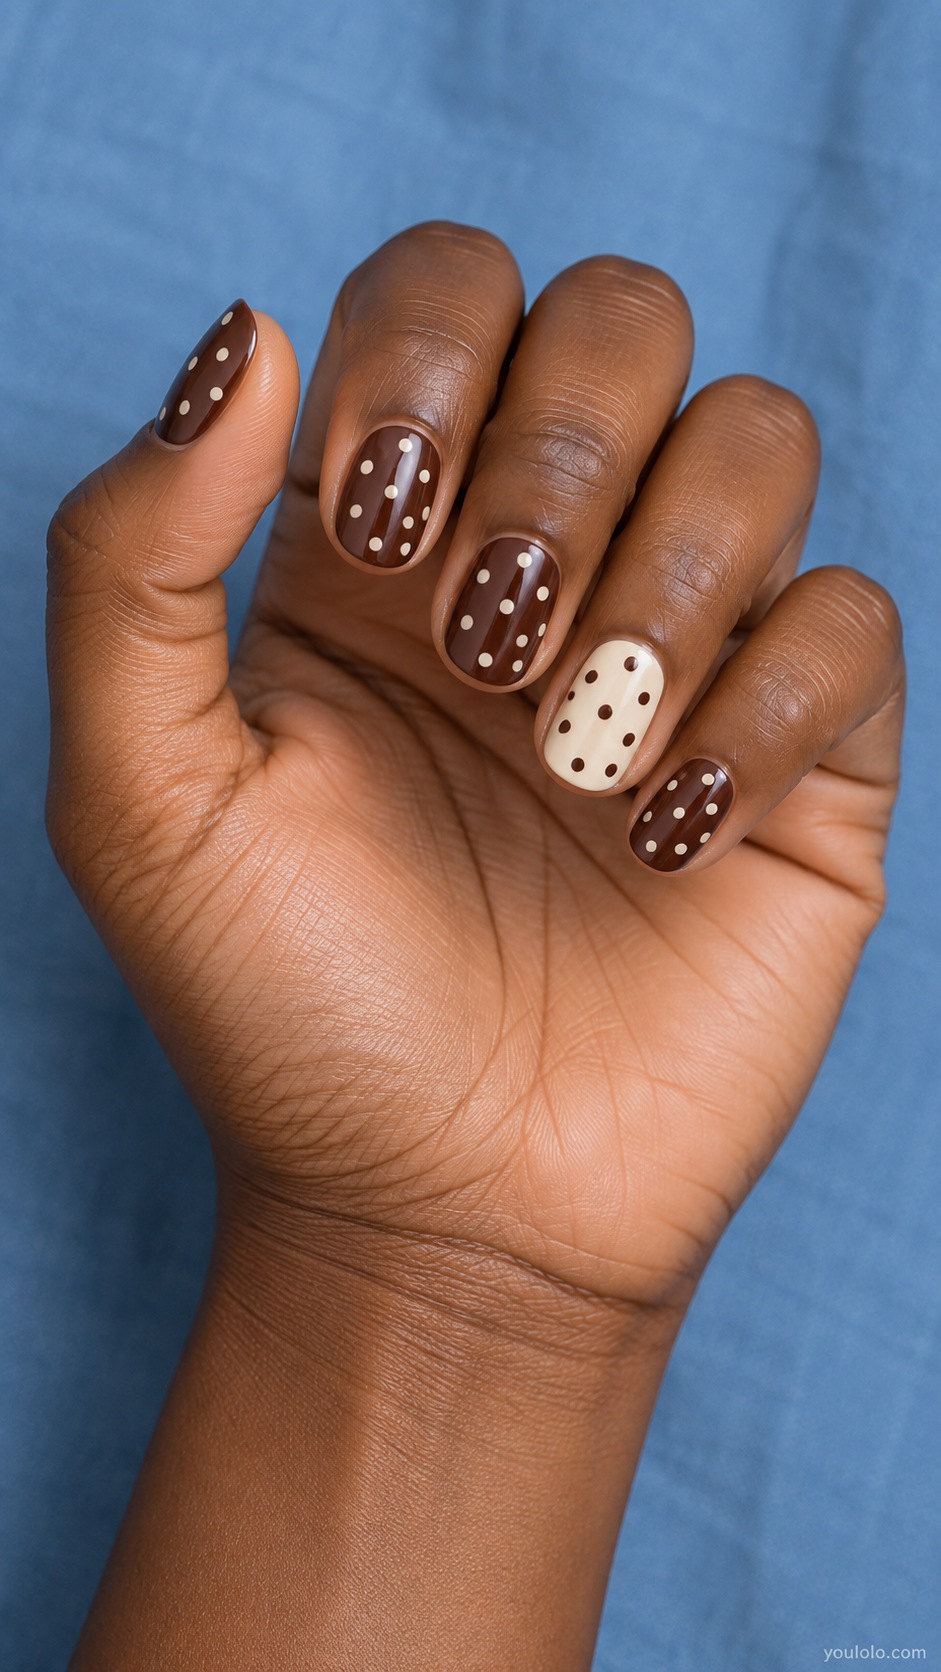
One reversed accent makes a cocoa-and-ivory dot set feel considered. Four nails keep the darker background, while the ring nail flips the colors. I would pair it with a plain camel coat and a white scarf.
Use a similar dot size on both backgrounds. Changing the scale as well as the colors can make the accent feel like a different manicure rather than part of the same set.
7. Butter Yellow Cocoa Dots
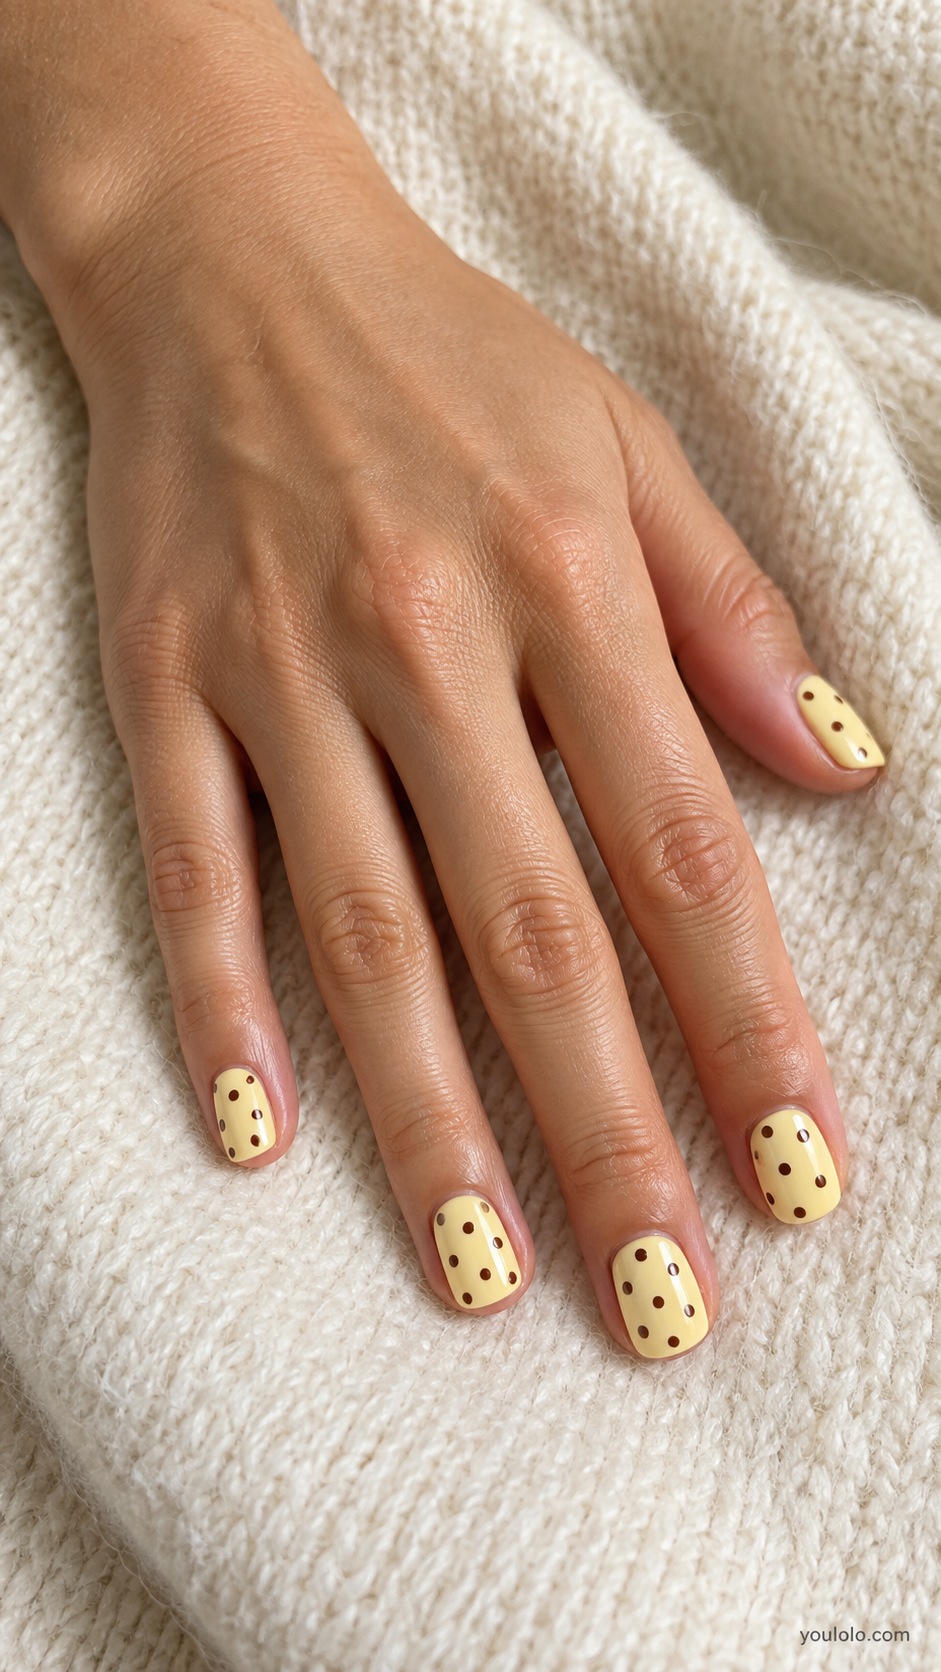
Butter yellow softens chocolate dots into a cheerful combination. I would wear it with a white cotton shirt and light denim, especially when I want brown without an autumn mood. Short squovals keep the bright base tidy.
Choose a pale buttery yellow rather than a sharp neon. The softer background lets the brown look warm and keeps the overall contrast comfortable.
8. Blush and Brown Dots
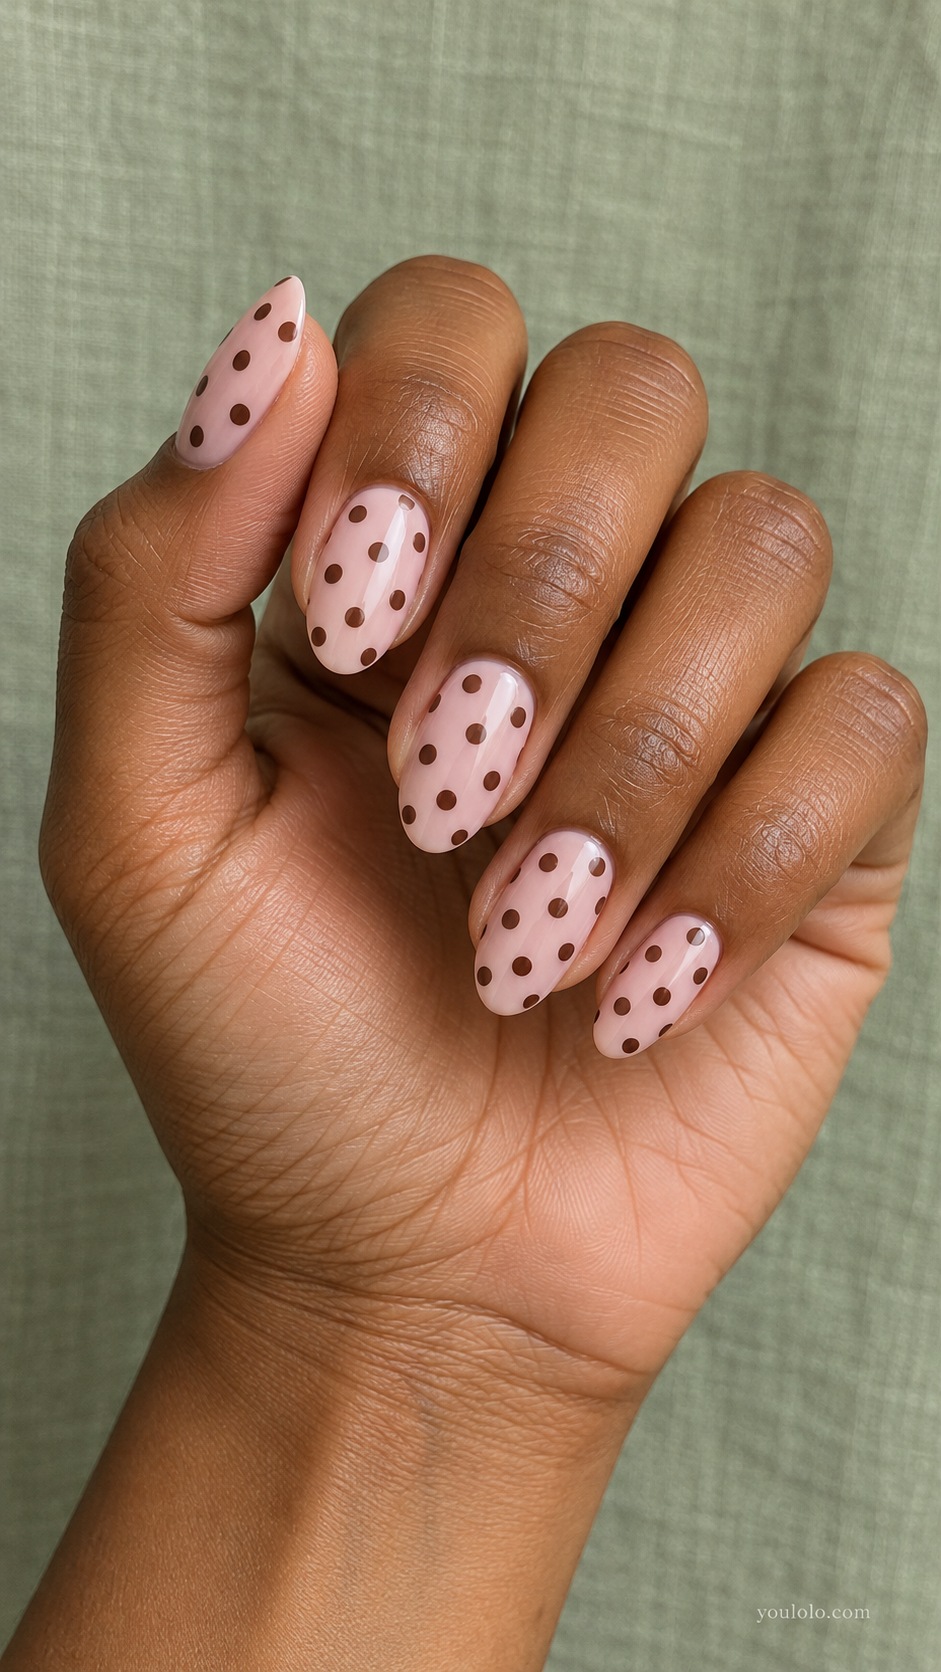
Blush pink with chocolate dots has a sweet, familiar feel that works well with cream knitwear. I would keep the dots medium and evenly spaced, then skip bows or hearts so the print stays the main idea.
Check that the pink is visible beside your skin. A nearly invisible sheer base gives a different result from the softly opaque blush shown here.
9. Brown Cream Dot Duo
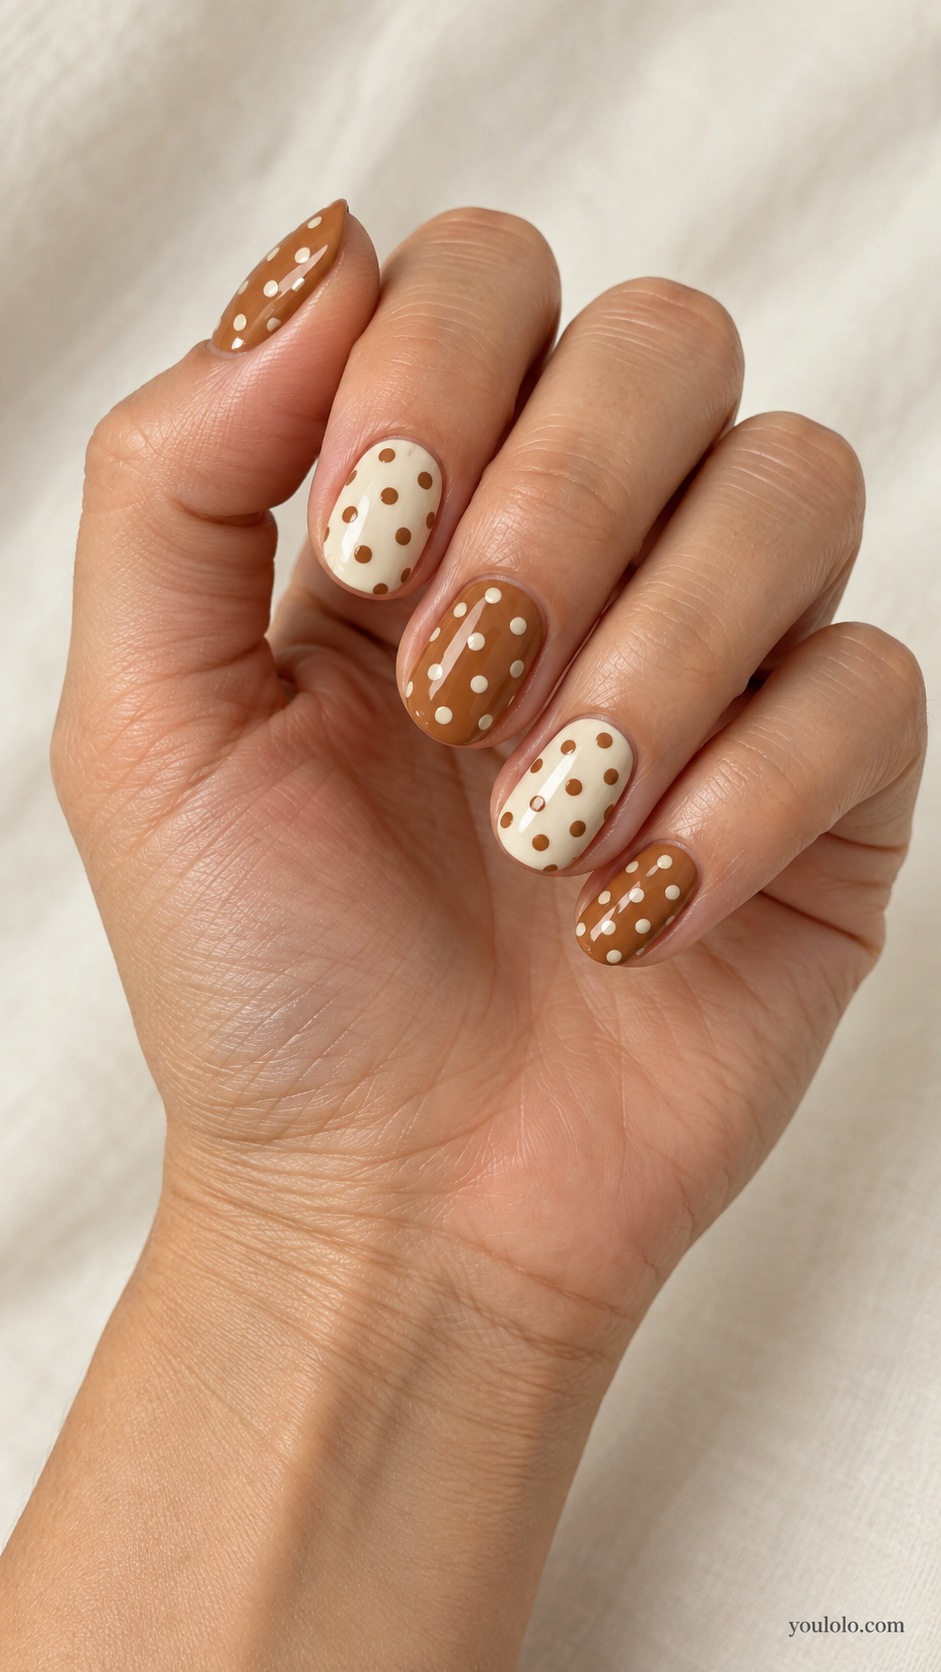
Alternating caramel and cream backgrounds make a simple dot print feel more varied. I like this with a plain brown dress and minimal jewelry. Each nail has its opposite-color dots, so the palette connects the set.
Keep the placement style consistent even as the colors switch. Similar spacing helps the alternation feel deliberate rather than a collection of unrelated accent nails.
10. Mocha Dot Border
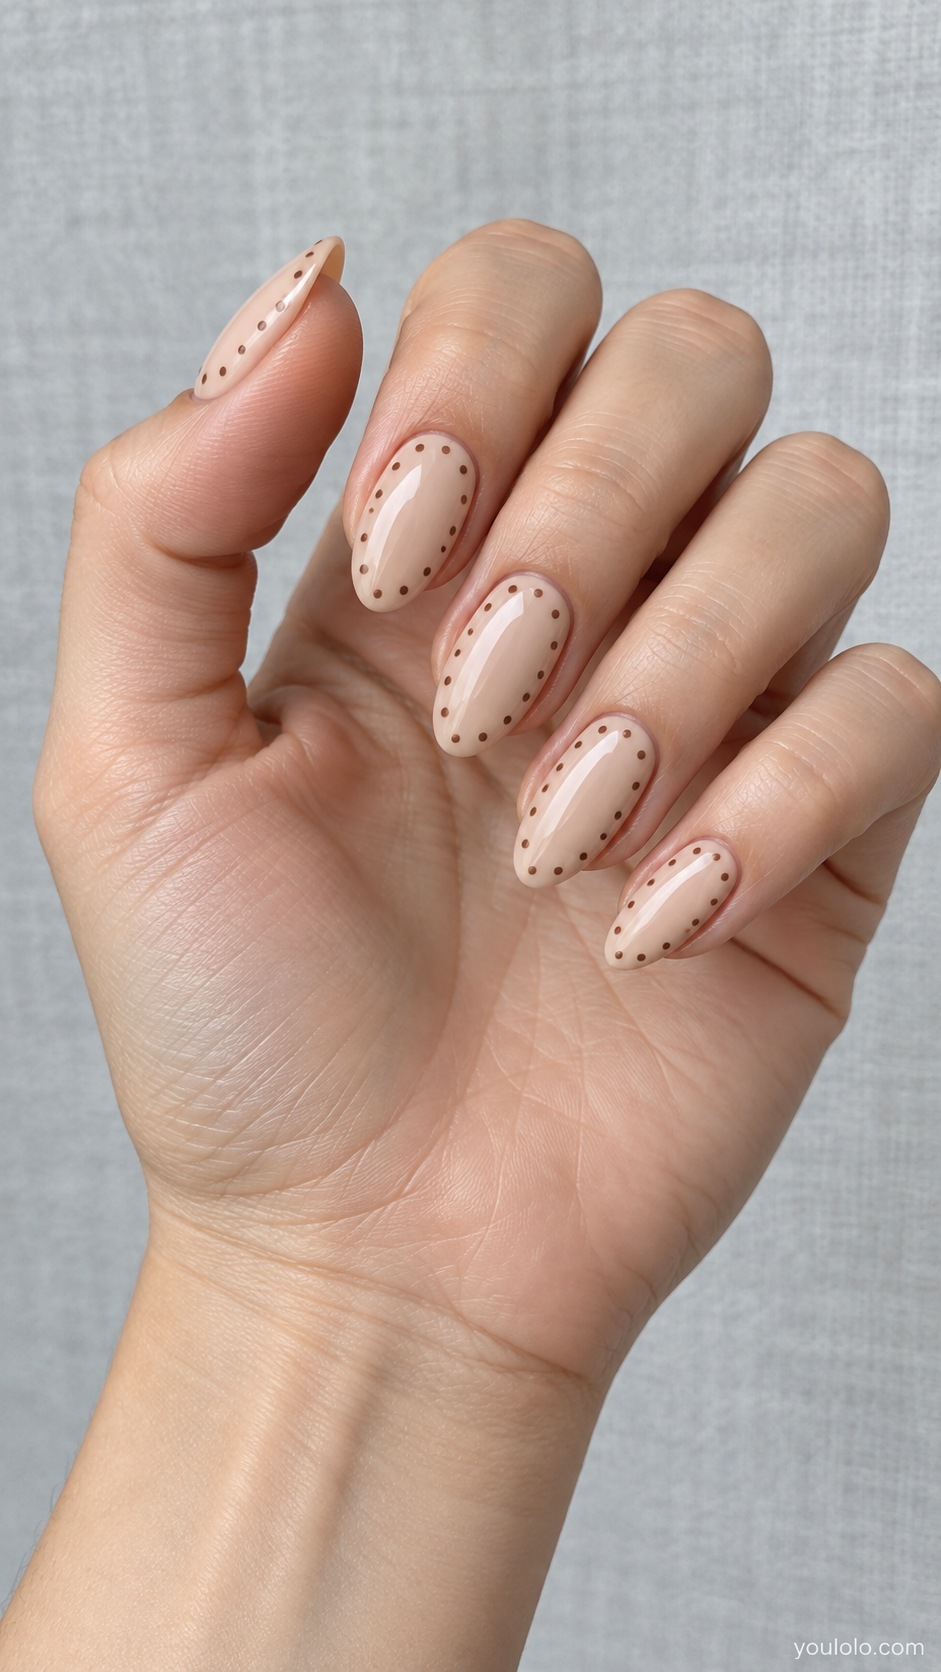
A dotted mocha border leaves the center of a nude nail open. I would choose this with a white shirt and a fine gold bracelet for a lighter take on the print. The almond shape gives the dots a curved path.
Ask for enough space between each dot that the border does not become a solid line. The individual circles are the charm of the design.
Minimal placement and texture changes
11. Coffee Single Dot
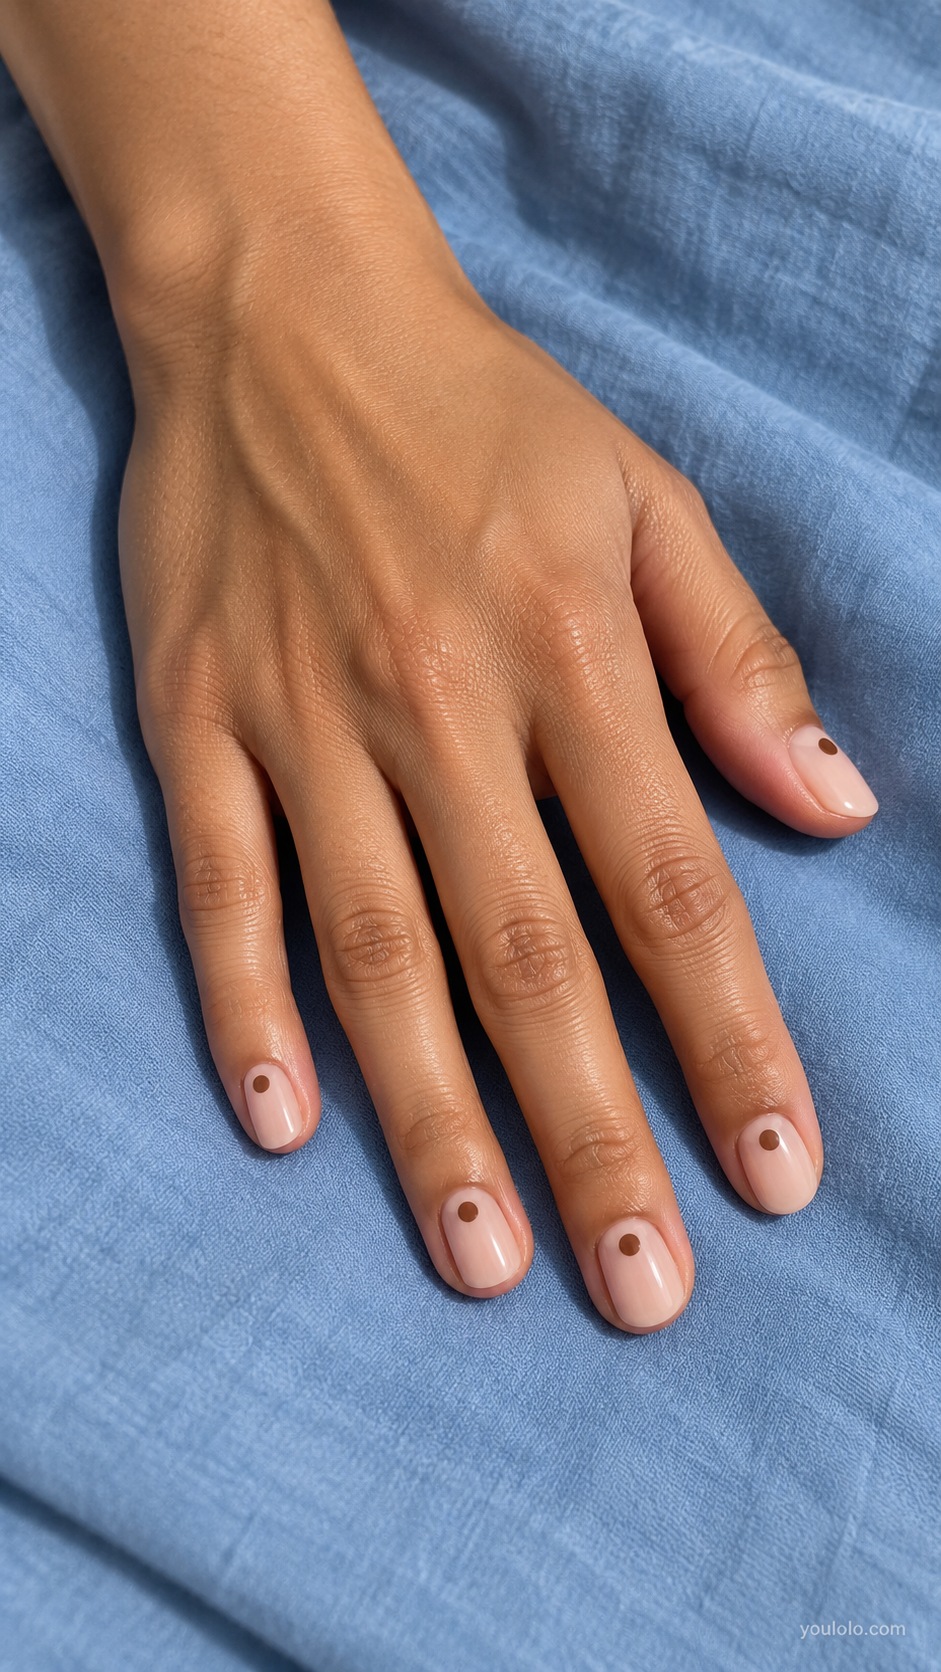
One coffee dot on each short round nail is almost a punctuation mark. It is the set I would pick when I want a tiny graphic detail rather than a full print. Pair it with black trousers and a cream tee.
Placement matters more than quantity here. Check the position on one nail first, keeping the dot low enough to feel intentional but comfortably inside the nail surface.
12. Chocolate Dot Fade
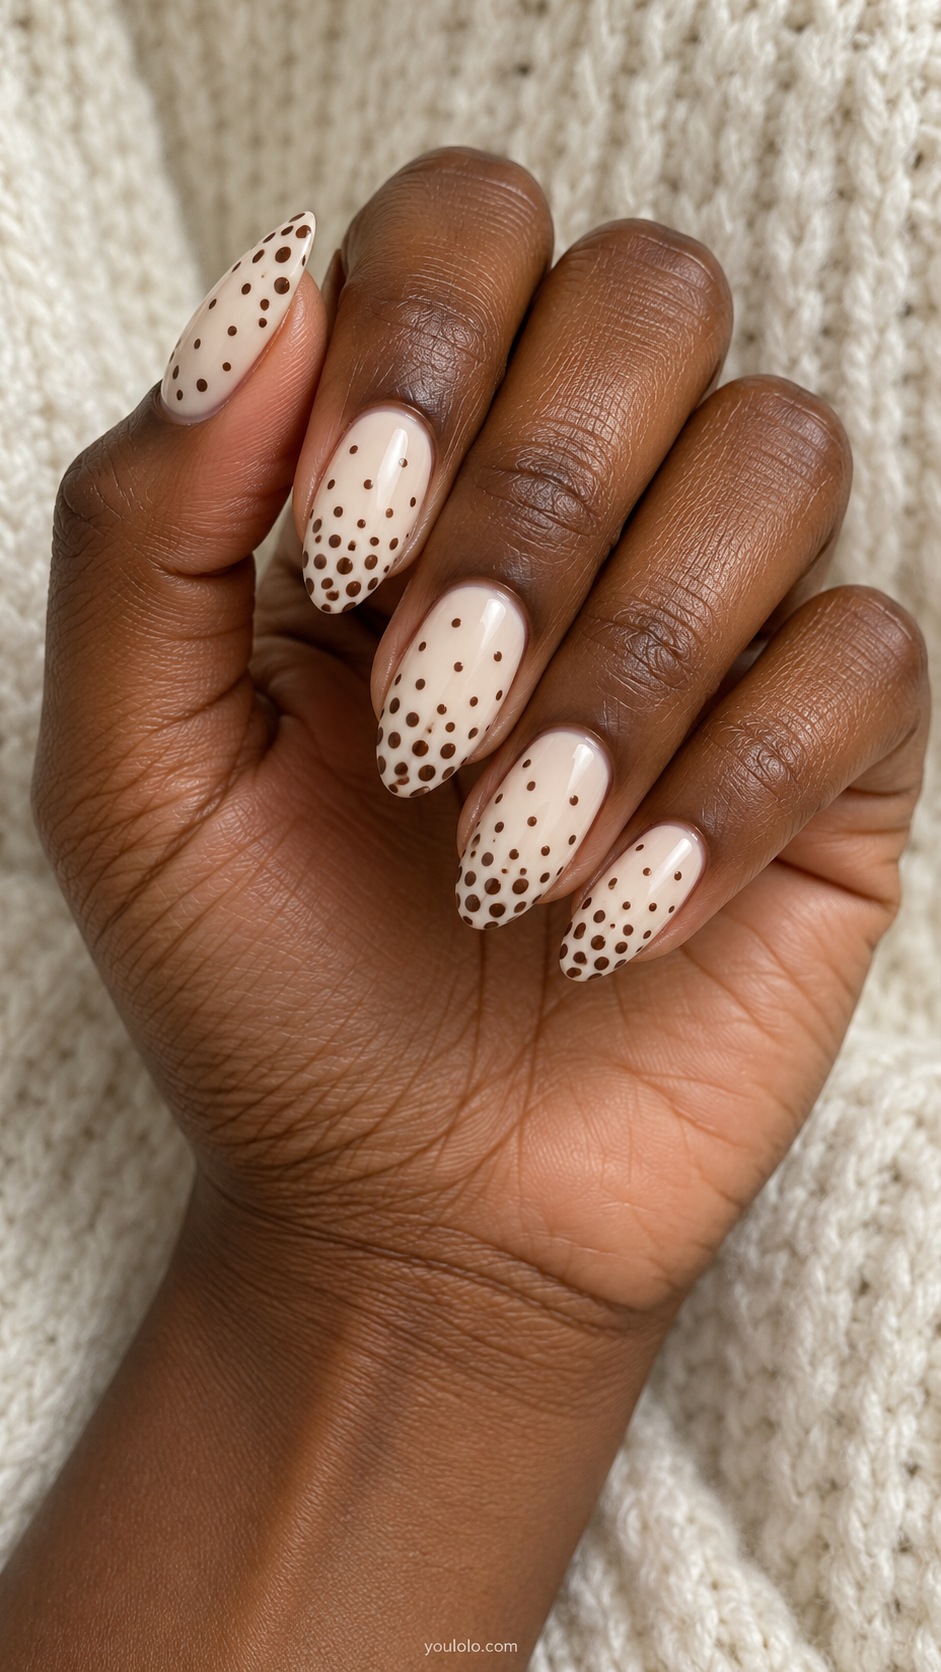
A chocolate dot fade gets denser toward the tips while leaving the base airy. I like the gradual change with an ivory blouse and a brown bag. Medium almonds give the pattern enough space to thin out.
The fade should come from spacing, not from turning the dots into smudges. Ask for clear circles throughout, with fewer of them near the cuticle.
13. Tan Twin Dot Rows

Two neat rows of ivory dots make tan nails feel graphic and orderly. I would wear this with a plain navy knit rather than another spotted item. Short squares suit the little vertical lines.
Keep a visible gap between the rows. If they are too close, the center can look like a single busy stripe instead of two clean sequences.
14. Cocoa Matte Dots
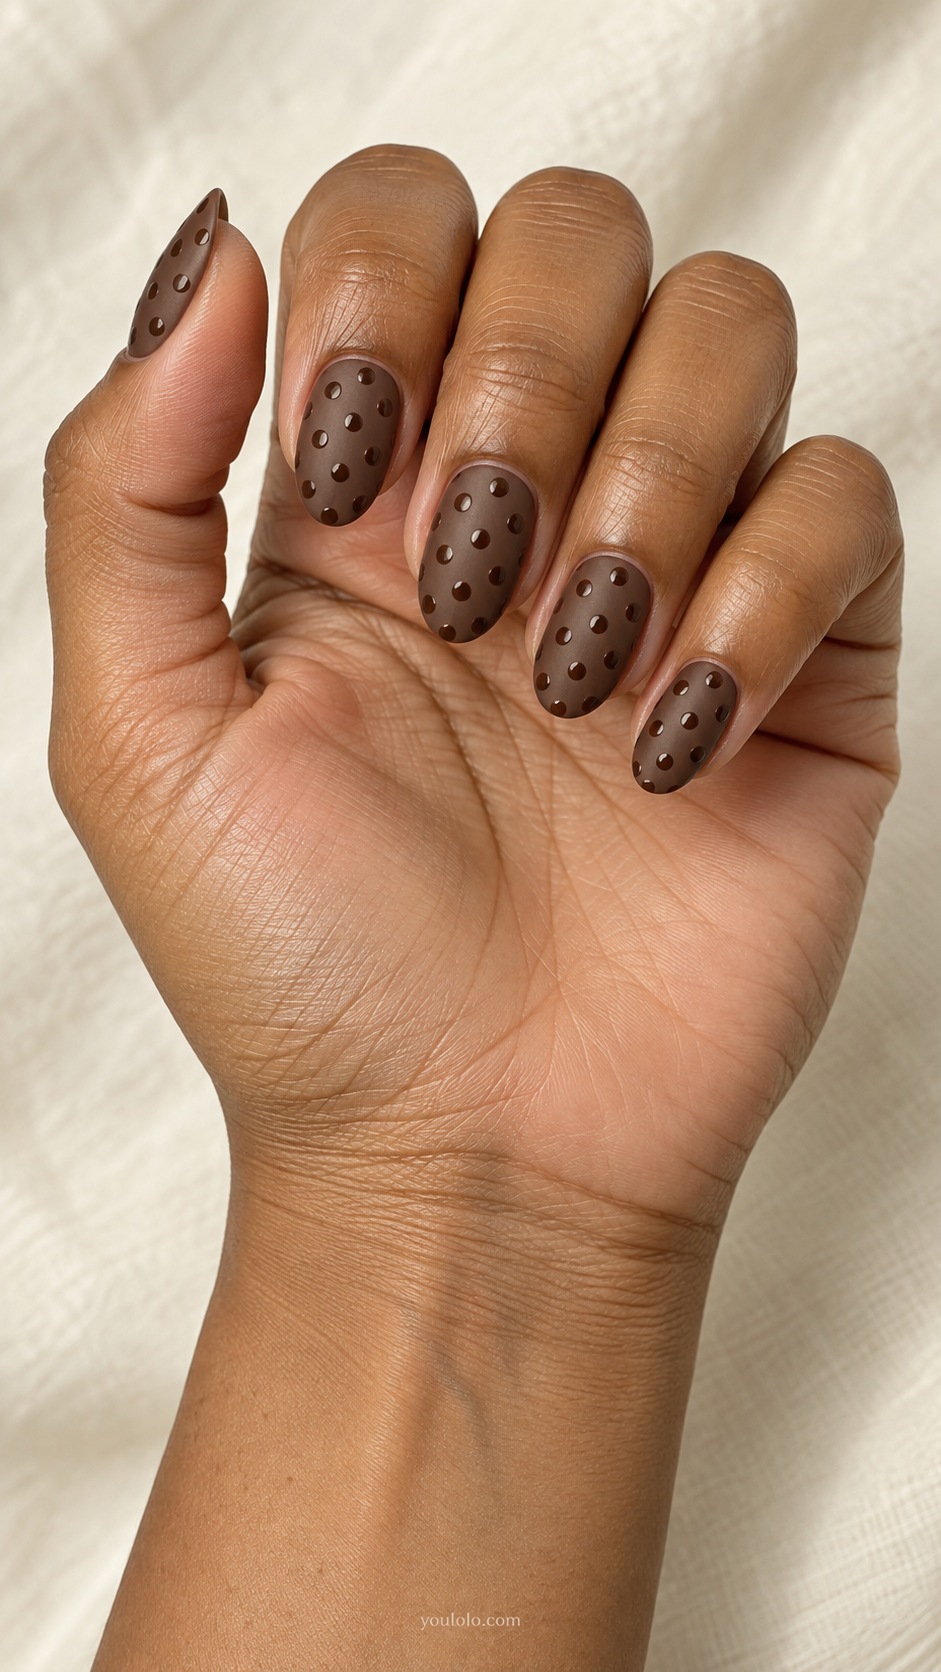
Glossy brown dots on matte cocoa are a texture idea rather than a color contrast. I like them for someone who wants a playful print that stays dark and subtle. A cream sweater would make the finish difference easier to notice.
Ask to see the effect under ordinary light. Same-color dots can be discreet, and that is part of their appeal; they will not look as bold as ivory circles.
15. Brown Dot Half Moons
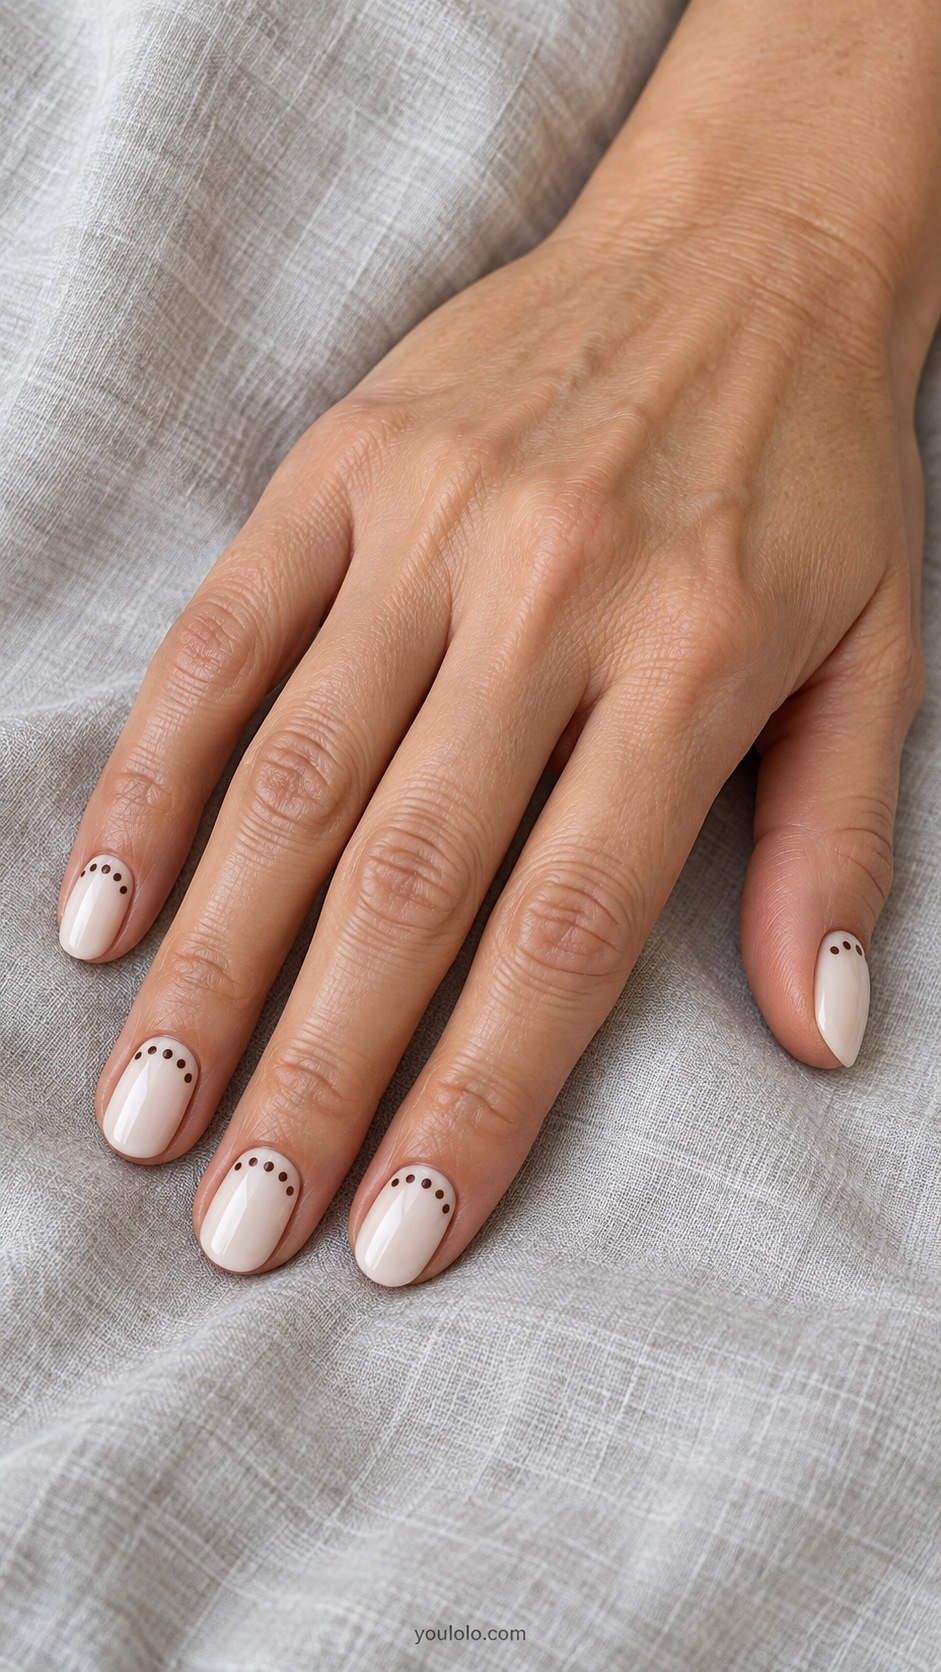
Dots arranged around a half moon give the pattern a curved structure. I would keep the ivory center plain and wear this with a brown cardigan and simple jeans. It feels lighter than an all-over dot manicure.
Scale the arc to each nail. On the little finger, fewer dots may look better than forcing the same count used on the thumb.
Metallic accents and dotted tips
16. Espresso with Gold Dots
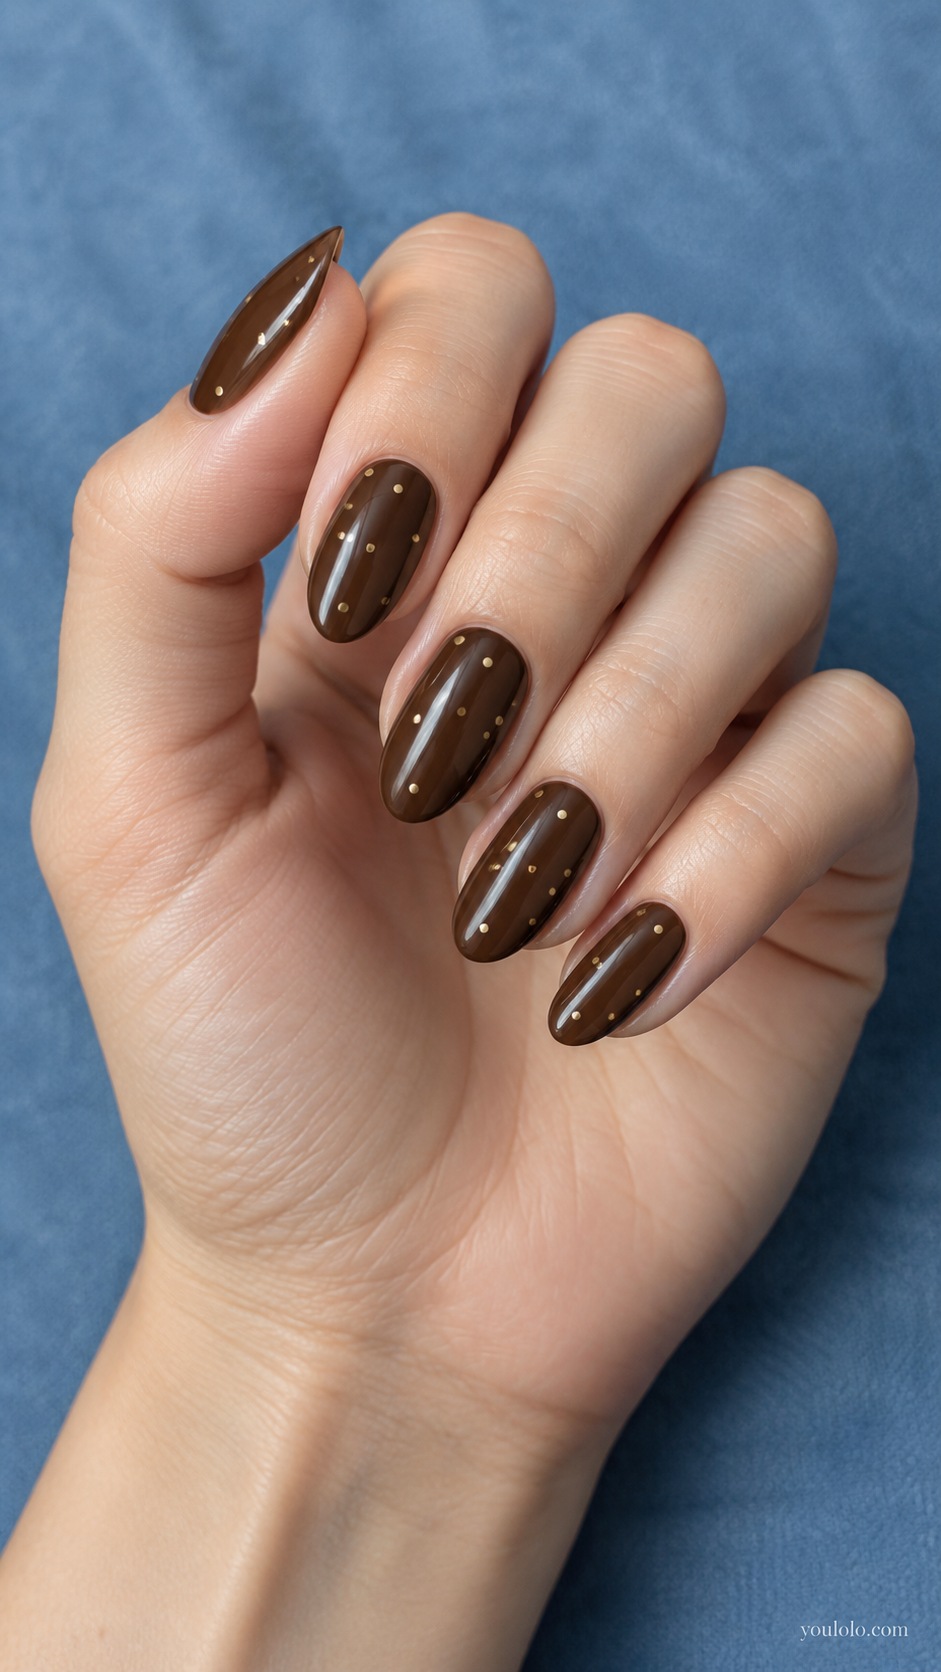
Tiny flat gold dots make espresso feel ready for an evening. I would wear this with a black dress and one pair of gold earrings, keeping the dots widely spaced. The dark base gives each small metallic mark room to shine.
Specify painted metallic dots if you want a smooth surface. Studs are a different choice and add texture as well as shine.
17. Latte Dots and French
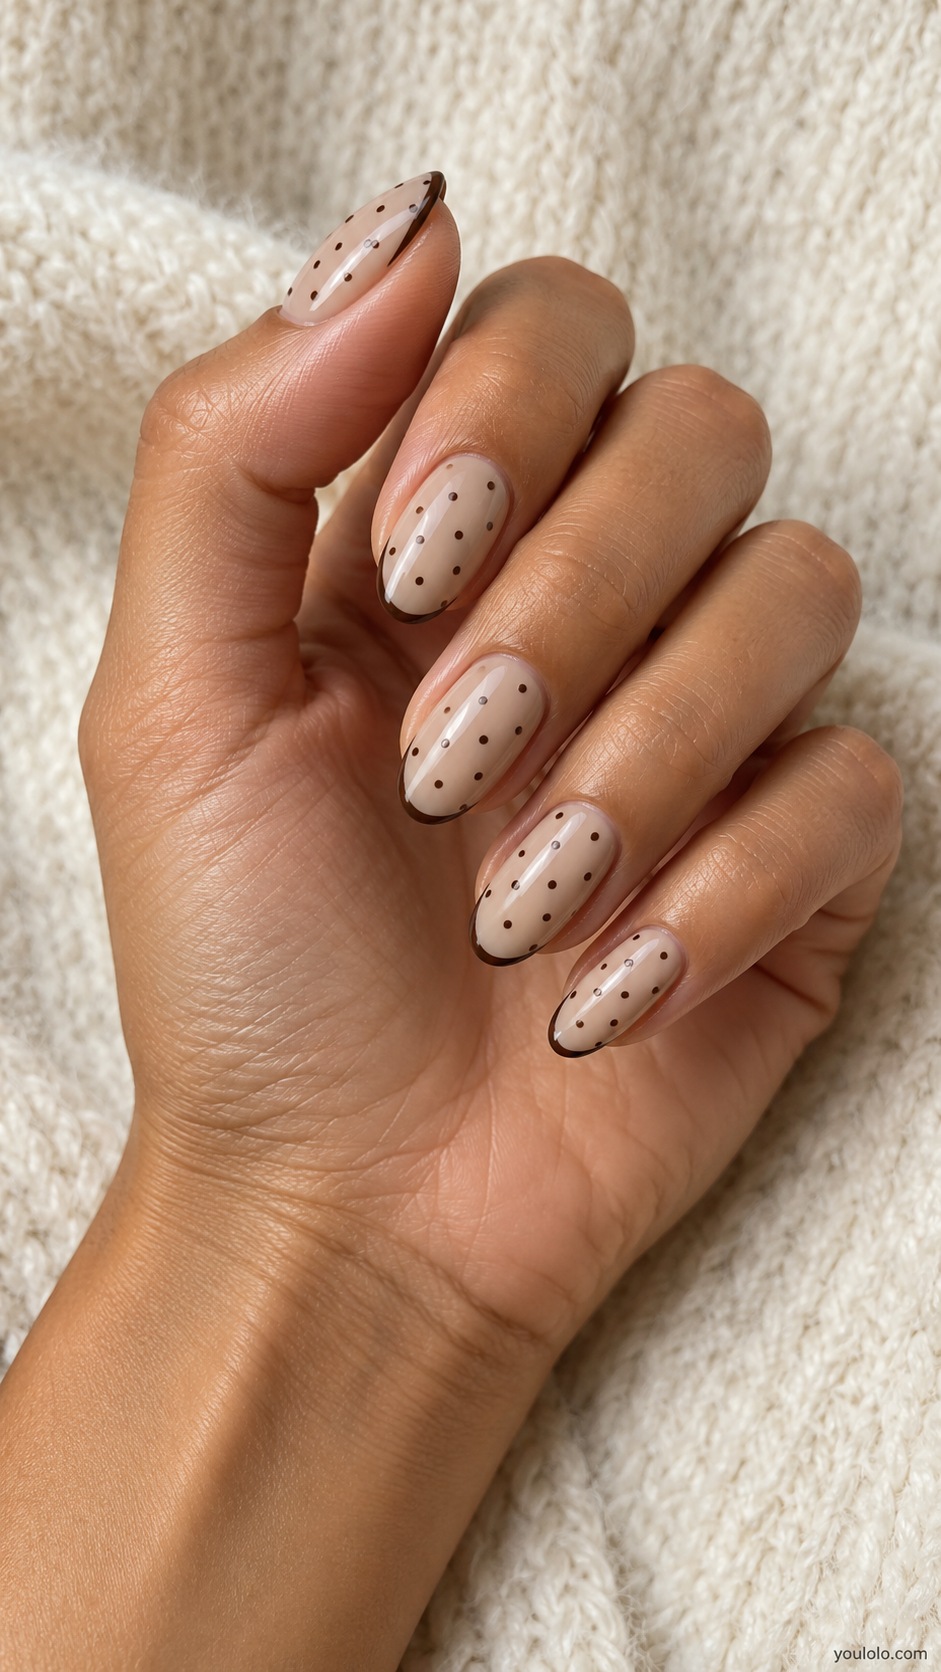
A fine dark French edge gives latte polka dots a little extra definition. I like this with a white shirt and tailored brown trousers. The tip should remain secondary to the dots, not become a heavy band.
Choose the dot size and border thickness together. If both are large, a short nail can become crowded; keeping one delicate helps the other read clearly.
18. Brown Dot Split Panel
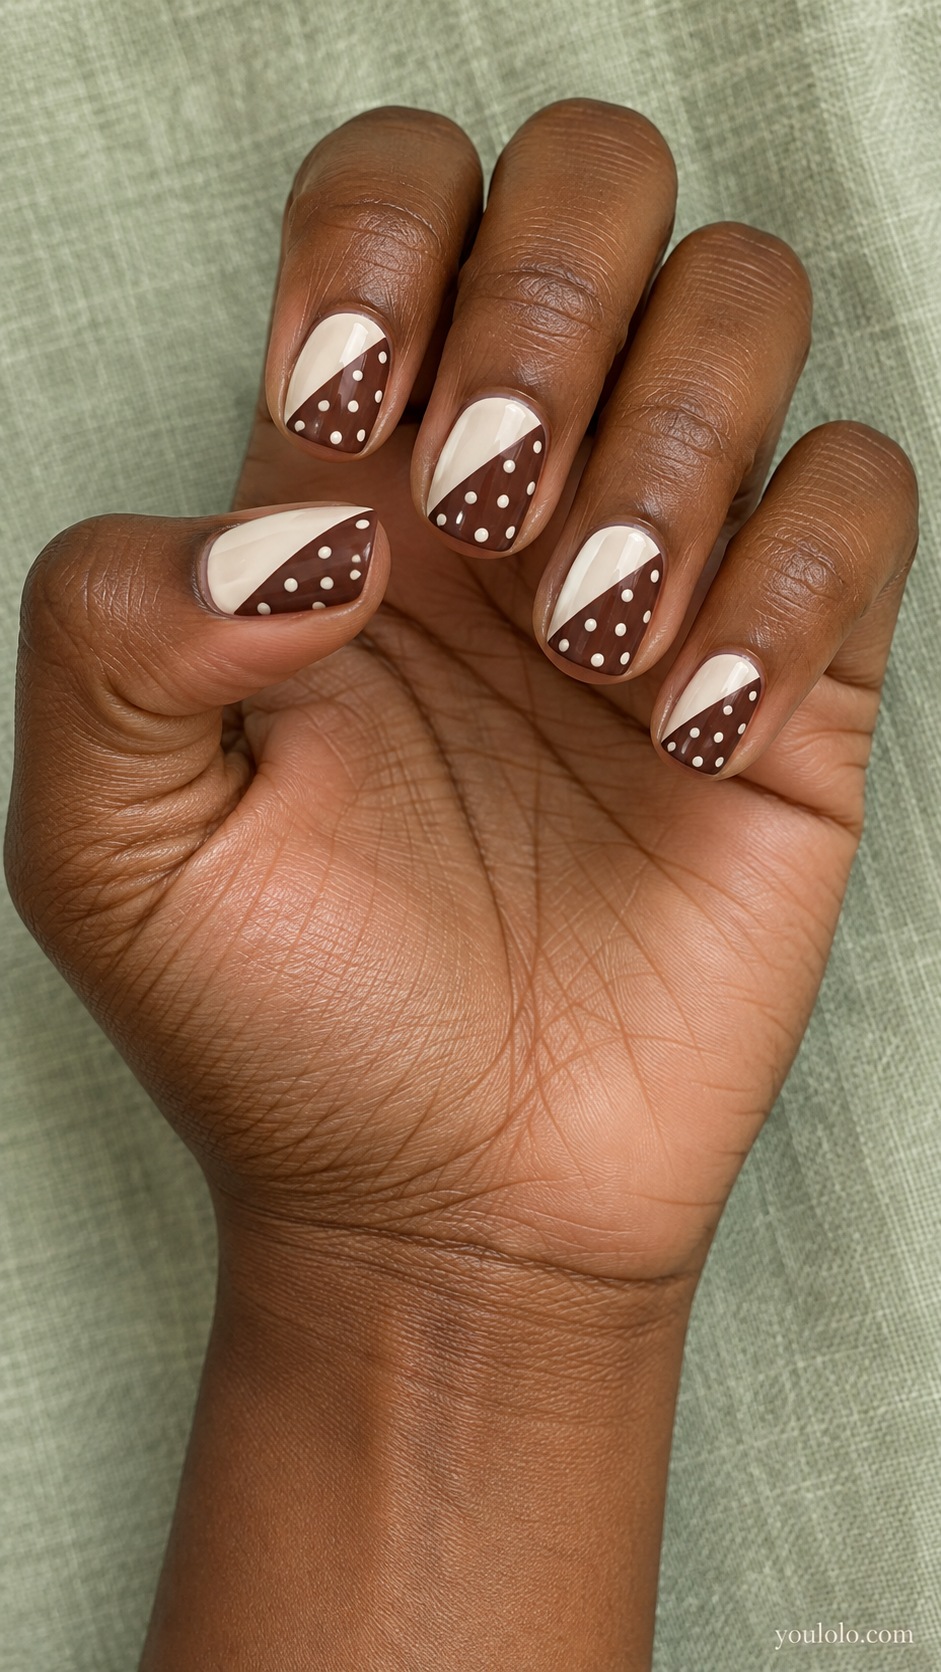
A diagonal cocoa panel with ivory dots leaves the other half of the nail plain. I would wear this with a simple cream outfit, letting the split layout provide the interest. Short soft squares make the geometry neat.
Keep the dots inside their panel. A clean boundary is what separates this from an ordinary all-over print and gives the design its graphic character.
19. Toffee Dot Tip Scatter
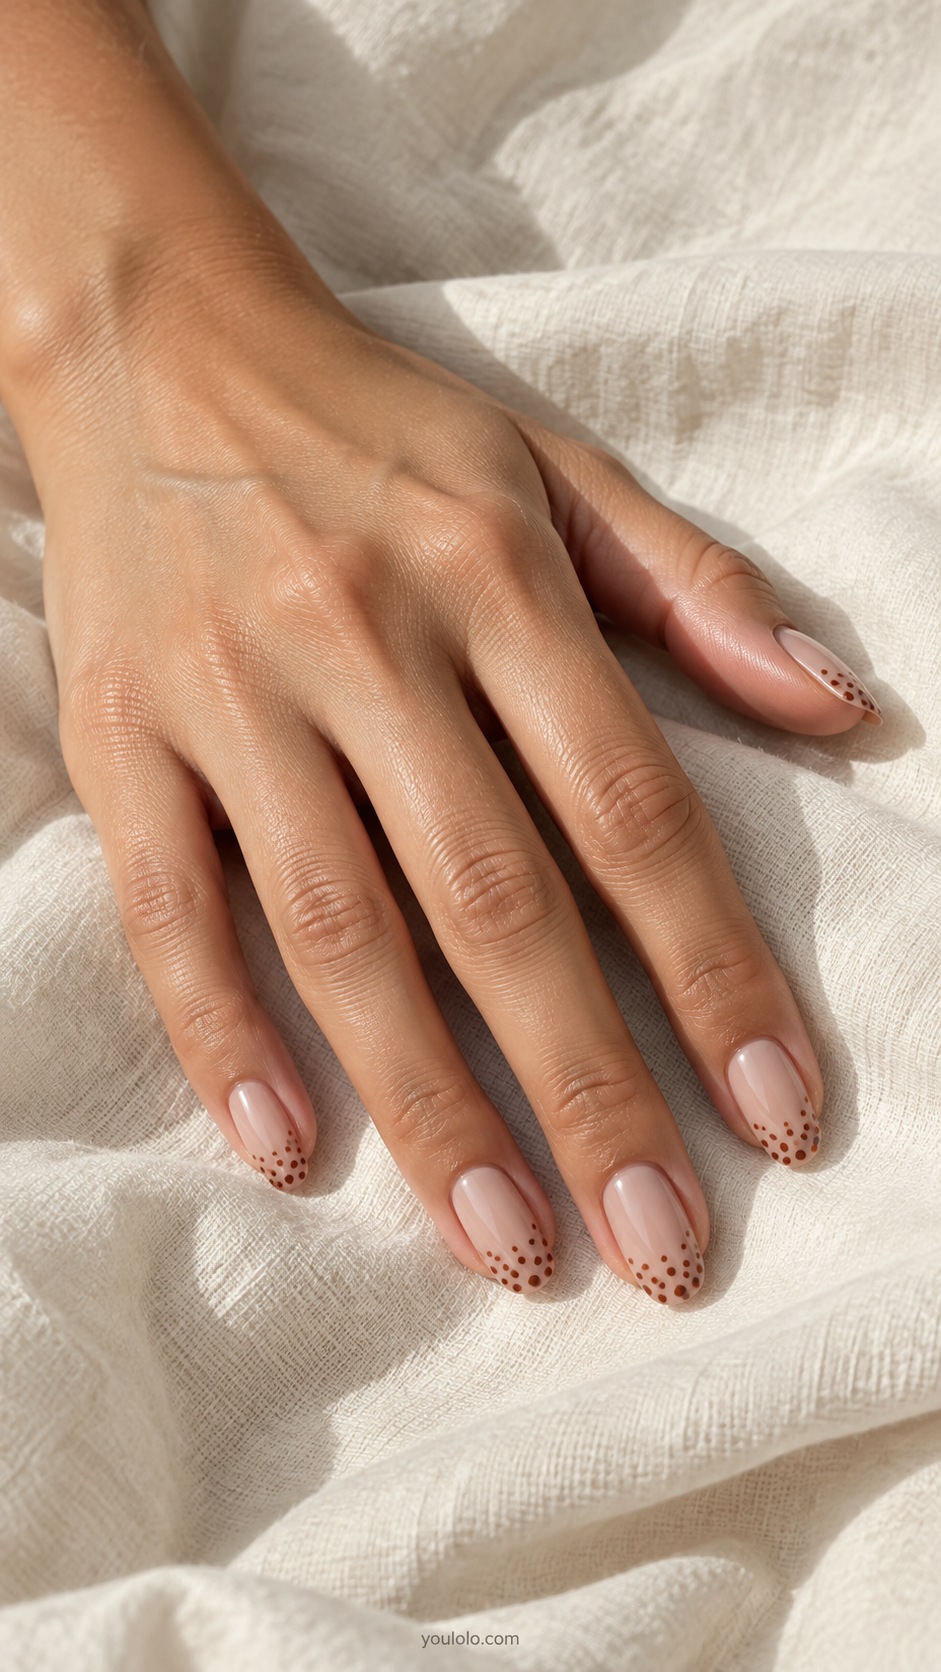
Toffee dots scattered over a sheer tip are a softer alternative to a solid French. I like them with linen and light knitwear, especially when I want the hand to feel mostly nude. Medium almonds give the scatter space.
Ask for the dots to stay near the free edge. Letting them drift too far toward the base turns the design into a full dot fade instead.
20. Cream Dot Ring Accent
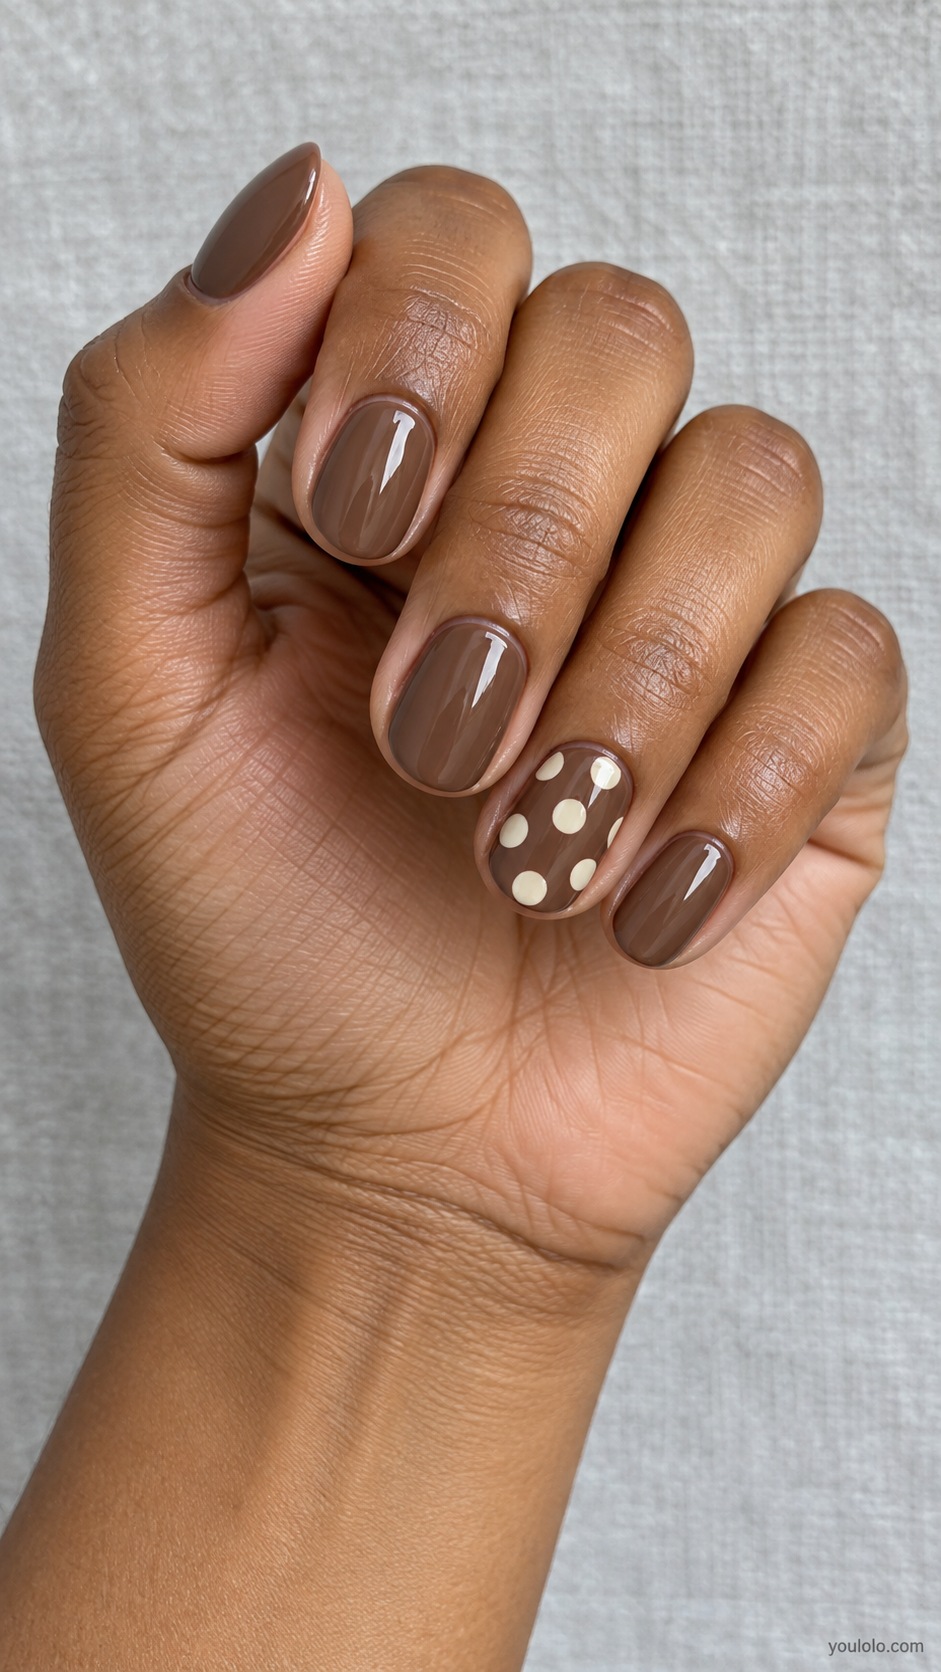
One cream-dotted ring nail is enough to change a plain mocha set. I would choose this with an everyday denim outfit, particularly if I was unsure about wearing print on all five nails. The accent does the work.
Use a few larger dots that are easy to see. A very tiny pattern on only one nail may disappear unless you look at it closely.
21. Three Brown Dot Mix
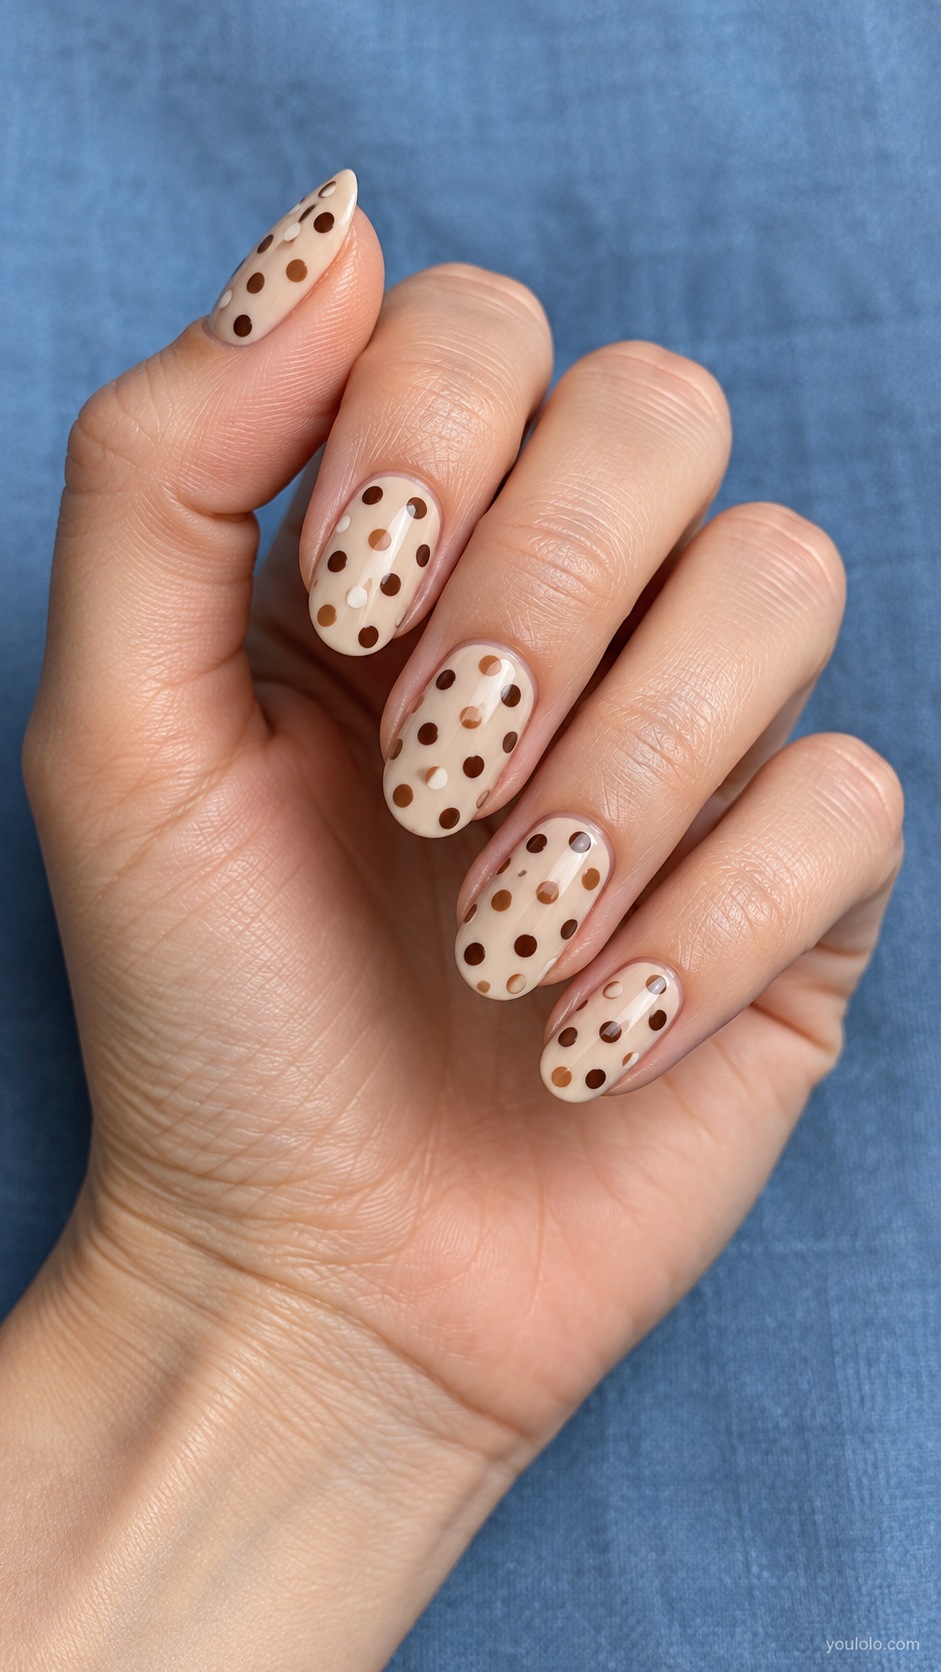
Three brown shades make dots on beige feel tonal rather than high contrast. I like caramel, cocoa and espresso together, with a simple ivory sweater nearby. The pattern has variety without needing another color family.
Keep the circles similar in size and let the shades provide the difference. If the marks vary wildly in shape, the result can start to resemble speckles instead of polka dots.
My shortcut for choosing the right amount of print
If you are unsure about a full dot set, start with one accent nail or one dot on each nail. If you already love print, choose a clear all-over pattern and keep the surrounding outfit simple. I would rather see well-spaced dots than several unrelated decorations competing for the same small surface.
For a salon brief, name the base, dot color and approximate scale, then show the artist which areas should remain plain. If you enjoy another classic brown pattern, take a look at our tortoise nail ideas.
Brown Polka Dot Nails FAQ
How do you make polka dots on nails?
A dotting tool can place small rounded marks with controlled spacing. Practice the size on a sample before working on the final design, and follow the application and drying or curing instructions for the product you use.
What dot colors work with brown nails?
Ivory gives a clear classic contrast, blush feels softer, butter yellow feels lighter and gold adds a metallic accent. For a subtle version, use glossy brown dots over a matte brown background.
Can polka dots work on short nails?
Yes. Adjust the number and size of the dots to the available space. Fewer clear circles or one accent nail can look more deliberate than a crowded miniature pattern.
Why do my dots look uneven?
The amount of product, tool size, pressure and surface angle can all change a dot. Test the size and spacing first. A hand-painted set does not need machine-perfect circles, but a consistent overall rhythm helps it look intentional.
How do I make brown polka dot nails look subtle?
Use lower contrast, smaller dots, more empty space or a single accent. One coffee dot on a sheer nail gives a much quieter result than large ivory dots covering every brown nail.