The Best Fluffy Pancakes recipe you will fall in love with. Full of tips and tricks to help you make the best pancakes.


Chocolate can look creamy, smoky, red-brown, or almost black before a glaze goes over it. That is why I would choose chocolate glazed nails by the base first and the reflection second. A delicate pearl layer should reveal the brown you like, not hide it beneath a different metallic color.
This guide gives extra room to chocolate glazed French nails: fine cocoa edges, angled ganache, side tips and small cream seams. It also includes plain and tonal dark brown glazed nails for readers who want the finish without a French border. The aim is a clear choice you can explain at an appointment.
Chocolate glazed nails: choose brown, then choose shine
| Starting point | What changes | Useful comparison |
|---|---|---|
| Milk chocolate | A lighter, warmer brown base | Fine golden pearl versus a cool white veil |
| Espresso | A deeper, almost-black impression | Whether brown remains visible in ordinary light |
| Rose mocha | A pinker brown undertone | How it looks beside gray and cream |
| Chocolate French | Brown concentrated at the edge | Tip width and the amount of open neutral base |
This collection focuses on soft glaze and controlled color placement. For a stronger metal effect, a mirror-chrome reference communicates a different result. Tell the artist which reflection you mean rather than relying on the word chrome alone.
Manucurist’s brown-nail guide includes a brown French with a golden glazed effect. The ideas below explore that broader combination with different tip shapes and base depths; they are not exact product swatches.
Images are individually AI-generated design references, not salon photographs or exact product swatches. Colors and reflections will vary with the actual products, base and lighting.
1. Milk Chocolate Pearl
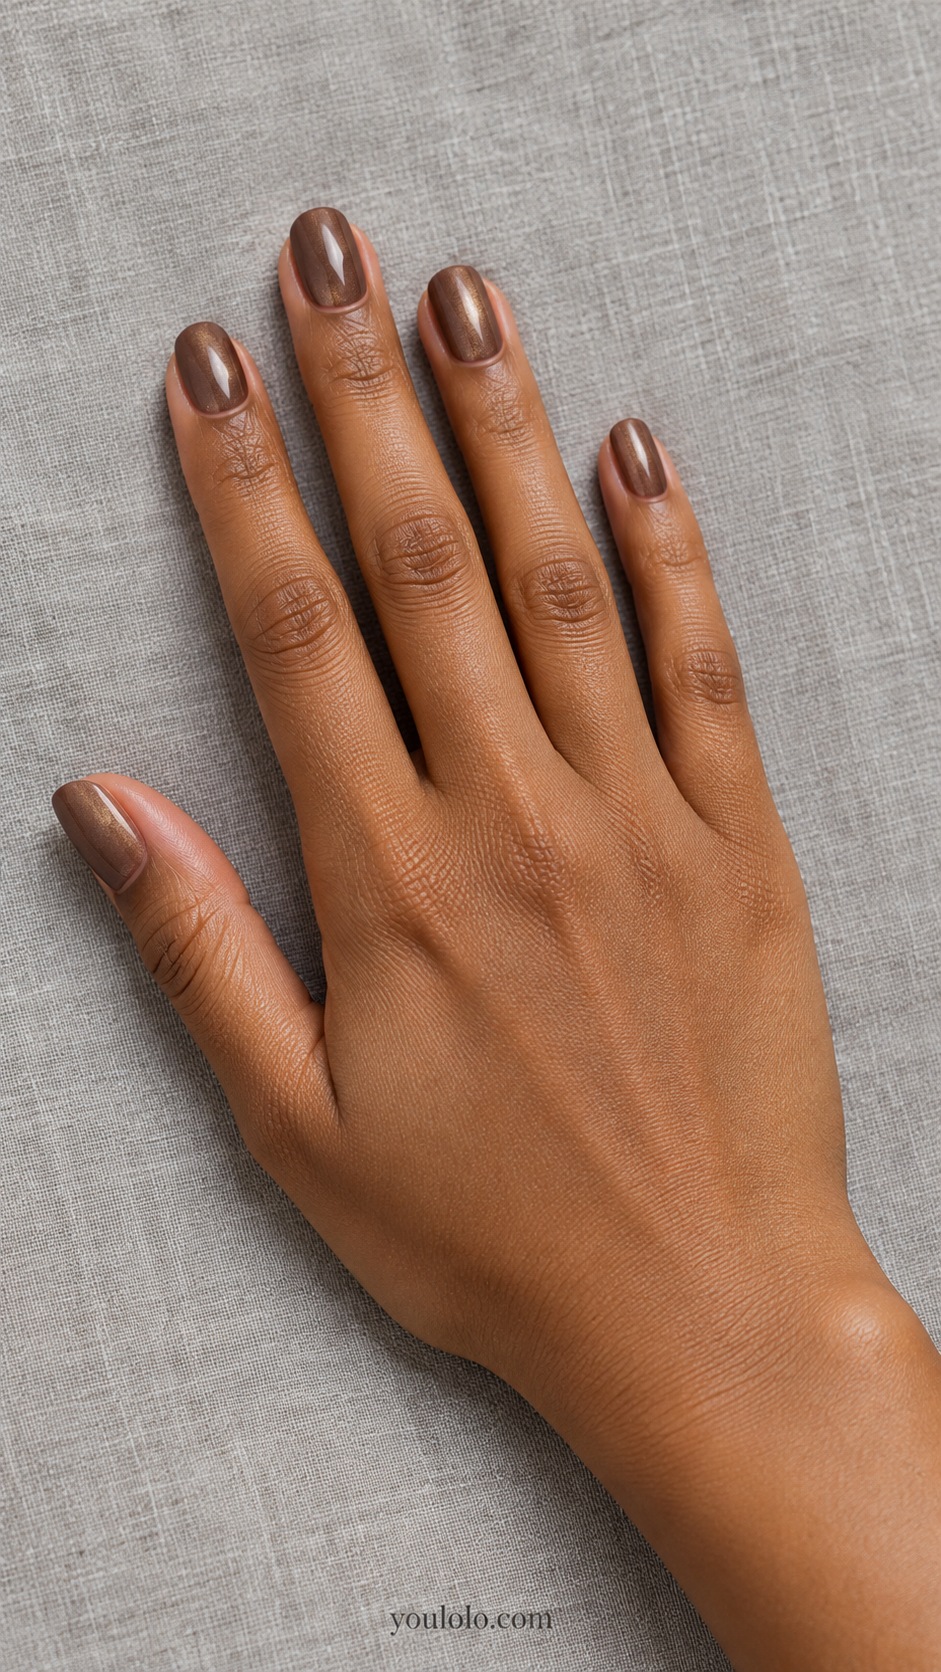
Milk chocolate under a fine golden pearl veil makes a warm starting point for chocolate glazed nails. The short oval shape keeps the look simple, with the reflection adding detail to an otherwise plain brown. I would choose this when espresso feels too dark but beige is not enough color.
Compare the base before and after the glaze. It should still look brown rather than turning bronze. A cream shirt or faded denim would support the warm tone without needing another gold element in the manicure.
2. Espresso Glaze Rounds
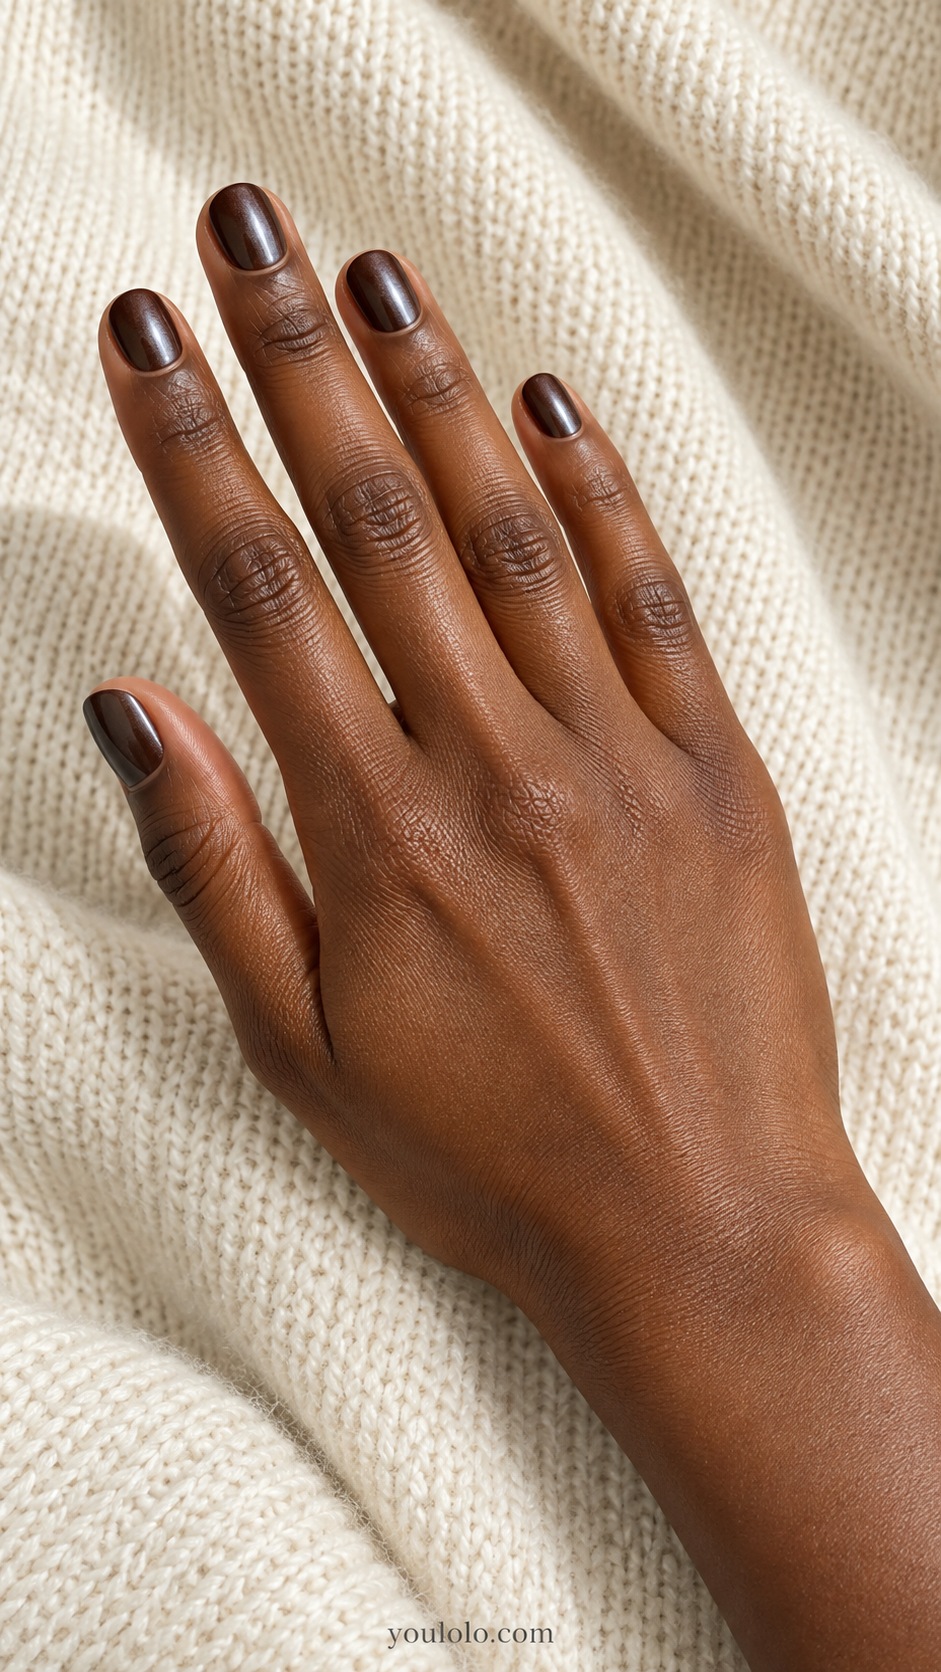
Espresso gives very short rounds a deep brown base, while a cool pearl veil prevents the surface from looking completely flat. The dark color remains the main impression. I like this when you want the depth of an almost-black manicure with a little more warmth underneath.
Check the sample away from direct light to see whether you can still recognize brown. If it reads as black, compare a lighter espresso. I would keep the glaze fine and even, with no extra tip line competing for the small space.
3. Chocolate Glazed Classic French
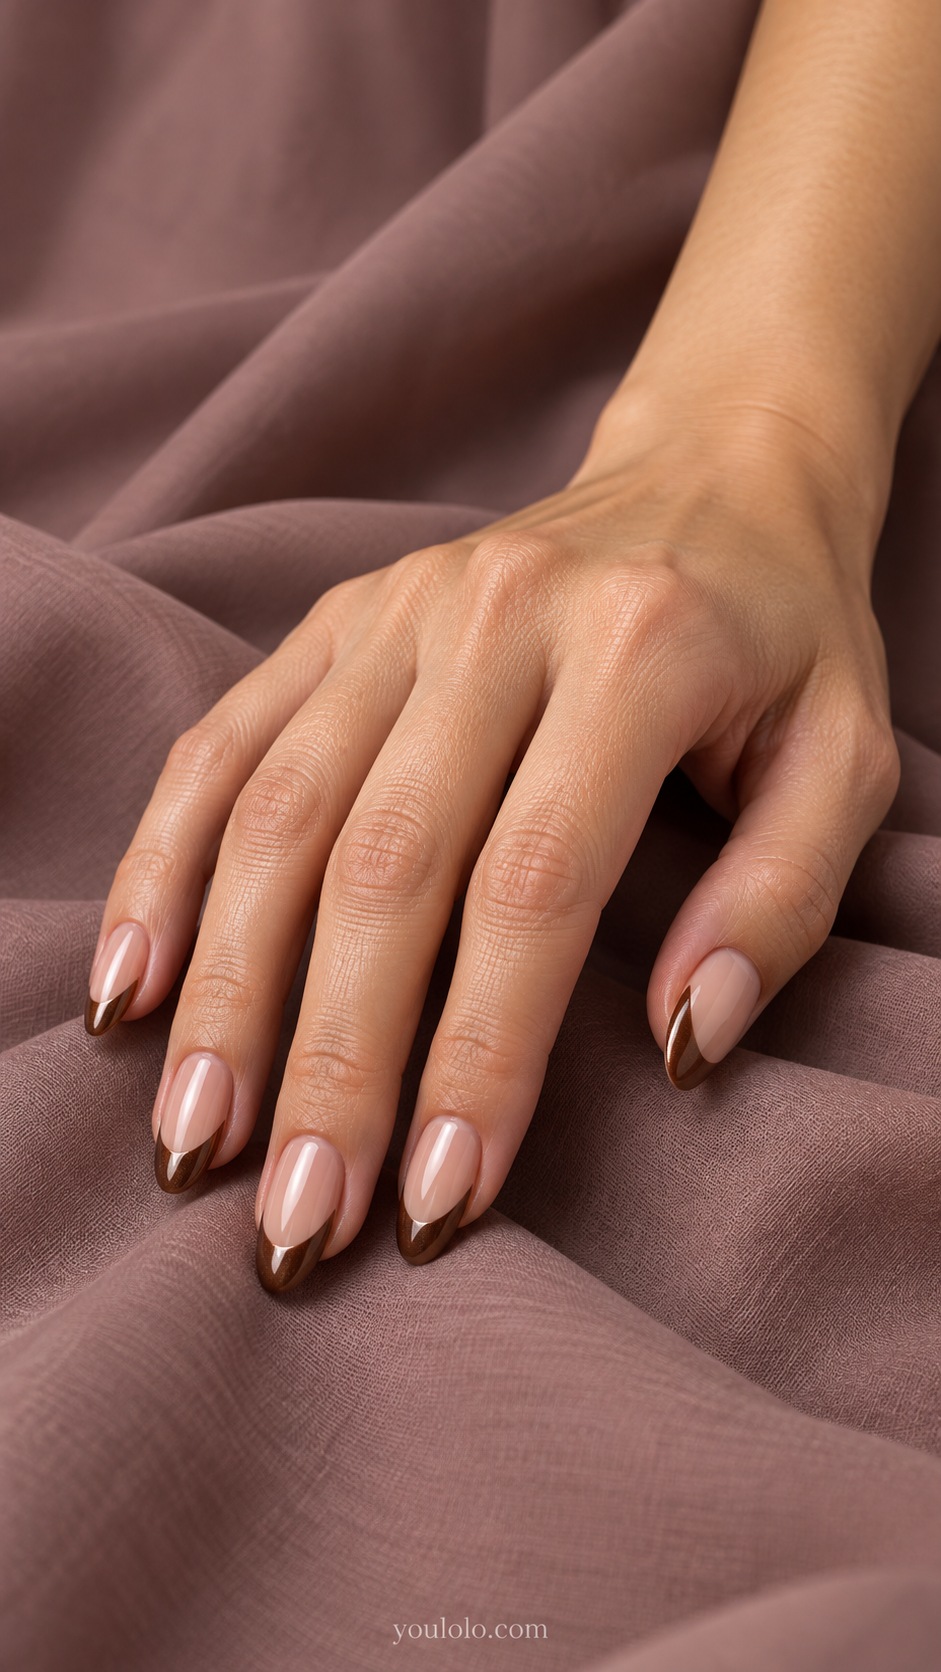
A classic chocolate French places the rich color at the almond tips and leaves the beige base open. The pearl finish runs through the design, connecting the neutral area to the darker edge. This is the reference I would use for a clear chocolate glazed French nails brief.
Ask for the tip depth you actually want rather than copying it from a longer extension. A moderate border keeps the base visible. I would pair this with warm ivory clothing and leave out bows or charms so the glazed edge remains the focus.
4. Cocoa Micro French
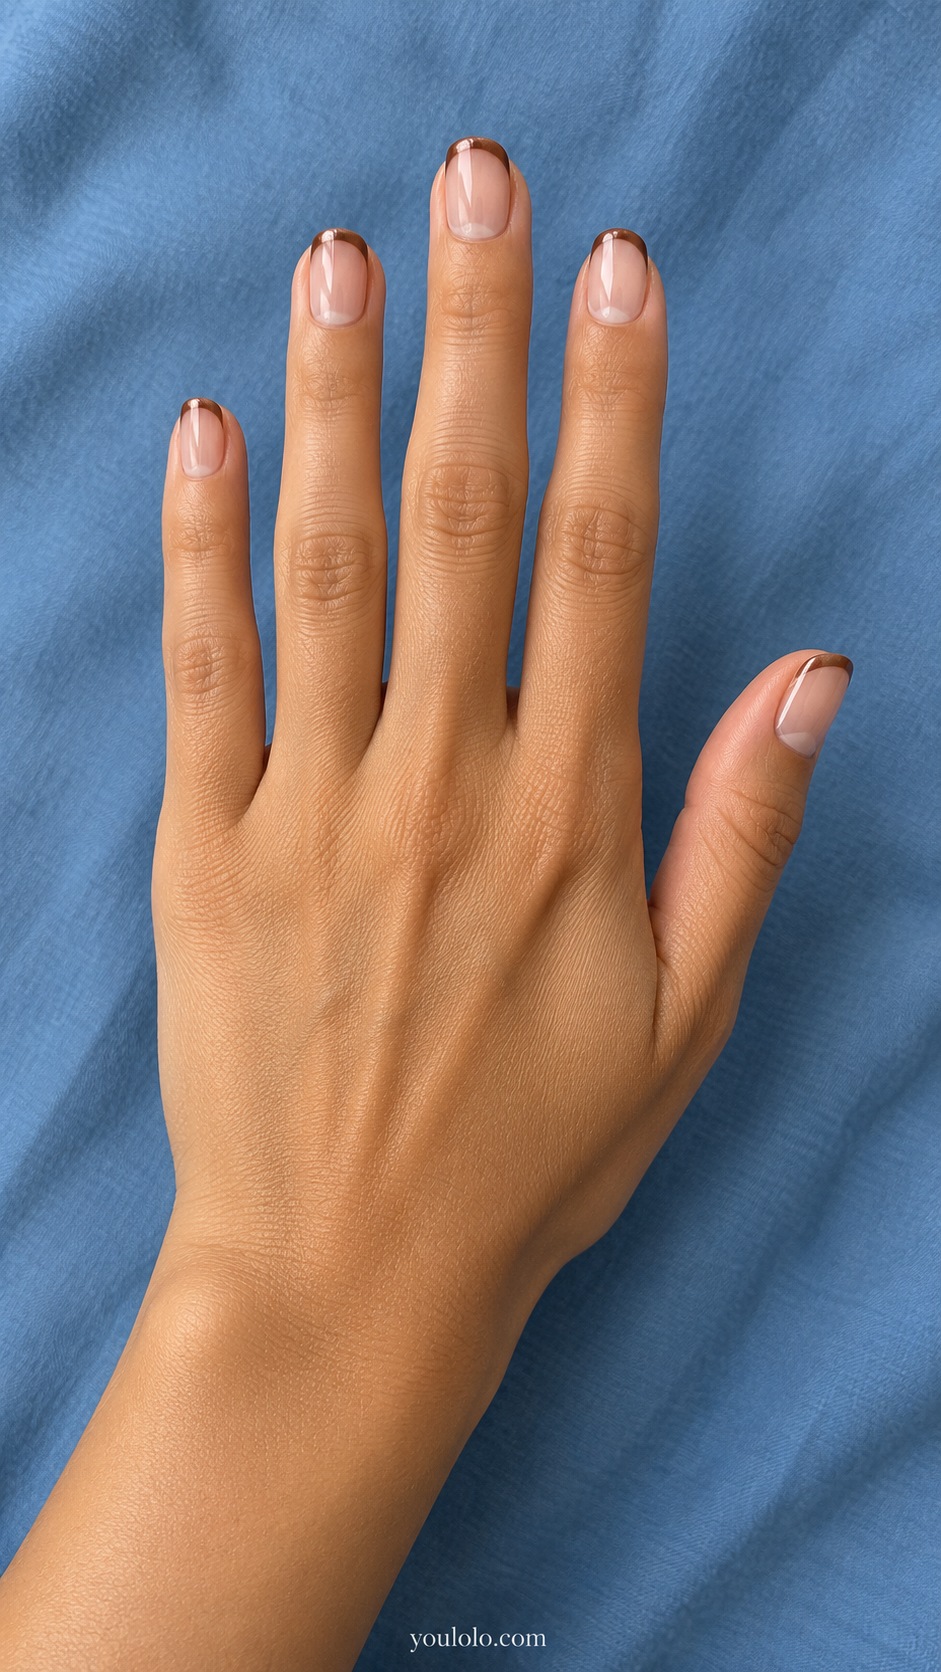
A narrow cocoa tip brings brown into a mostly neutral manicure. On short ovals, the fine pearlescent border feels lighter than a full chocolate set while still making the edge distinct. The sheer glazed base gives it a little glow between the cuticle and the French line.
Choose the width on the shortest nail first. I would use a clearly brown cocoa rather than nearly black espresso for this delicate version. With a white shirt or neutral knit, the little edge supplies enough contrast without another painted detail.
5. Chocolate Double Smile
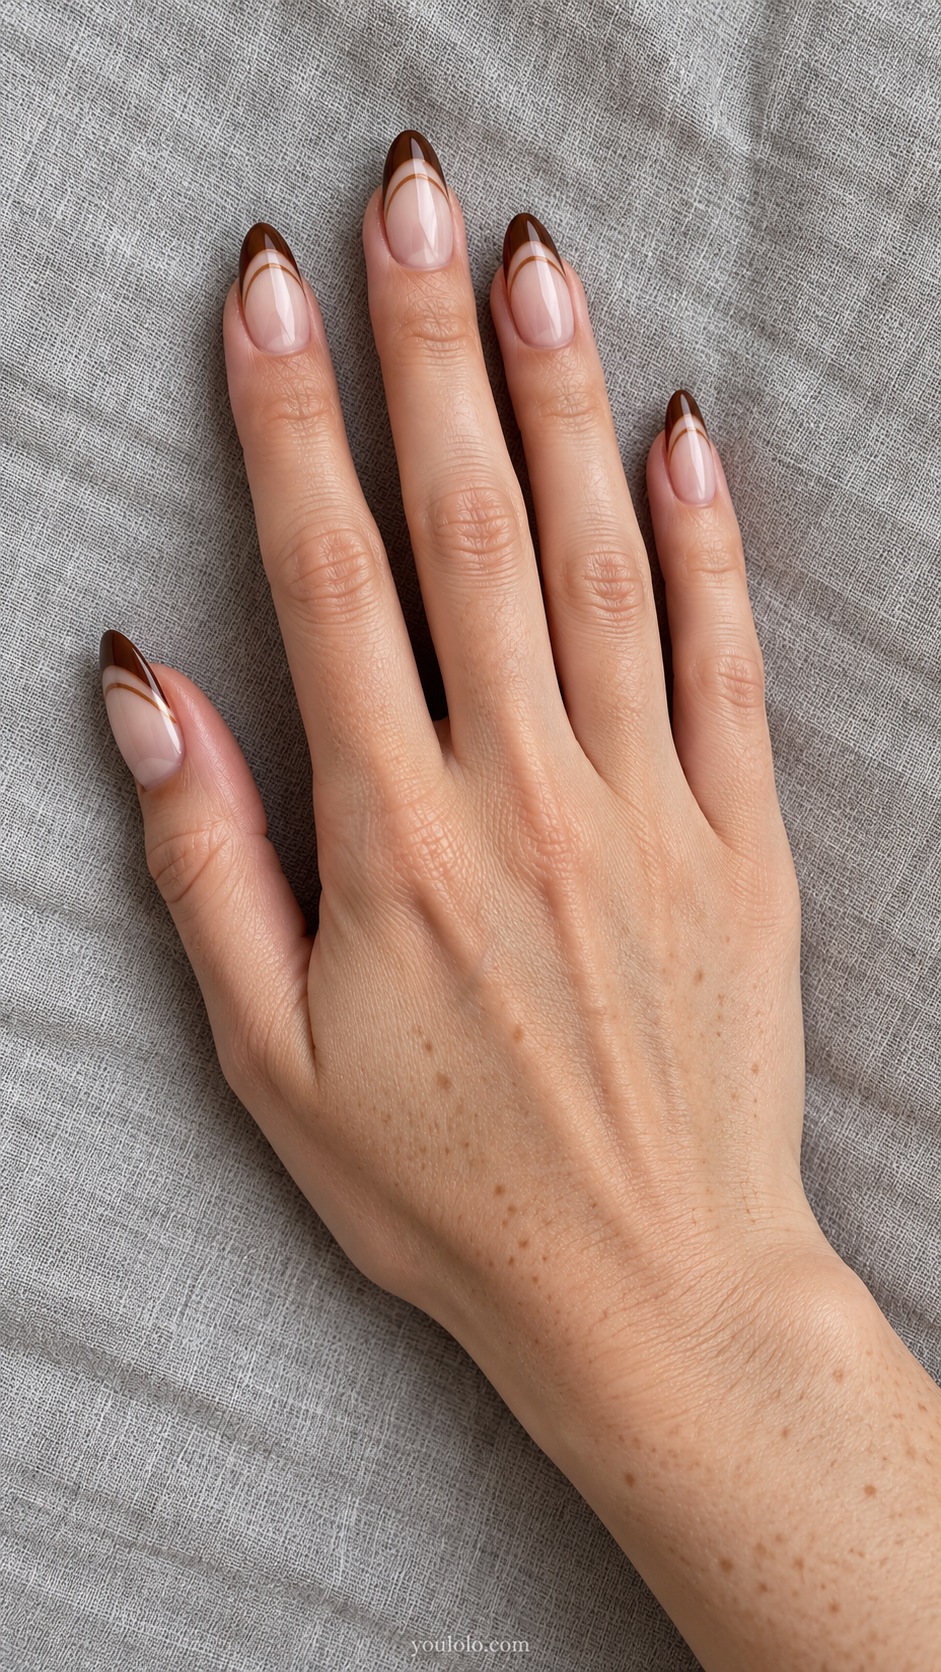
A separate caramel smile sits below the chocolate French tip, leaving a visible neutral gap between them. The shared pearl finish makes the two browns feel related, while the spacing gives the design its structure. Almond nails have room for both curves without making the tip feel heavy.
Have the artist demonstrate the gap before repeating the design. If your nails are short, one chocolate border may be the clearer option. I would keep the caramel line fine and choose a plain cream sleeve so the layered French stays readable.
6. Angled Ganache French
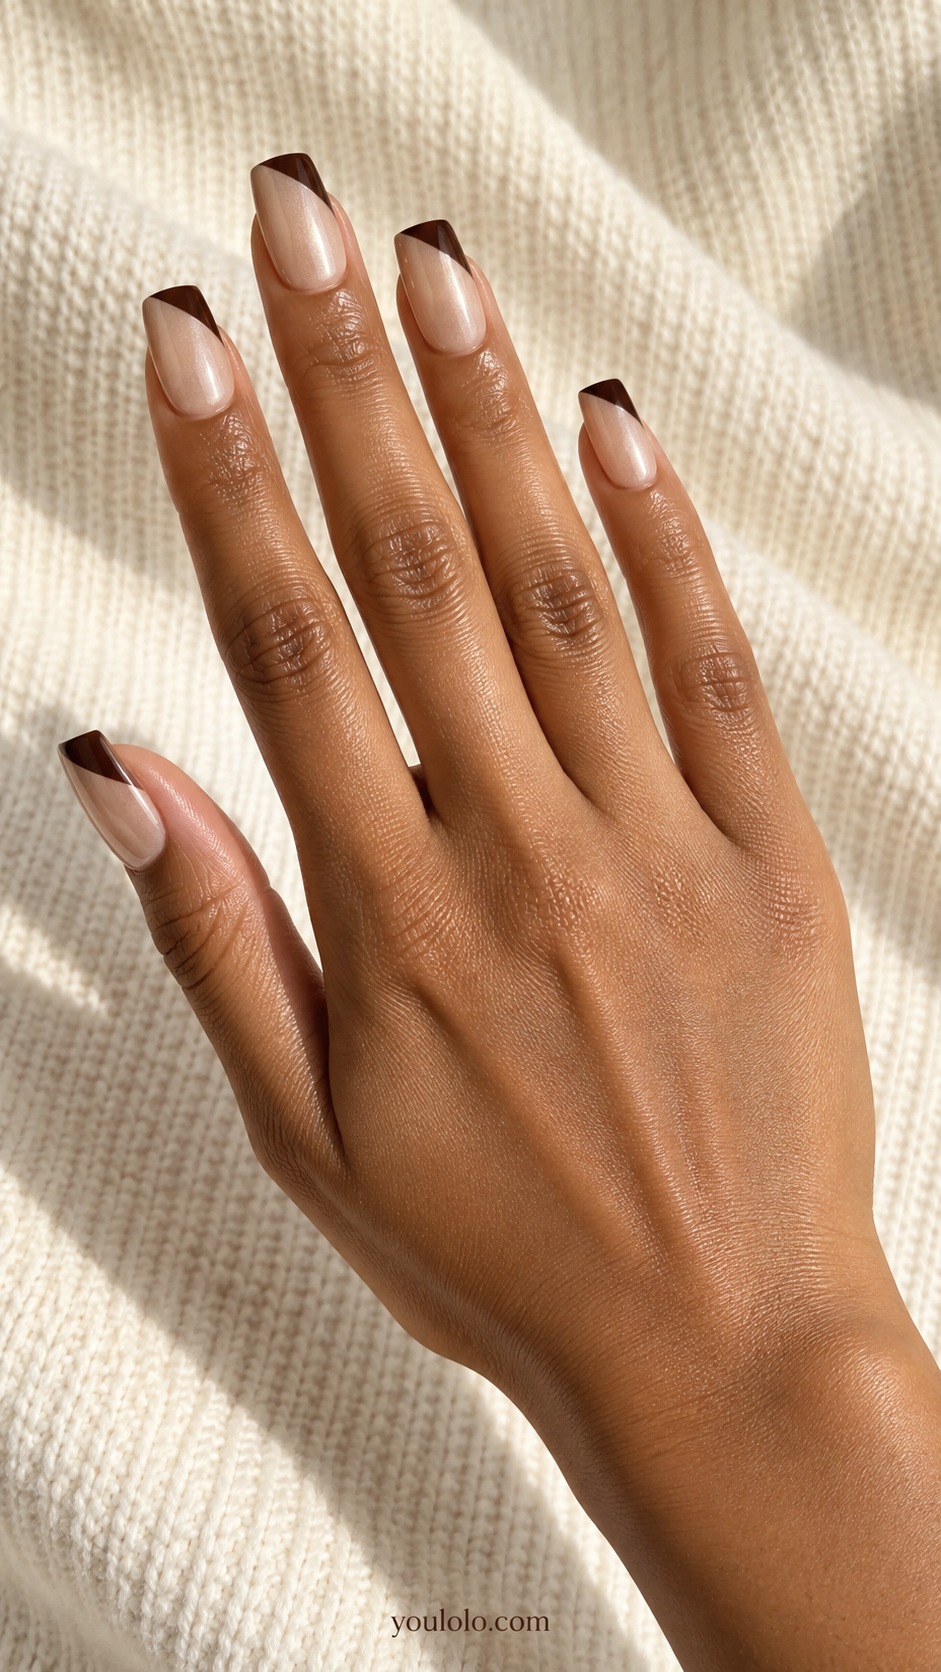
An angled ganache tip uses a slanted boundary instead of a curved smile. The square nail makes that diagonal especially clear against a glazed beige base. I like this for someone who wants chocolate French nails to feel graphic without adding a separate motif.
Decide how high the dark section should climb on one side. A steep angle can cover much more of the nail than expected. I would keep enough beige visible to preserve the French effect and let the pearl sheen soften the strong line.
7. Reverse Cocoa Glaze
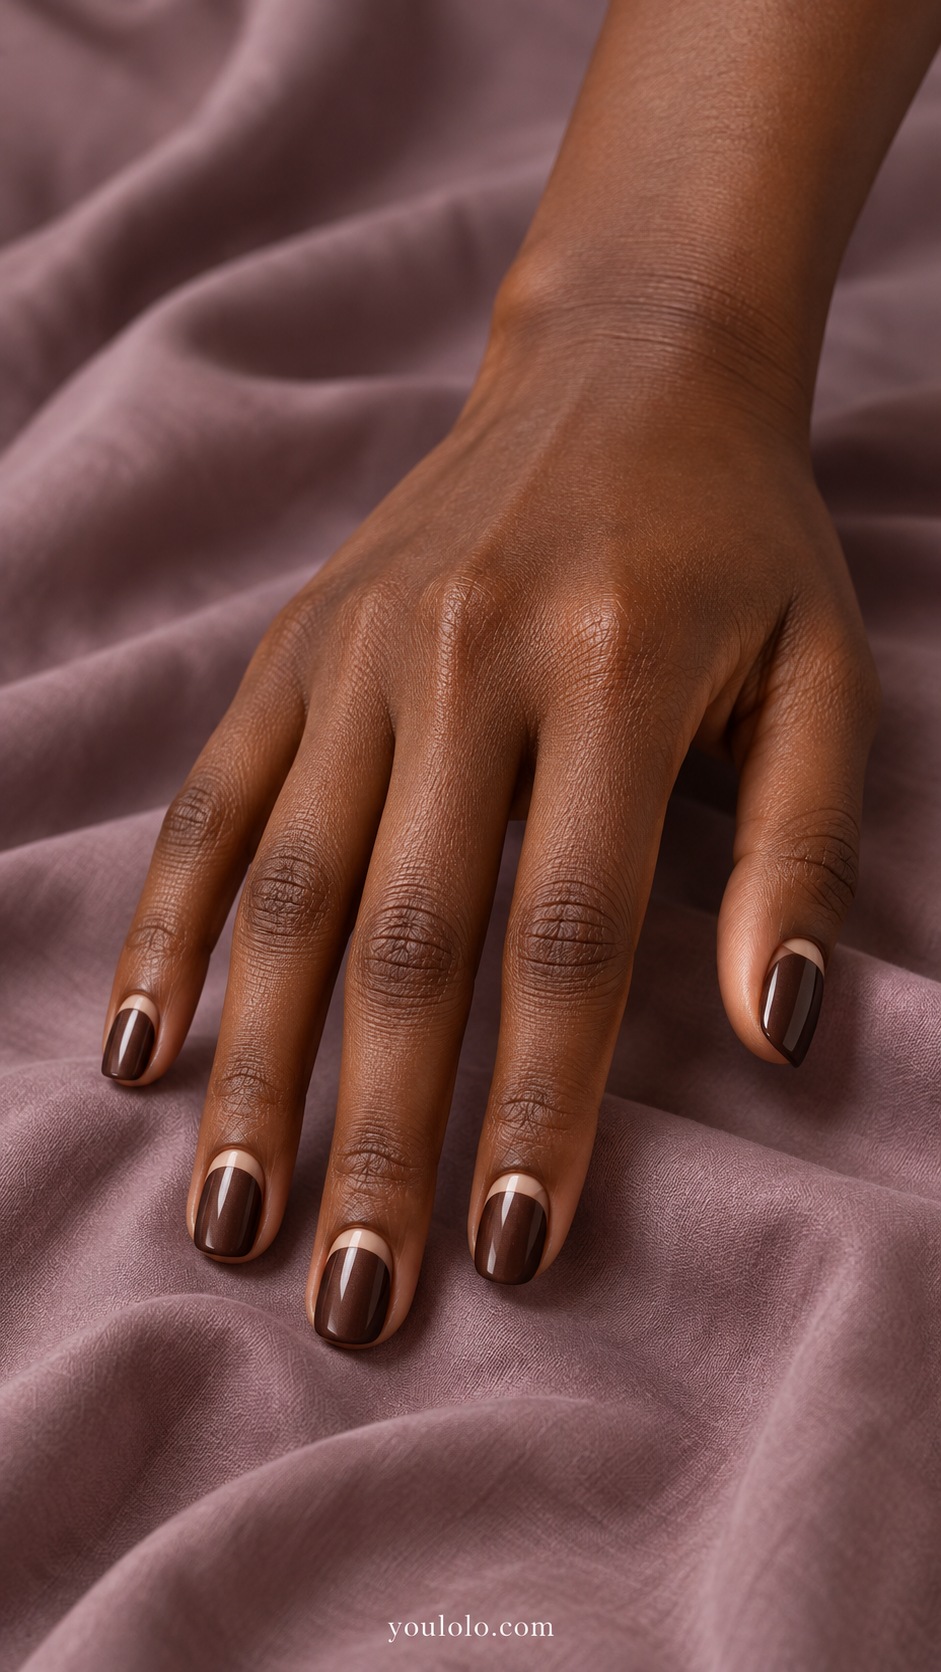
A light latte crescent at the cuticle reverses the usual chocolate French arrangement. The rest of the short square remains deep cocoa and pearly, so the bright detail sits at the base rather than the tip. This creates a different balance while keeping the same brown family.
The reverse line should stay narrow and follow the cuticle curve without touching the skin. I would choose latte over white for a softer contrast. A tan or ivory sleeve suits the warm detail without needing a matching brown pattern.
YOU MAY ALSO LIKE
If bows and decorative accents are what you love about a brown French, our existing chocolate French-tip collection explores that style.
8. Cinnamon Chocolate Glow
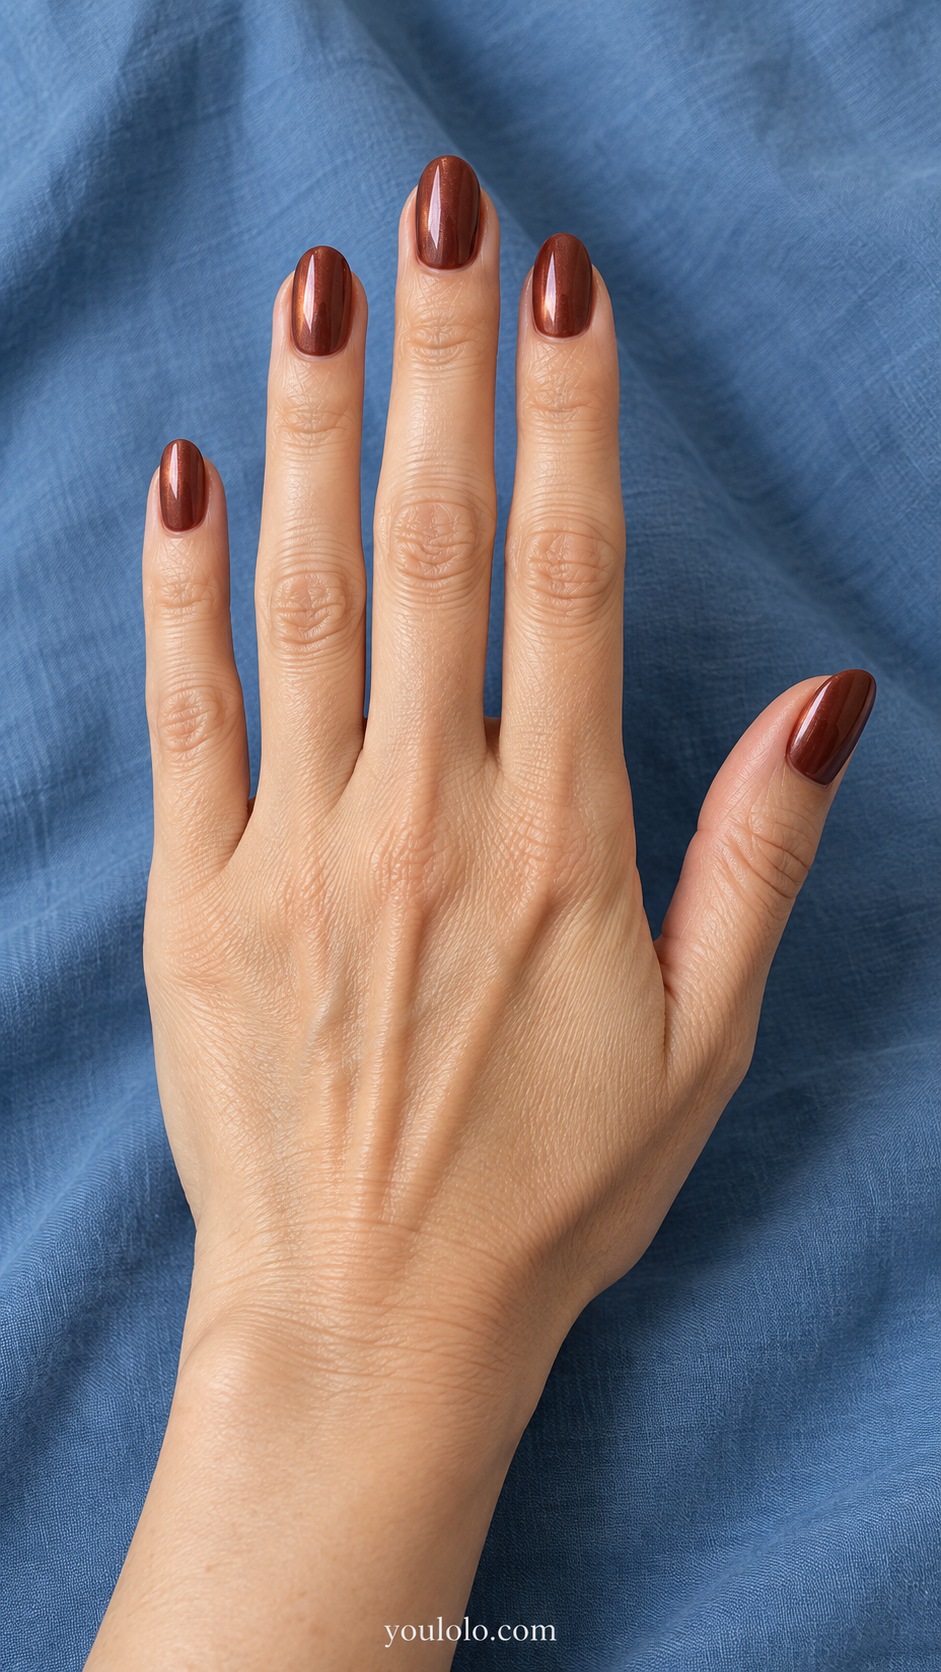
Cinnamon chocolate adds a red undertone to the glazed palette. The warmth becomes visible beneath a fine pearl reflection, making the oval nails feel different from cool espresso or neutral cocoa. This would be my choice beside rust, cream, or camel fabrics.
Compare it with a neutral chocolate sample in the same light. Some red-browns can read closer to burgundy than expected. Ask for the amount of warmth you prefer and keep the glaze light enough that the chosen undertone is still recognizable.
9. Bittersweet and Latte Fade
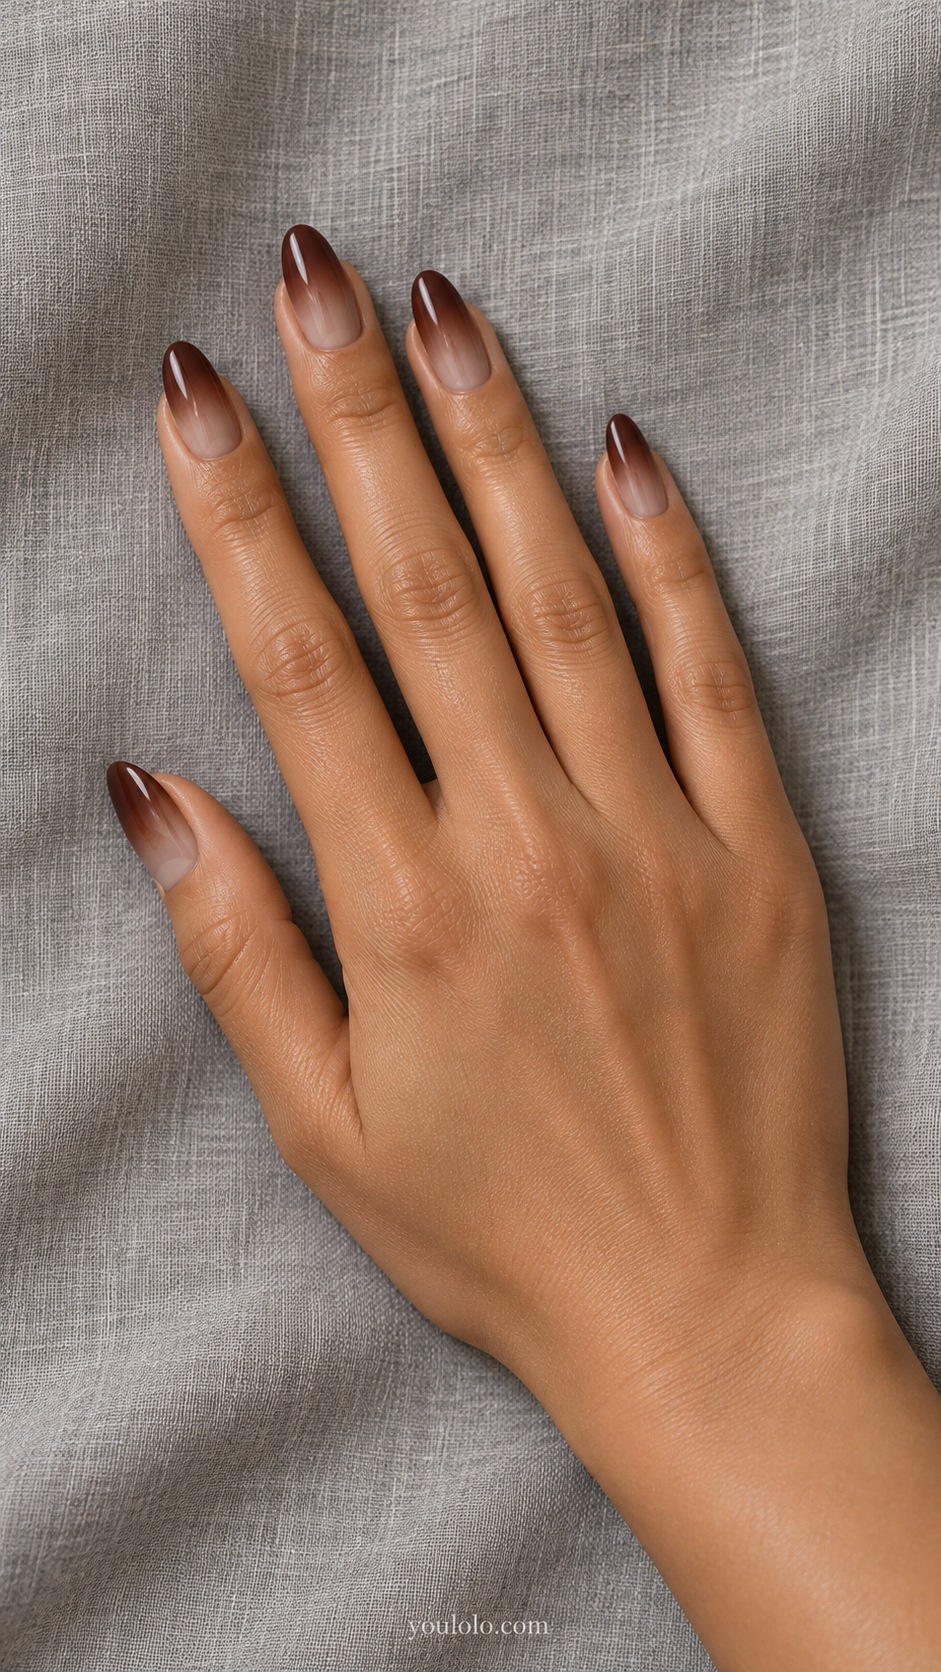
Latte gradually deepens into bittersweet chocolate toward the tips. A smooth pearl veil joins the shades without turning the transition metallic. Almonds give the fade enough length to feel gradual, making this softer than a sharply divided brown French manicure.
Ask for a visible middle tone between the pale base and dark end. A sudden jump can look like a blurred tip rather than a full gradient. I would keep the darkest area relatively small and wear the set with a simple cream knit.
10. Chocolate Pearl Side French

A chocolate crescent wraps around one side and the tip of a short oval. The neutral pearl center remains mostly open, giving the design a lighter mood than a symmetrical dark French. I like the movement created by the uneven border.
Show the artist which side should carry the wider section. The asymmetry needs to look deliberate rather than accidentally thicker on one edge. I would keep the base sheer and avoid an extra outline, letting the curved chocolate shape provide the detail.
11. Glazed Cocoa and Cream Tip
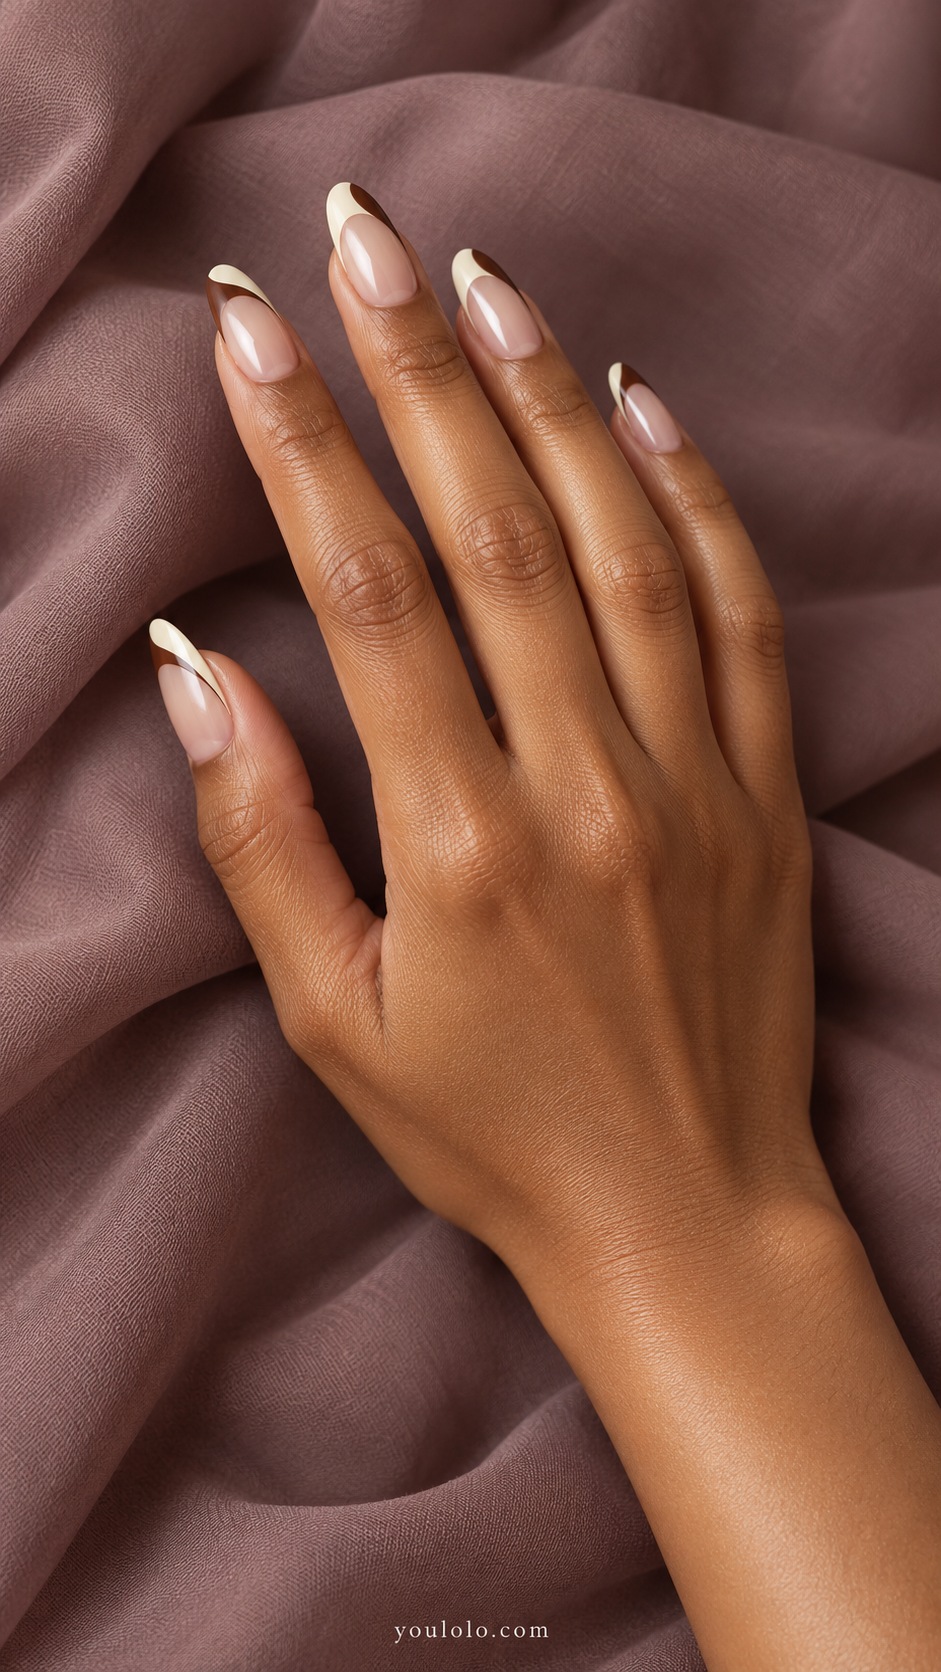
Cream and chocolate divide the French edge into two unequal curves. The nude pearl base leaves space beneath them, while the lighter tip section changes the weight of the darker brown. The almond shape supports the curved meeting point without a rigid central split.
Choose one color to dominate; I would let chocolate take the larger area. A tiny cream section is enough to break up the edge. On shorter nails, simplify the crossing instead of adding more lines to explain it.
12. Chocolate French Pearl Seam
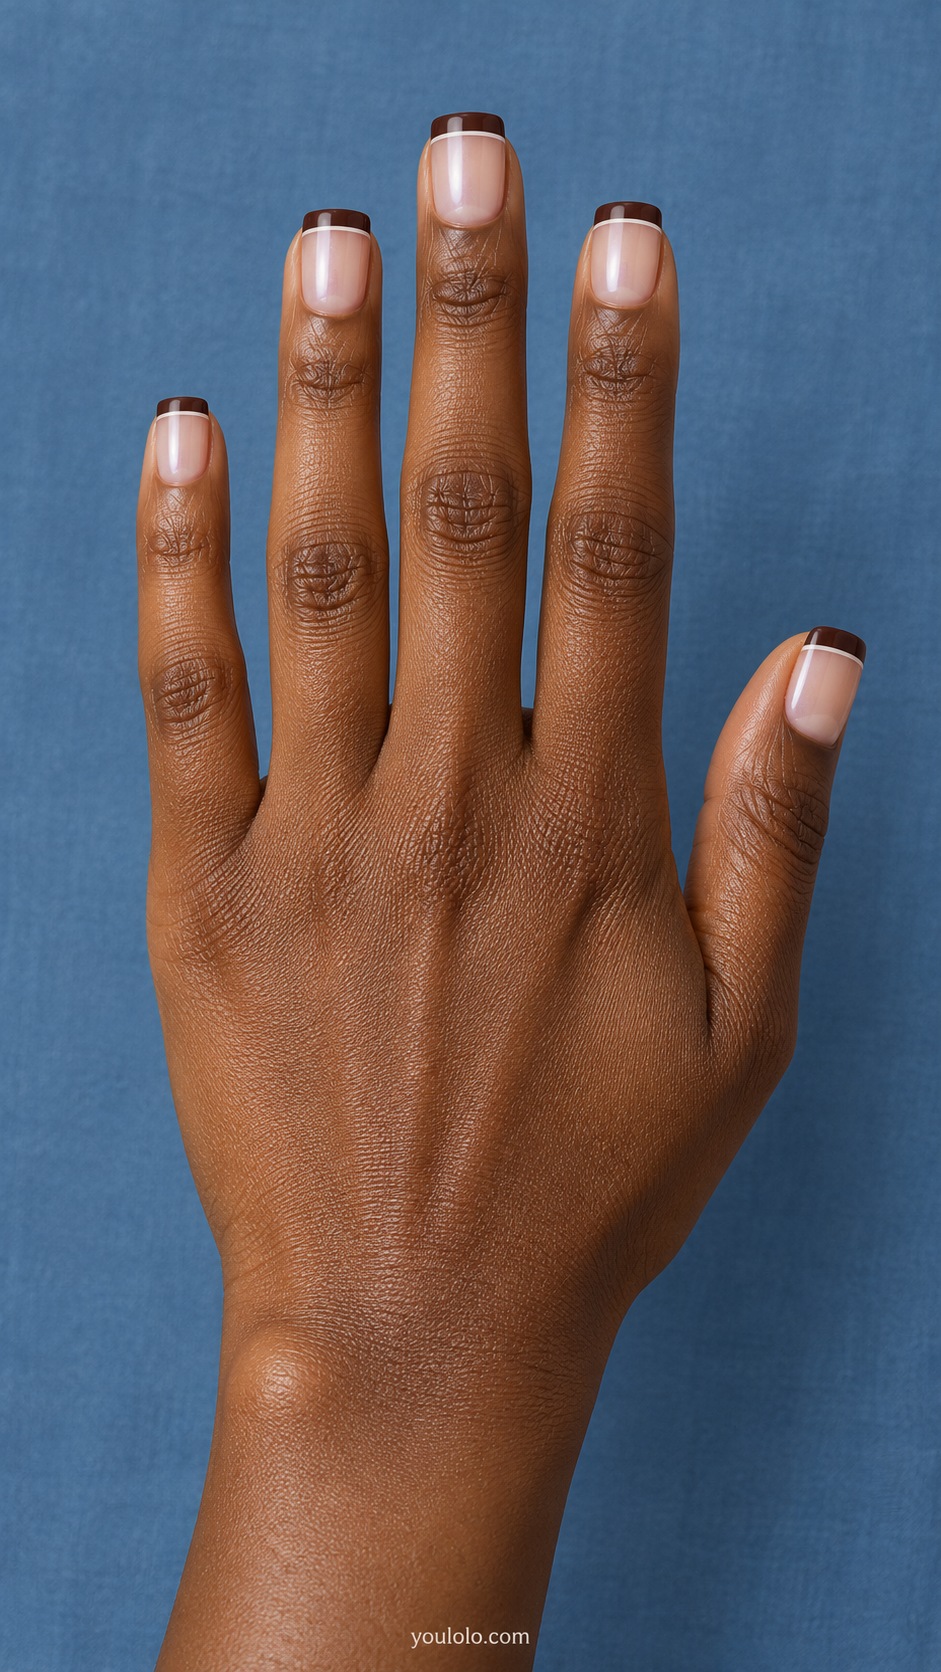
A fine ivory seam separates a straight chocolate tip from a pink-beige glazed base. The square outline gives the border a clean horizontal direction, and the little pale line adds contrast without covering much of the nail. This is a more defined version of a simple brown French.
The seam needs to remain much narrower than the chocolate band. I would test the two widths on one nail first. A plain white cuff can repeat the small ivory detail while the rest of the outfit stays neutral.
13. Dark Brown Glazed Window
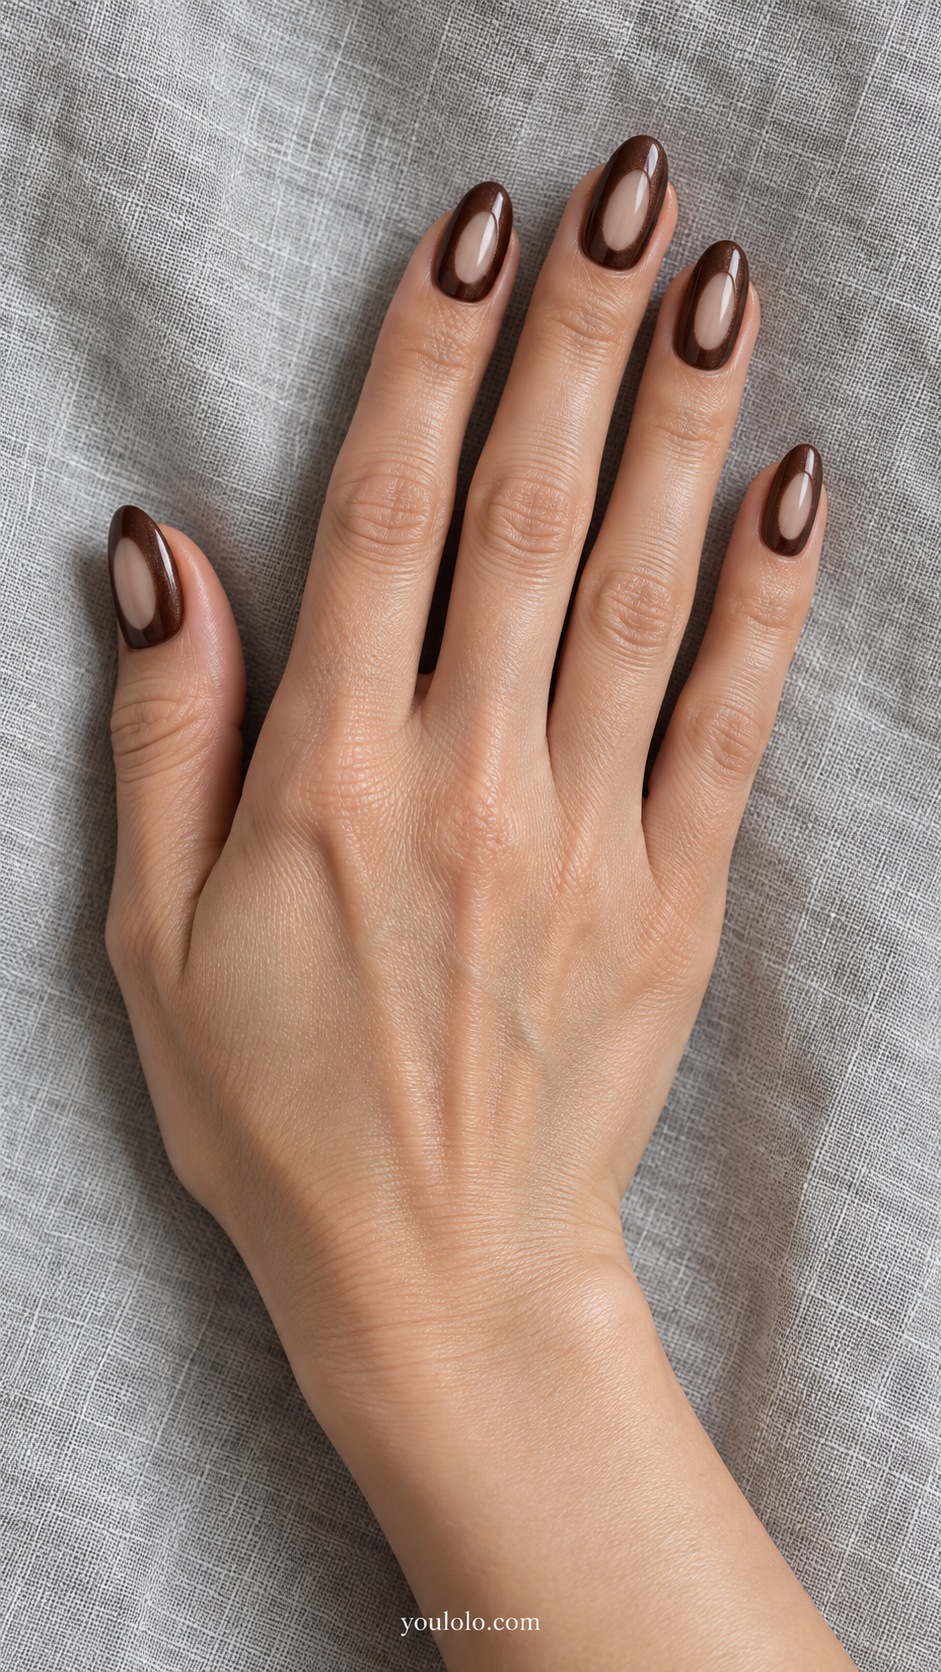
A narrow sheer window opens the center of a dark brown glazed nail. The surrounding cocoa remains pearly, making the difference in coverage as important as the color. Oval nails soften the opening and keep the design from feeling like a rigid rectangular panel.
Ask for a slim, clearly defined window rather than a large bare-looking patch. I would keep its placement consistent across the hand. The idea works best when the brown remains dark enough to outline the opening after the glaze is added.
14. Mocha Rose Pearl

Rose mocha sits between brown and a muted pink-brown neutral. A rosy pearl reflection reinforces that softness on short rounds, creating a less golden option than milk chocolate. I would choose it with gray, dusty rose, or a cream blouse.
The undertone matters more than the name. Compare two mocha samples and choose the one that looks right beside your skin and clothing. Keep this version plain so the small change between the brown base and rosy reflection has room to show.
15. Chocolate Glazed Cuticle Dot
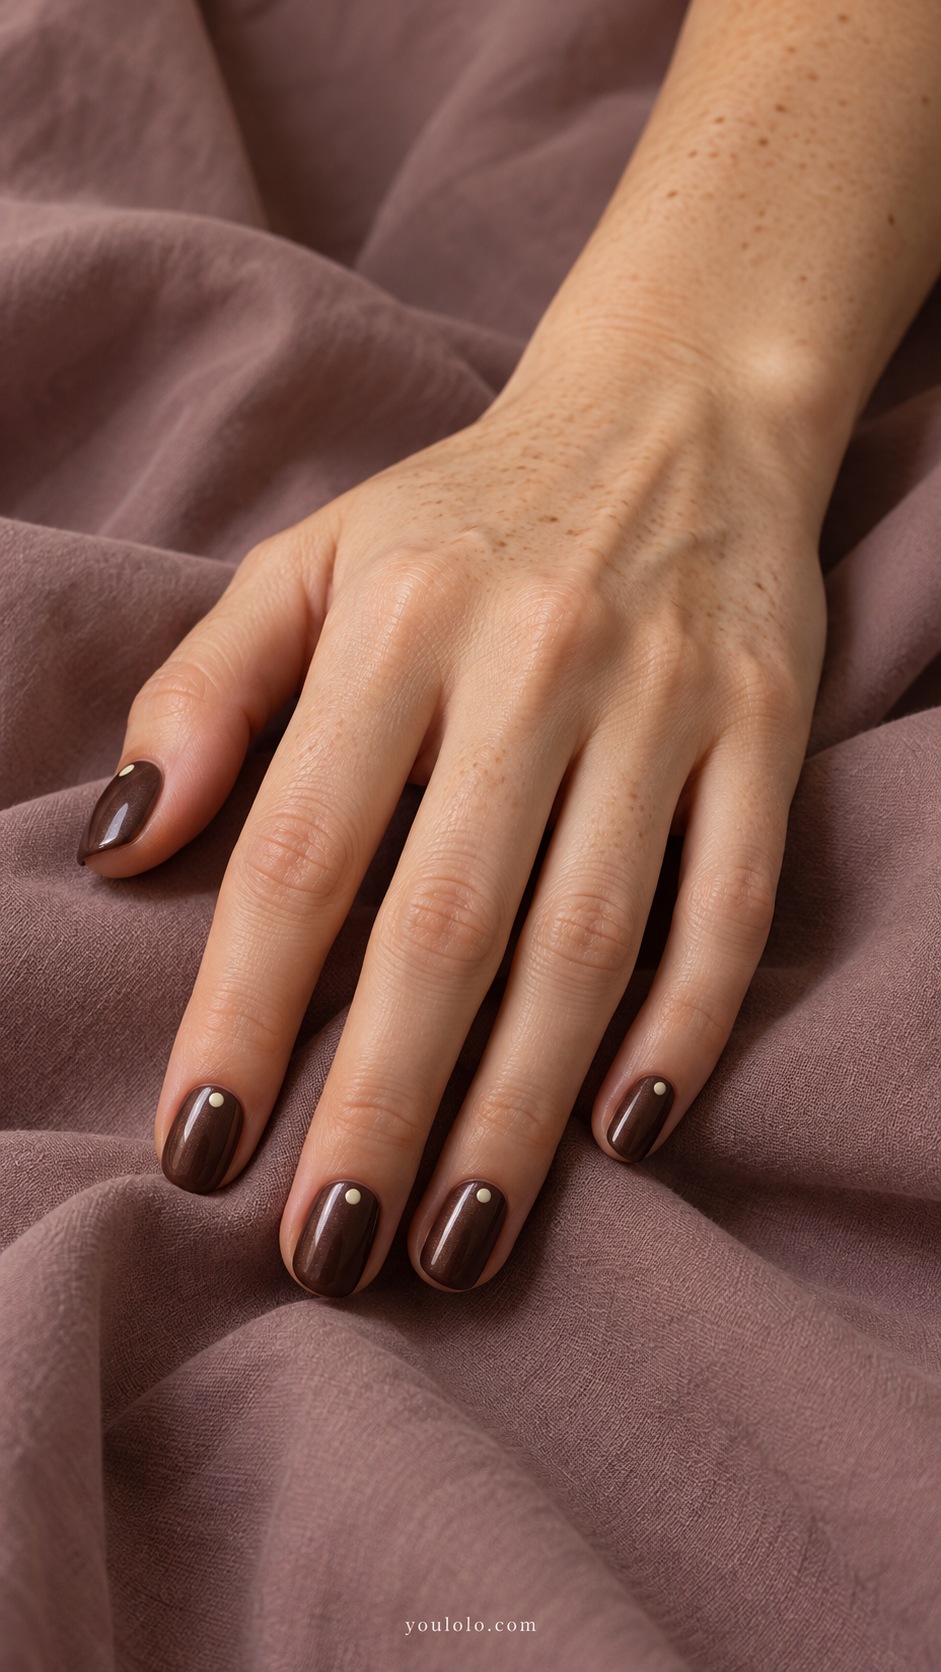
One ivory dot near each cuticle gives dark chocolate pearl a small repeated accent. The oval nails stay mostly brown, with the pale marks providing a simple point of contrast. I like this when a French border feels too familiar but a detailed pattern feels unnecessary.
For a smooth alternative to tiny pearl-like accents, ask for flat painted dots scaled to the individual nails. Start with the smallest nail so the size does not become too large across the set. I would leave the tips completely plain and pair the manicure with an unpatterned cream sleeve.
YOU MAY ALSO LIKE
For a stronger reflective finish, compare these soft glazes with the separate brown-chrome collection.
16. Cocoa Glaze Half Dip
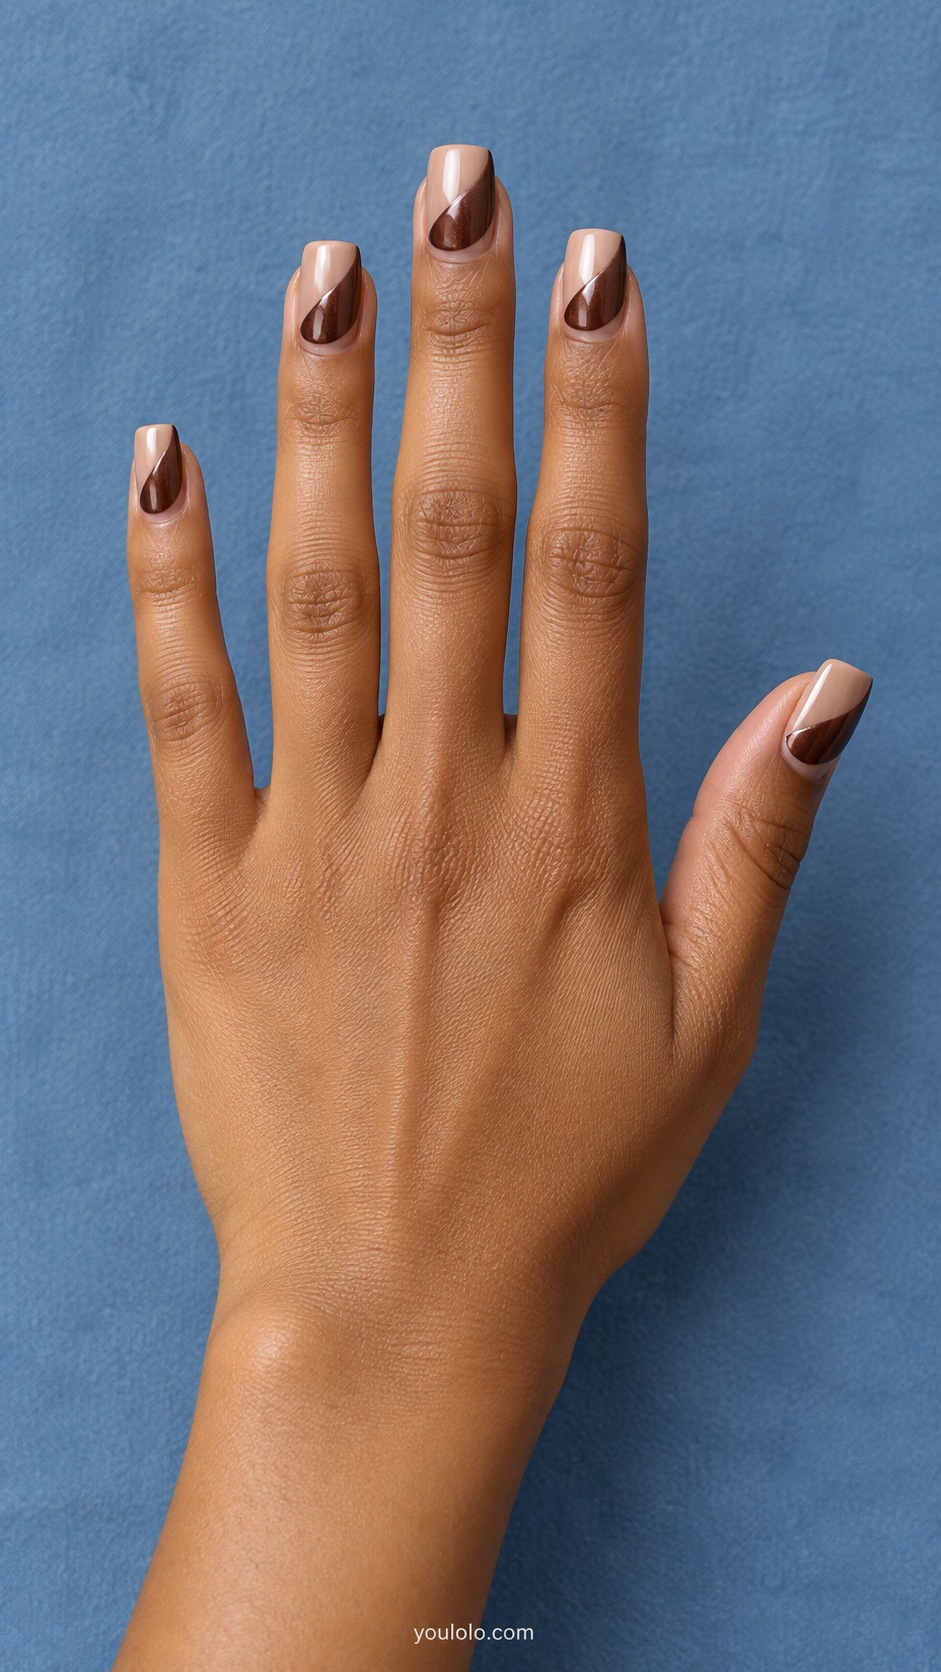
A diagonal half dip covers more of the square nail than a narrow angled French. The chocolate pearl section feels like a broad color panel beside sheer beige glaze. This is the bolder geometric choice in the collection, with less emphasis on preserving a delicate tip.
Agree on the amount of dark coverage before painting. I would keep the dividing line clean and skip any additional metallic seam. A black or ivory outfit gives the two areas a clear context without introducing another competing color.
17. Chocolate Pearl Croissant Arc
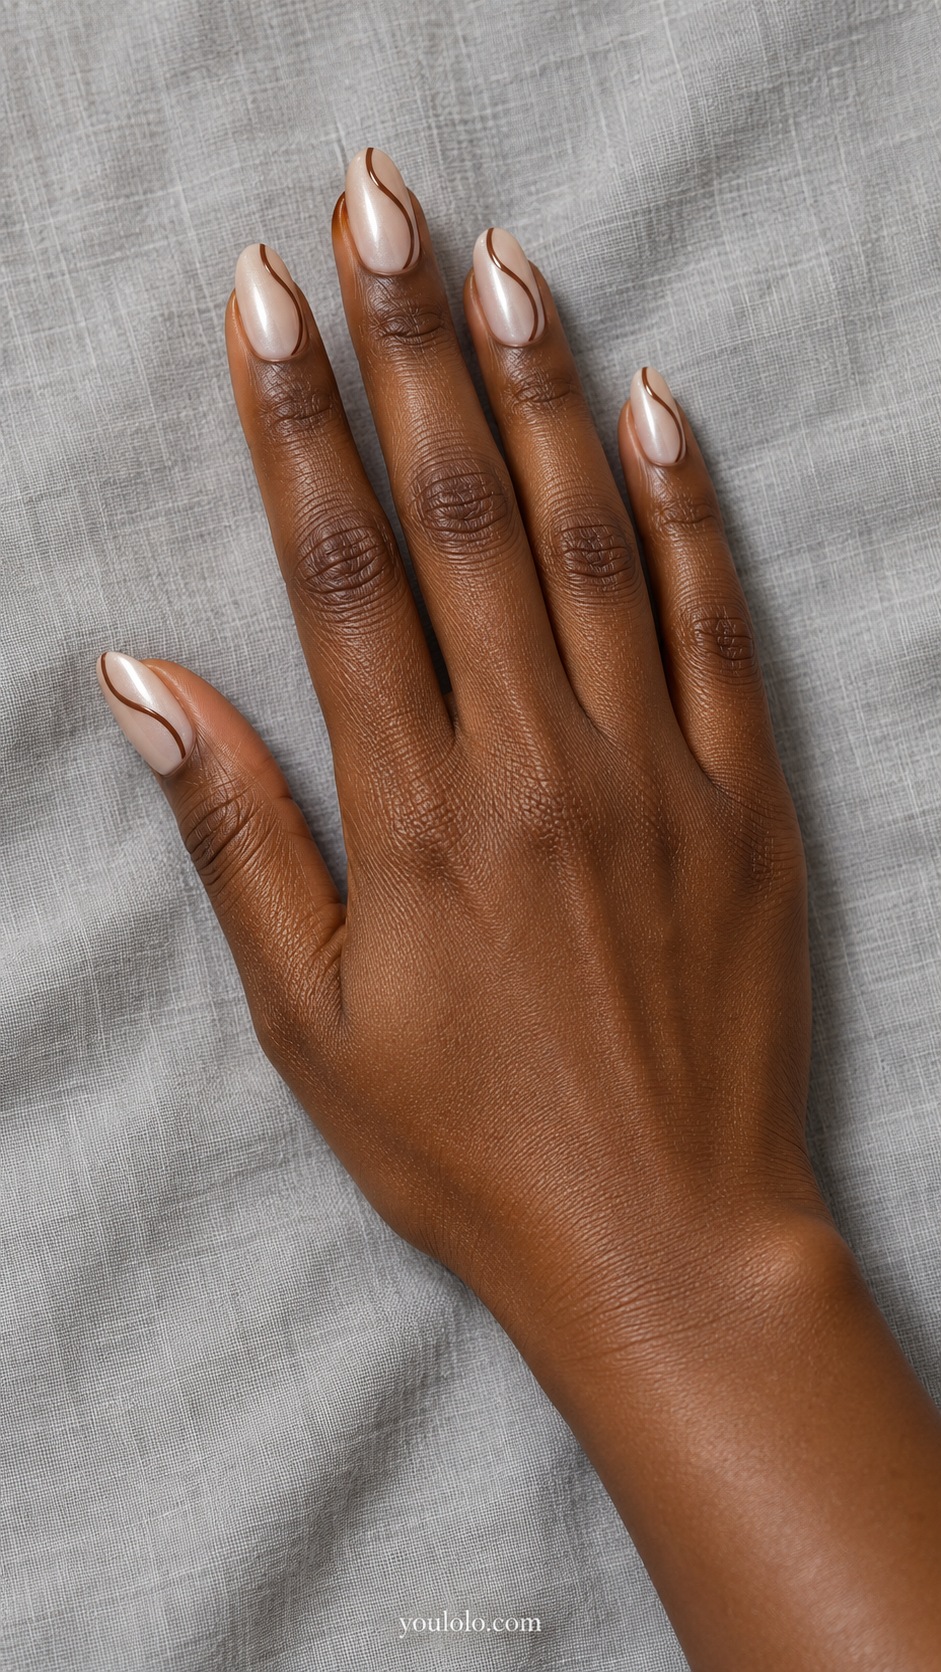
A single cocoa arch rises from one side toward the tip over a milky latte base. The pearl glaze connects the colors, while the open area around the curve keeps the almond nail spacious. The idea is a painted arc, not a literal food illustration.
Ask for a fine line with a smooth change in direction. A heavy band would feel more like a side French. I would choose this if I wanted a small graphic detail and pair it with plain soft fabrics rather than a busy print.
18. Espresso with Champagne Tip
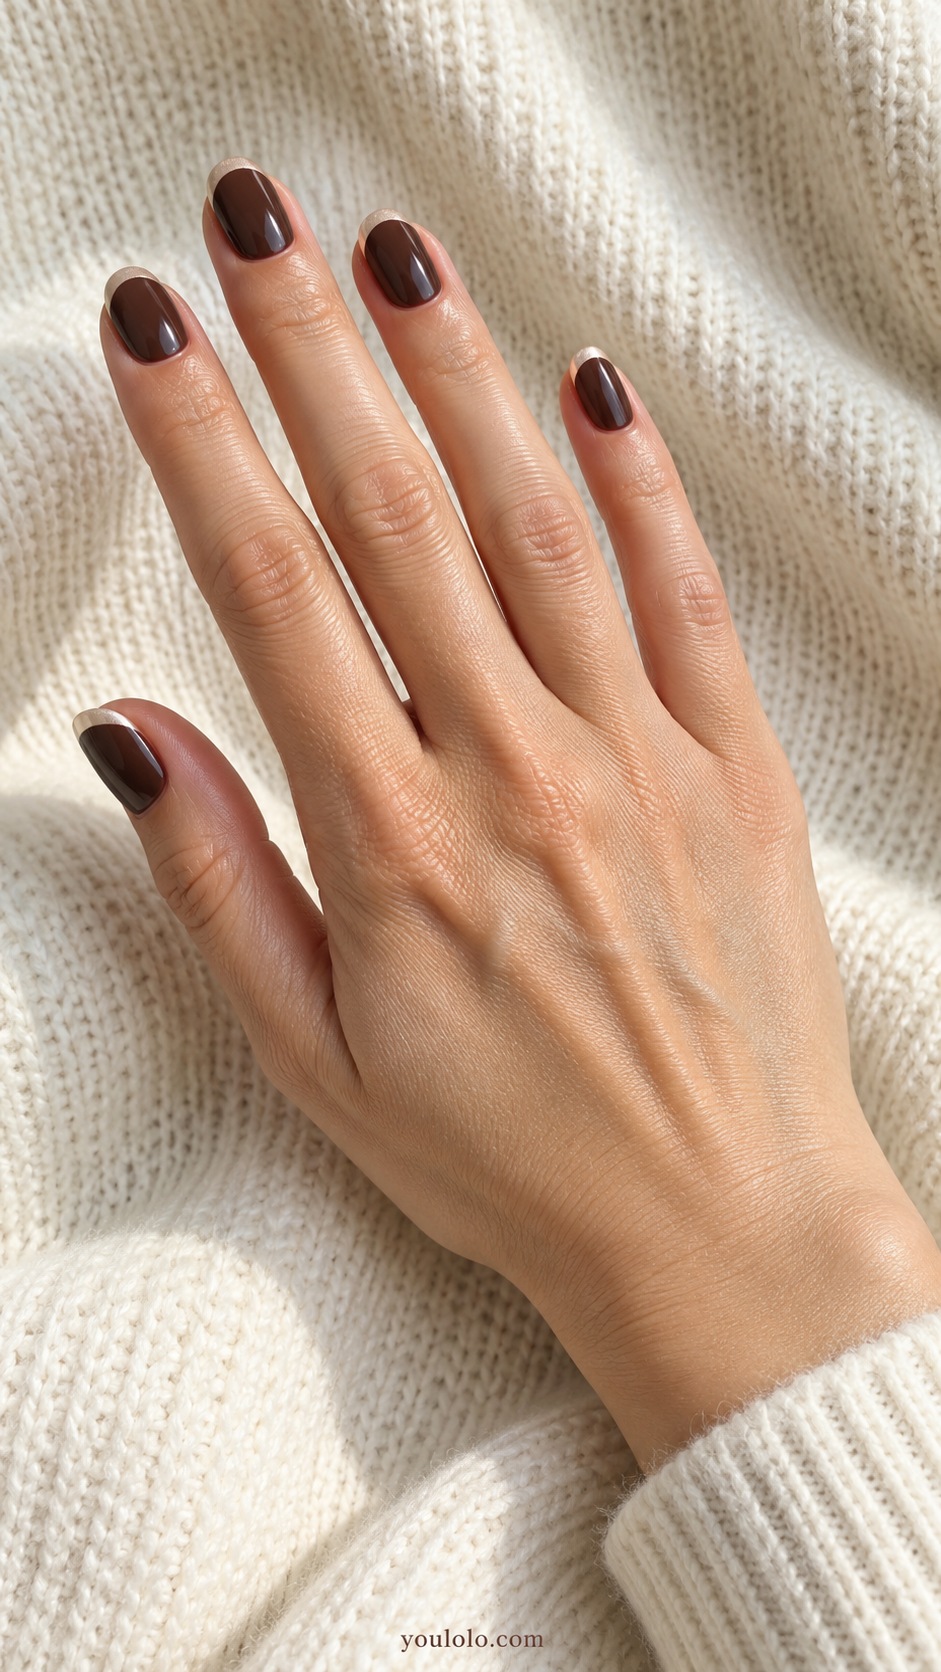
Champagne pearl at the edge lightens an espresso manicure without turning the tip white. The dark glazed base and warm pale border create a clear but soft contrast. Short ovals keep the French section compact, so the espresso remains the dominant color.
Compare champagne with ivory on a sample before deciding. I would choose the warmer option beside cream or tan clothing. Keep the border fine and pearlescent rather than glittery; the small difference in reflection is enough detail for this version.
19. Chocolate Glaze Tonal Pair
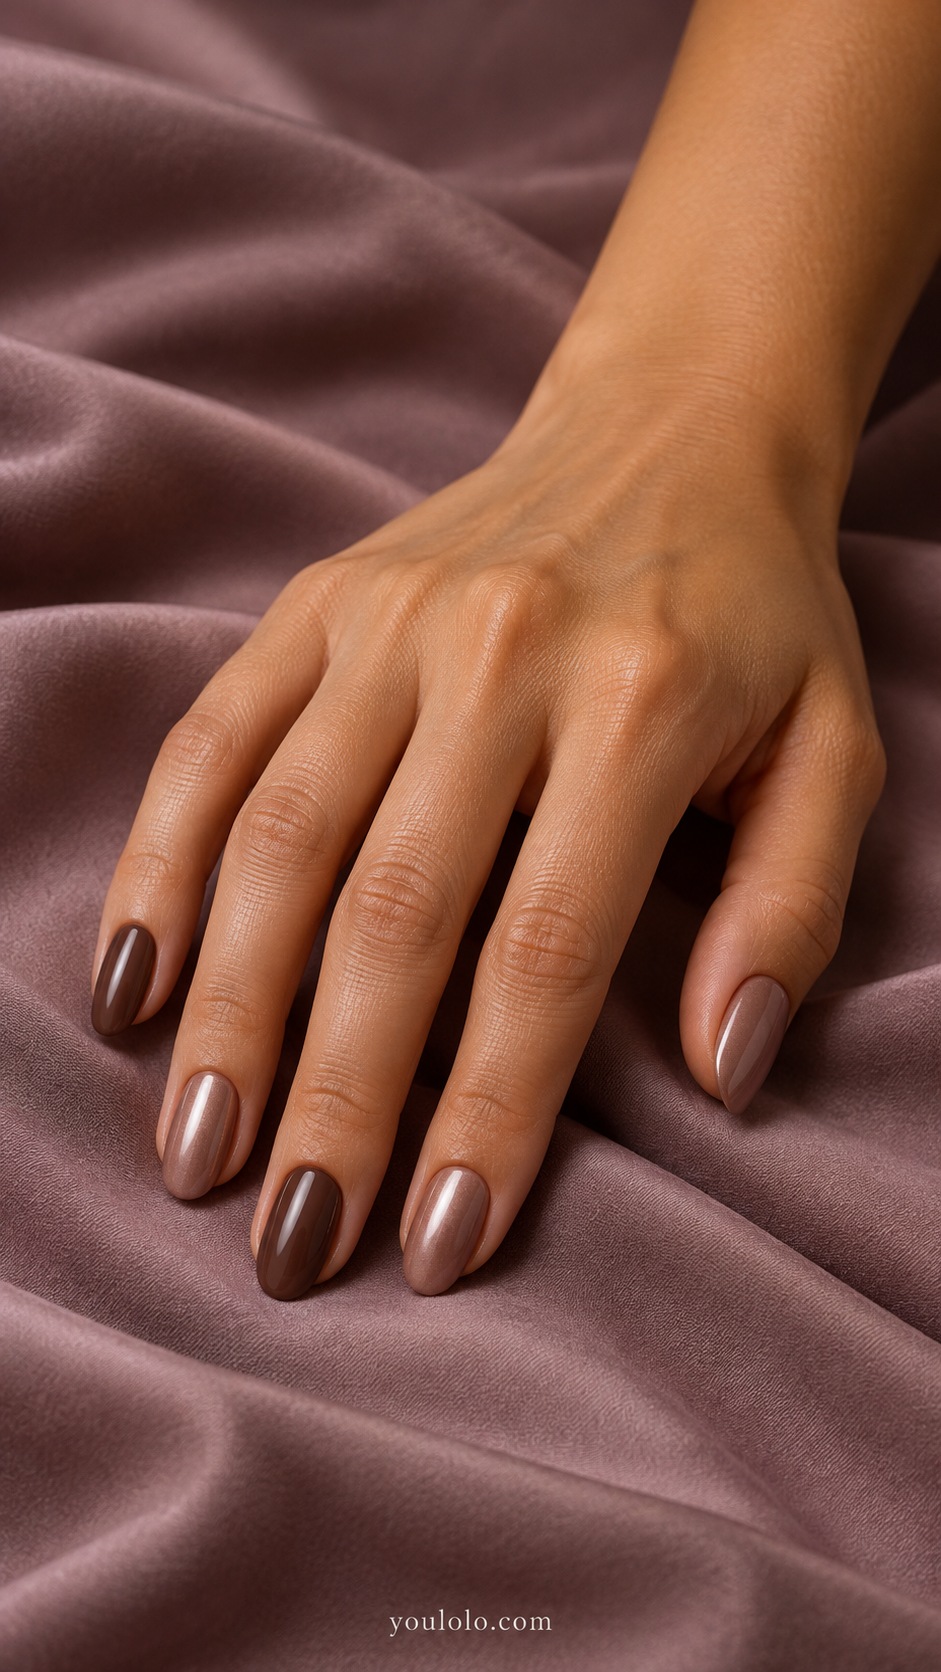
Milk-chocolate accents break up a deeper cocoa set while every nail shares the same glaze. The arrangement gives the hand a gentle change in color without adding a pattern. Medium ovals keep the darker and lighter shades visually related.
Choose the accent placement intentionally and compare both browns beneath the same pearl finish. I would keep their undertones similar so the set feels connected. This is a useful option when you cannot choose between two browns but do not want five different shades.
Choose the width of your chocolate glazed French
A micro edge leaves the neutral base in charge. A classic French adds a clearer brown section. An angled or side tip changes the direction of the color, while a broad half dip feels more like a graphic panel. I would decide which balance I wanted before adding a second line.
For short nails, start with a fine cocoa border or one simple reverse crescent. For more length, a separate caramel smile can have enough room to remain distinct. If two curves merge visually, simplify the design instead of squeezing the gap smaller.
If you want to compare the brown itself across different finishes, browse our chocolate brown nail collection.
Dark brown glaze without losing the brown
Ask to compare the base before and after the reflective layer. If the finished sample looks silver, bronze, or nearly black when you wanted chocolate, changing the base or the strength of the glaze may get closer to your reference. A product name alone cannot settle that visual choice.
OPI describes separate lacquer-topper and chrome-powder options. Let the salon identify the suitable system and its instructions for the chosen effect.
My shortlist would be milk chocolate pearl for an all-over color, cocoa micro French for a lighter look, and espresso with a champagne edge for stronger contrast. A useful brief names the brown undertone, preferred length, tip width, and the amount of pearl reflection.
Chocolate Glazed Nails FAQ
Are chocolate glazed nails the same as brown chrome nails?
The names can overlap, but a soft pearl glaze and a full mirror-metal finish look different. This guide focuses on visible brown bases with delicate reflection. Show the exact finish you prefer.
Can chocolate glazed French nails work on short nails?
Yes. A narrow cocoa edge leaves space for the neutral base. Double smiles and broad angled tips may need simplifying on a very short nail so the lines do not crowd together.
Which base goes under a chocolate French tip?
Sheer beige, pink-beige and milky latte all create different contrasts. Compare the neutral base with the brown tip before adding the glaze. There is no single nude that suits every preference or skin tone.
How do I keep dark brown glazed nails from looking black?
Compare a slightly lighter espresso or cocoa sample in ordinary light. Ask to see the finished glazed version, because the base and reflection work together. Avoid choosing solely from a brightly lit close-up.
Should the glaze cover the French base as well as the tip?
Either visual approach can be discussed with your nail artist. A shared veil connects the neutral and brown areas; a stronger reflection only at the tip emphasizes the border. Specify the contrast you want.
Can I choose a cool brown instead of a golden chocolate?
Yes. Espresso, smoky cocoa and rose mocha can move away from a warm golden palette. Compare the actual undertone and the color of the pearl reflection rather than choosing by a food-inspired name alone.