The Best Fluffy Pancakes recipe you will fall in love with. Full of tips and tricks to help you make the best pancakes.

Chocolate French tip nails pair the familiar French layout with a softer brown edge. The reference here uses a milky pink base, slim chocolate tips, one little bow, and a dotted accent. It feels sweet because the dark color stays mostly at the perimeter, leaving the pale center open.
A quick naming note helps when booking: chocolate milk nails often means a creamy brown all-over color. The looks below are specifically French designs with chocolate-colored tips. There are seventeen different arrangements, from barely-there outlines to ribbon details and sculpted smile lines. You can choose a painted bow or keep the set completely flat and minimal.
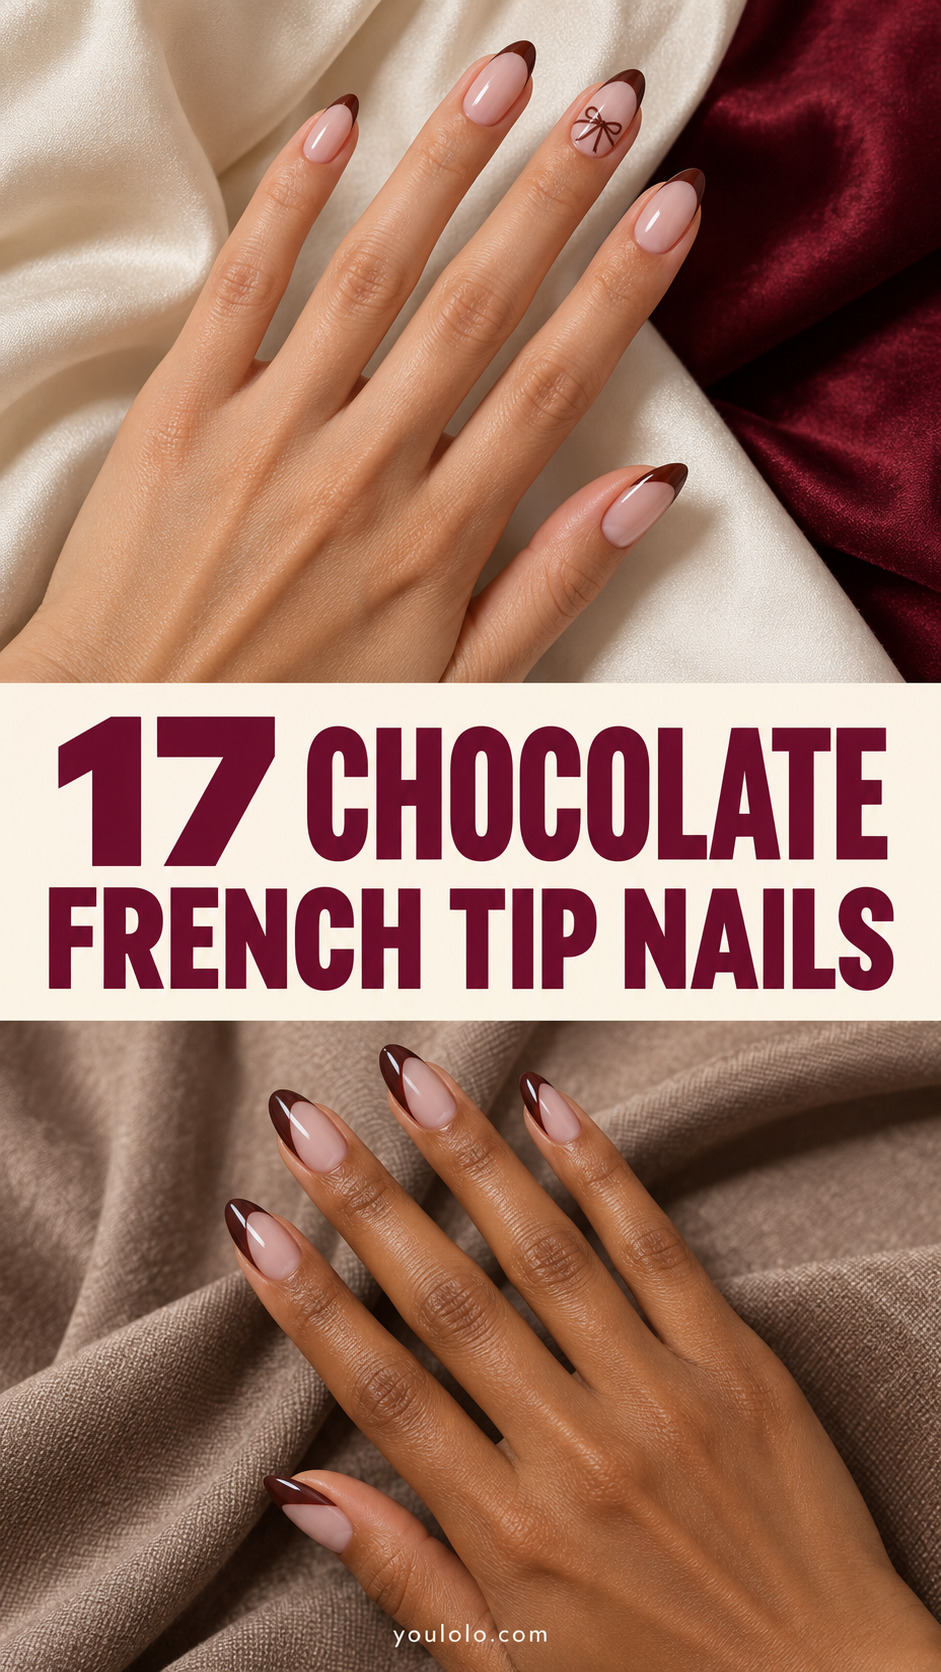
Images are original AI-created design illustrations, not photographs of completed salon services. They are intended as visual briefs; a nail artist can adapt the details to your chosen shape and length.
How to choose chocolate French tip nails
Choose the brown and the tip depth
Choose the brown first. Milk chocolate has a softer, warmer appearance than a very dark espresso. A dark tip makes the border more obvious against pale pink. A lighter cocoa shade creates a gentler transition. Neither shade has to match your skin; the aim is to choose the contrast you want on your own hand.
Next, decide how much of the nail the tip should cover. A micro French leaves nearly all the base visible. A deeper smile line becomes a larger color block. On shorter nails, a narrow edge can preserve more visible pink, but it still needs to be wide enough for the artist to paint cleanly. A very thin line is not automatically the best choice for every shape.
Match the base to your bow layout
The base is a separate decision. Sheer nude lets more of the natural nail show, milky pink looks softer and more opaque, and cream creates a warmer contrast. Show your artist the base you like as well as the tip. Asking only for brown French nails leaves this important part of the look unspecified.
Bows can sit in several places: below the tip, at the cuticle area, or integrated into the smile line. Pick the location before choosing the size. A small painted bow usually leaves more open space than a large charm. If the bow is the reason you love the manicure, avoid surrounding it with so many extra details that it becomes difficult to see.
Finish and press-on details
Finish changes the design even when the colors stay the same. A crisp cream tip, a reflective magnetic tip, and a soft ombre tip are different requests. Magnetic polish creates a changing reflection; ombre creates a blended color boundary. Bring a reference for the effect rather than relying on a color name alone.
For press-ons, ask how the French line will be adjusted to your selected length. A deep smile on a long almond tip may consume too much of a shorter nail. Check the seller's size guide and decoration description. The fact that a set is called reusable or salon-quality in an advertisement does not establish a particular wear time for your hands.
17 chocolate french tip nails ideas to compare
1. Milky Pink Micro French
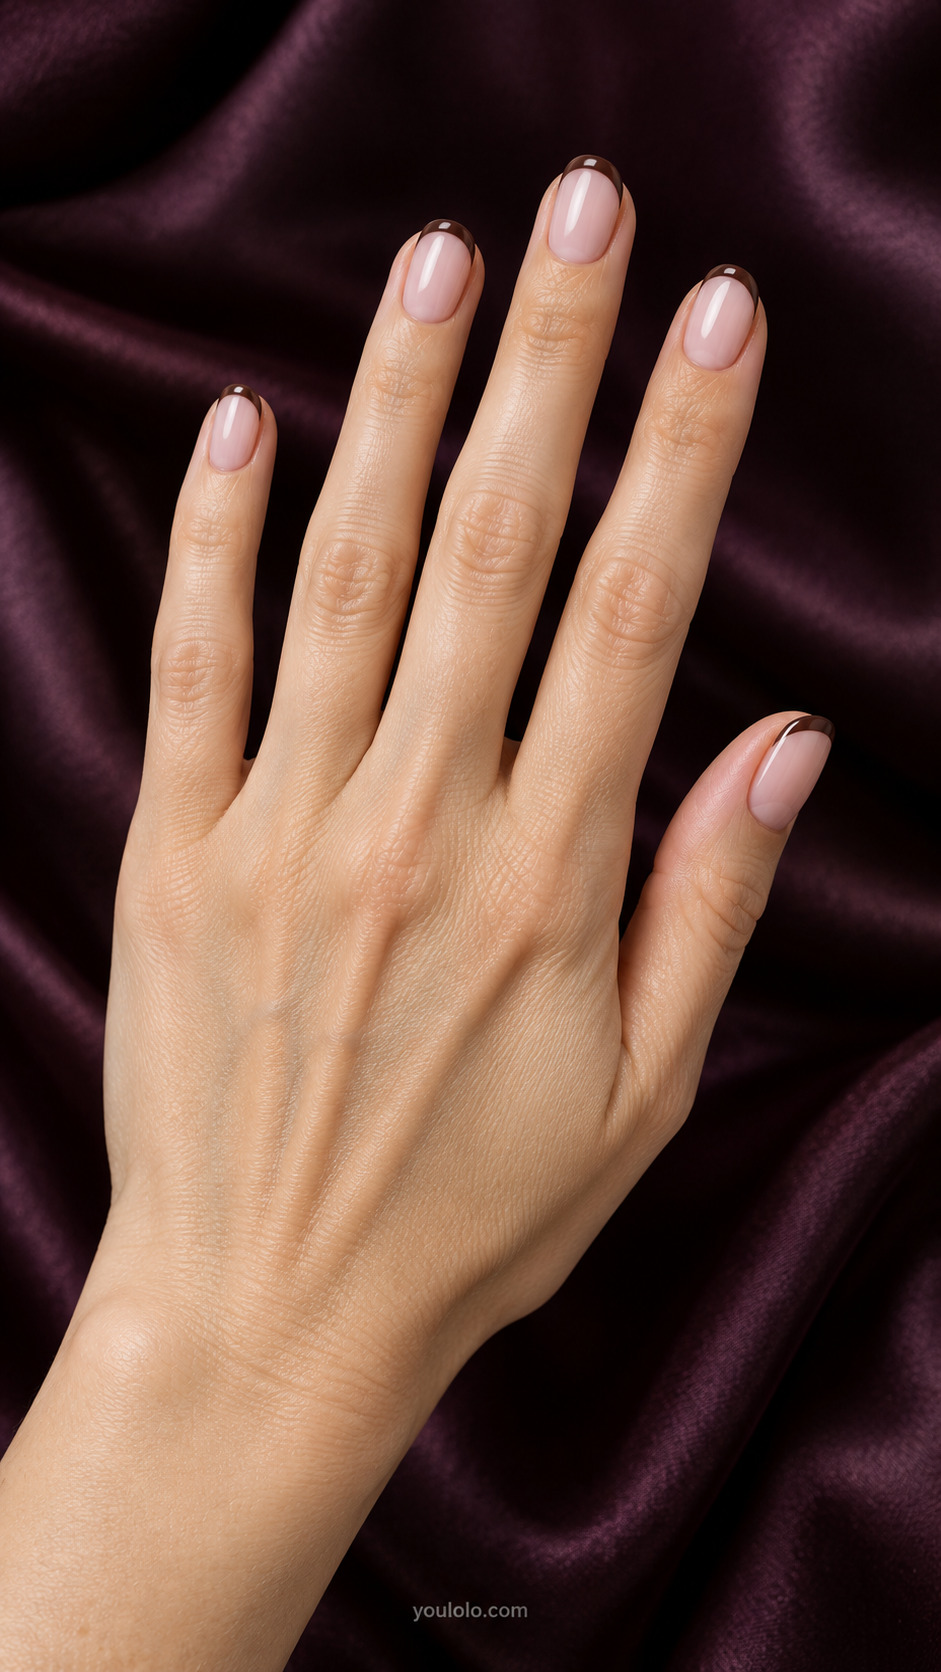
This is the quietest interpretation of the reference. The brown line should follow the free edge without becoming a wide color block. Choose this when you like the chocolate contrast but want the pink base to remain the first thing you notice.
2. Single Painted Bow
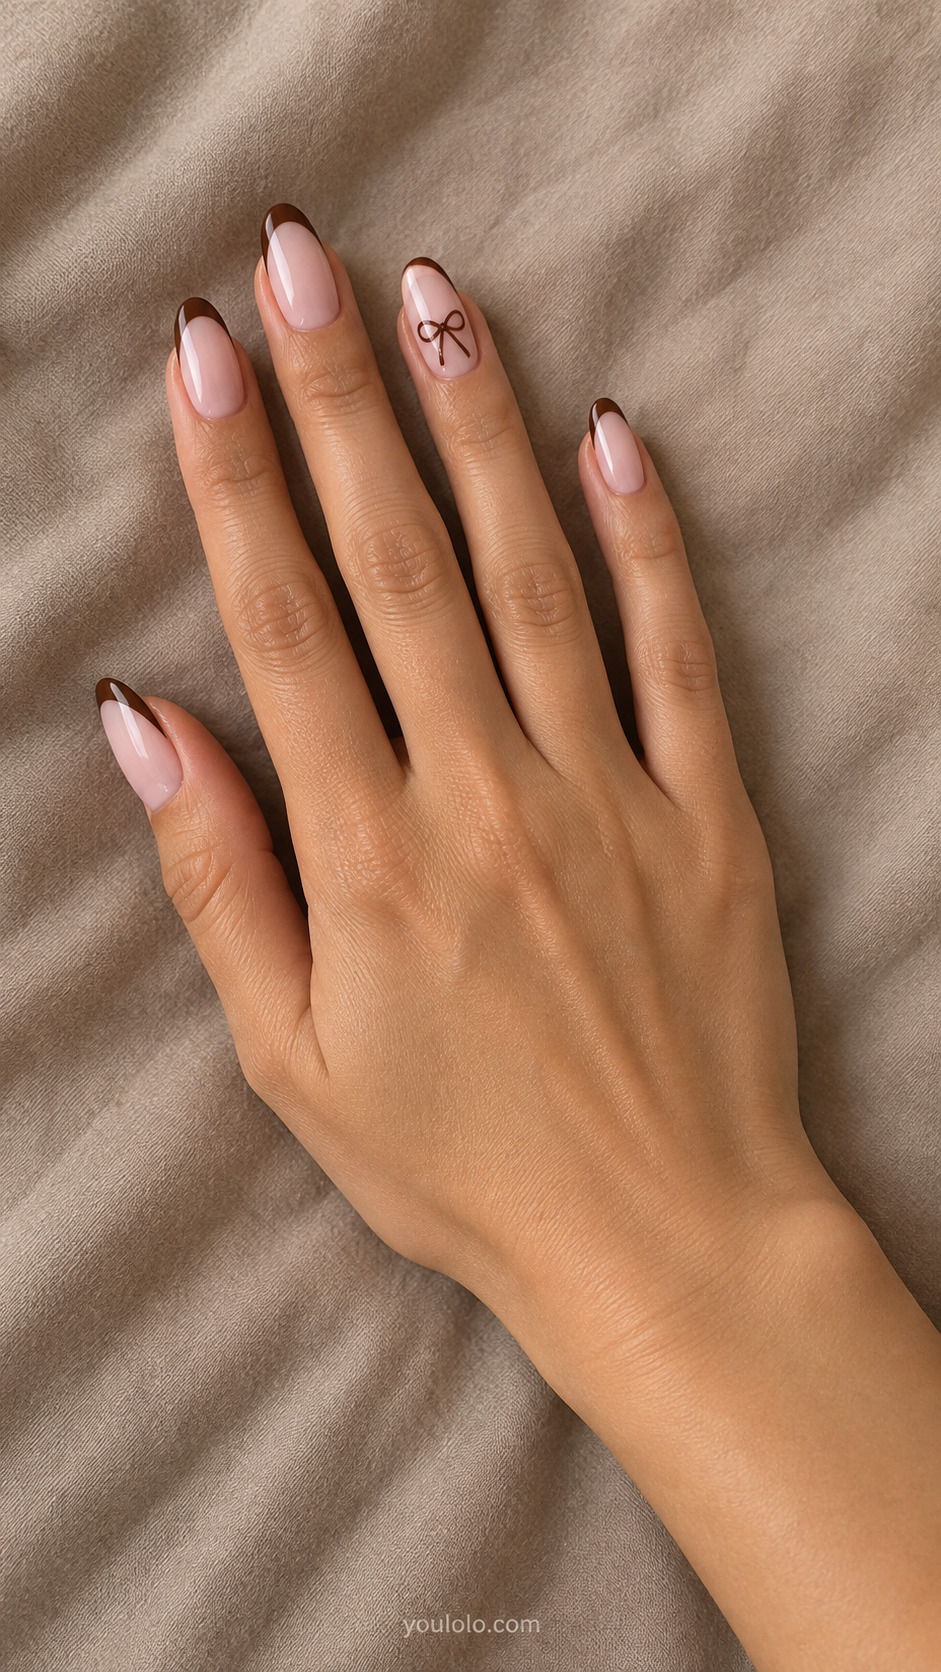
Let the bow sit below the tip with space between its loops and the smile line. Fine tails make it feel like ribbon rather than a solid shape. Keep the other nails clean so the bow remains a deliberate accent.
3. Double Cocoa Smile
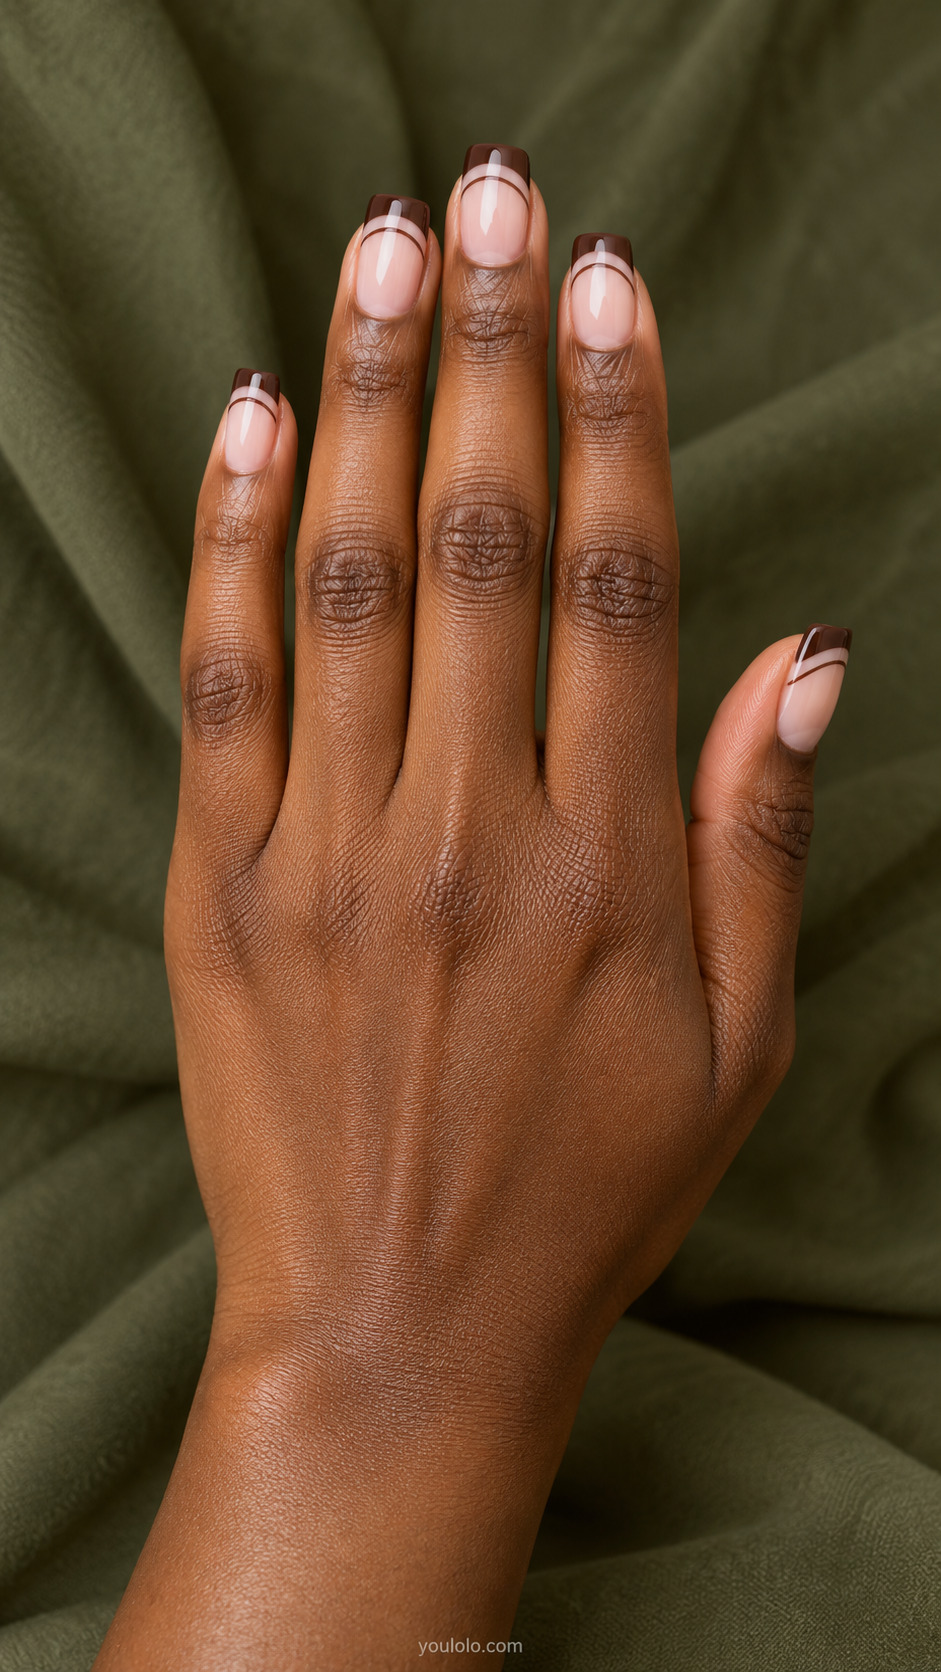
The second curve changes the geometry without adding a new motif. Keep a visible strip of pink between both lines. It is a good option if you prefer a graphic manicure but do not want charms or tiny painted decorations.
4. Asymmetric Brown Sweep
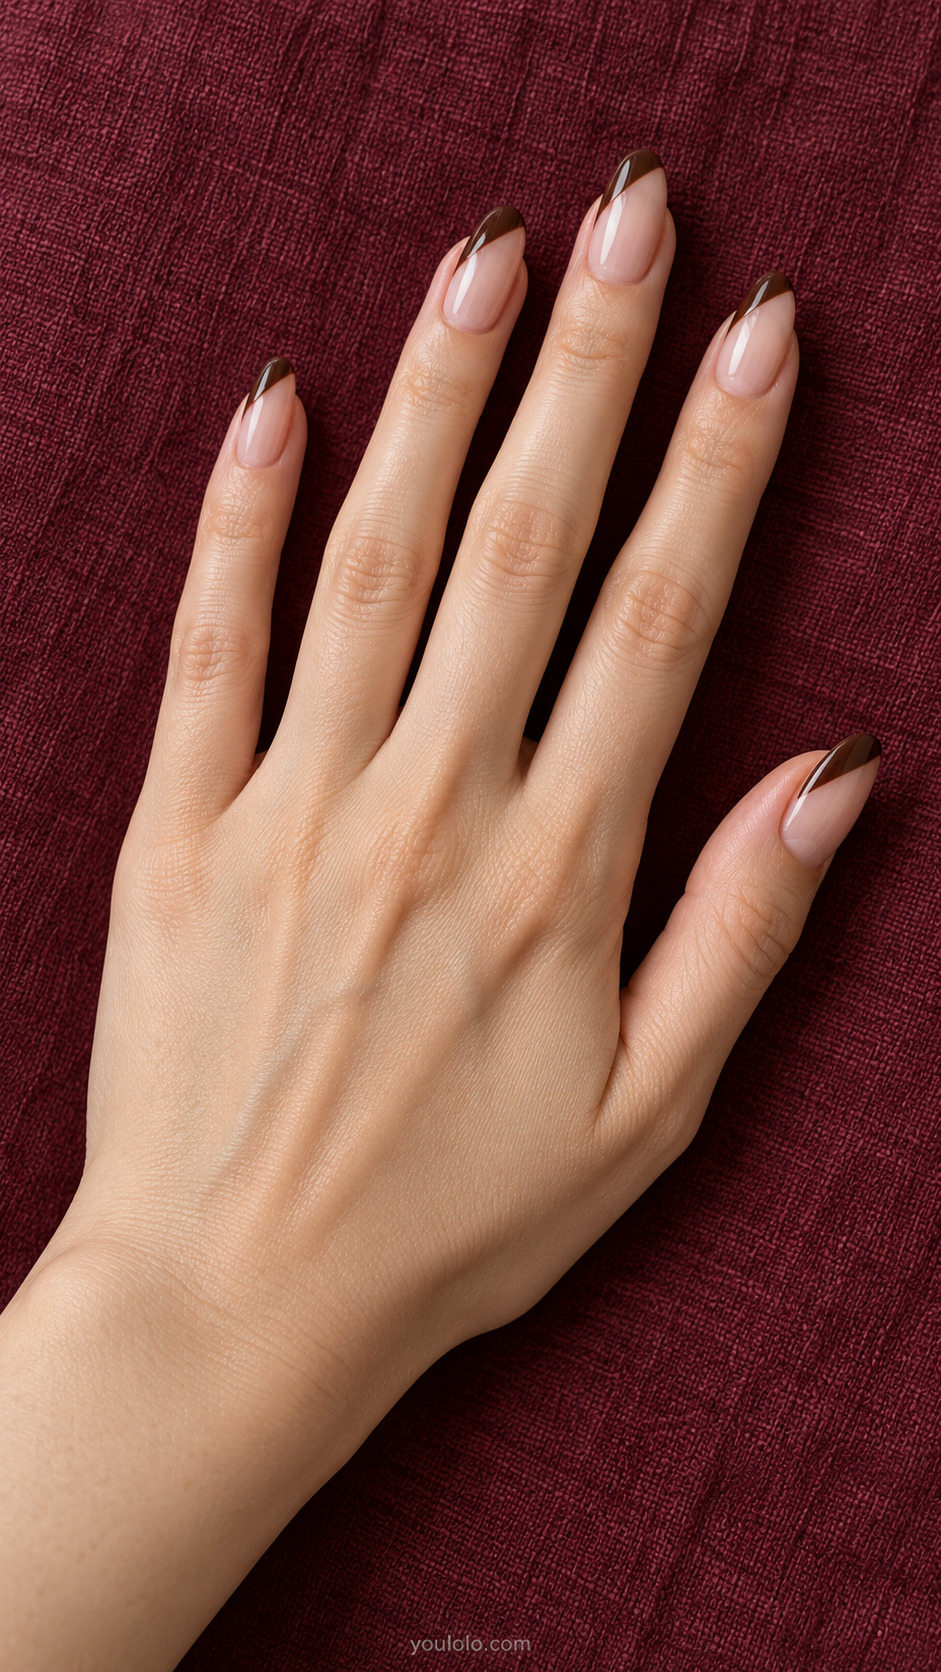
This tip deliberately travels along one side of the nail. Ask for the sweep to repeat in the same direction across the hand. A clean taper is more important than making every tip exactly the same depth on differently sized nails.
5. Vanilla Inset French

The vanilla line separates the brown from the pink and makes the French shape stand out. Keep it narrow so it reads as edging rather than a second thick band. A square outline gives the two borders a clear, tailored finish.
6. Ribbon Near the French Tip
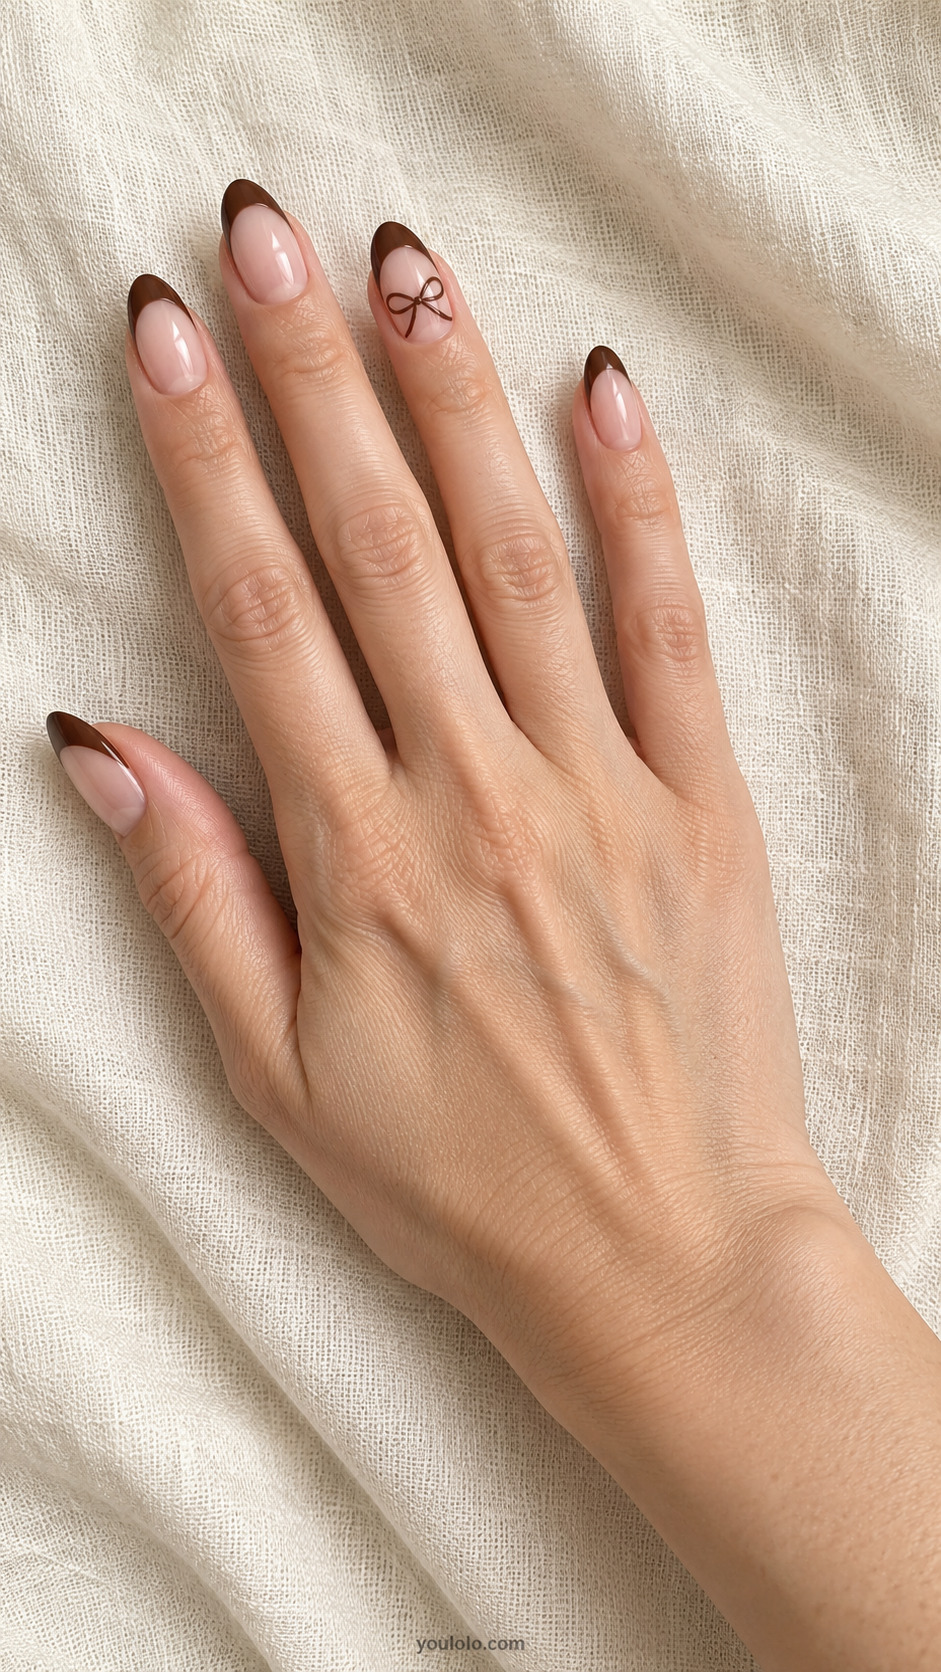
A little ribbon sits near the upper part of the nail, drawing attention toward the chocolate tip. Leave a small strip of blush visible around the bow so its loops remain readable. Painted linework keeps the accent light alongside the solid brown edges.
7. Mocha Ombre French

A blurred transition makes a gentler alternative to crisp French tips. Specify that the darker color should stay near the end, leaving the base visibly pink. This is a gradient tip rather than an all-over brown ombre manicure.
8. Chocolate V Tips
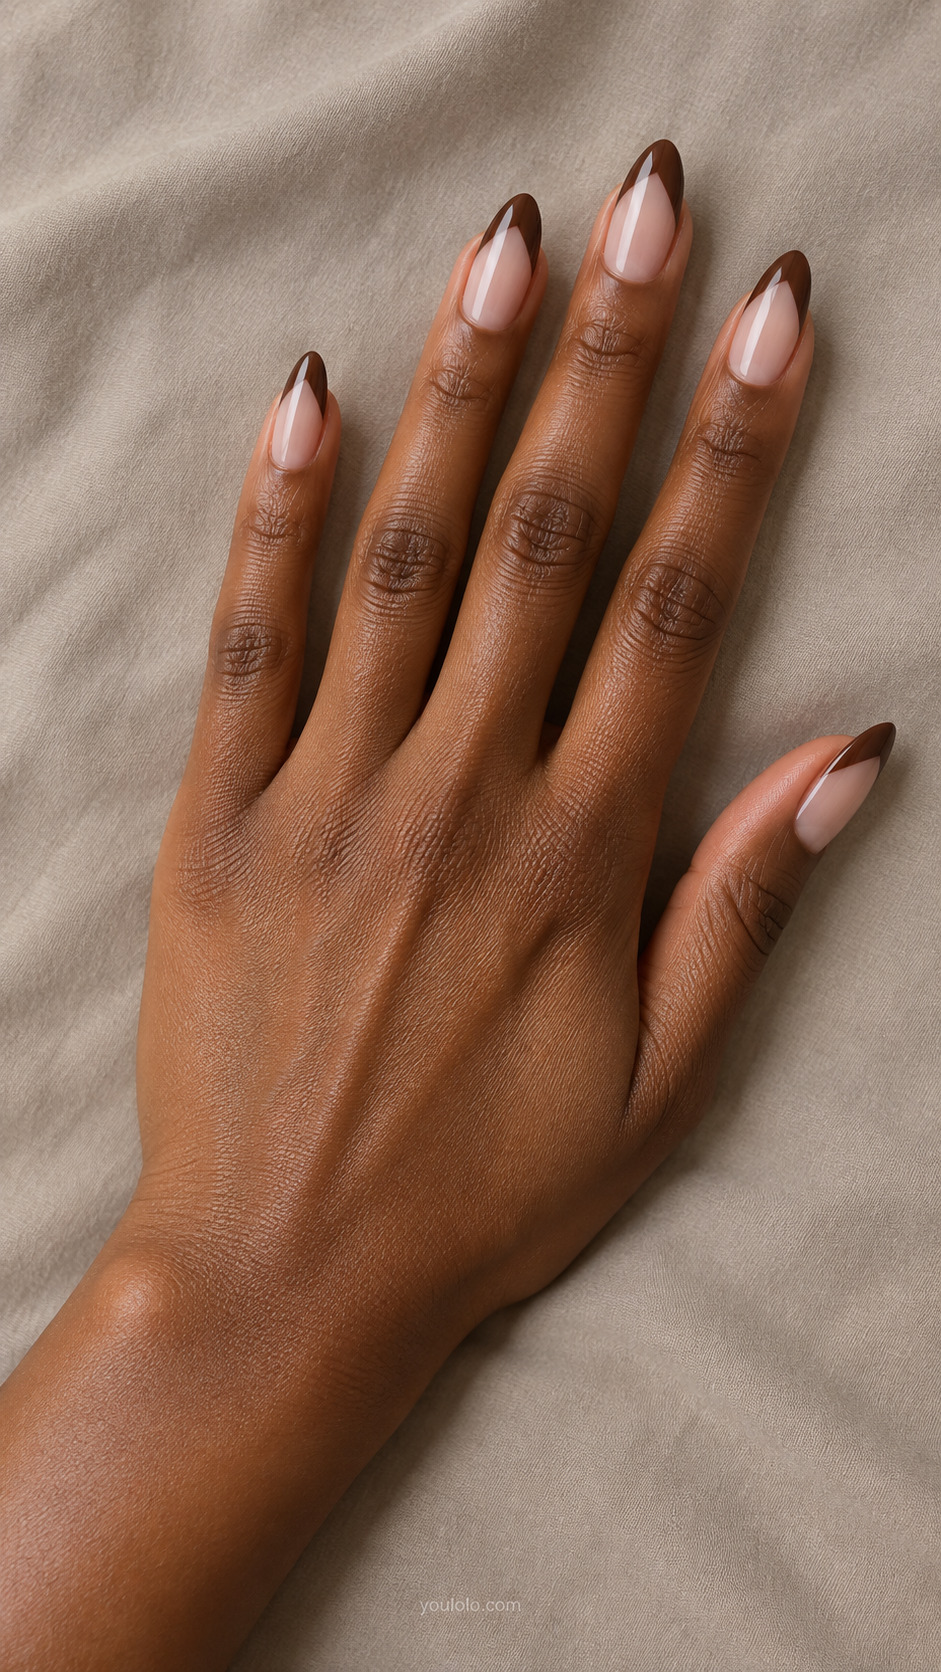
The pointed boundary echoes the almond shape. Keep the meeting point centered and avoid extending the brown too far down the sidewalls. A narrow V will feel lighter; a deeper one makes a stronger statement.
9. Scalloped Cocoa French
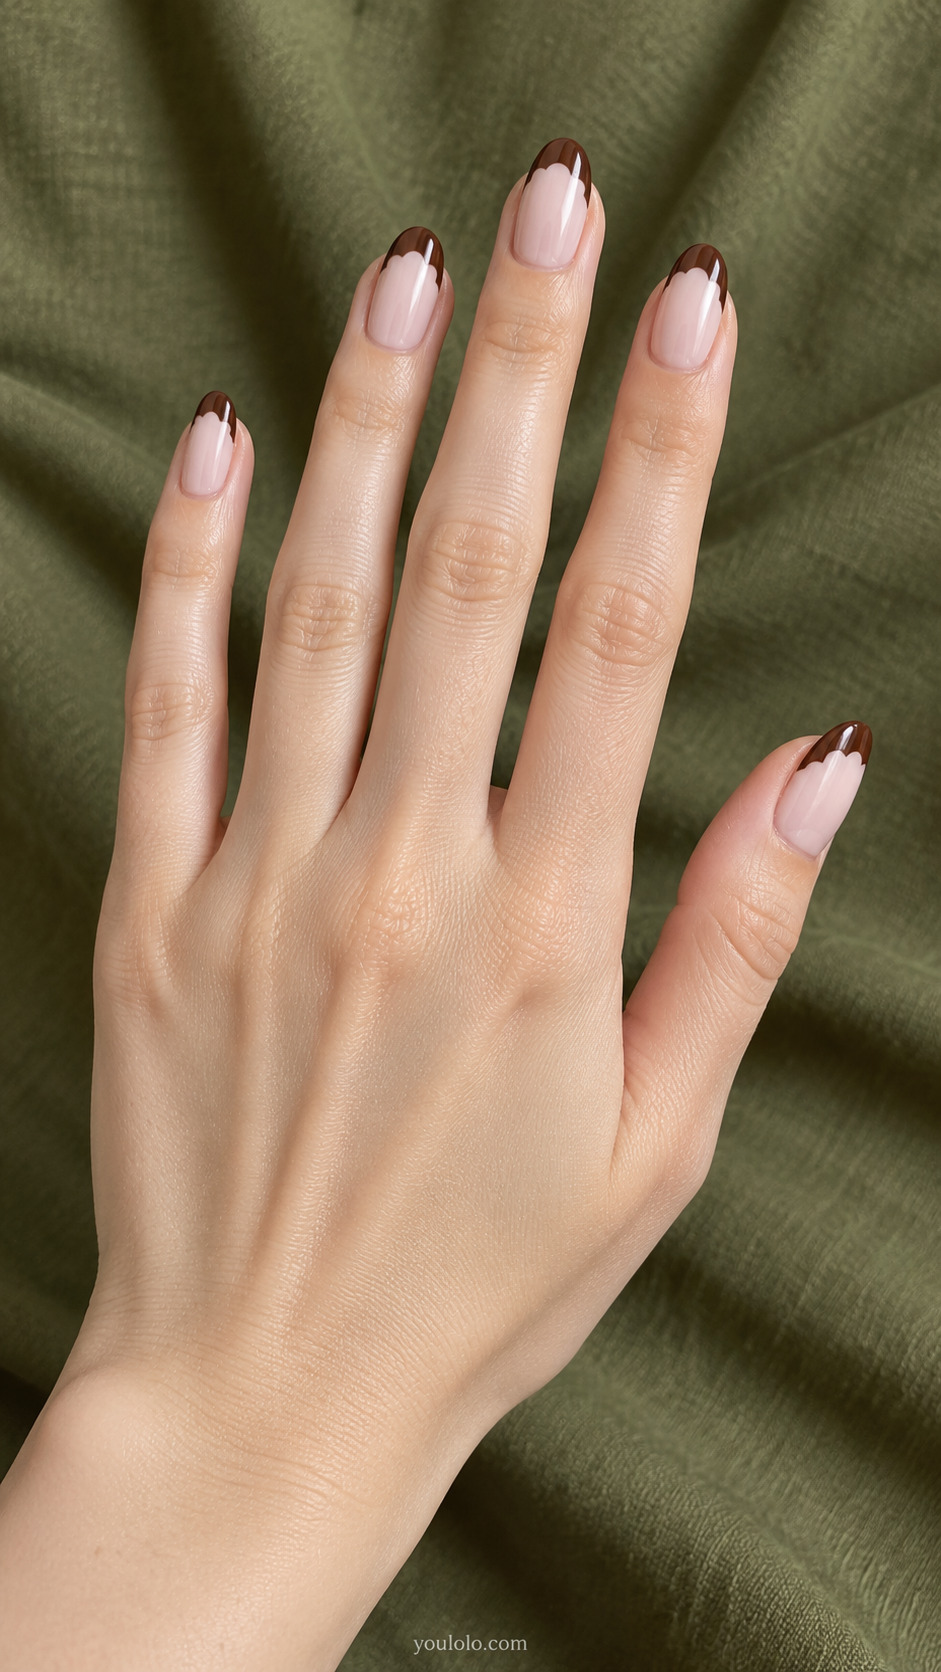
Rounded scallops replace the usual smooth smile line. Use a few clear curves rather than many tiny bumps. The rest of the nail is best left plain because the unusual tip already supplies the decorative detail.
10. Split Milk and Dark Chocolate
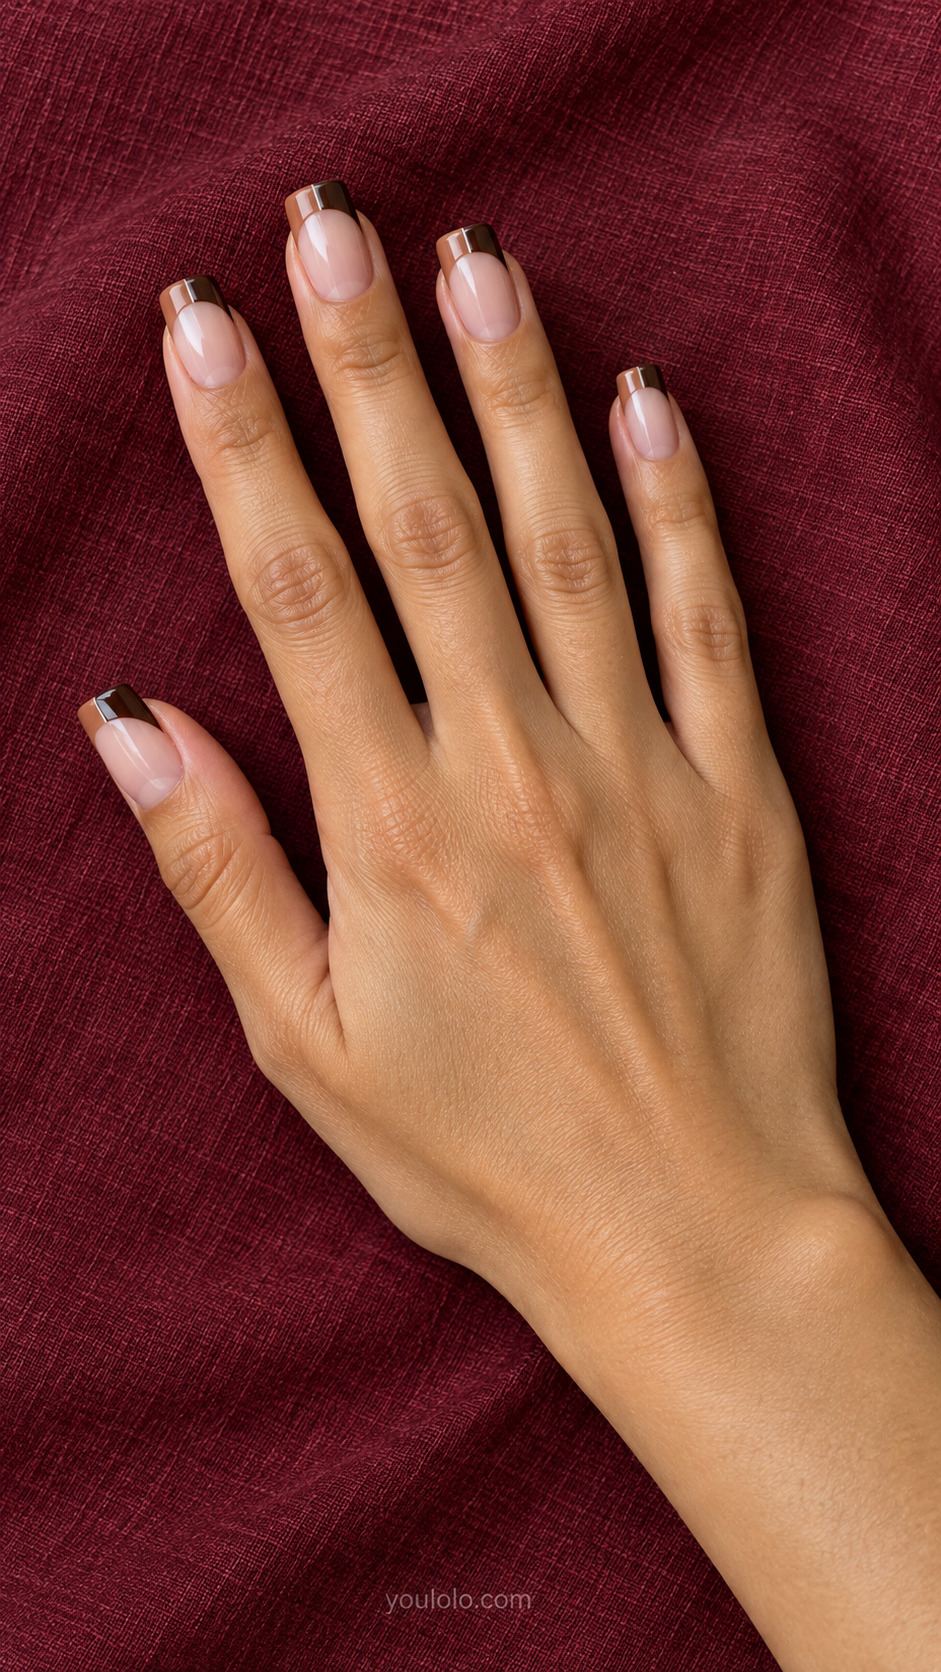
Two brown shades create contrast within the same tip. Ask for similar opacity so one half does not look patchy beside the other. A straight center division gives a cleaner result than a blurred boundary for this particular design.
11. Tiny Bow at the Cuticle
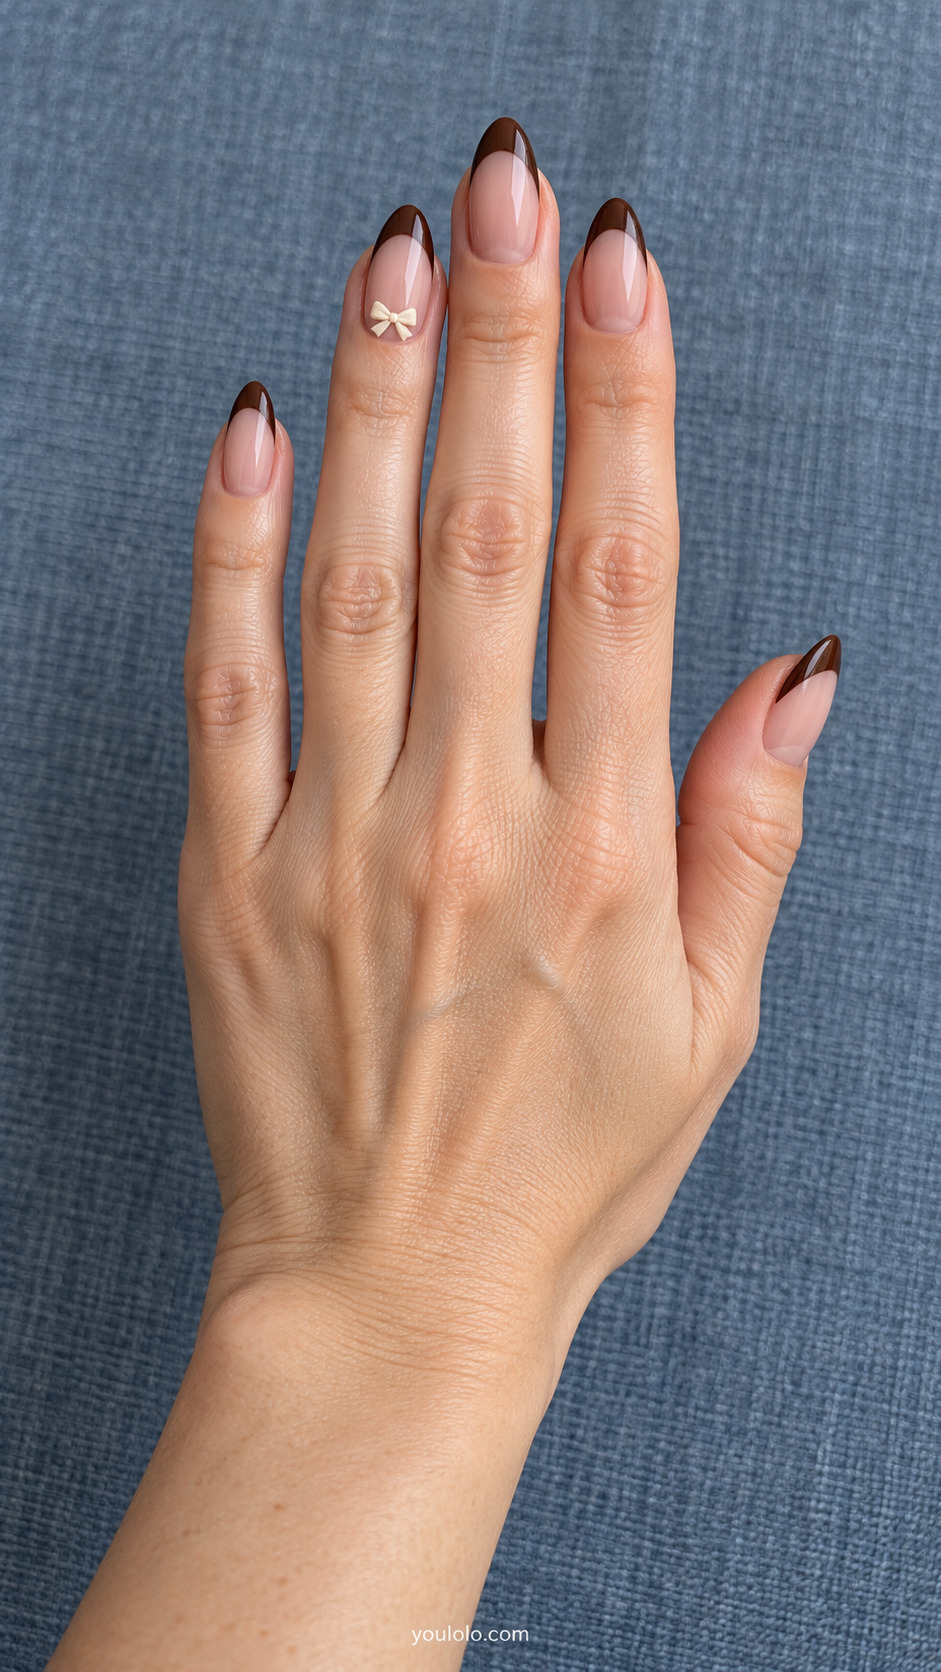
Moving the bow down leaves the French edge uninterrupted. Keep it above the skin with a visible margin around the shape. A cream bow is softer than a dark one and works well when you want a small surprise detail.
12. Chocolate Outline French
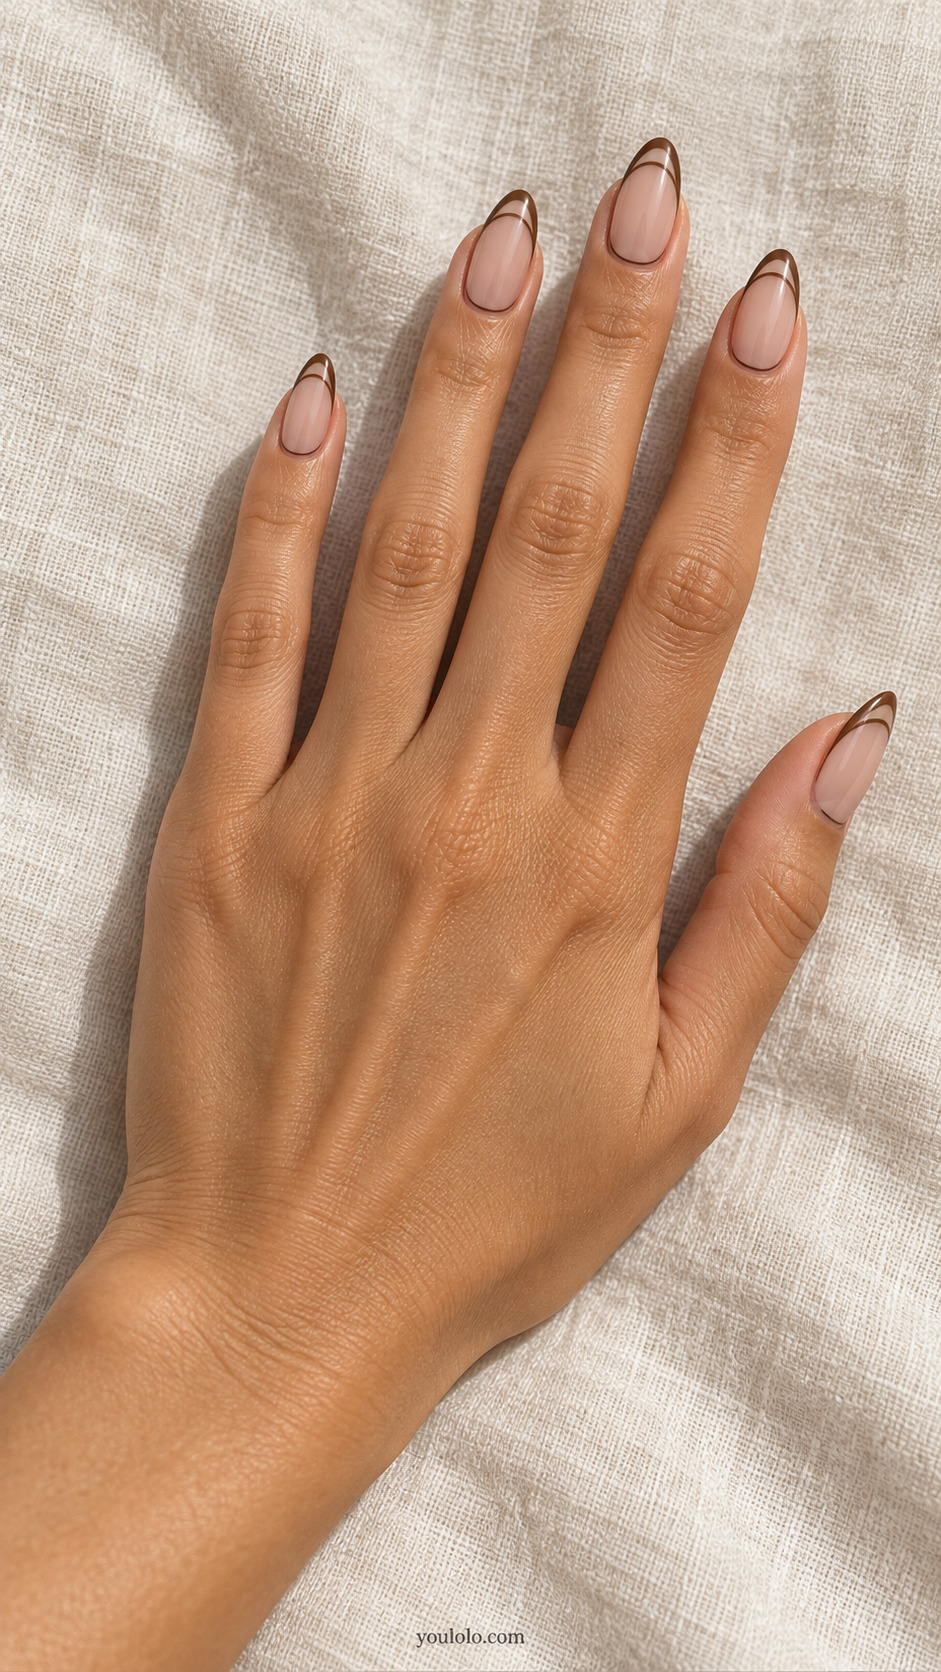
Fine brown lines outline the nail and trace a hollow French tip, leaving the nude base visible between them. Keep the perimeter border delicate so it does not overpower the curved tip. This graphic option relies on precise, even linework rather than heavy decoration.
13. Cocoa Tips with Pearl Point
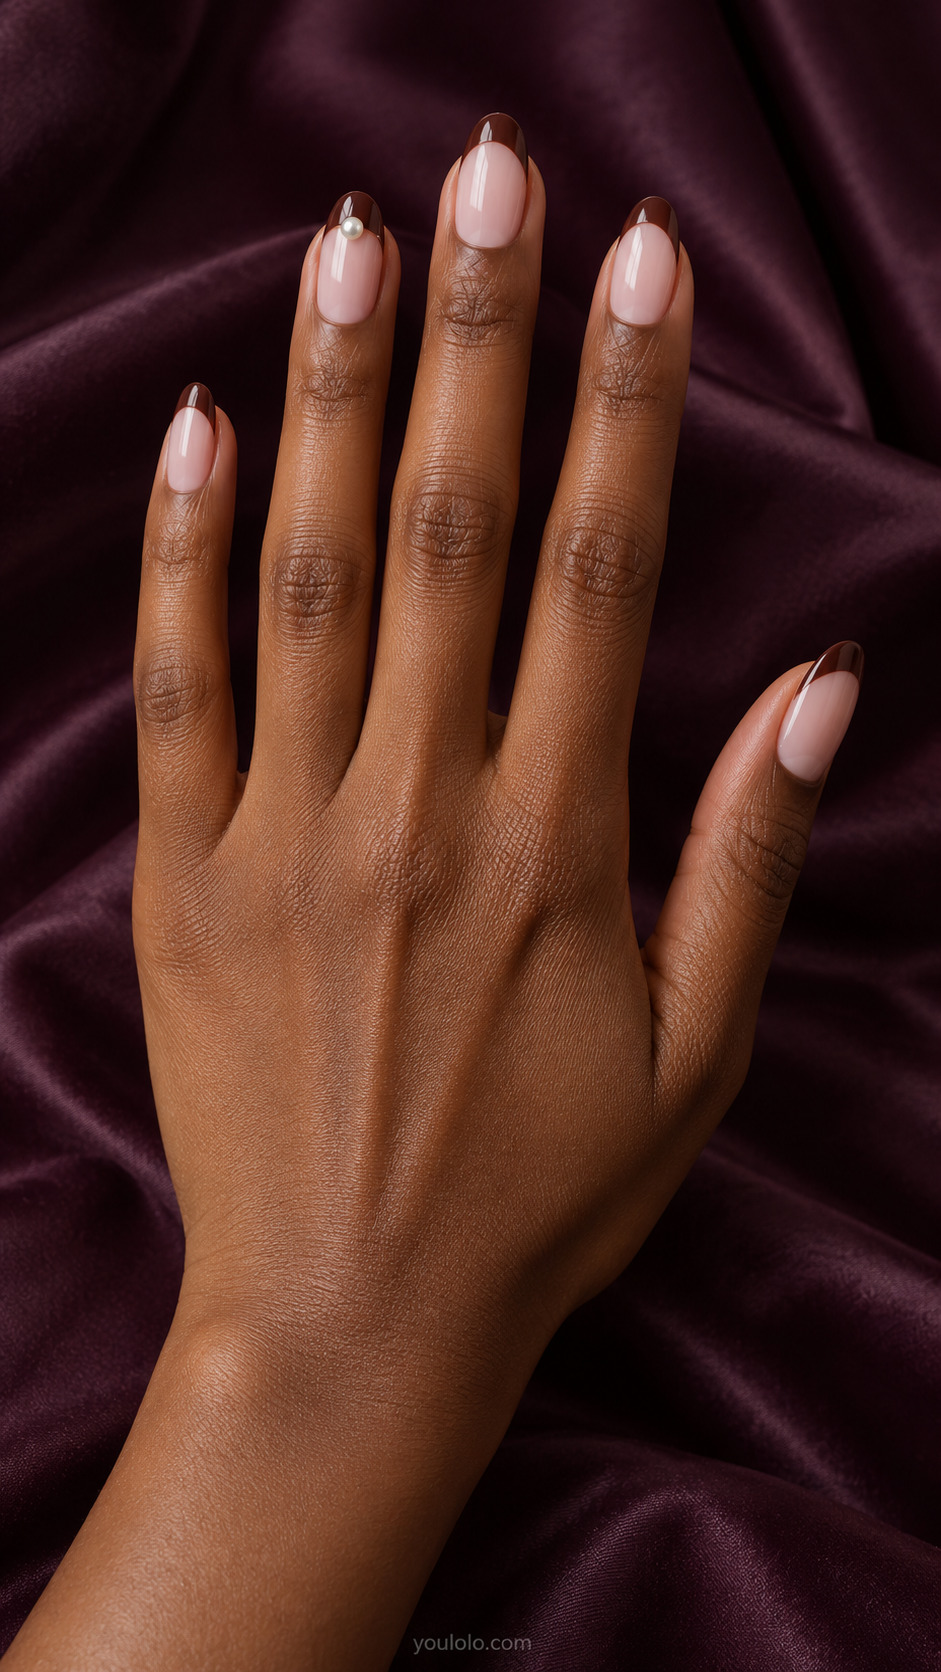
One pearl gives the set a dressier finish while keeping the brown edge visible. Discuss whether you want a real raised accent or a painted pearl effect. Avoid several pearls along every tip if you prefer the restrained version.
14. Rounded Corner French
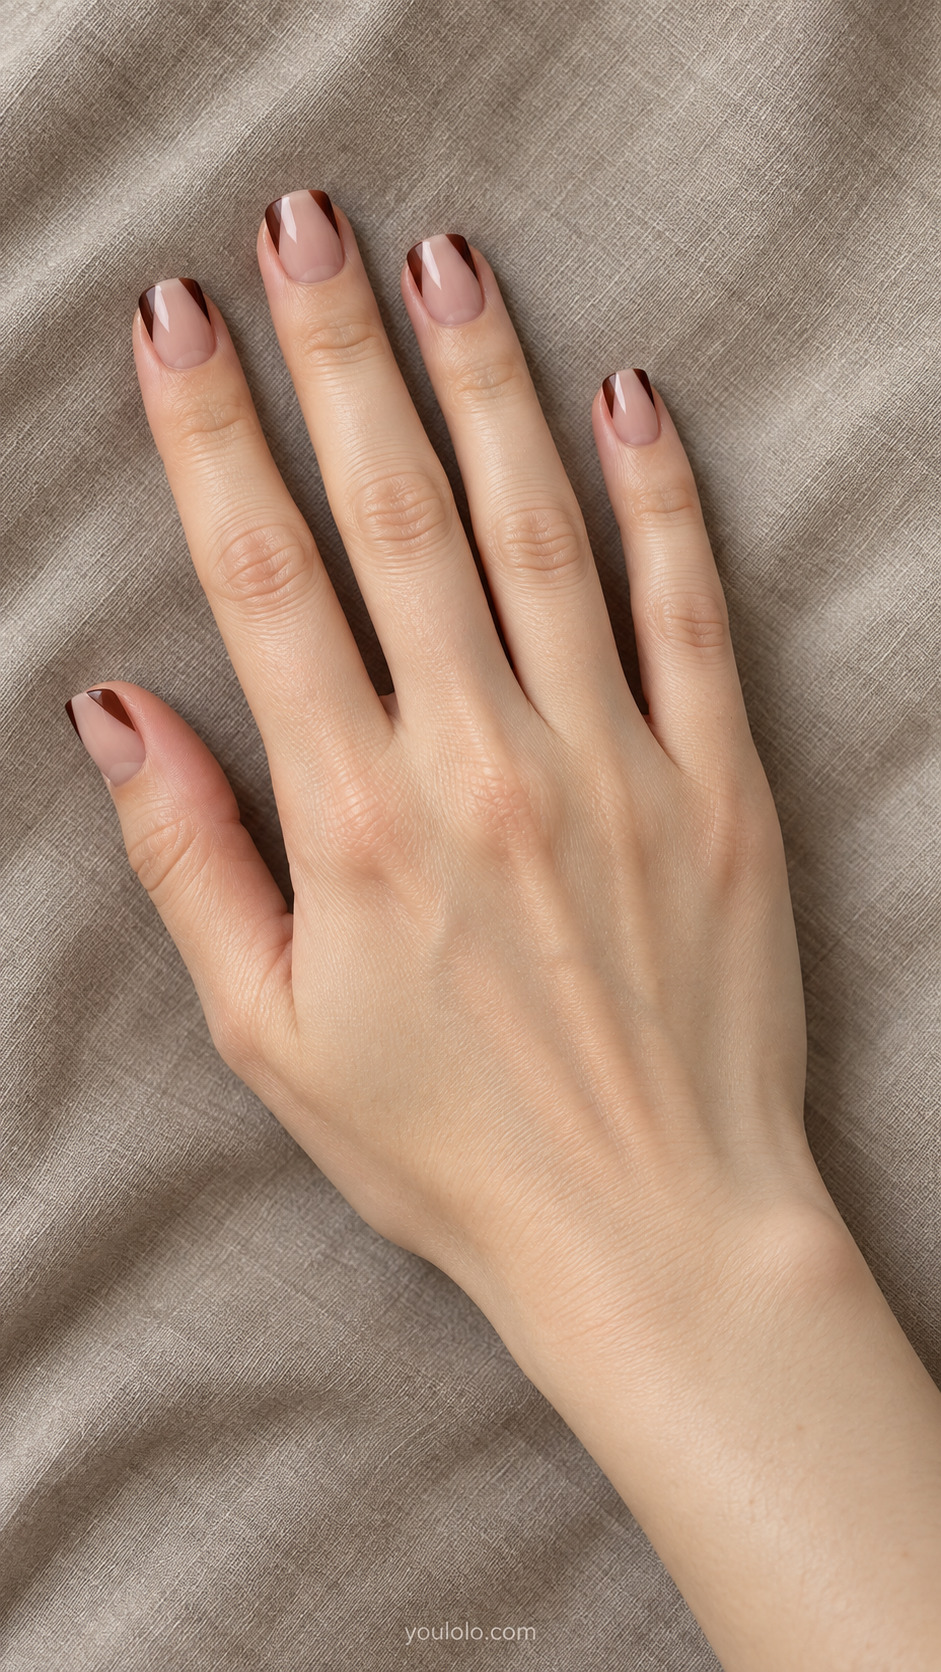
Separated corners suggest a French manicure without forming a continuous band. Keep both sides balanced and the central gap intentional. This is especially useful when a full dark tip feels too heavy on a shorter nail.
15. Velvet Chocolate Tips
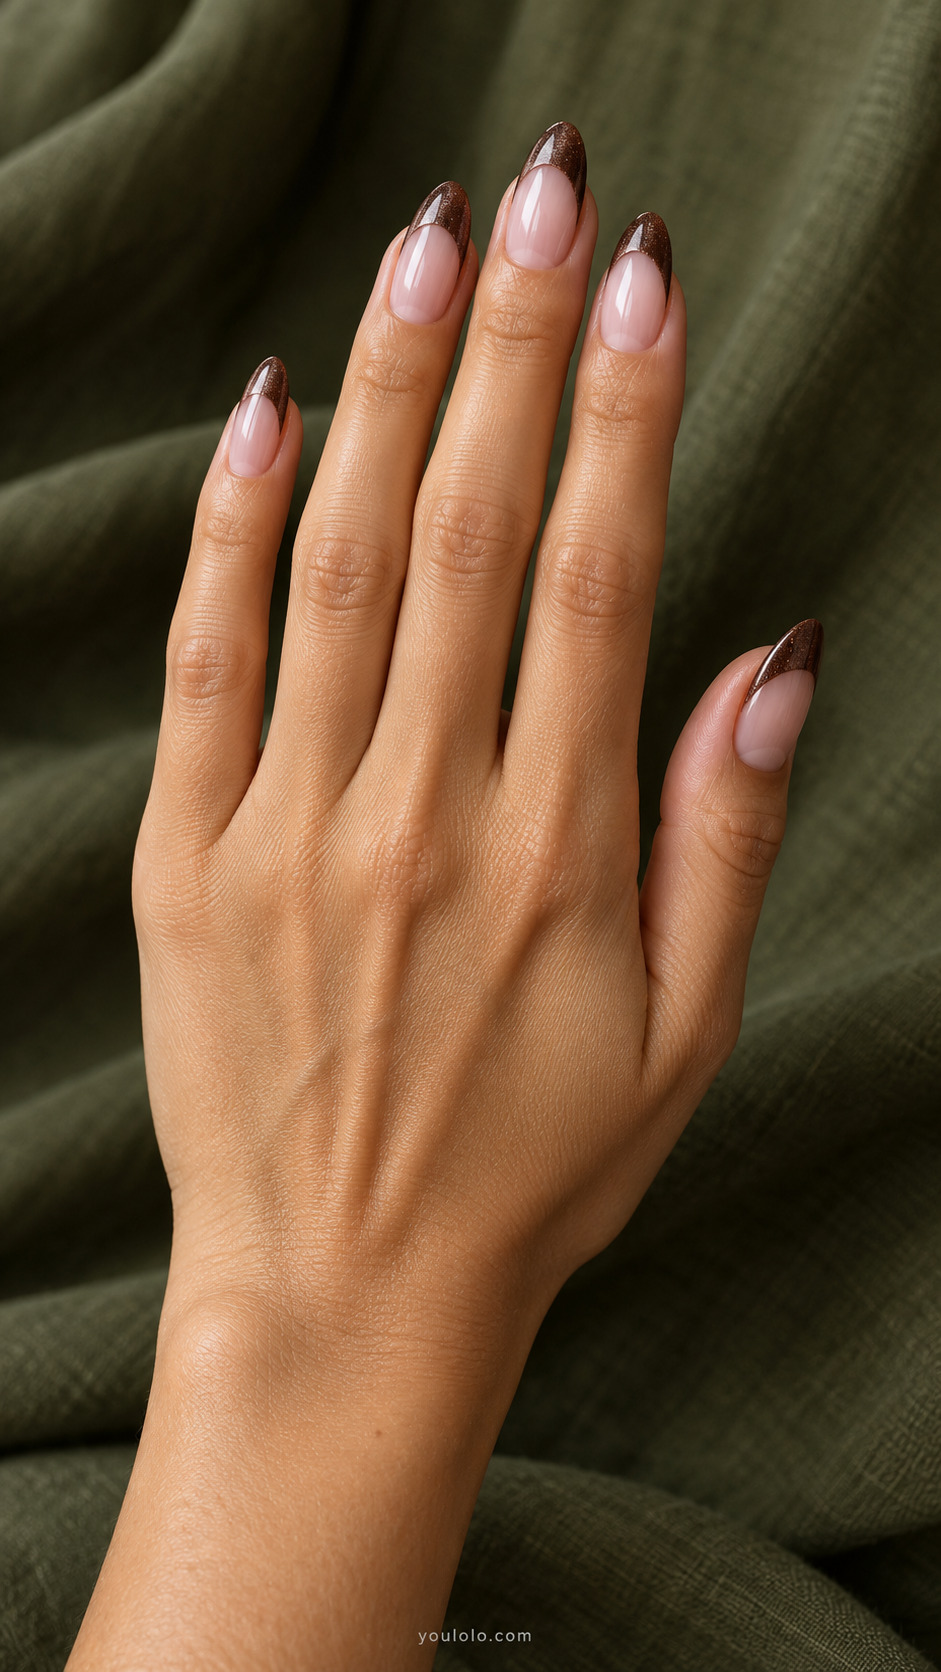
The shimmer belongs inside the tip and should not cover the entire nail. A magnetic effect changes with lighting, so a photograph captures only one angle. Ask your artist to show a sample if the direction of the reflection matters to you.
16. Chocolate Bow and Fine Lace
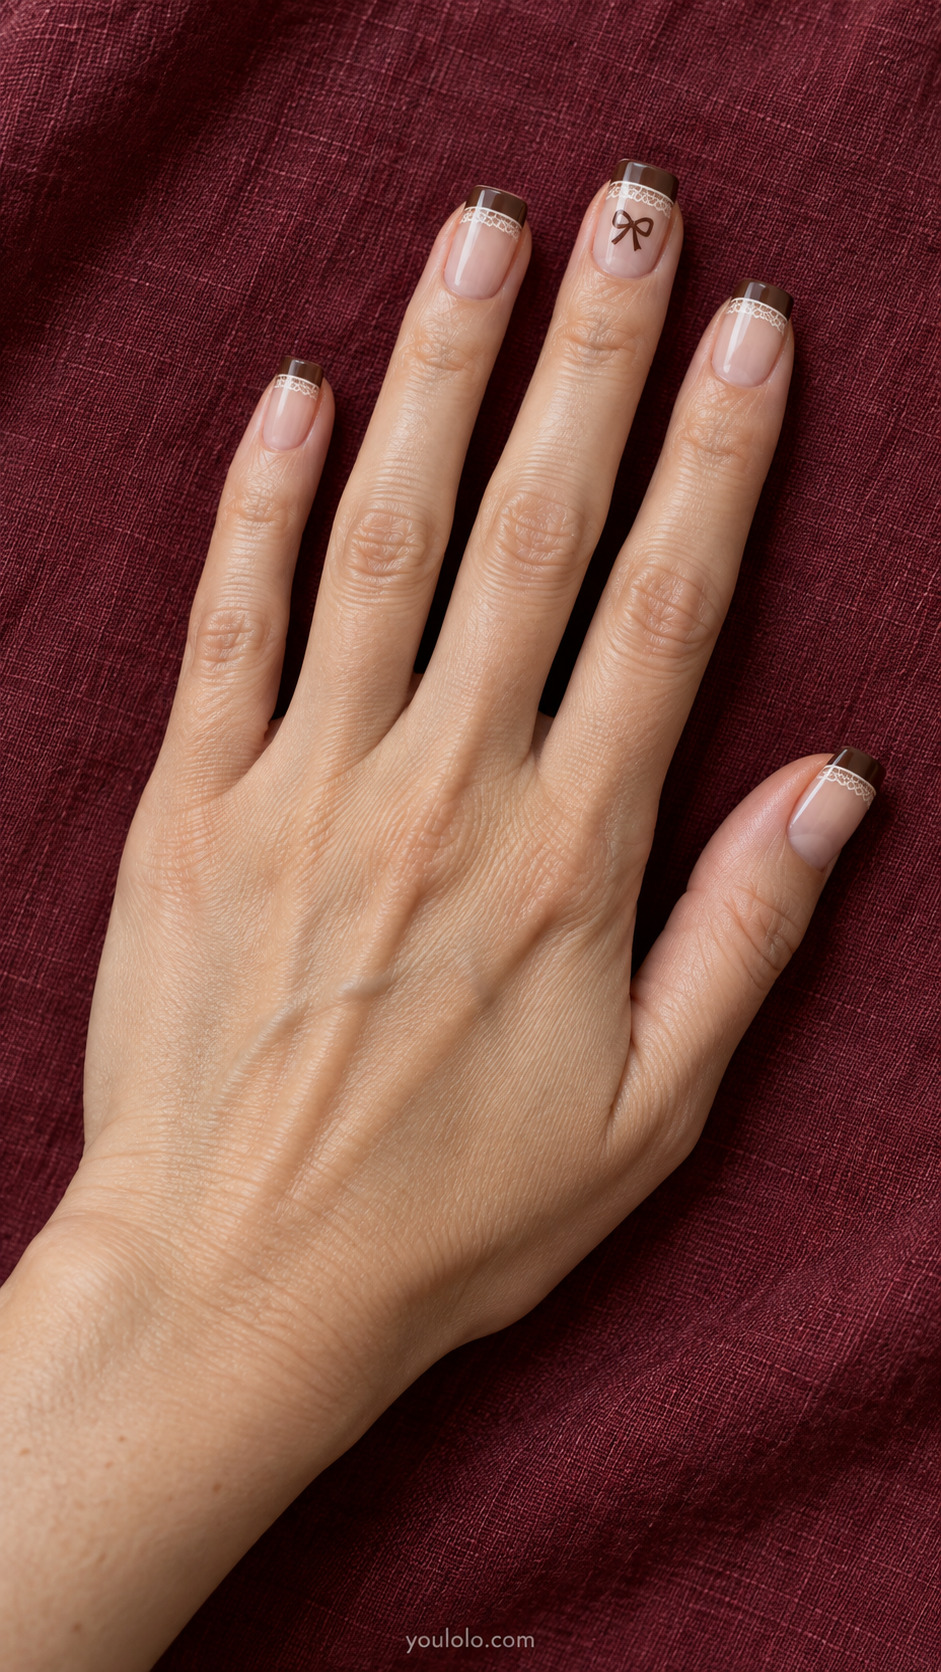
The lace is a small supporting detail rather than a full pattern. A few fine loops beneath one tip are enough. Keep the bow narrow and let the other nails remain simple so this set does not become visually crowded.
17. Gloss on Matte Cocoa Tips
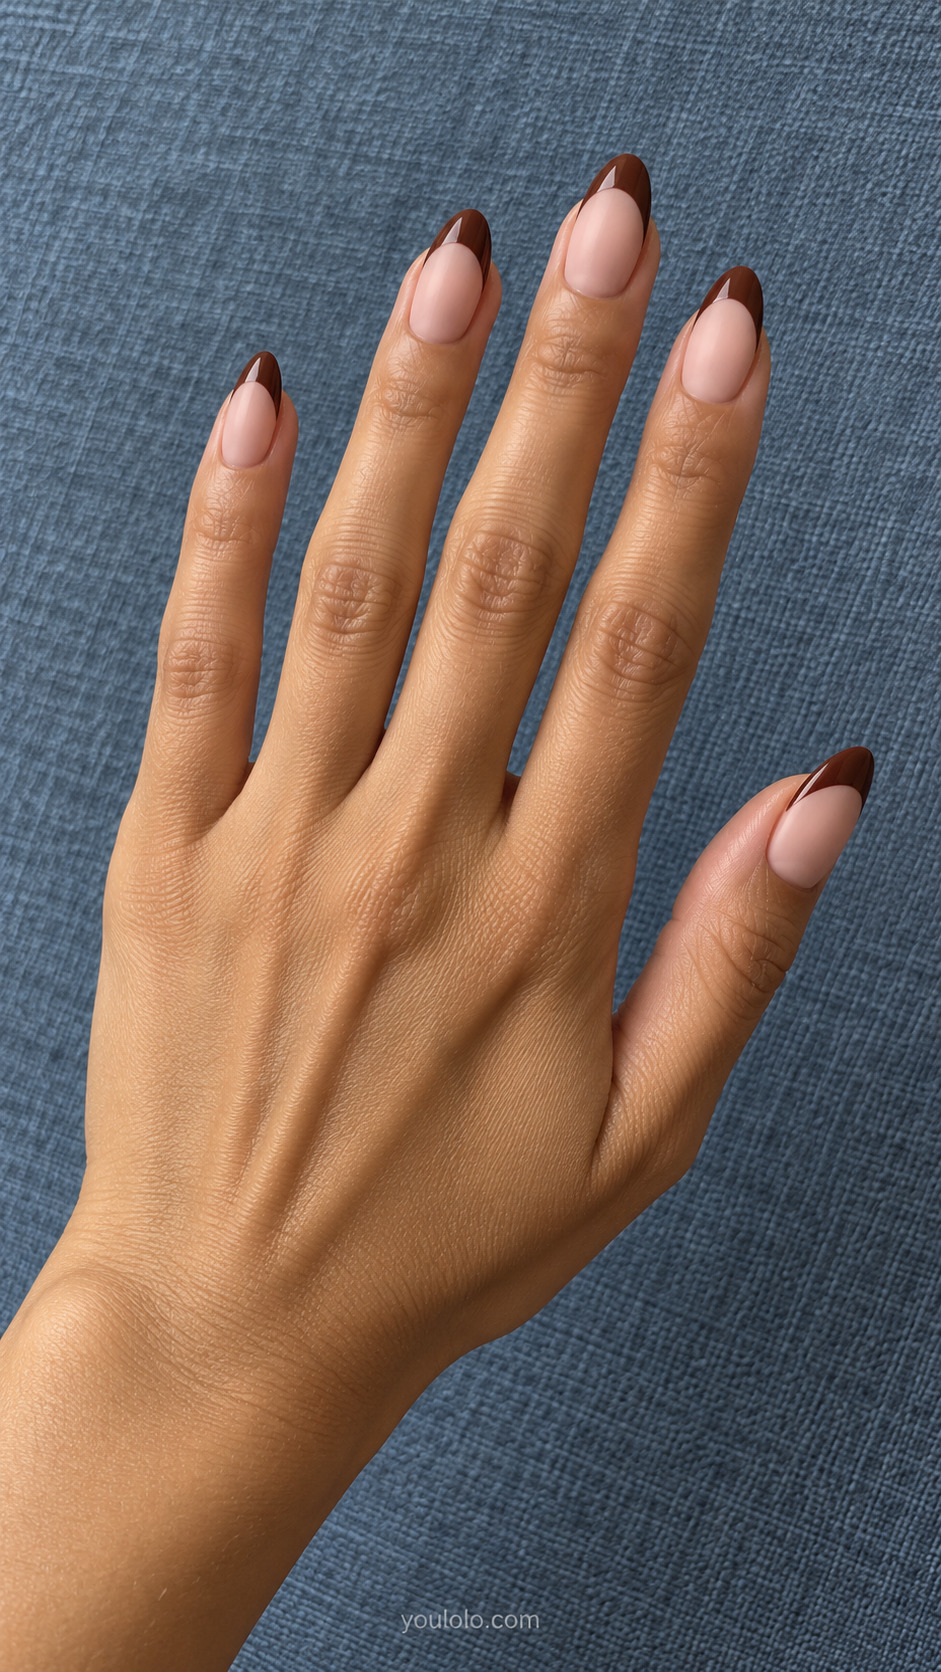
The contrast comes from the finish as well as the color. Specify matte only on the base and shine on the brown tips. This offers a different mood from the ribbon designs without requiring additional painted motifs.
What to ask for at the salon
A clear brief might be: milky blush base, medium almond shape, narrow chocolate tips, and one flat brown bow. Add whether you prefer a shiny or matte base. If you want a variation, change one part of that brief, such as replacing the sharp tip with a blurred edge or adding a second smile line.
Chocolate French tip nails can be simple enough for an everyday manicure or more decorative for an occasion. The most useful reference is the one that matches both your preferred length and your chosen amount of detail. Save a close view of the tip if its shape matters more than the bow.
For another direction, explore our brown polka dot manicure ideas and compare the amount of pattern before choosing your next manicure.
Chocolate french tip nails: frequently asked questions
Are chocolate French tip nails the same as chocolate milk nails?
Not necessarily. Chocolate milk nails commonly refers to a creamy brown color across the nail. Chocolate French tips place the brown mainly at the free edge, often over nude or pink. Some looks combine the two ideas.
Can chocolate French tip nails work on short nails?
Yes. A micro tip, rounded-corner tip, or simple narrow smile line can work well. Detailed bows and double lines may need simplification so they remain distinct at a shorter length.
Which base color goes with brown French tips?
Milky blush, sheer nude, and soft cream are all useful choices. Blush creates a pink-and-brown contrast; cream makes the palette warmer; sheer nude keeps more of the natural nail visible.
Can the bow be painted instead of raised?
Yes. Ask for a fine-line painted bow or a flat decal if you want a smoother look. A raised charm is a separate decoration choice and should not be assumed from the word bow.
References and design notes
The sources below document relevant patterns, colors, or techniques. The illustrations and individual combinations in this article are original interpretations; the sources do not establish that every pictured combination was recreated or wear-tested.

[…] another autumn direction, explore our chocolate French tip nails […]
[…] For another direction, explore our chocolate French tip nail ideas. […]
[…] 17 Chocolate French Tip Nails: Beautiful Bow Ideas […]