
The Best Fluffy Pancakes recipe you will fall in love with. Full of tips and tricks to help you make the best pancakes.


Brown polka dot nails turn a simple repeated shape into the main feature of a manicure. A cream background makes the dots clear; a sheer nude background creates a softer contrast. Add a solid chocolate or wine-colored nail and the set gains depth without needing a complicated pattern on every finger.
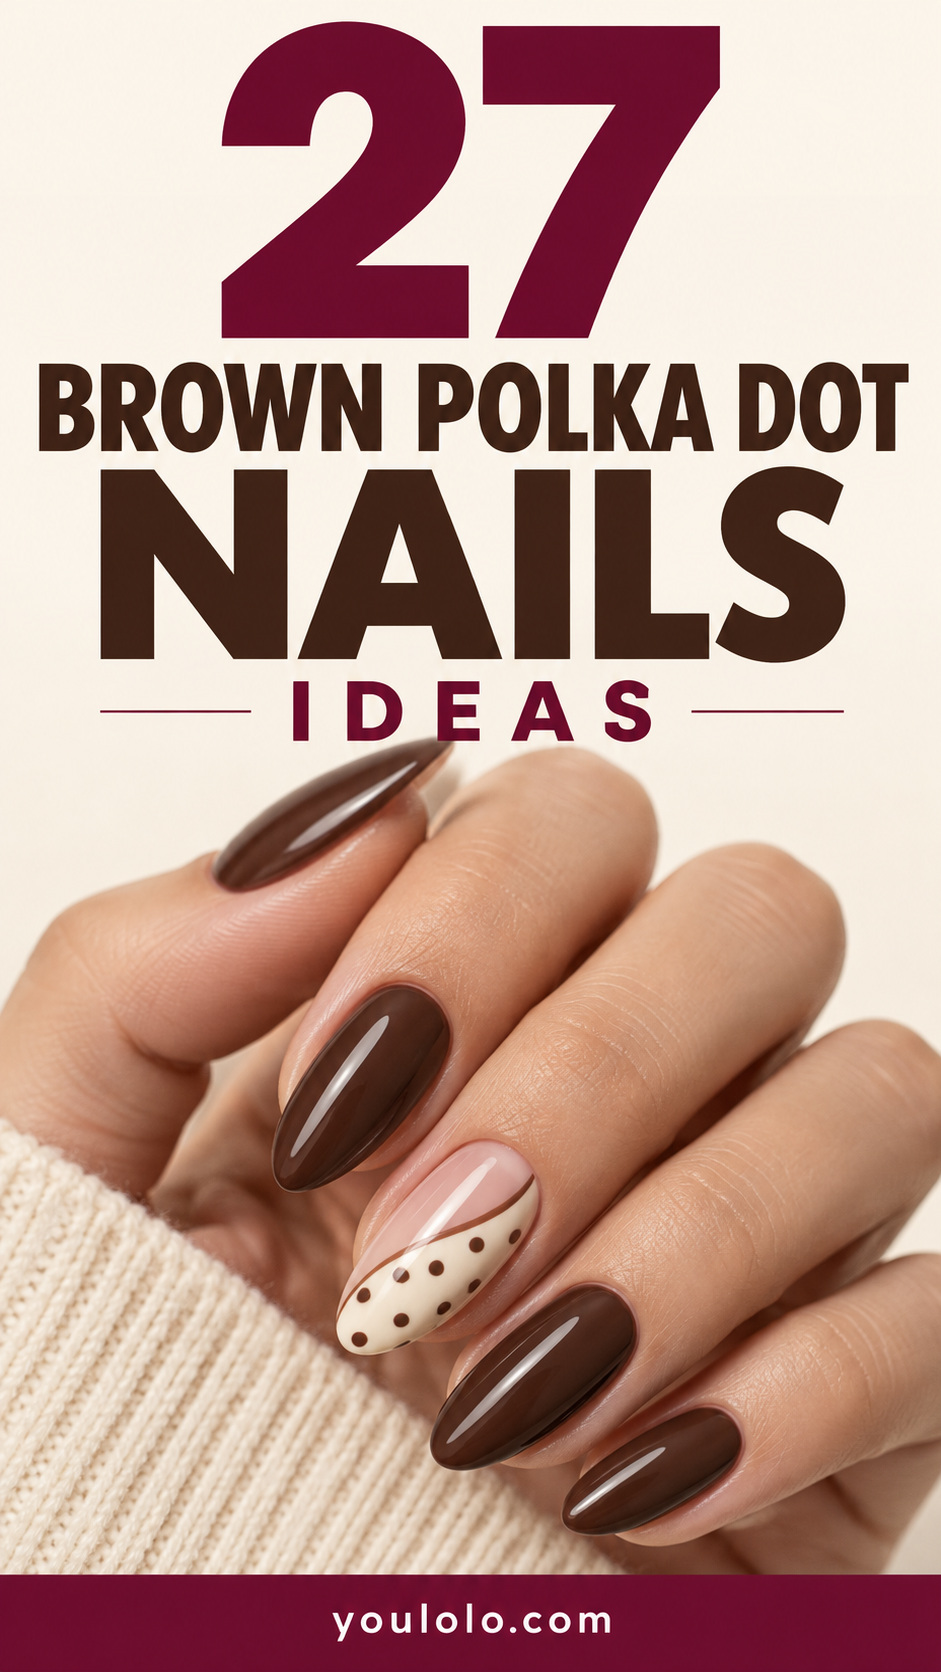
If you enjoy a mixed manicure, dots can sit alongside tortoiseshell accents. The trick is to give each pattern its own space. Small circular dots create a regular rhythm, while amber mottling has a looser, layered appearance. They do not need to be blended on the same nail to work together.
Brown polka dot nails: choose the dot size first
Tiny dots leave more of the background visible and feel delicate. Larger dots create a stronger graphic statement. Neither requires perfect mathematical spacing, but a consistent size makes the pattern easier to read.
Before adding other details, decide whether the dots will cover the whole nail, sit only on the tip, or form a smaller accent area. That choice changes the manicure more noticeably than adding another nearly identical shade of brown.
1. Chocolate dots on a cream base
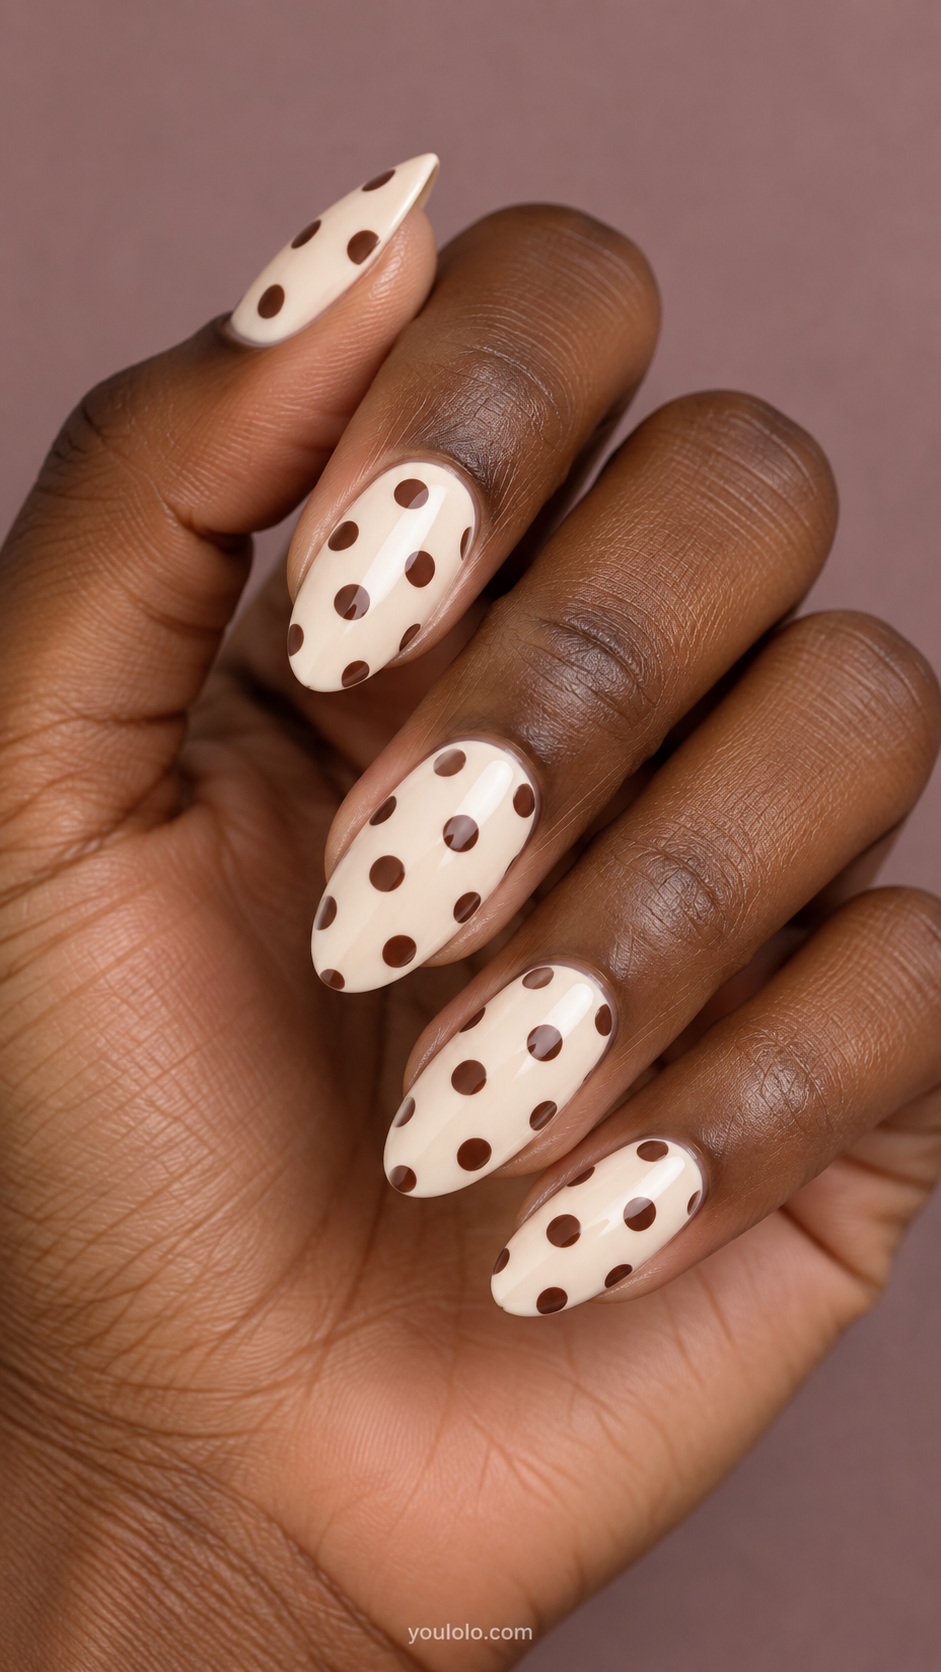
Use a warm cream background with medium chocolate-brown dots. Keep the size similar across the hand and leave clear gaps between them. This is a complete design on its own; a glossy finish and a consistent shape give it enough structure without metallic decoration.
2. Tiny espresso dots on sheer nude
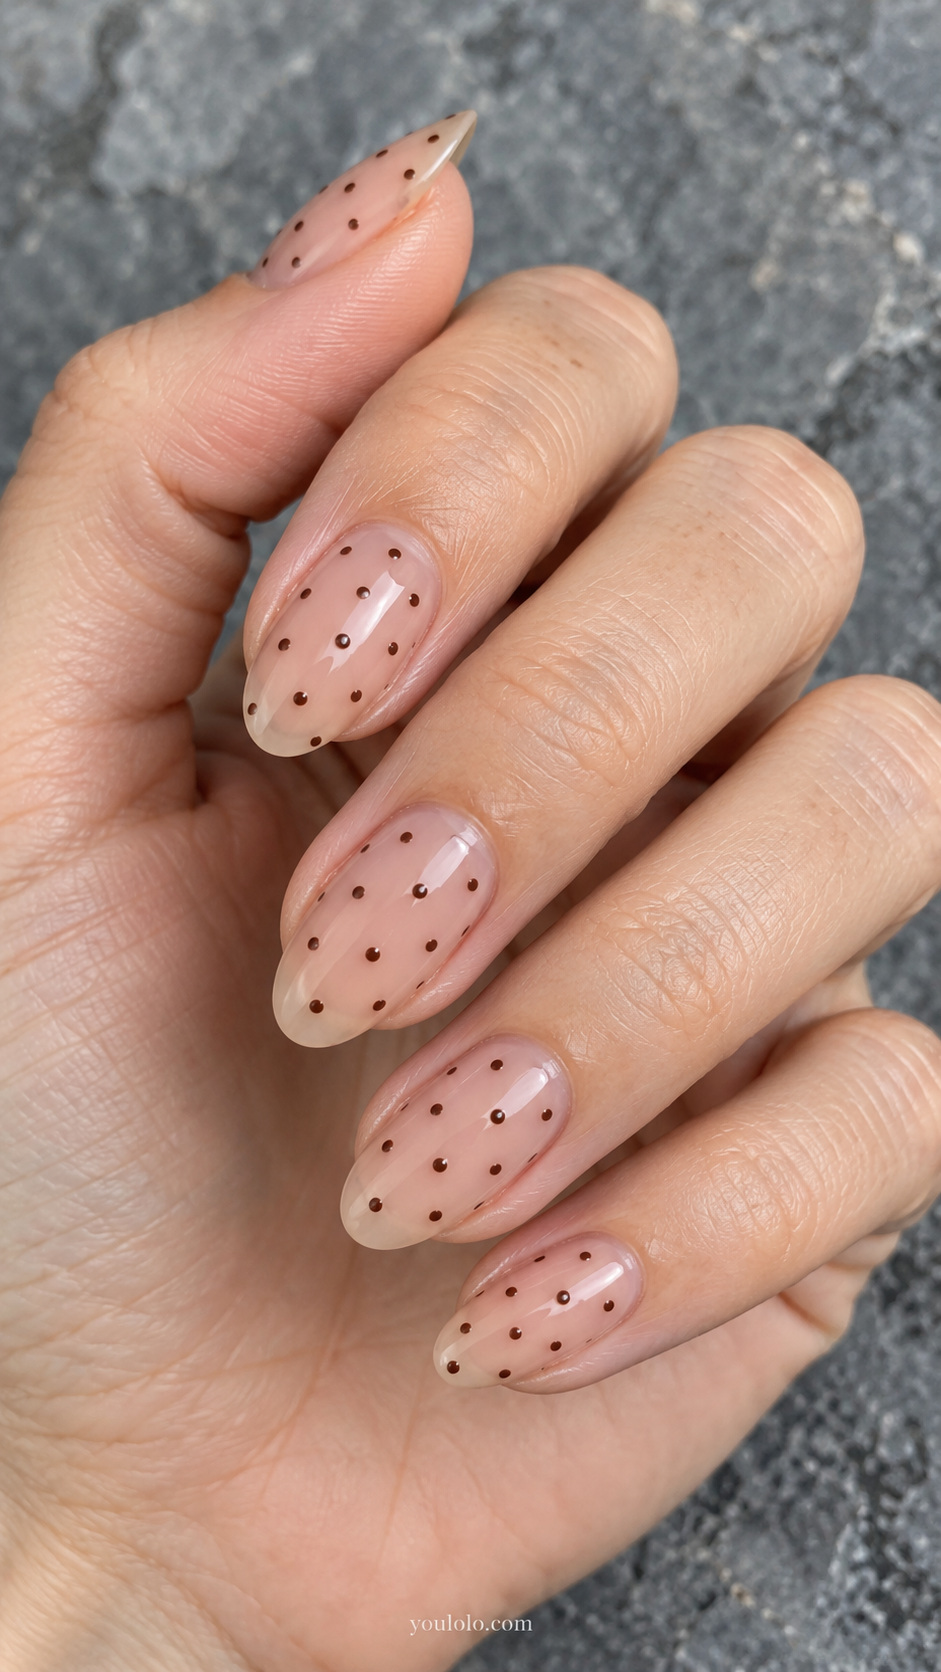
Choose a translucent base and smaller, darker dots for a lighter effect. The natural nail remains part of the appearance, so bring a reference for how much coverage you want. This option suits someone who likes patterned nails but does not want every nail to look fully painted.
3. Cream dots with solid burgundy accents

Pair three cream-and-brown dotted nails with two solid burgundy nails. The red changes the mood while the dots stay central. Pick a wine shade that remains visibly red next to the brown, especially if you want the two dark colors to feel distinct.
4. Brown polka dot French tips
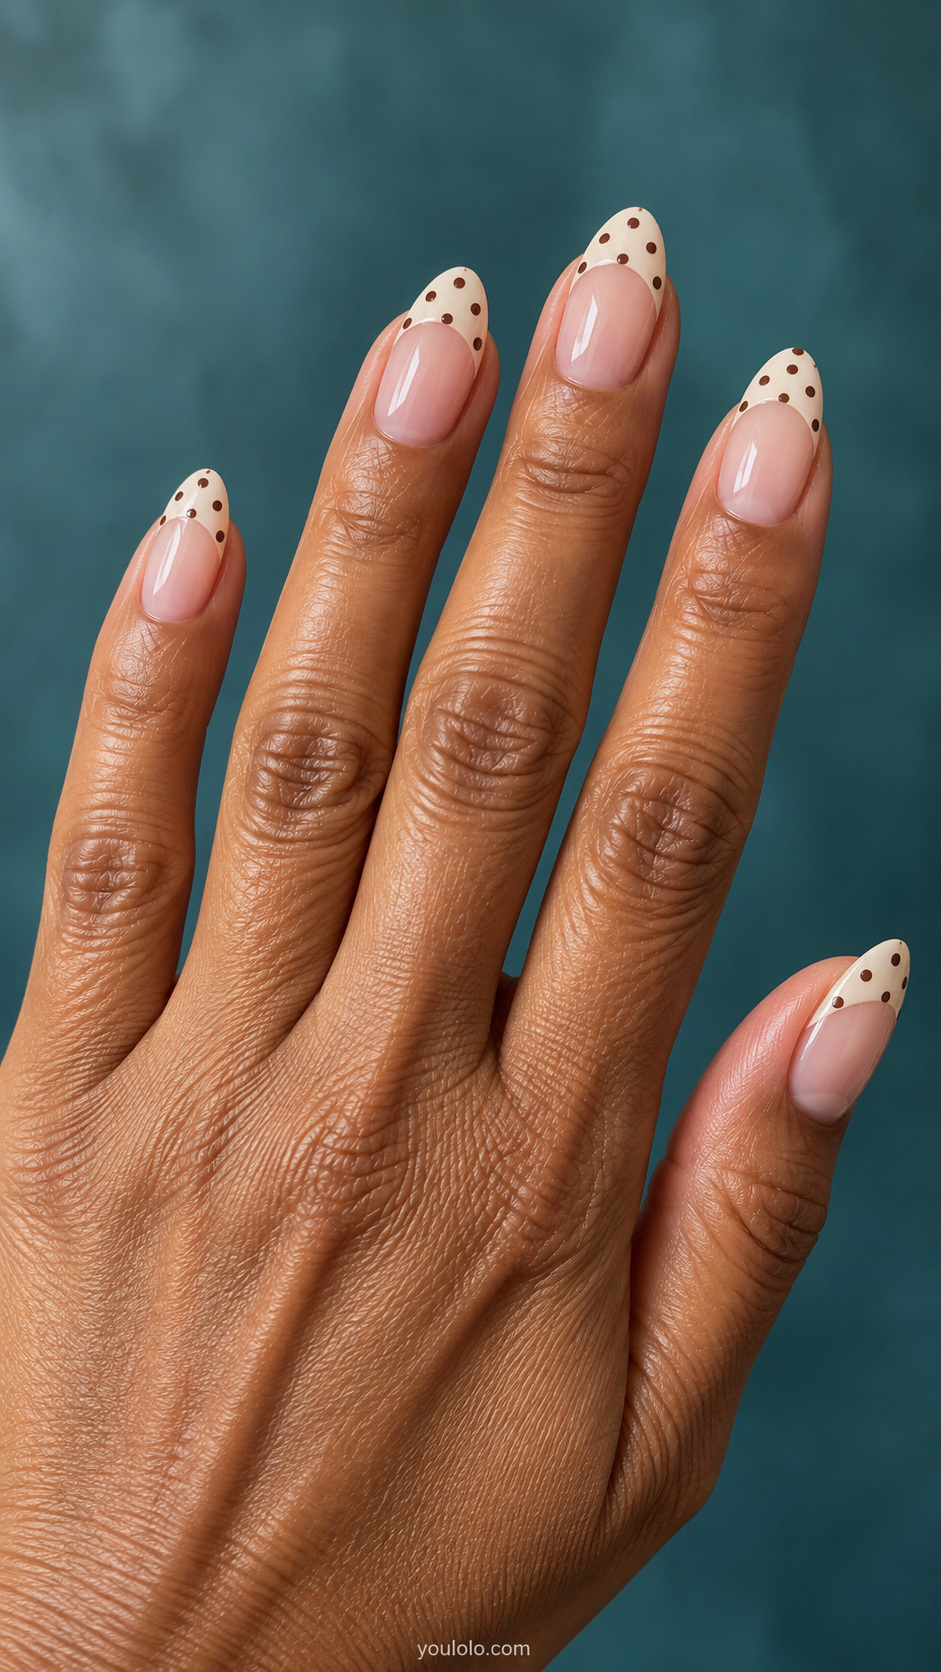
Keep the main nail sheer and place the dots inside a cream French tip. Use fewer dots than you would on a full nail so the pattern remains recognizable. A broader tip offers more room, while a very narrow tip may suit a simple row of dots instead.
5. One tortoiseshell accent among dotted nails

Add one amber tortoiseshell nail to a mostly cream-and-brown dotted set. Give the amber pattern irregular dark patches rather than repeating the round dot shape. That difference is what makes the two patterns interesting together. Keep the remaining nails consistent so the accent does not get lost.
6. Reversed cream dots on chocolate
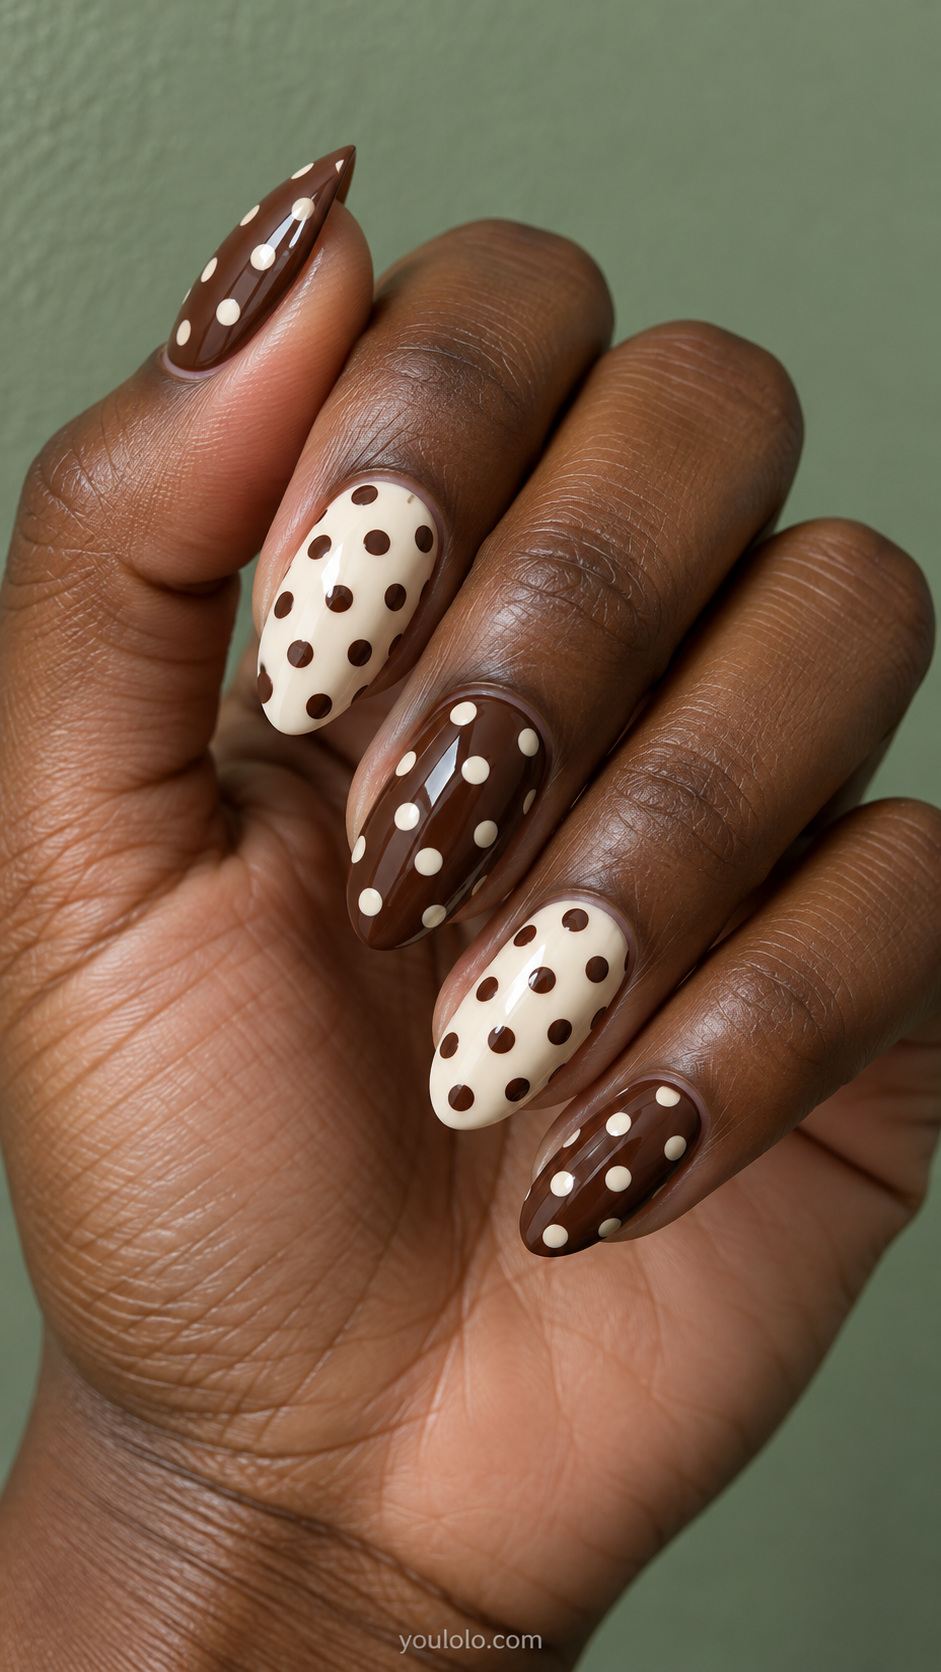
Switch the colors on one or two nails: a chocolate background with cream dots, beside cream nails with brown dots. Repeating the same dot size helps the reversed pattern feel connected. This is a bolder option that does not require a third color or extra embellishment.
7. A dotted half-nail design
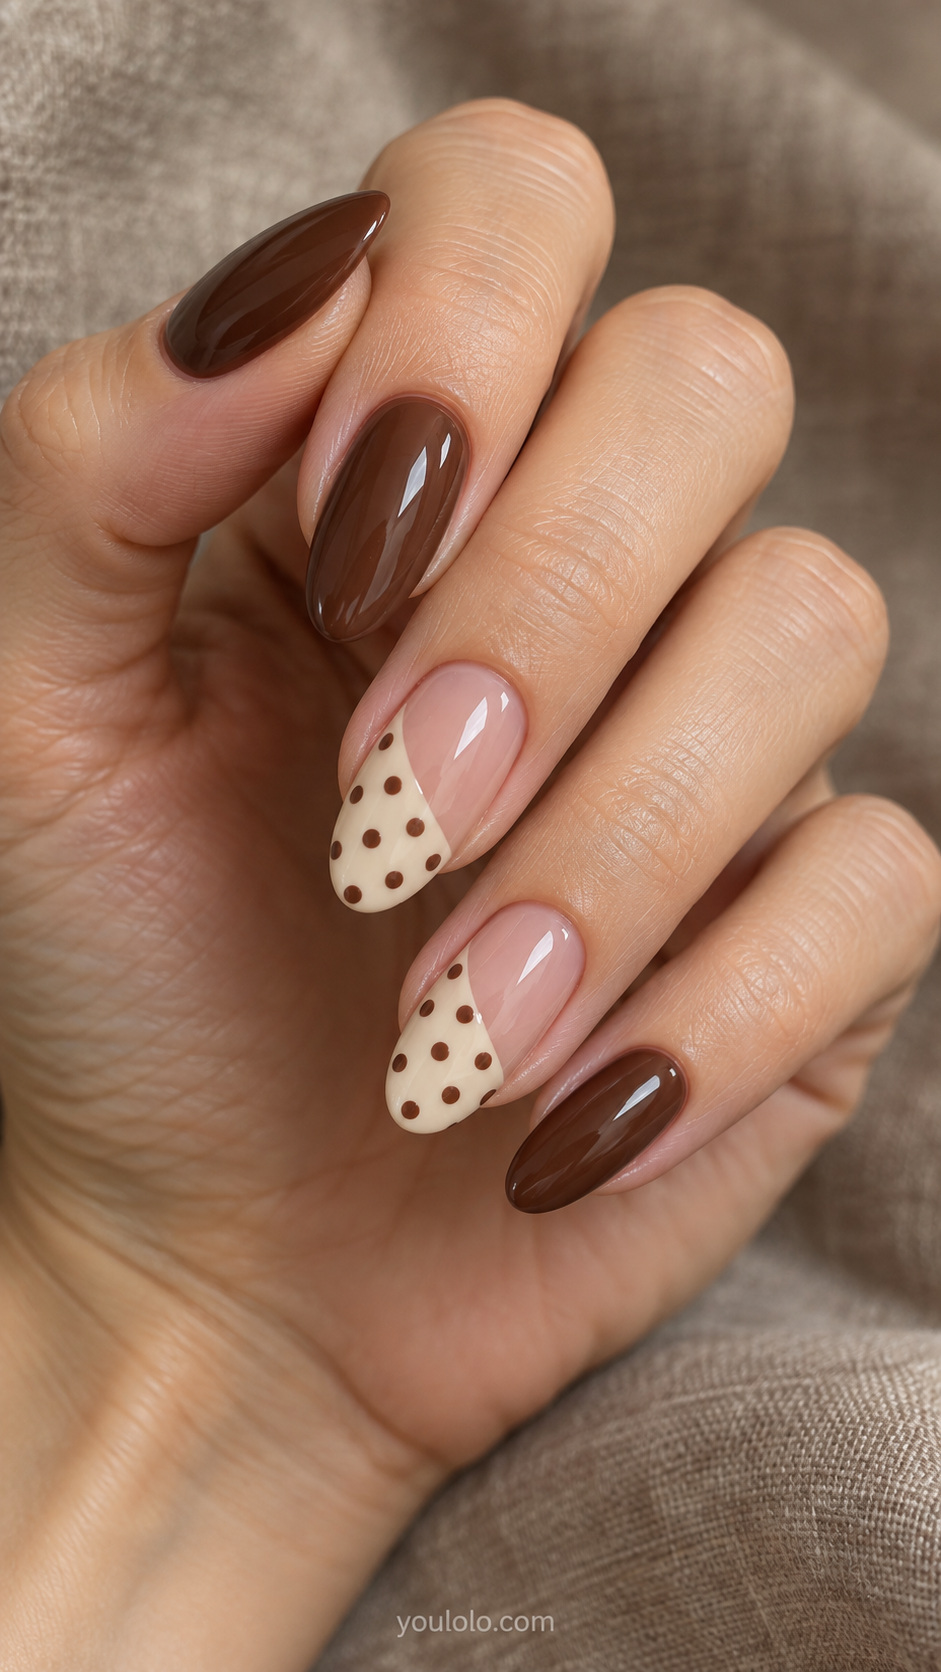
Divide an accent nail into a cream patterned section and a sheer section, using a simple curve or diagonal boundary. Keep the brown dots inside the cream area. The open space makes the design feel different from an all-over print, especially when paired with solid chocolate nails.
8. A five-design autumn mix
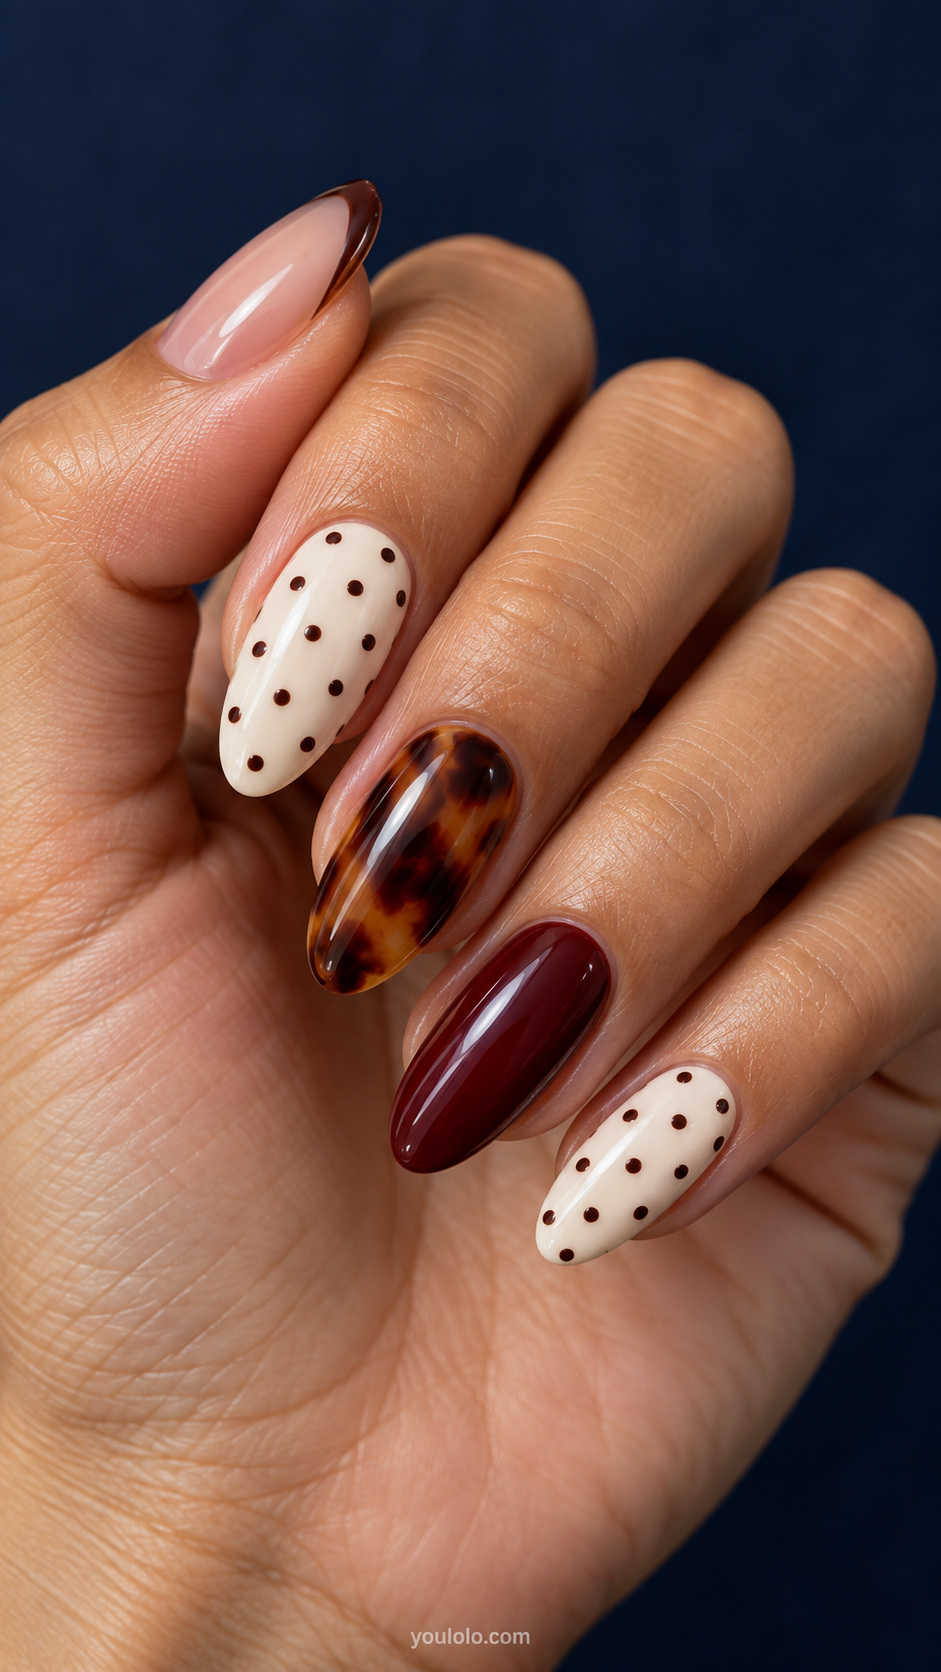
Use one solid burgundy nail, one tortoiseshell nail, two cream nails with brown dots, and one sheer nude nail with a narrow dark tip. The repeated cream and brown connect the different elements. Make the dotted nails the clearest repeated motif so the set still has a recognizable main idea.
9. A single row of brown dots
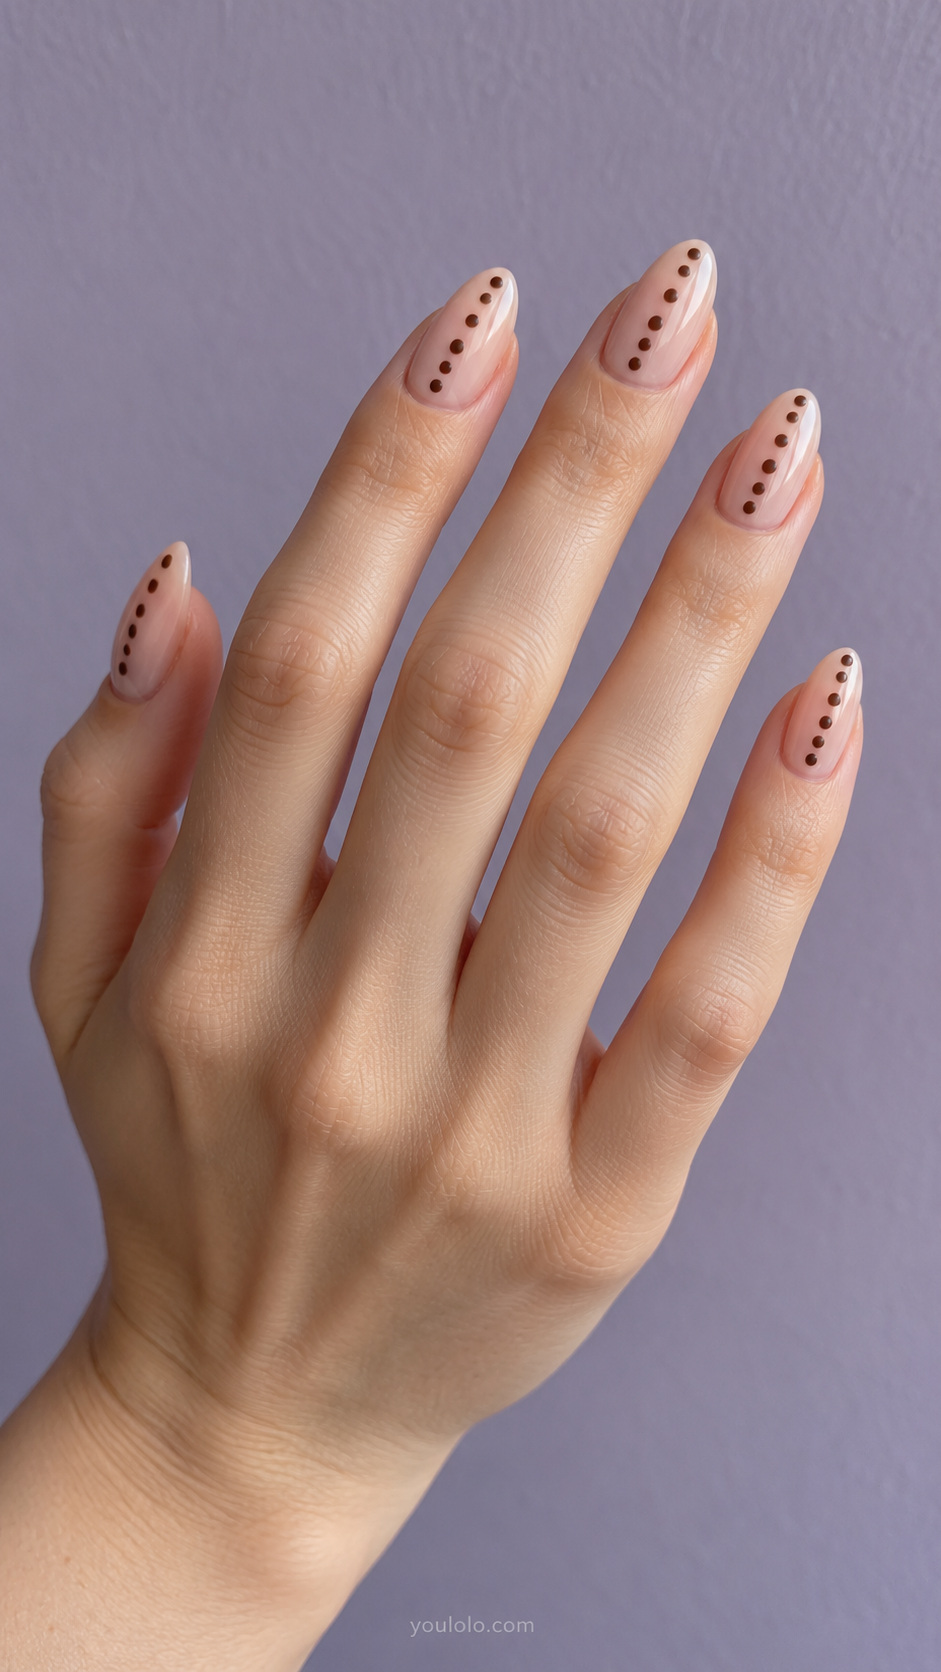
Set one straight row of chocolate dots down the center of a sheer nude nail. Keep the dots similar in size with regular spaces between them. This uses the polka-dot motif sparingly and offers a quieter alternative to covering the entire nail with a repeated pattern.
10. Brown dots along a curved French line
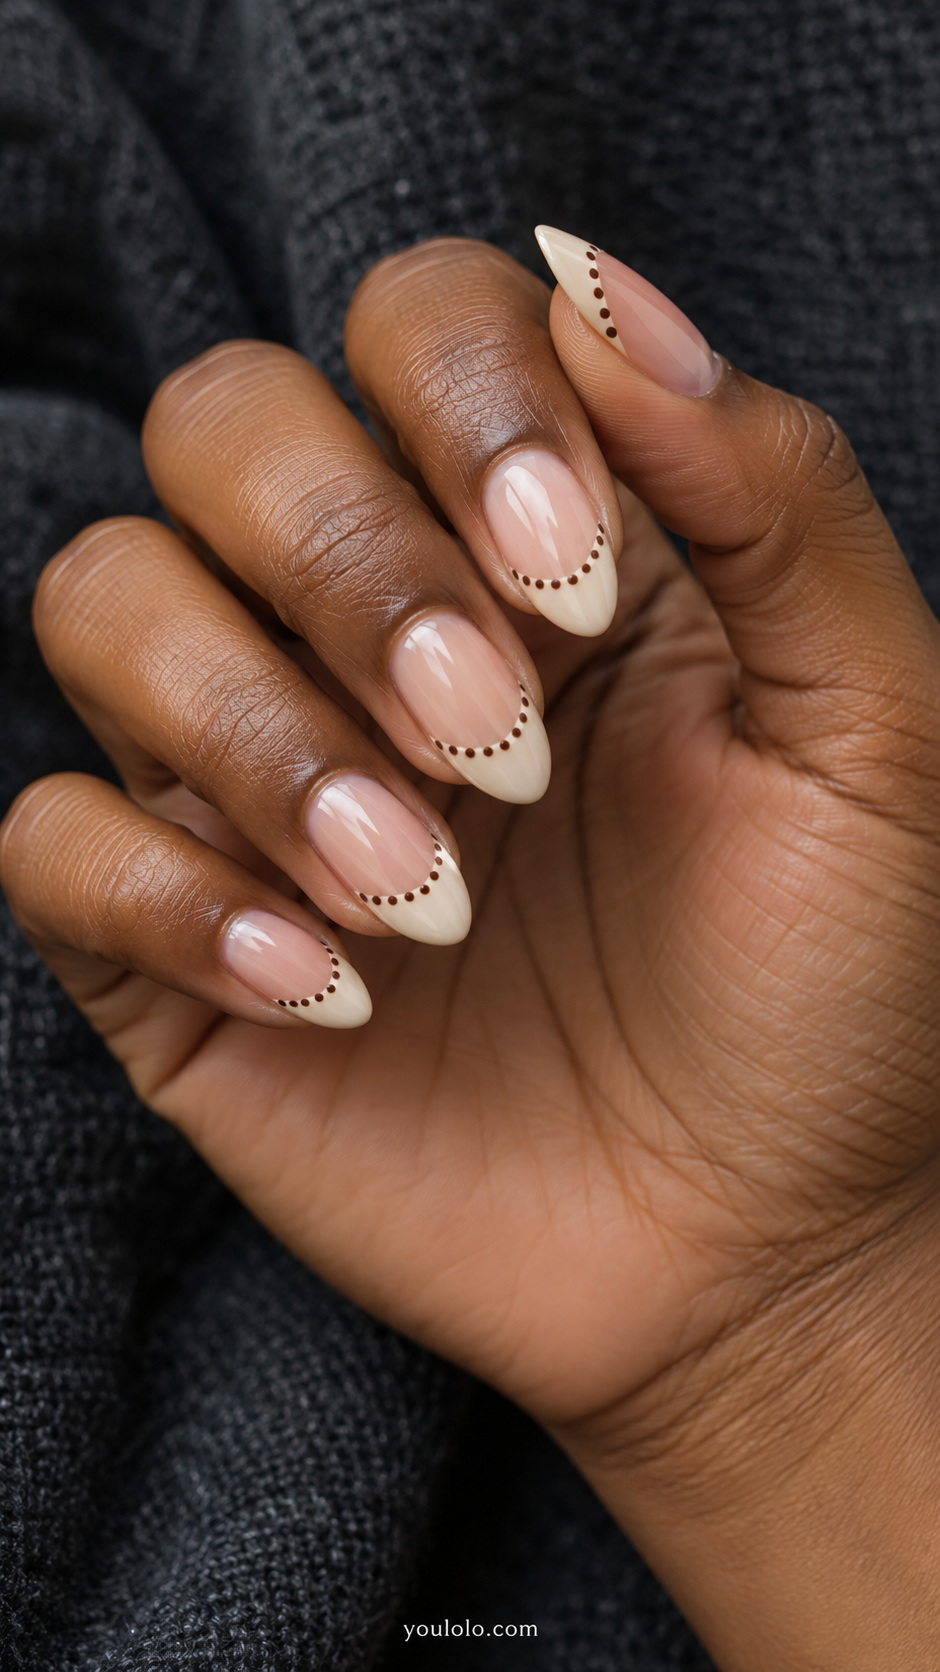
Follow the inner curve of a cream French tip with tiny chocolate dots, leaving the rest of the tip plain. The dots act as a decorative border rather than an all-over print. Use a broad enough curve that the individual marks stay distinct.
11. A large-dot accent on short cream nails
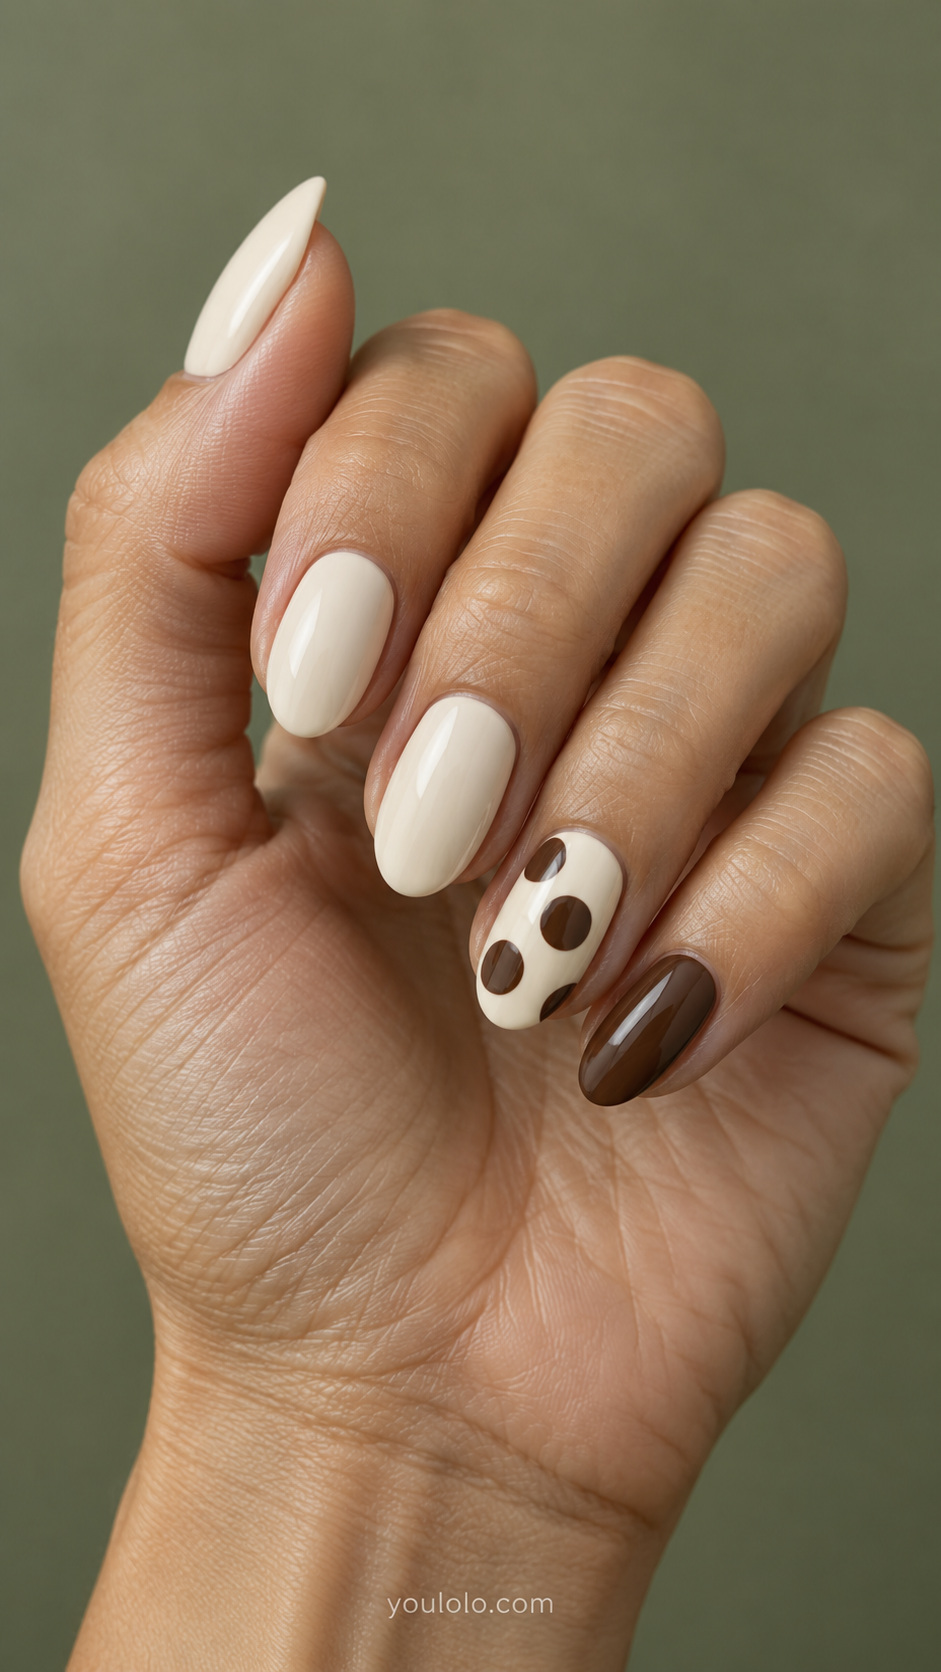
Make one short cream nail the focal point with three oversized brown dots. Keep the other nails solid cream or chocolate. The large scale changes the character of the print: it feels graphic and deliberate, with more emphasis on each circle than on a repeated texture.
12. Matte cocoa with glossy dots

Choose a matte cocoa background and add slightly darker glossy round dots. The contrast comes mainly from reflection, so this is a subtle design in diffuse light. Ask your artist to show the final combination before applying it across the hand; two finishes can look closer than expected.
13. Brown dots around a sheer heart
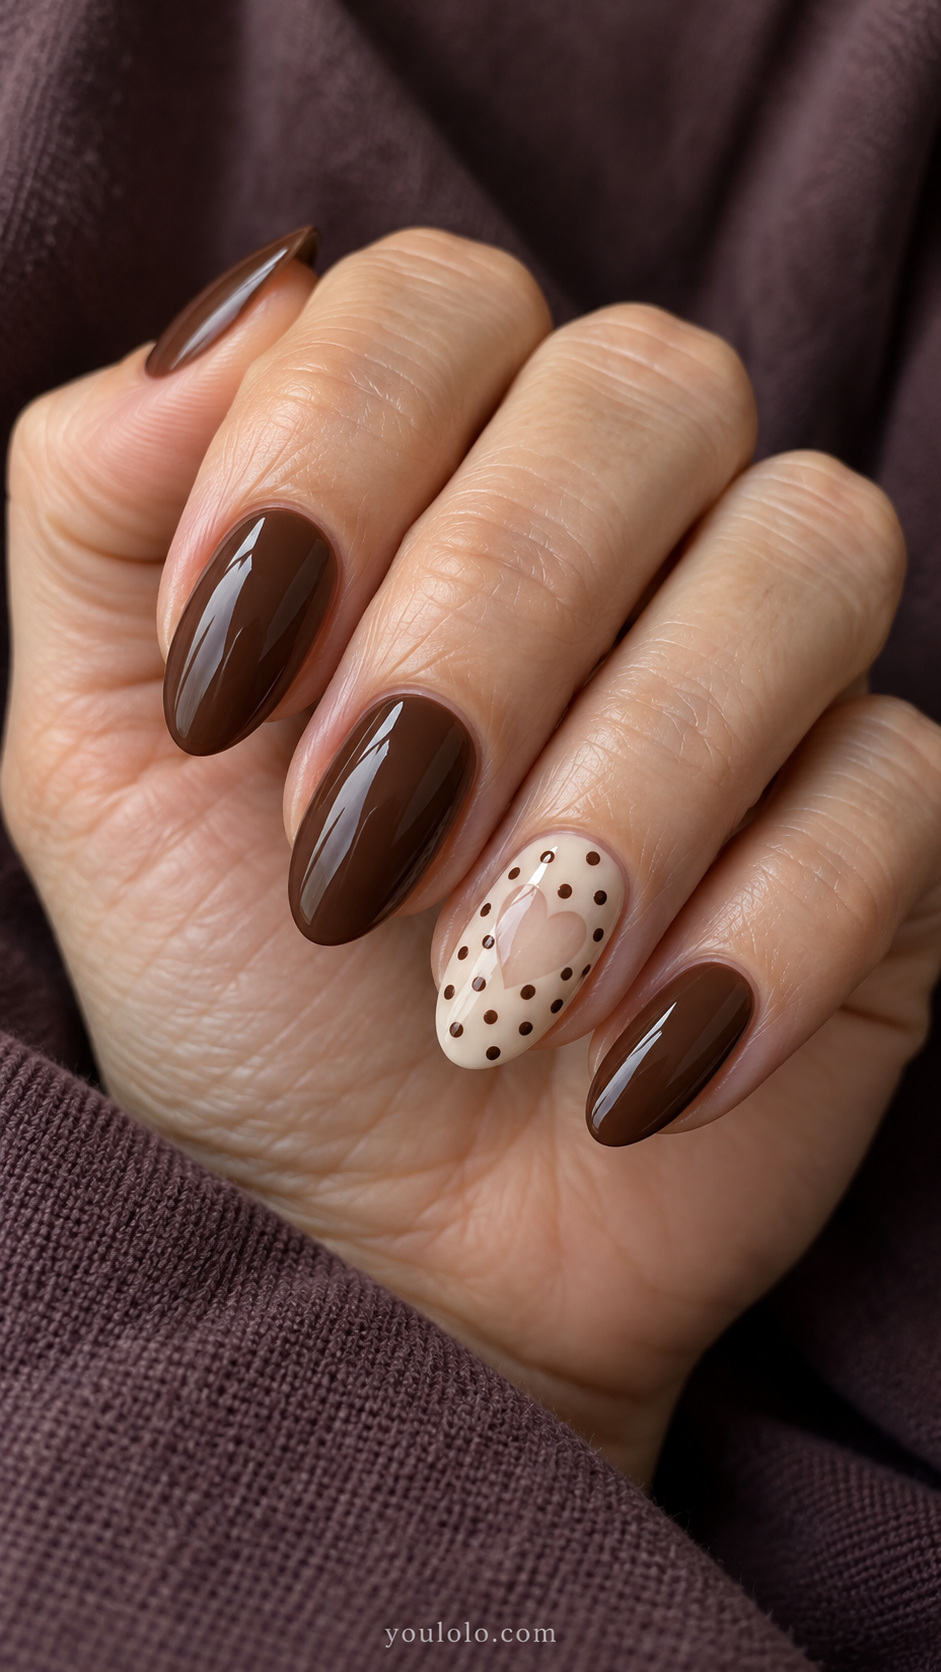
Leave a small heart-shaped clear area on a cream accent nail and arrange brown dots around it. Keep the dots outside the heart so the empty shape remains recognizable. Pair the accent with plain chocolate nails to make the heart window the main decorative detail.
14. Cream dots fading from the base
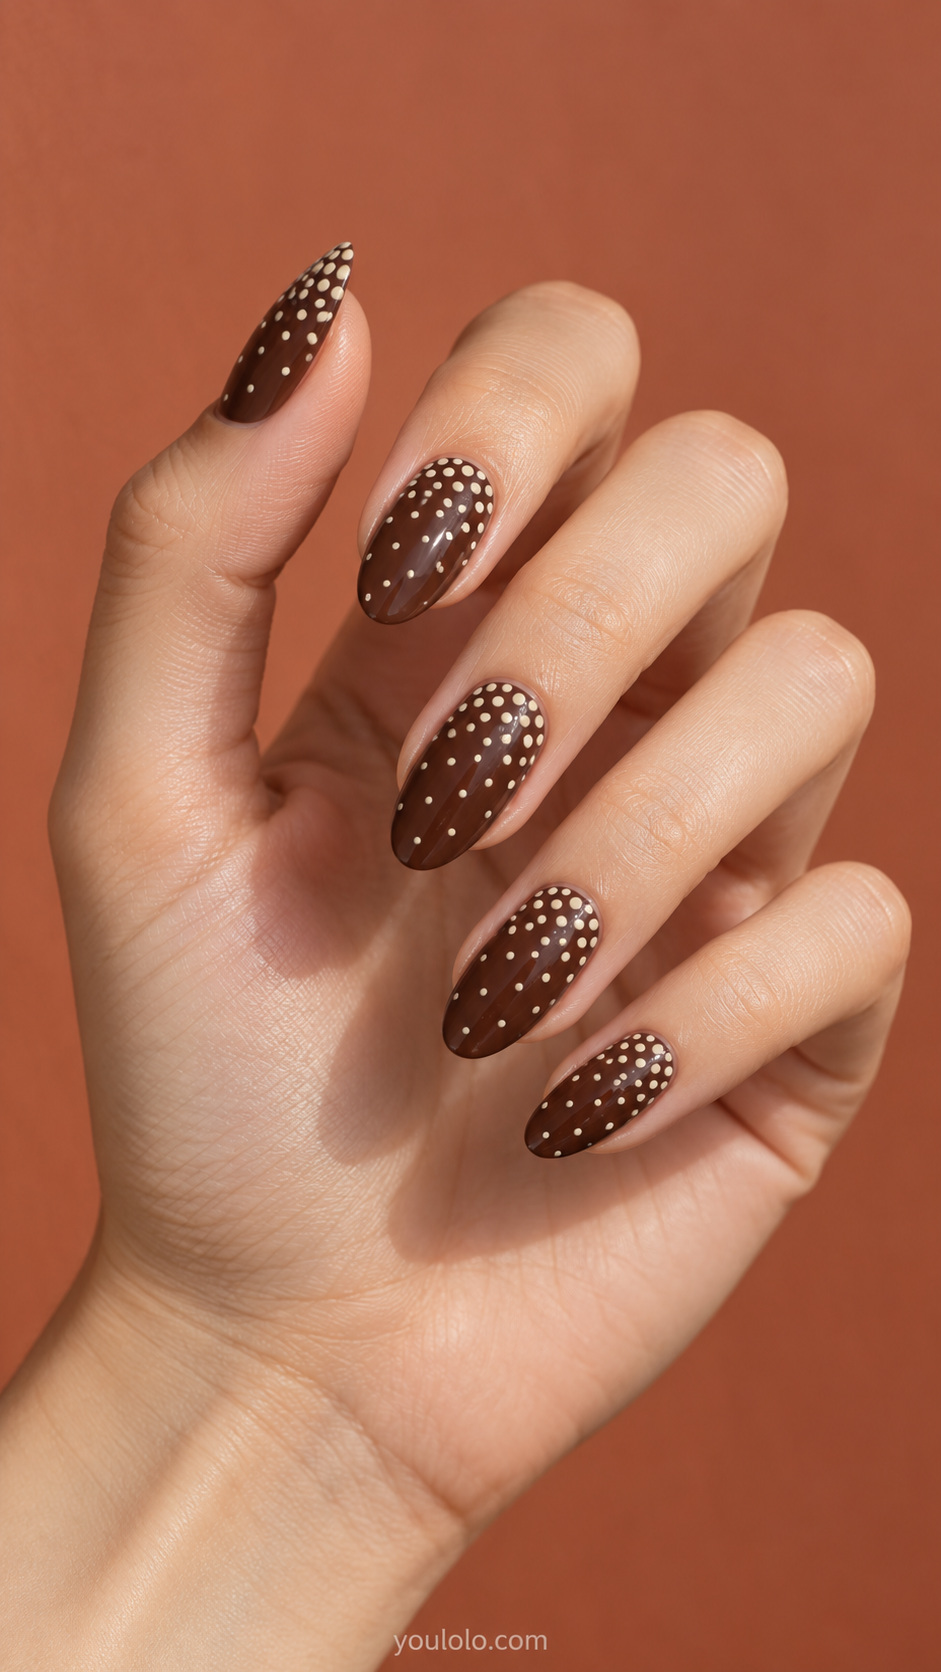
On a chocolate base, place a loose cluster of tiny cream dots near the base and fewer dots toward the tip. Keep every mark individually visible. The gradual change in spacing creates a dotted fade without blending the colors into an ombre.
15. Brown dotted half moons
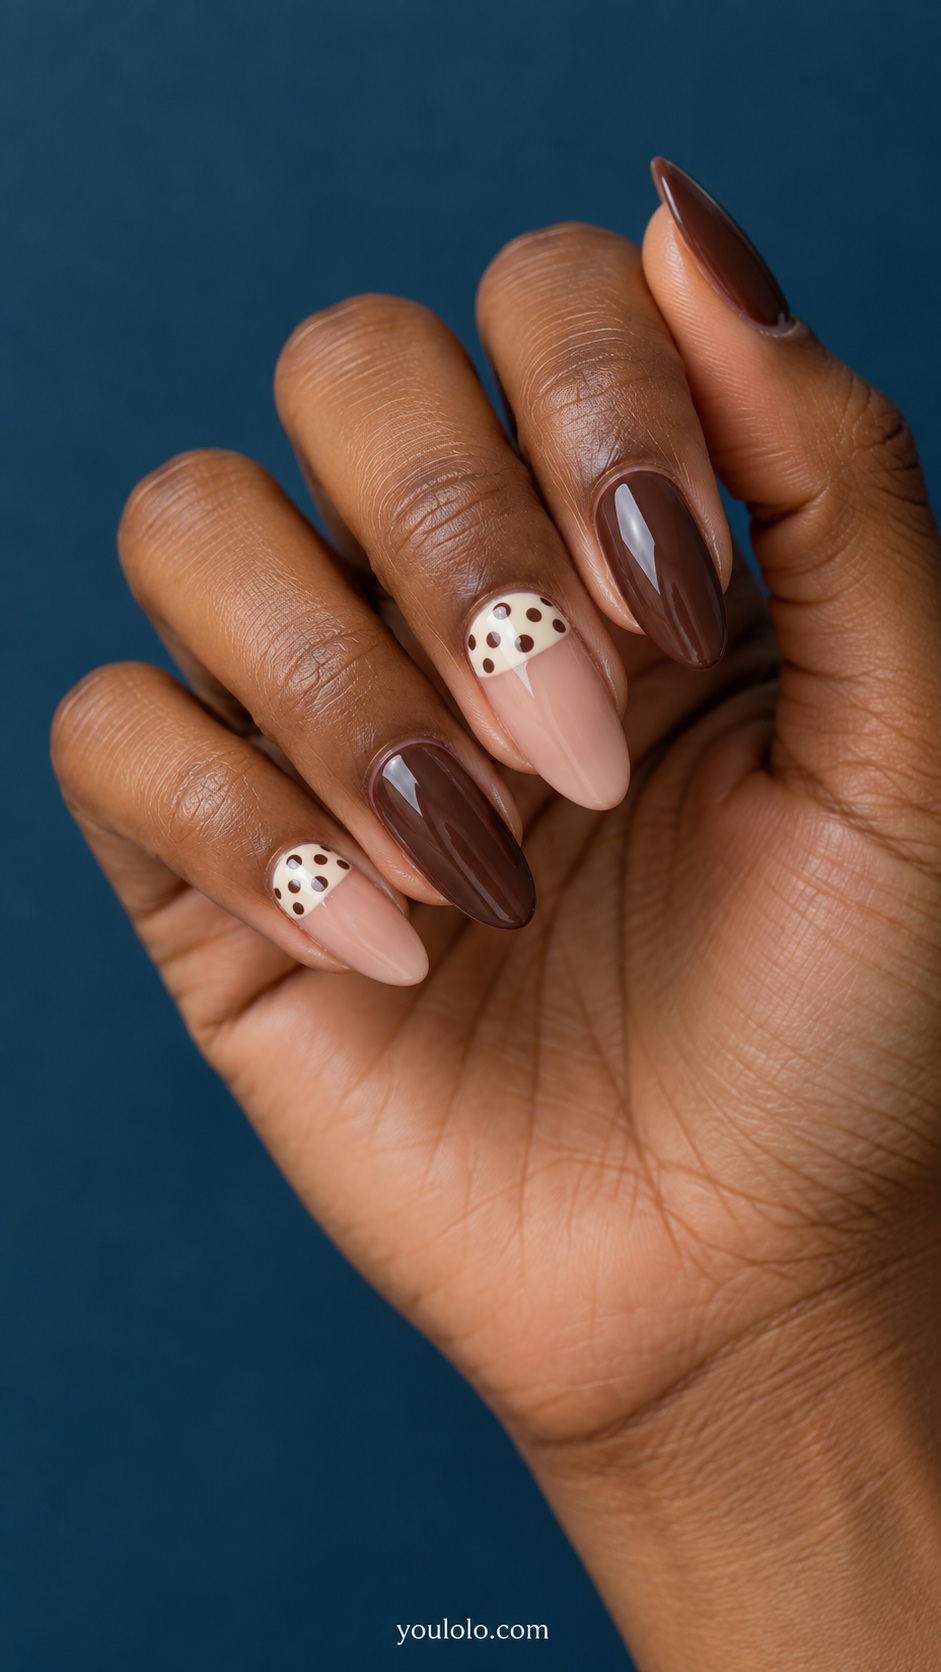
Place the cream-and-brown dot pattern inside a broad half moon near the base of one or two nails. Leave the rest of each nail sheer or solid chocolate. This shifts the pattern away from the tips, making it a different layout from dotted French nails.
16. Brown polka dots with a fine ivory bow

Paint a small flat ivory bow on one solid chocolate nail and keep two neighboring nails cream with brown dots. Leave the remaining nails plain. Putting the bow on a separate surface preserves the round dot pattern instead of layering several motifs into the same space.
17. Double-outline dotted French tips

Use a cream tip with brown dots and add a very thin chocolate line along the inner French curve. Leave a narrow cream gap between the line and the nearest dots. The boundary gives the tip definition while the dots keep the design playful.
18. Brown dots on soft pink
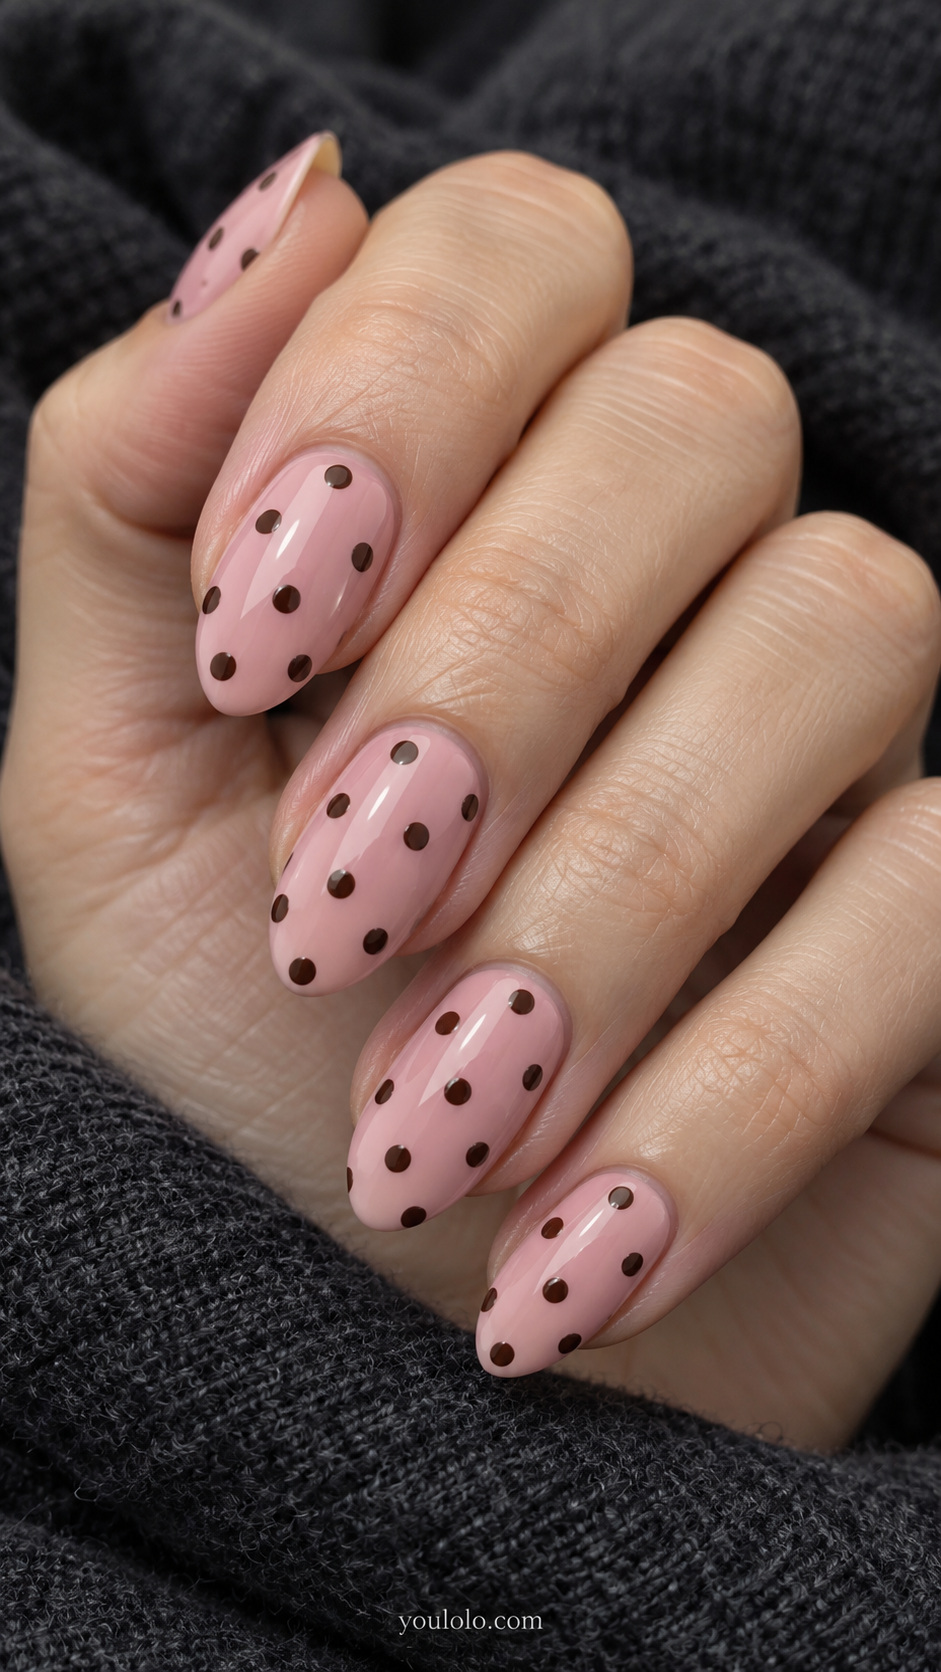
Switch the background to a gentle opaque pink and keep the dots chocolate brown. Use the same background on all nails for a coherent set. This changes the color relationship without adding more decoration; a dusty pink creates a quieter contrast than a bright candy shade.
19. Mocha dots on a pale blue base
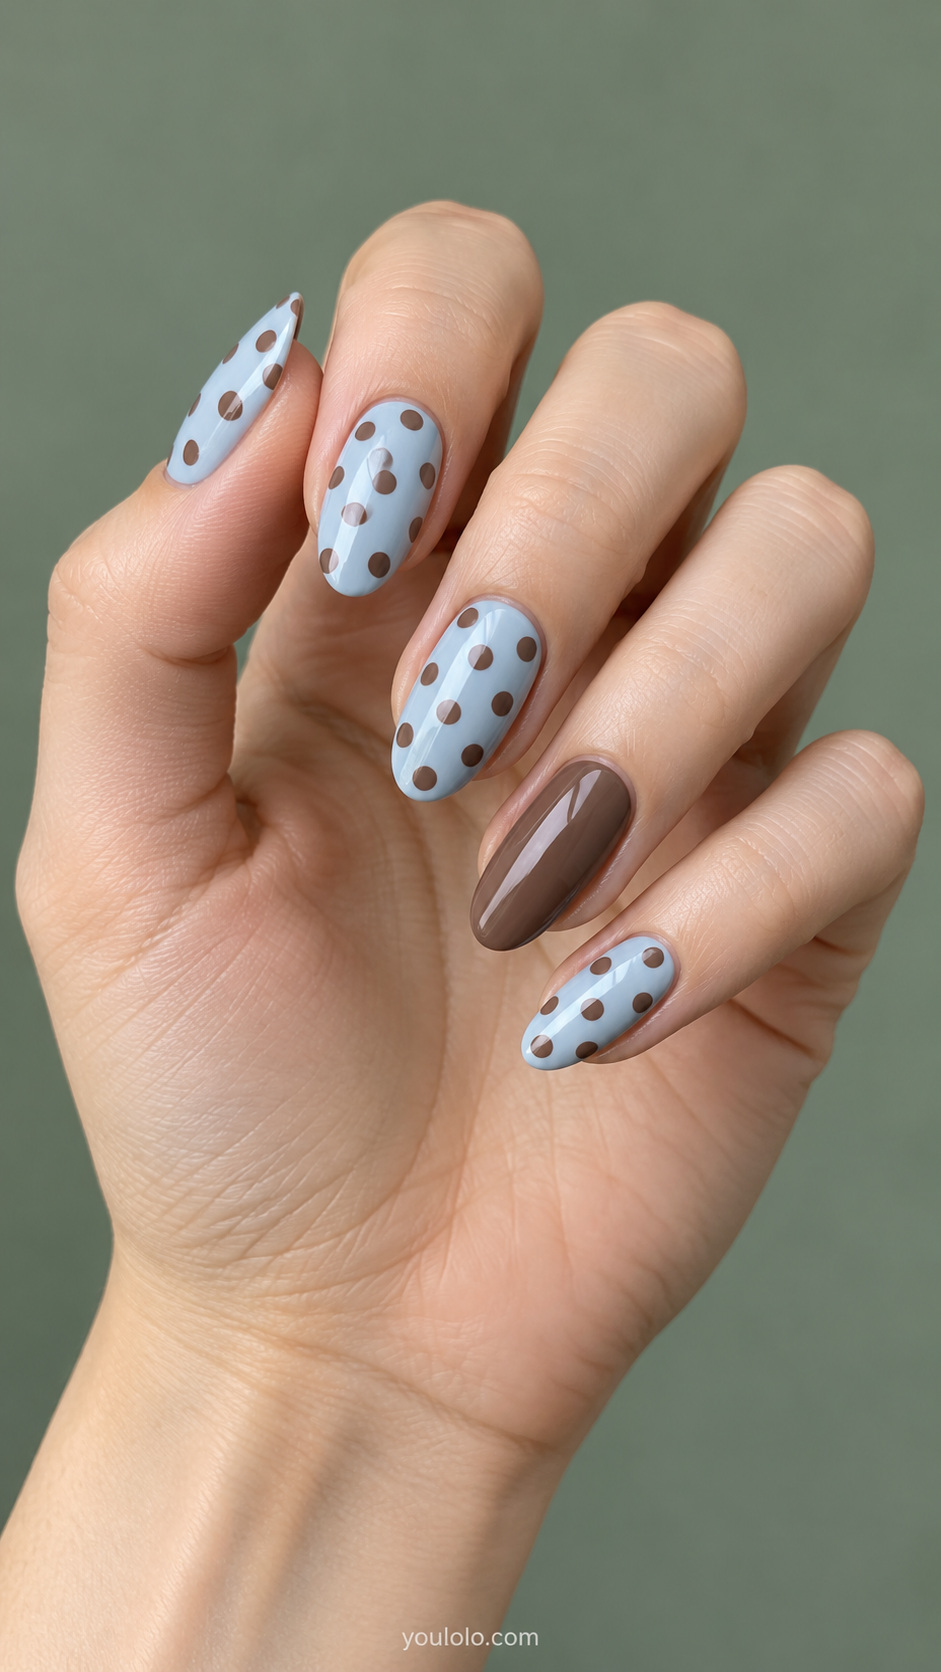
Pair a muted pale-blue background with warm mocha dots, using one solid mocha accent nail. Keep the blue soft and the dots clearly brown rather than black. The cool background changes the mood while preserving the simple repeated-circle pattern.
20. A dotted border around cream centers
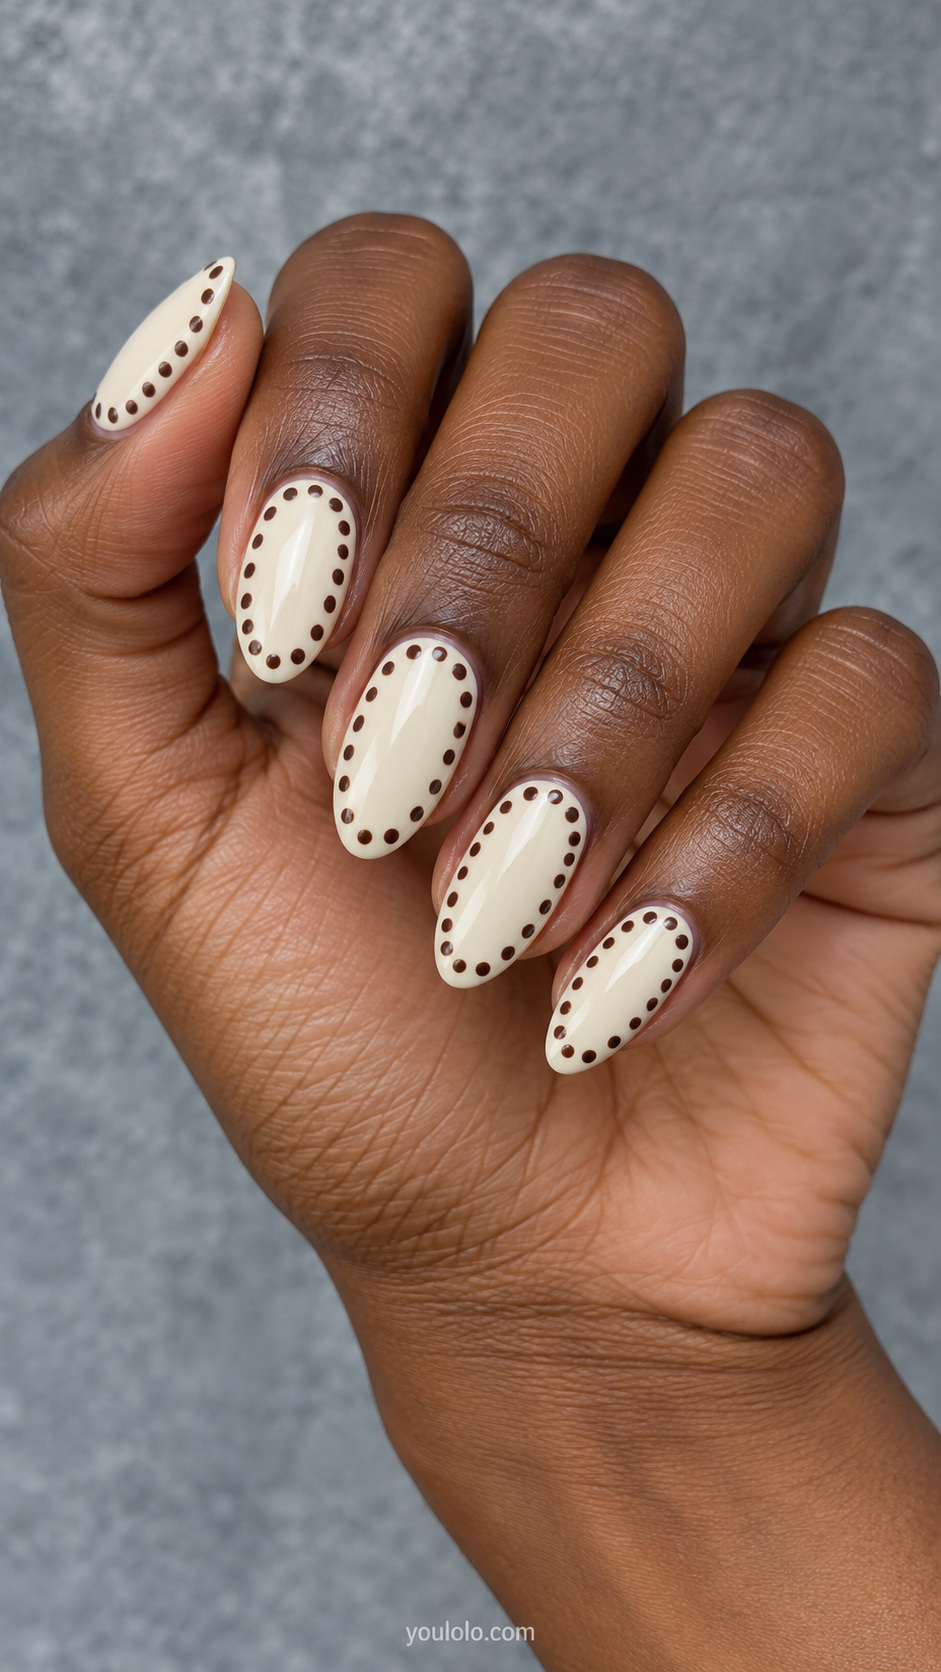
Arrange small chocolate dots around the outer perimeter of a cream nail, leaving the center empty. Keep the dots comfortably within the painted surface rather than crowding the skin. The frame effect is the main idea, so avoid adding a second motif in the open center.
21. Paired brown dots on sheer nails
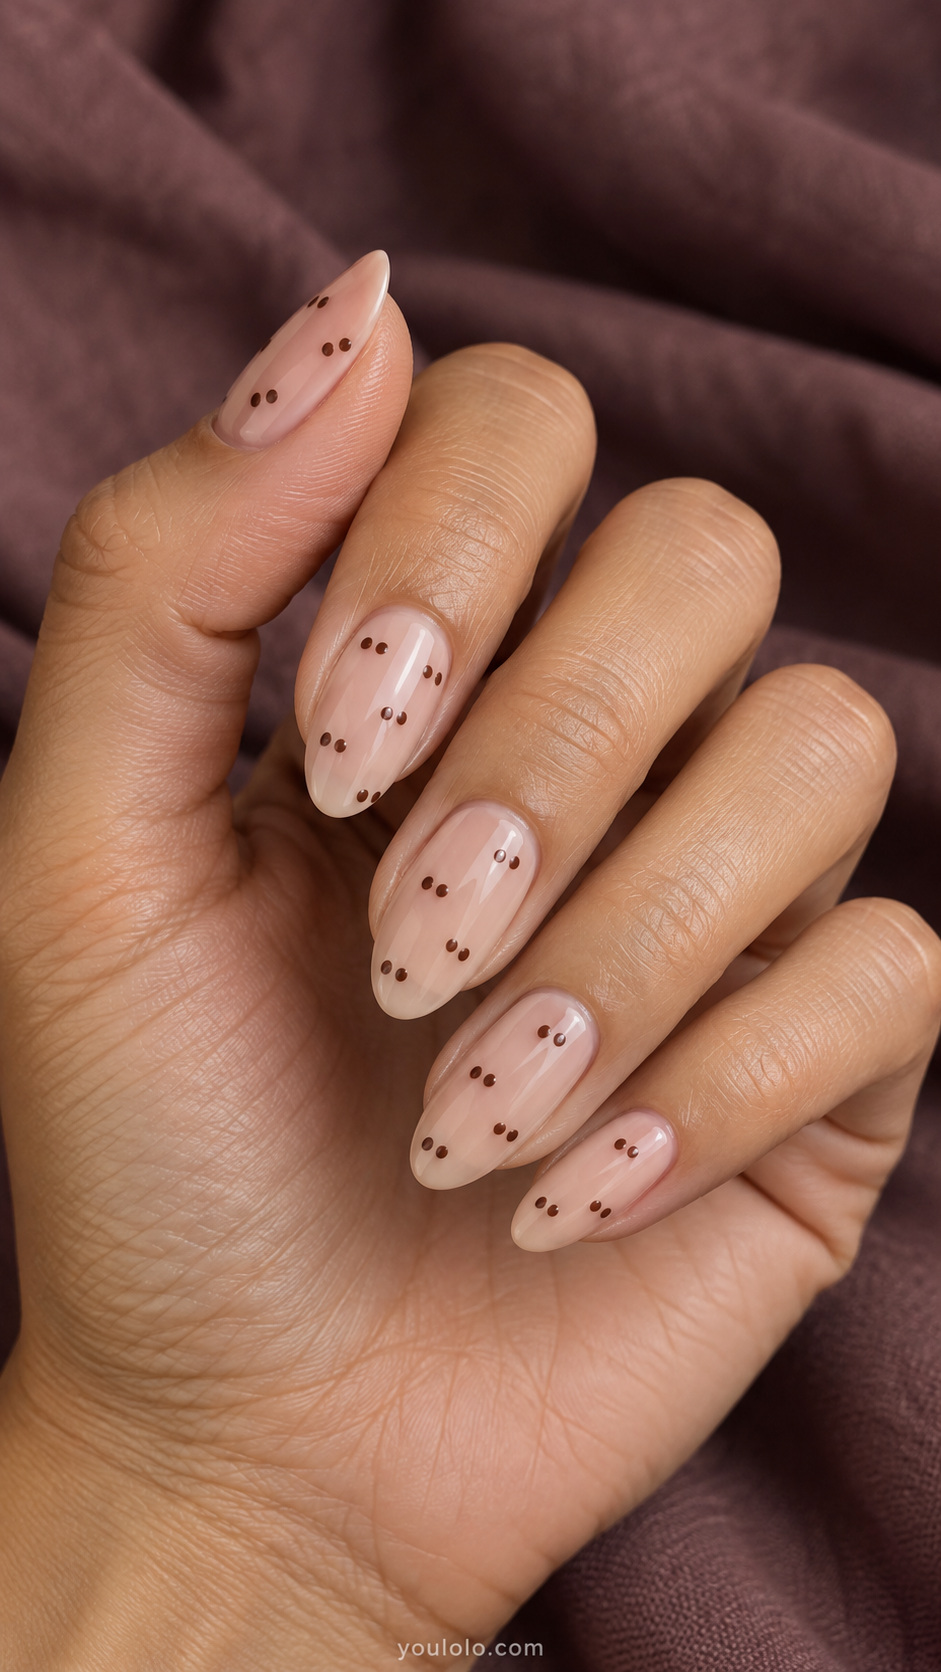
Place small pairs of brown dots at intervals across a sheer nude background. Maintain a narrow gap inside each pair and a wider gap between pairs. This grouping gives an ordinary dot pattern a different rhythm without making the circles larger or introducing another color.
22. Dotted cream tips with chocolate half moons
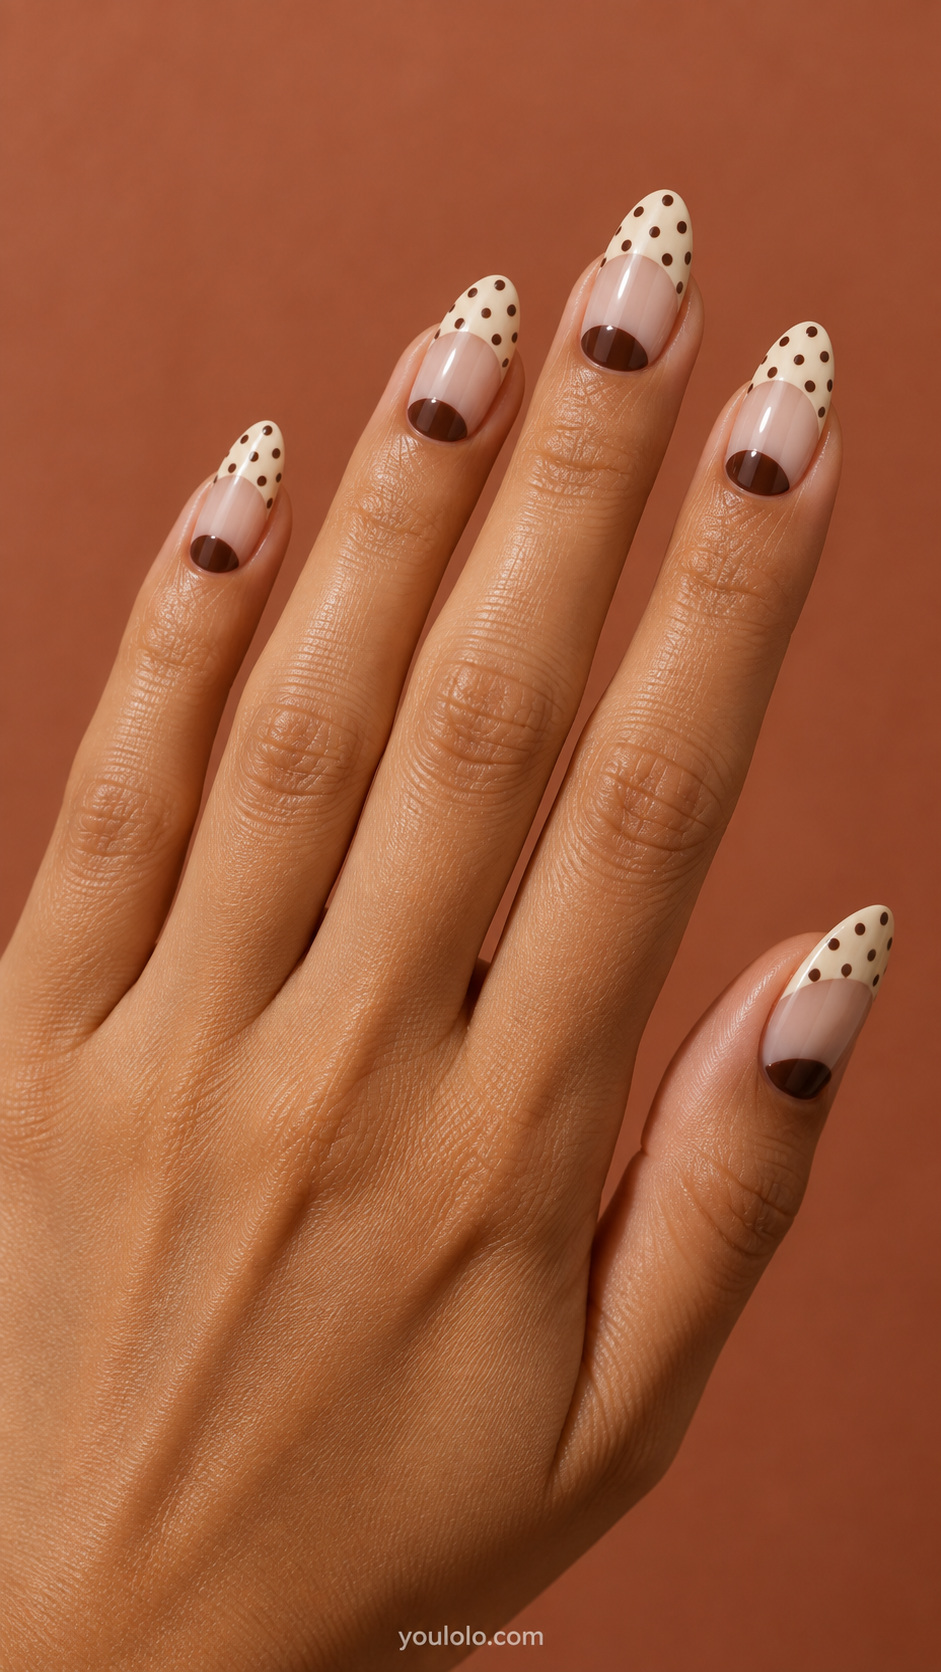
Combine a cream French tip covered in brown dots with a small solid chocolate half moon at the base. Leave a sheer section between them. The unpainted-looking middle keeps the two decorated areas separate and prevents the nail from becoming one dense brown-and-cream surface.
23. A brown dot gradient by size
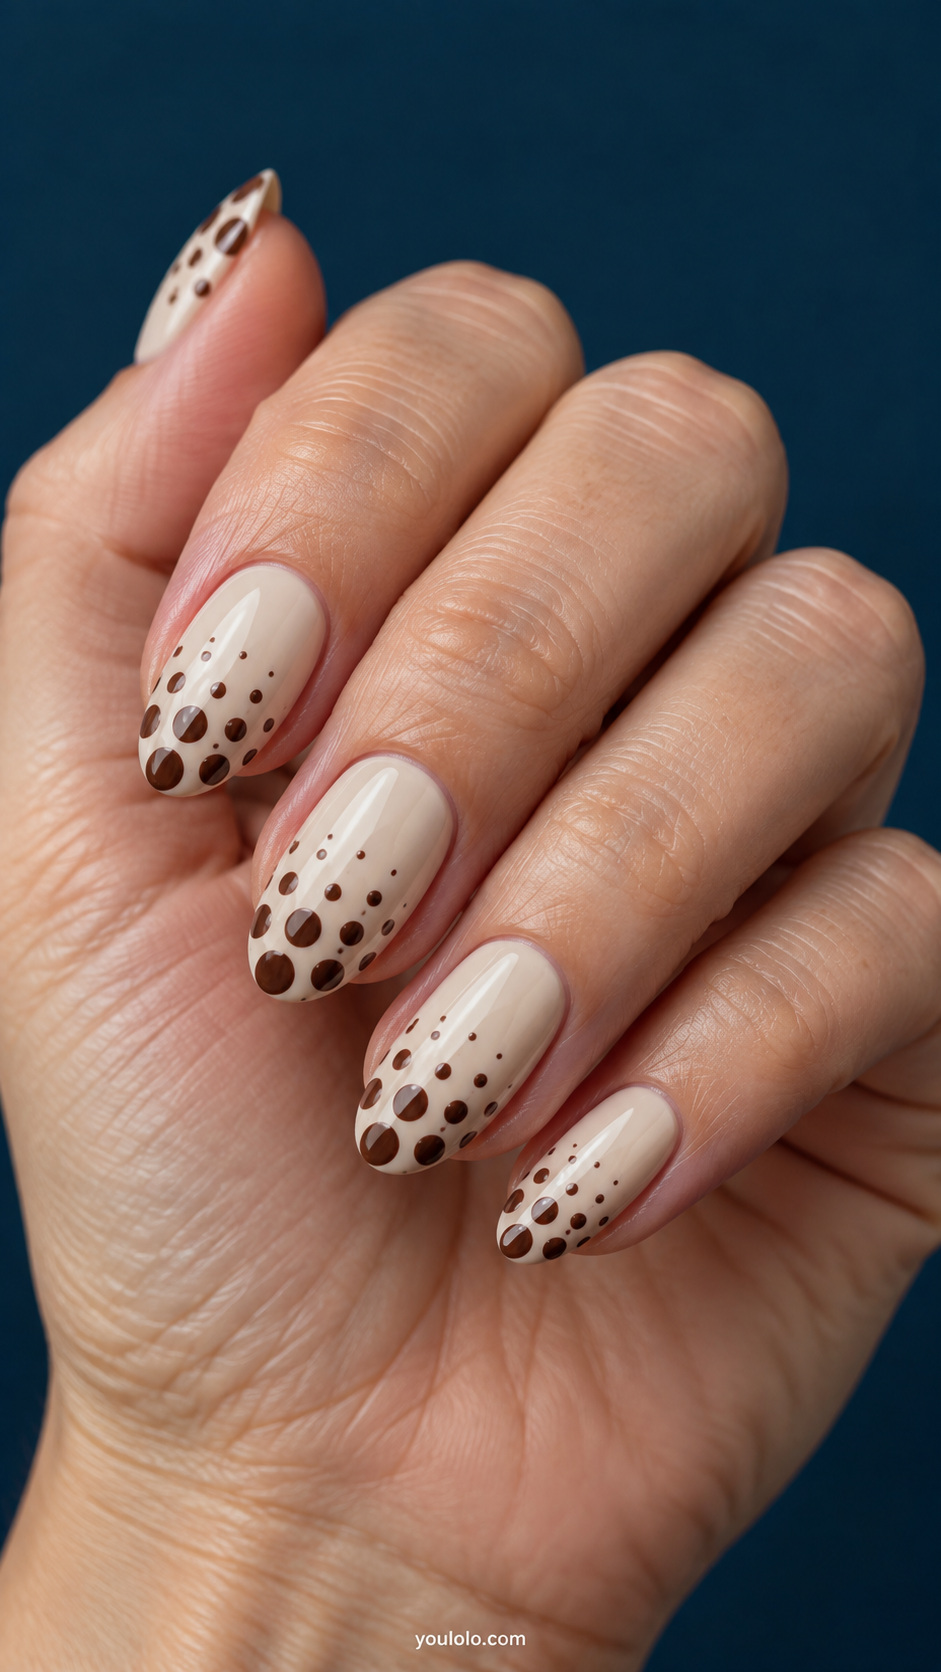
Arrange a few larger chocolate dots near the tip of a cream nail, then use progressively smaller dots toward the base. Keep the spacing open and avoid letting the circles merge. The change in size creates the effect; extra glitter or an additional print would distract from it.
24. Polka dots beside fine brown pinstripes

Alternate cream nails with small brown dots and cream nails with fine brown vertical stripes. Use the same brown for both motifs and leave one nail solid chocolate. Matching the palette allows the patterns to differ without making the set look disconnected.
25. Dotted ivory with olive-green accents
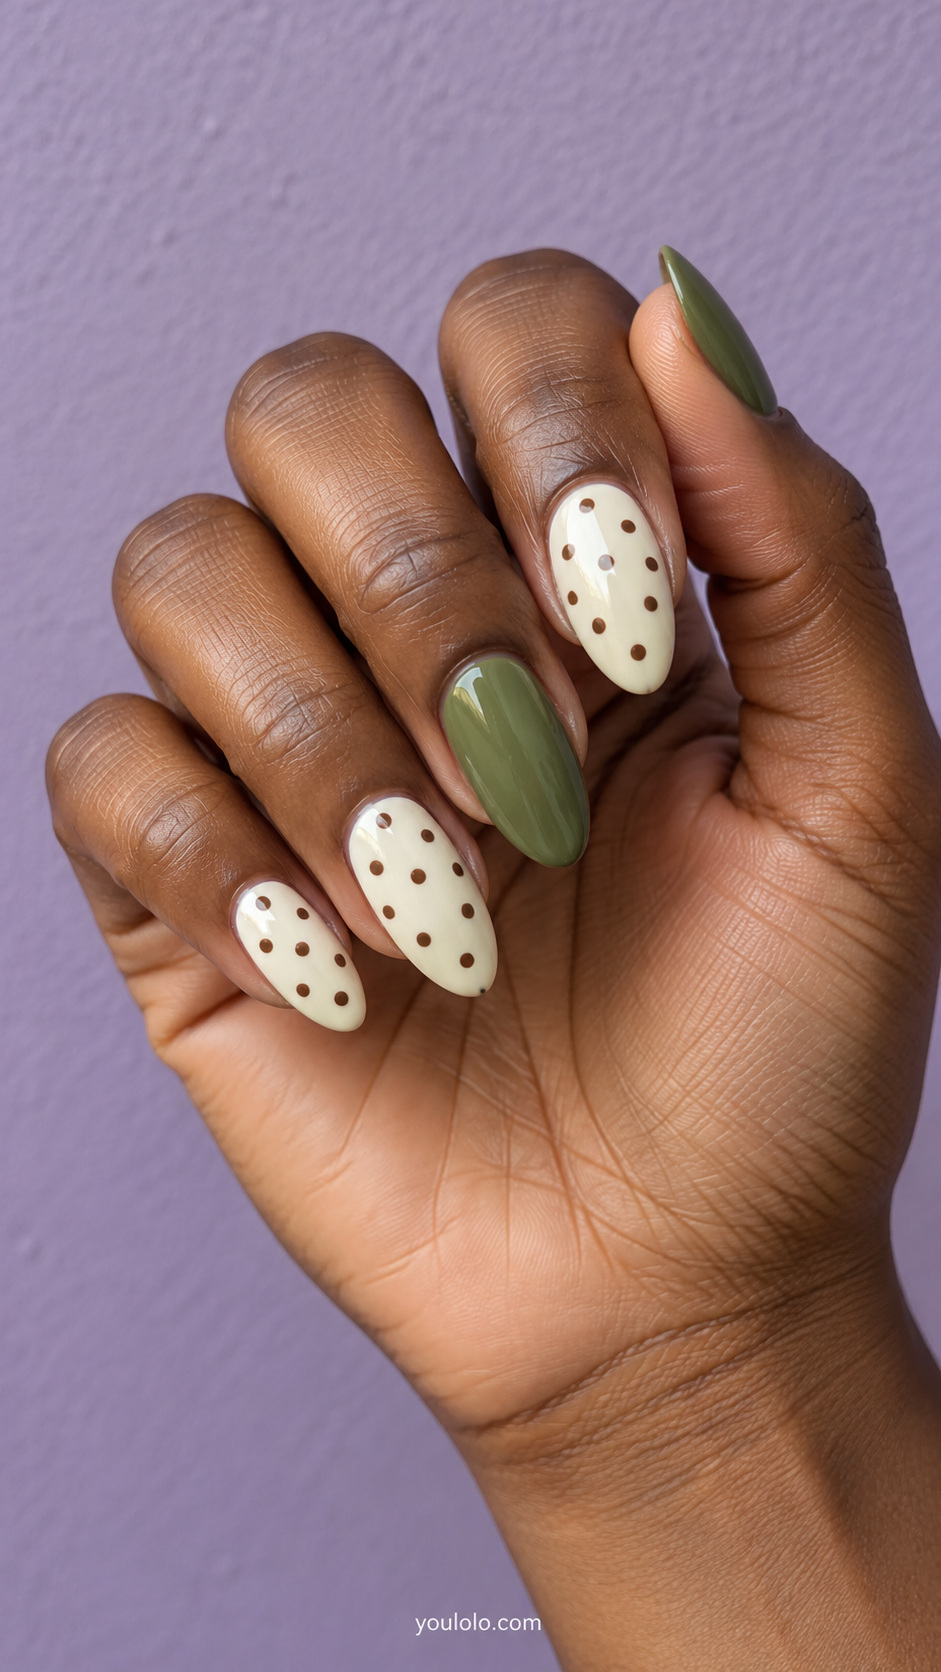
Choose three ivory nails with brown dots and two solid muted olive nails. The olive becomes a clear accent while the repeated brown dots remain the main pattern. A muted green keeps the colors grounded; a bright lime would create a much sharper contrast.
26. Brown dots with a single gold crescent

Add a narrow gold crescent near the base of one cream-and-brown dotted accent nail. Keep the remaining dotted nails free of metal. Use a small, flat painted or foil detail so the crescent acts as a quiet highlight rather than hiding several dots.
27. An asymmetric dotted corner
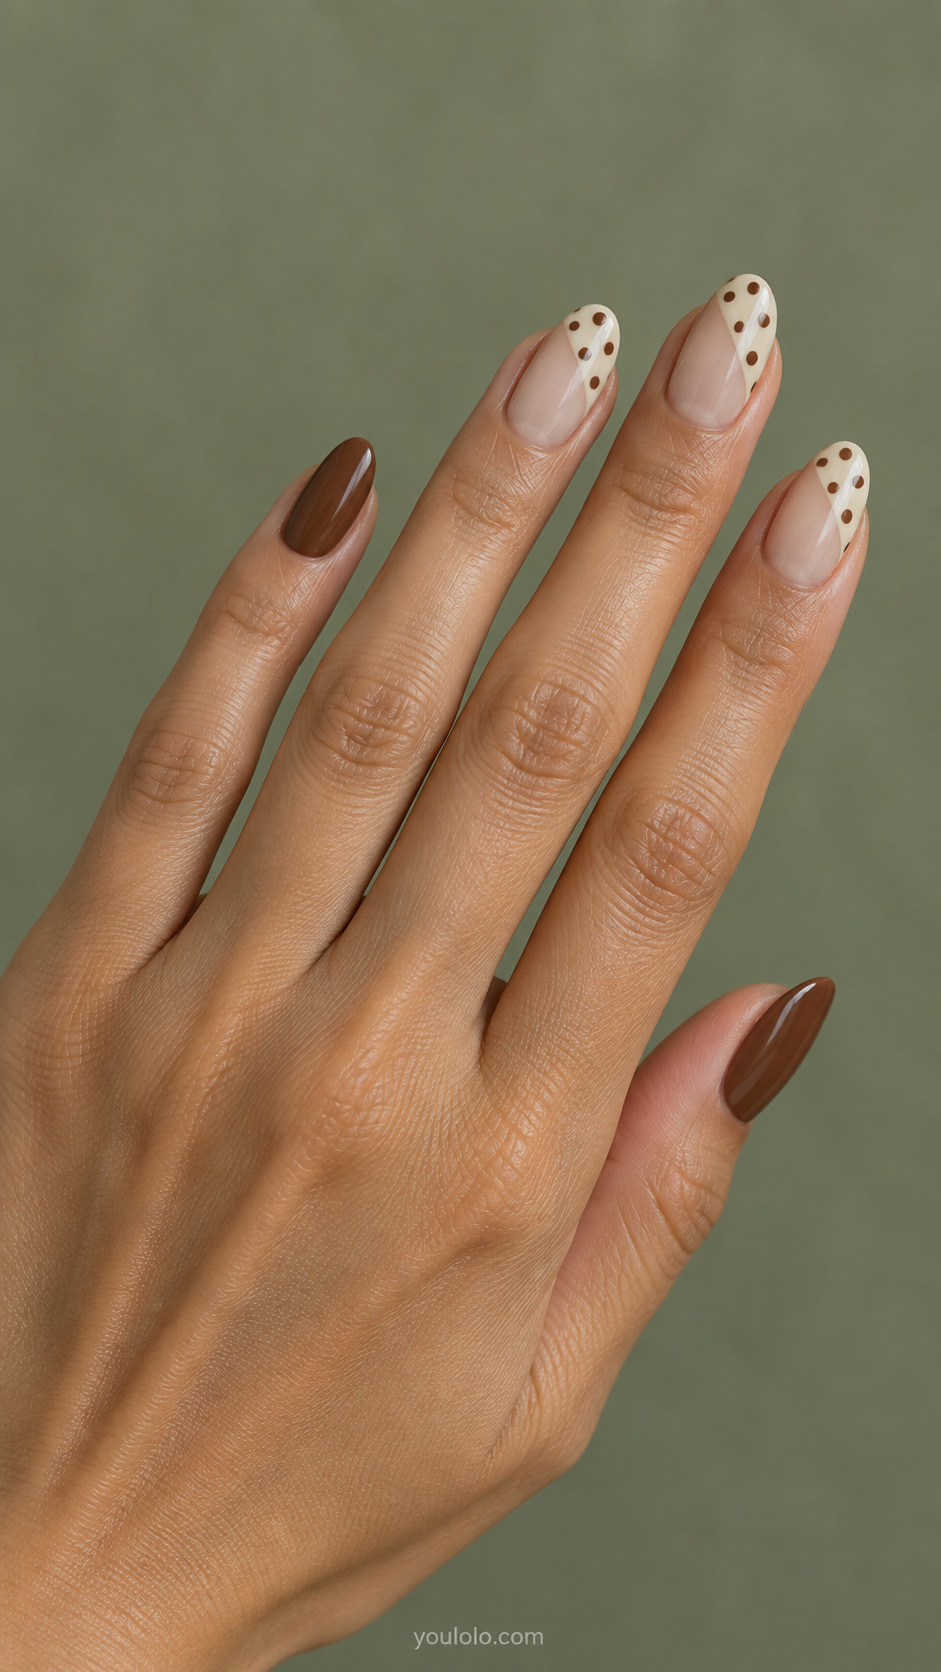
Cover one diagonal corner of a sheer nail with cream and add brown dots only inside that section. Leave the rest of the nail clear-looking and pair the accent with solid chocolate. Unlike a full half-nail split, this small corner creates a restrained, off-center detail.
Polka dots, leopard spots, and tortoiseshell are not interchangeable
A polka dot is a discrete round mark repeated across a background. Leopard nail art generally uses irregular spots or rosette-like shapes. Tortoiseshell relies on mottled, layered-looking patches over an amber or brown background.
A mixed set may include more than one of these patterns, but the article title and salon brief should name what is actually present. For a manicure featuring round brown dots and amber mottling, “brown polka dots with tortoiseshell accents” is more precise than calling the entire look leopard print.
Make the layout work for your nail length
On short nails, simplify the dot count and use the whole surface for any tortoiseshell accent. On longer almonds, a French tip or divided pattern has more room to develop. You can keep the same cream-and-brown palette on an oval or rounded-square shape if that is your preference.
Ask your artist to show the planned dot size on one nail before repeating it. A small change in scale can shift the design from subtle to playful without changing the colors at all.
Choosing brown polka dot nails by scale and placement
The first choice for brown polka dot nails is the size of the dots. Tiny espresso marks leave more background visible; oversized circles make the pattern the main statement. Decide whether you want a delicate effect or a graphic one before adding another color.
Designs 9, 20, and 21 show three restrained arrangements: a single row, a border, and paired dots. Design 23 changes the dot size toward the tip. If you like the idea of dots but find an all-over pattern too busy, these layouts give you several ways to reduce the coverage.
Choose a background that shows the pattern clearly
Cream makes brown polka dot nails feel warm and gives the dots a clear outline. Soft pink creates a gentler variation, while pale blue changes the contrast more noticeably. A sheer base allows some of the natural nail to remain part of the design.
To mix patterns, give each one a separate role. Stripes can occupy one nail, dots another, and a solid color can connect them. Brown polka dot nails with tortoiseshell accents work best as a deliberate combination of two different motifs rather than a single indistinct print.
Make the reference easy to reproduce
Before your appointment, choose the background, dot color, approximate dot size, and accent placement. If both hands should match, say so. Otherwise, you can repeat the same color balance with different positions. Brown polka dot nails do not need mathematical symmetry, but a clear plan helps the set feel coordinated.
For a practical dot-layout reference, OPI’s Dotticure tutorial demonstrates a sequence of dots. Use the placement as a starting point and select colors that suit the version you saved.
If you would rather make amber mottling the main feature, compare our burgundy and tortoiseshell designs. Keep brown polka dot nails as the main pattern when you want clear repeated circles instead of irregular patches.
Brown polka dot nails: frequently asked questions
Are brown polka dots the same as animal print?
No. Brown is a color, not a pattern category. Regular round dots remain polka dots even when paired with a separate animal-inspired accent.
Can I leave out the burgundy?
Yes. Cream, chocolate, and sheer nude make a complete palette. Burgundy is an optional accent, not a requirement.
How do I keep a mixed set from looking crowded?
Repeat at least one motif, keep the palette limited, and leave a few nails solid or sheer. Decide which pattern should be noticed first, then use the others in smaller amounts.




[…] another cream-and-brown pattern, compare our brown dotted manicure ideas. Round dots give a more regular rhythm than tortoiseshell nails, so they work well on separate […]
[…] another direction, explore our brown polka dot manicure ideas and compare the amount of pattern before choosing your next […]
[…] 27 Brown Polka Dot Nails: Beautiful Designs to Save → […]