The Best Fluffy Pancakes recipe you will fall in love with. Full of tips and tricks to help you make the best pancakes.



Monochrome nails make small design decisions easy to see. A thin line, a curved edge or a patch of empty space can change the whole manicure when the palette is limited to black, white and a natural-looking base. That simplicity does not mean every set has to feel minimal: broad swirls, animal prints and dark marble can be just as expressive as colorful art.
These 26 looks explore different ways to use contrast. Some keep almost the entire nail nude, with only a tiny heart or a fine vertical line. Others give black and white equal space through checks, waves or split geometry. A few add depth through a soft gradient or a change from matte to gloss.
The collection also shows how to combine related accents without making the hand look random. Repeating the same base color or line weight can connect two different patterns. Plain companion nails provide a useful pause between detailed accents, especially when the artwork is small.
Use the close-ups to choose the kind of contrast you like before deciding on every finger. Each design includes a composition note and a practical adjustment to discuss with your artist. If you prefer short nails, reduce the number of lines or symbols while keeping their shape clear; that usually preserves the idea better than shrinking every detail.
Find your favorite direction
For the quietest looks, start with One Fine Black Line, Half-Moon Black Accents or a tiny heart. For stronger pattern, compare swirls, checkerboard and animal prints. For texture without extra color, look at marble, the soft black fade and matte tips with glossy accents.
1. Classic Black French
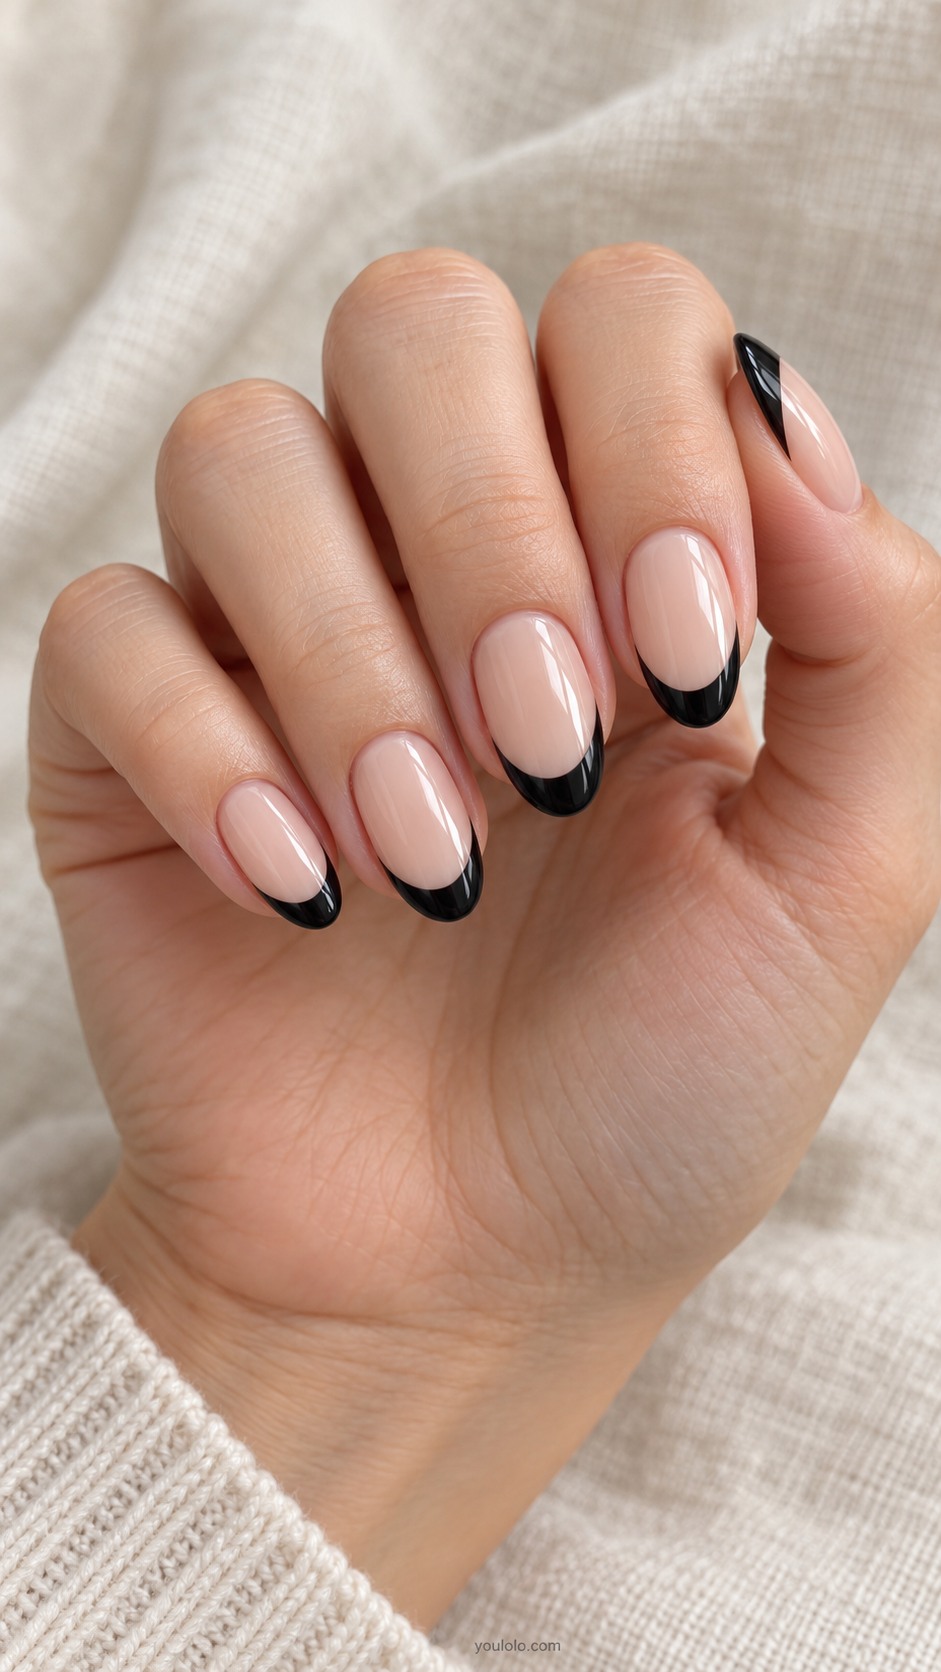
A black French tip gives a familiar manicure a stronger outline. The nude center keeps the result light, while the curved edge follows the nail shape. Consistent proportions matter more than an identical tip measurement on every finger, especially when the nail beds have different lengths.
Palette and placement: Nude oval nails clean curved black French tips, medium length.
The detail to discuss: Keep the black tip proportional to the visible nude nail bed.
2. Reverse French and Fine Outlines
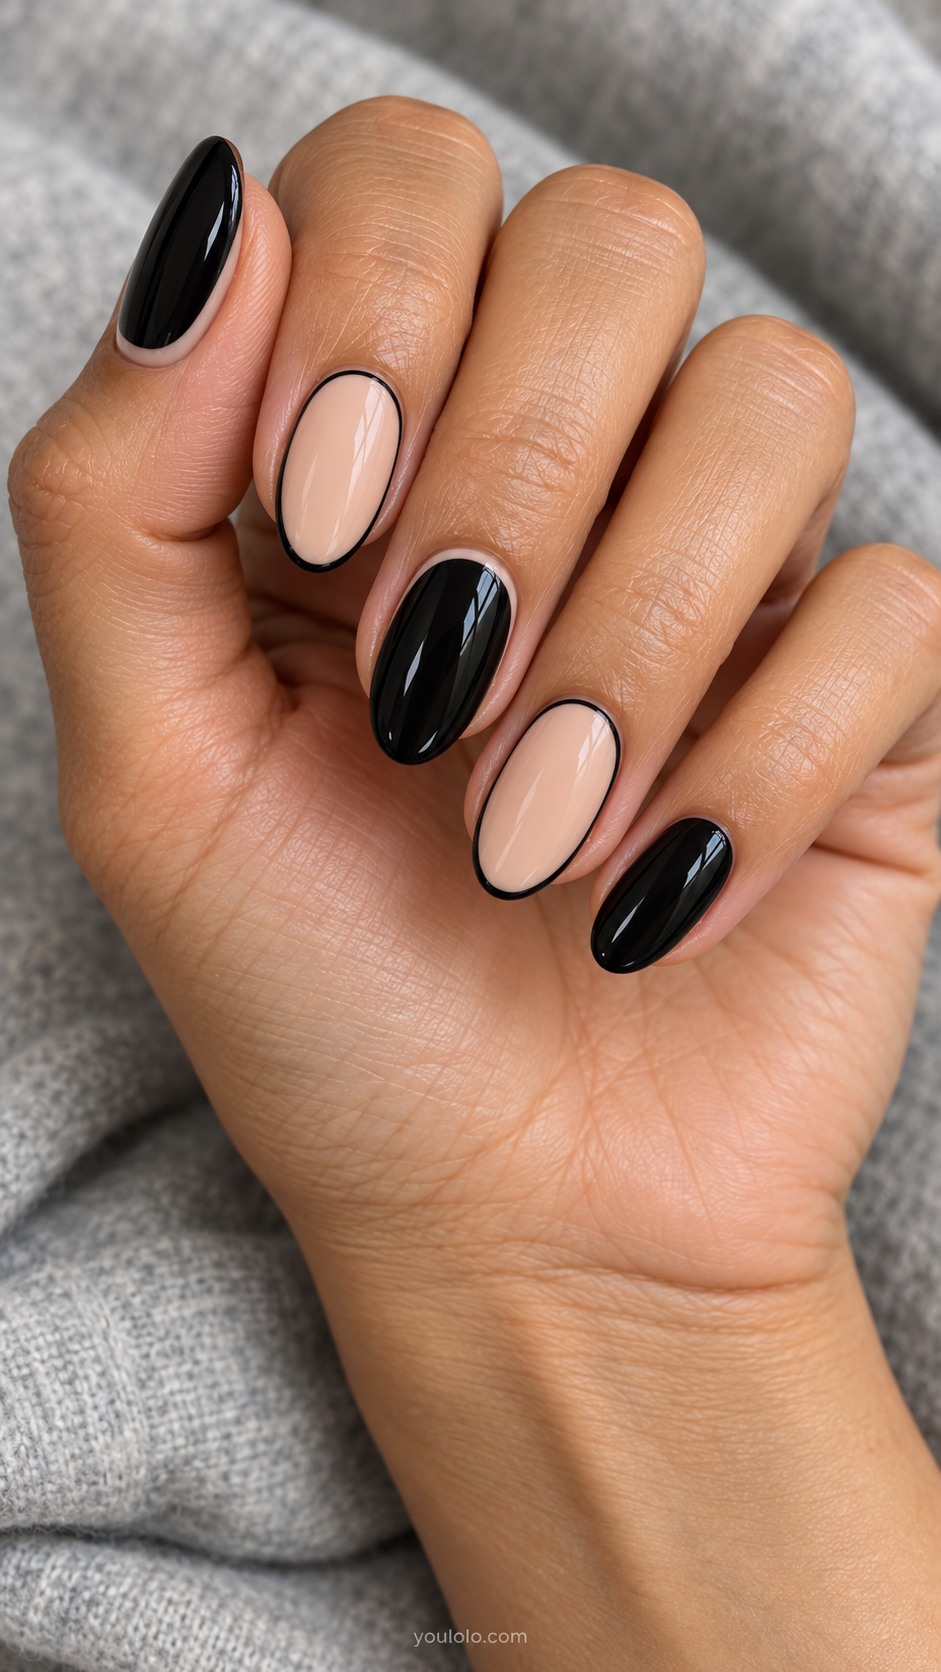
Reversing the balance of black and nude creates two related looks. A mostly black nail with a narrow nude margin feels bold, while a nude nail with a fine black perimeter feels lighter. Putting them together makes the contrast intentional without needing extra motifs.
Palette and placement: Glossy black oval nails with hairline nude outline near cuticle on two accents, nude nails with fine black perimeter others.
The detail to discuss: A narrow outline needs a steady clean edge; avoid making every border equally thick.
3. Flowing Black-and-White Swirls

Broad black-and-white swirls create movement through the whole nail. The curves should feel generous, with enough space to see where each color begins and ends. This is a strong graphic option when you want pattern but do not want tiny symbols or intricate miniature painting.
Palette and placement: Oval nails with broad organic black and ivory curved waves, flat glossy graphic finish.
The detail to discuss: Use two or three large curves instead of many tiny squiggles.
4. Fine Zebra Stripes

Zebra stripes work through uneven rhythm. Thin lines widen, taper and change direction, creating a more natural-looking print than perfectly parallel bands. Ivory keeps the contrast slightly softer than stark white. Plain companion nails help the stripes remain the focal point.
Palette and placement: Ivory oval nails two accents irregular fine black zebra stripes, others ivory.
The detail to discuss: Let the stripes taper and change direction rather than making them parallel.
5. Dalmatian Spots

Dalmatian-style spots are irregular, widely spaced and different in size. That variation keeps the manicure playful without turning it into a strict polka-dot pattern. A milky base softens the black, and short oval nails give the print a compact, easy-to-read surface.
Palette and placement: Milky ivory short oval nails scattered irregular black spots of varied size, some sparse accent placement.
The detail to discuss: Leave open ivory between the spots so the result does not become a solid dark patch.
6. Tiny Black Hearts and Bow Ties

The tiny heart and tuxedo are two small graphic accents with different personalities. One is simple and romantic; the other uses a bow tie and a pointed black shape to suggest formalwear. Nude companion nails keep the pair connected without adding more little symbols.
Palette and placement: Nude oval nails one small black heart accent and one tuxedo black tip with tiny bow tie white shirt area, others nude.
The detail to discuss: Give the heart and tuxedo their own nails rather than combining both symbols on one.
7. Checkerboard and Split Geometry

Checkerboard and quartered blocks use the same two colors at different scales. The small grid creates rhythm, while the larger geometric divisions offer a cleaner pause. A rounded square shape supports the straight lines without making the manicure feel excessively sharp.
Palette and placement: Short rounded square nails two accents crisp black ivory checkerboard and four-quarter geometric blocks, other nails nude.
The detail to discuss: Use larger squares if your nails are short so the grid stays crisp.
8. Yin-Yang Accent

The yin-yang motif works best when its curves are clean and its two dots remain distinct. Placing it on one nail keeps the symbol readable and leaves the rest of the set quiet. Black microtips repeat the dark color without turning every finger into another focal point.
Palette and placement: Nude oval nails one black ivory yin-yang circle design at tip of ring nail, others nude black microtips.
The detail to discuss: Keep the two dots small but distinct inside their opposite-color areas.
For another take on this direction, explore black French nail designs with different tip shapes.
9. One Fine Black Line
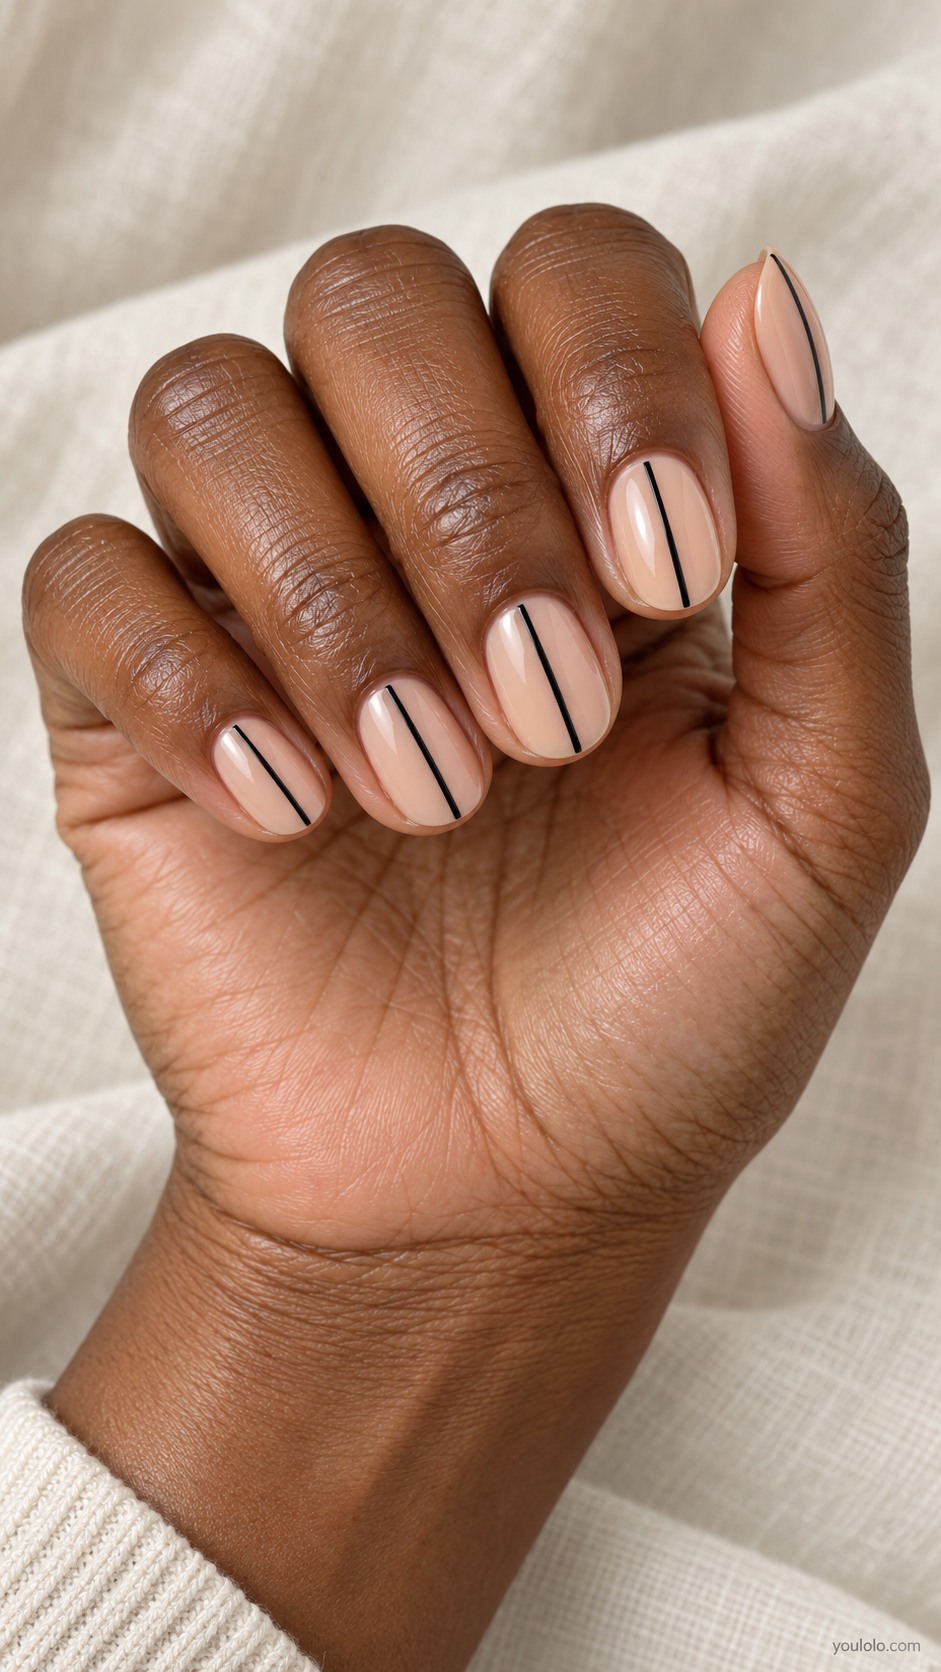
One fine black line can change a sheer nude manicure completely. The simplicity makes alignment and line weight especially noticeable. A vertical line follows the nail's length, while plenty of untouched base keeps the result minimal. You can repeat it across the hand or reserve it for one accent.
Palette and placement: Sheer nude short oval nails one thin vertical black line centered on each nail, minimal polished finish.
The detail to discuss: The simplest version needs only one accent nail with a line.
10. Half-Moon Black Accents
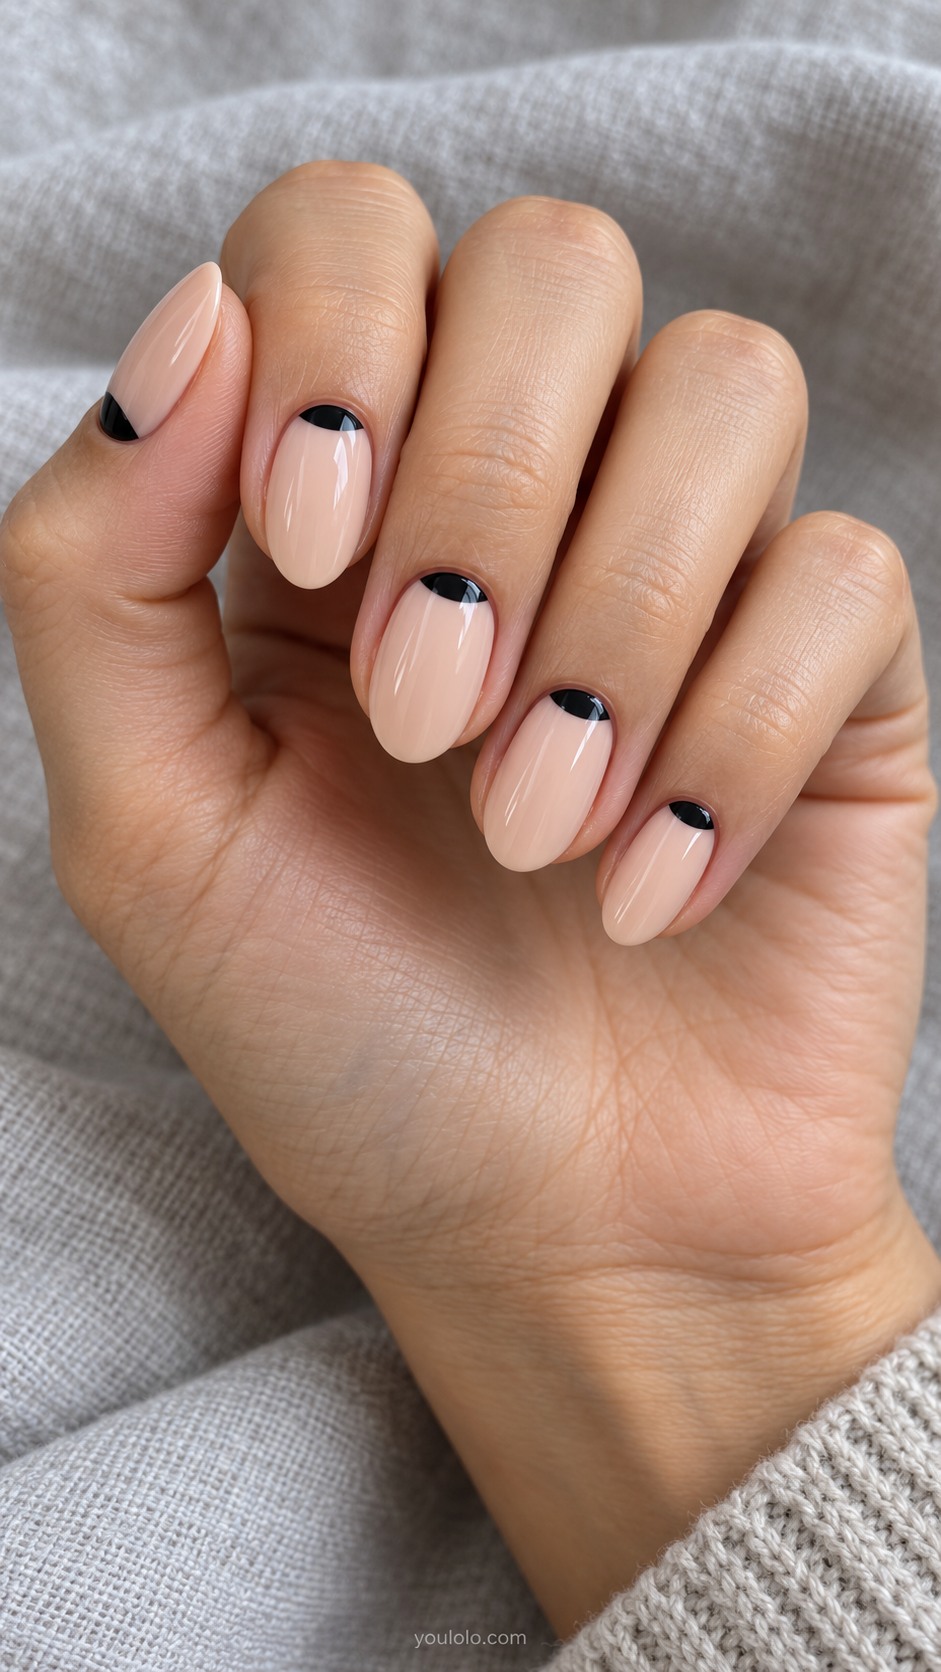
A small black half-moon places the contrast near the base instead of at the tip. The rest of the nail stays open and nude, giving the design a restrained graphic quality. A shallow curve looks lighter than a large solid semicircle that fills much of the nail bed.
Palette and placement: Nude oval nails small black half-moon near cuticle on each, glossy smooth finish.
The detail to discuss: Keep the half-moon shallow to preserve the open nude space.
11. Curved Negative Space

Negative-space curves let the nude base become part of the pattern. Bold black areas surround soft openings, creating contrast without adding a third color. Keep the openings large enough to read individually; too many small holes can make the design feel visually tangled.
Palette and placement: Nude oval nails two accents bold black flowing curved borders surrounding rounded nude openings, others nude.
The detail to discuss: Choose a small number of broad openings rather than a lace-like network.
12. Double and Wavy French
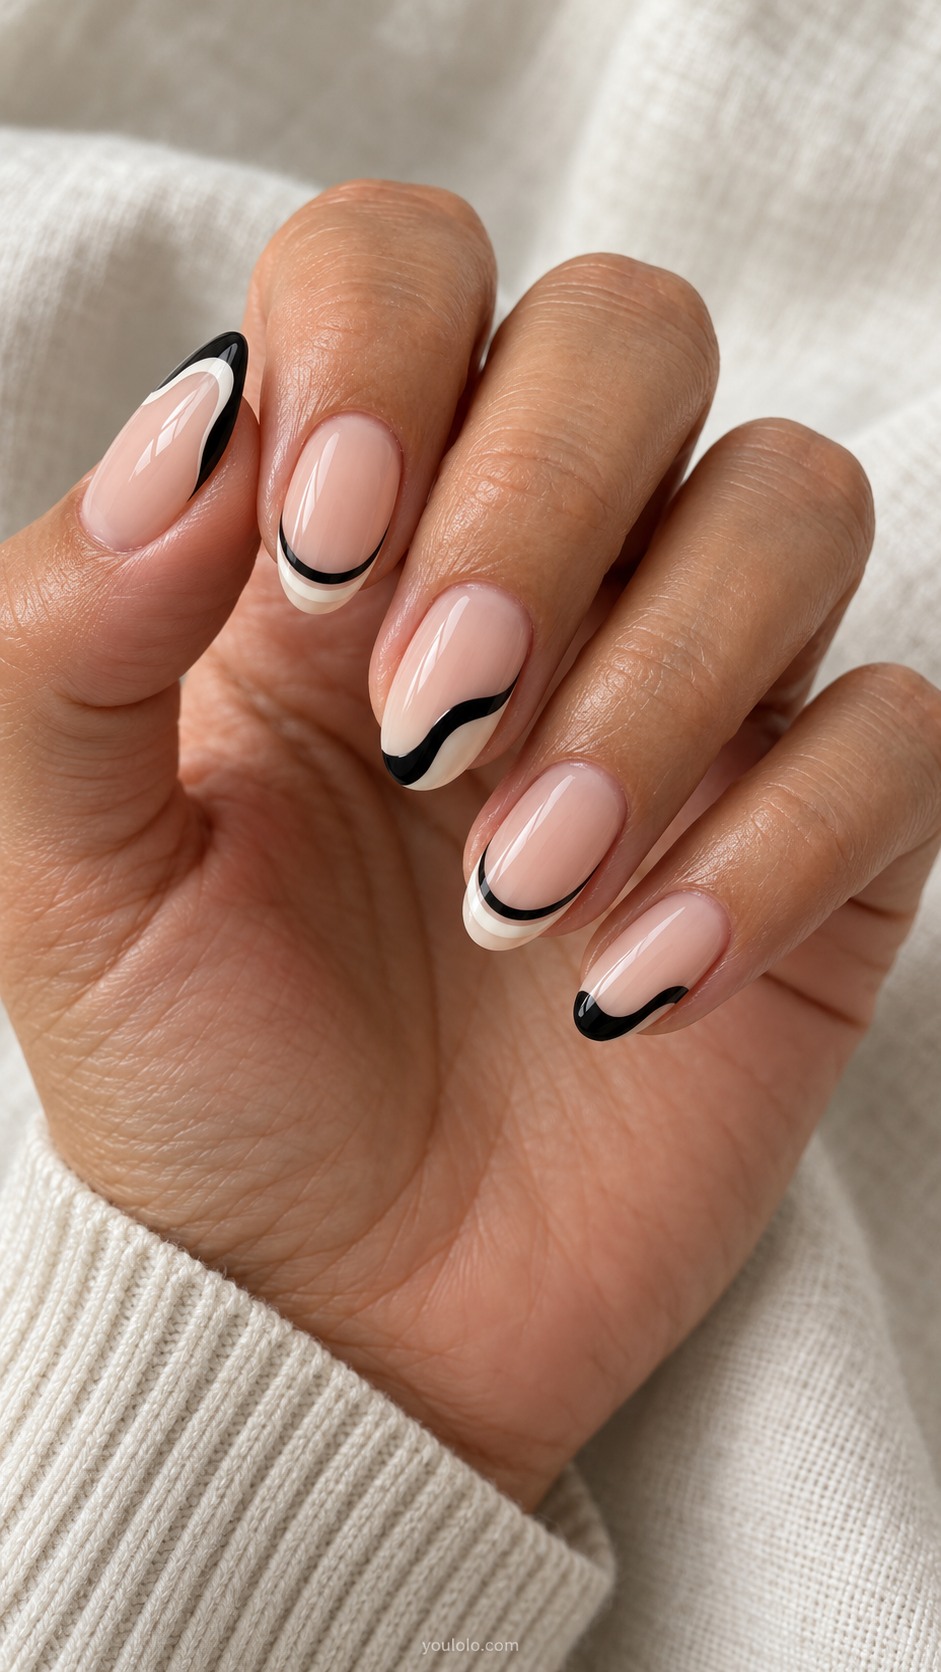
Double French lines and a single wavy edge share the same restrained palette but use different rhythms. One is orderly, the other more relaxed. A consistent amount of nude space connects them, allowing the variation to feel deliberate rather than like two unrelated manicures.
Palette and placement: Nude oval nails alternating thin black and ivory double French curves with single black wavy French tips.
The detail to discuss: Use a consistent tip depth to connect the different line treatments.
13. Crossing Abstract Lines

Fine crossing lines make a quiet nude base more expressive. The curves should stay light and open, with only a few intersections. Placing the crossing near the tip or off to one side gives the composition direction while preserving most of the undecorated nail.
Palette and placement: Nude almond nails two or three very fine black curved lines crossing near tip, plain nude companions.
The detail to discuss: Place the crossing away from the center if you want a lighter composition.
14. Black and White Marble Pairing
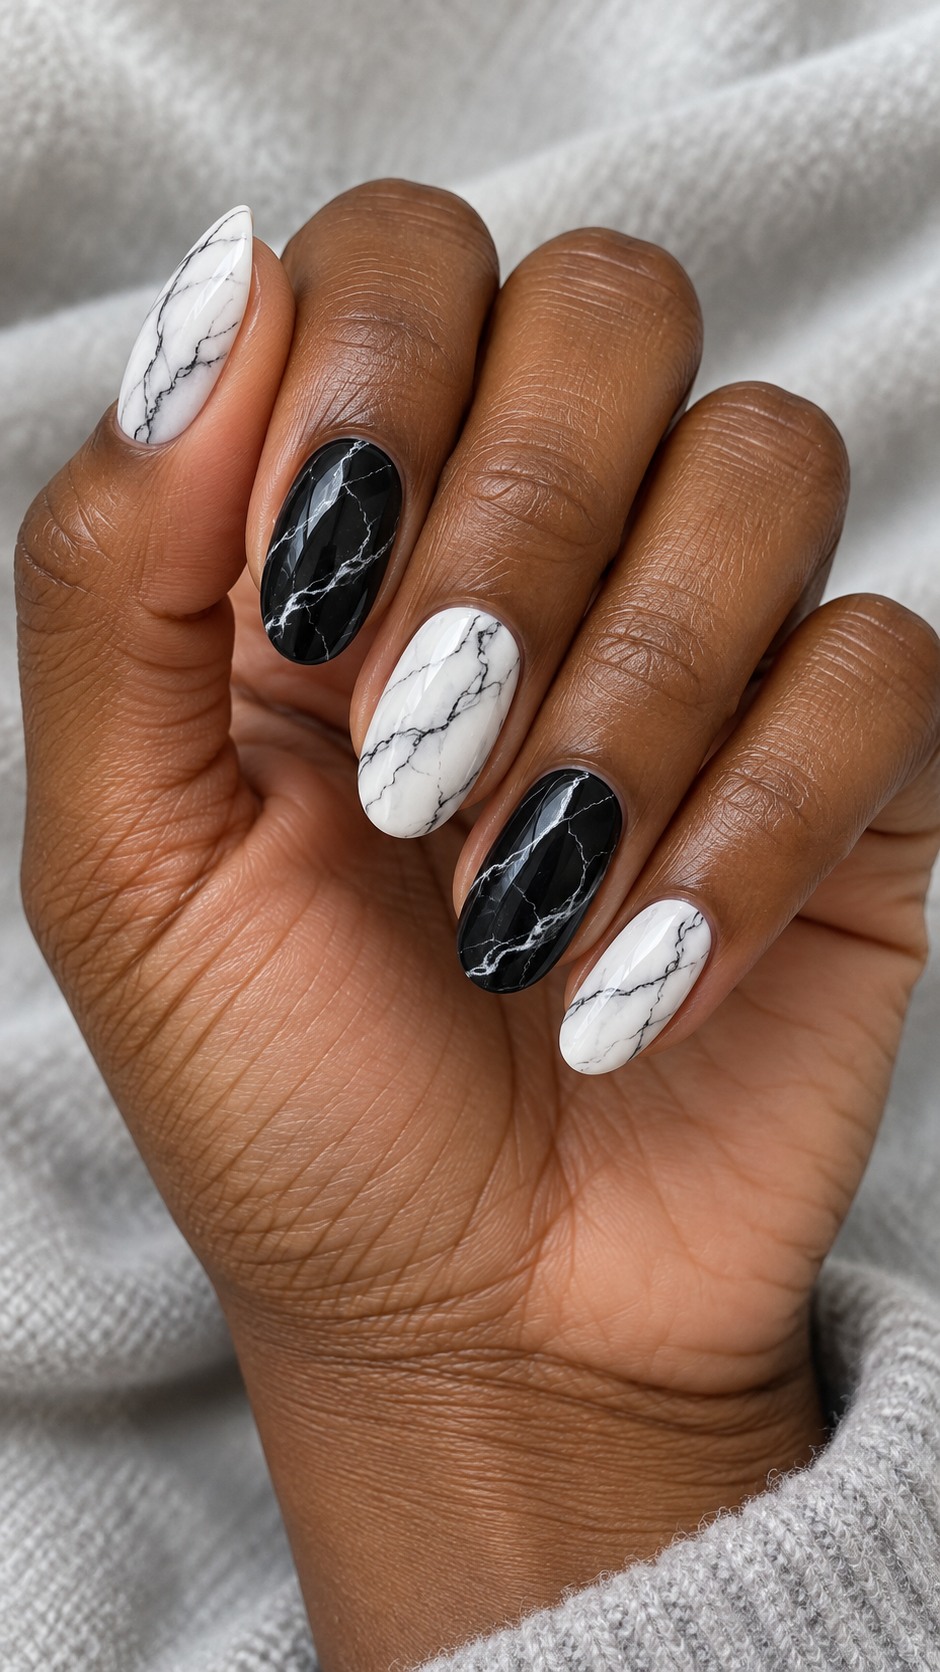
White marble and black marble mirror each other without using identical patterns. Fine charcoal veins move through the pale nails, while white wisps define the darker ones. Keep the veining sparse so the backgrounds remain clearly different and the contrast does not dissolve into gray.
Palette and placement: Oval manicure alternating white marble fine charcoal veins and black marble fine white veins, smooth.
The detail to discuss: Use sparse veins and let each background color remain dominant.
15. Continuous-Line Face

A continuous-line face needs only a few recognizable features to work at nail scale. A clean profile, a mouth and a short curve can suggest much more than a crowded drawing. Tiny dots on the companion nails repeat the black in a very restrained way.
Palette and placement: Nude oval nails one ring accent minimal black continuous line face profile, other nails single tiny black dot.
The detail to discuss: Focus on a clear nose and mouth outline instead of filling the nail with facial details.
16. Black Flowers on Nude
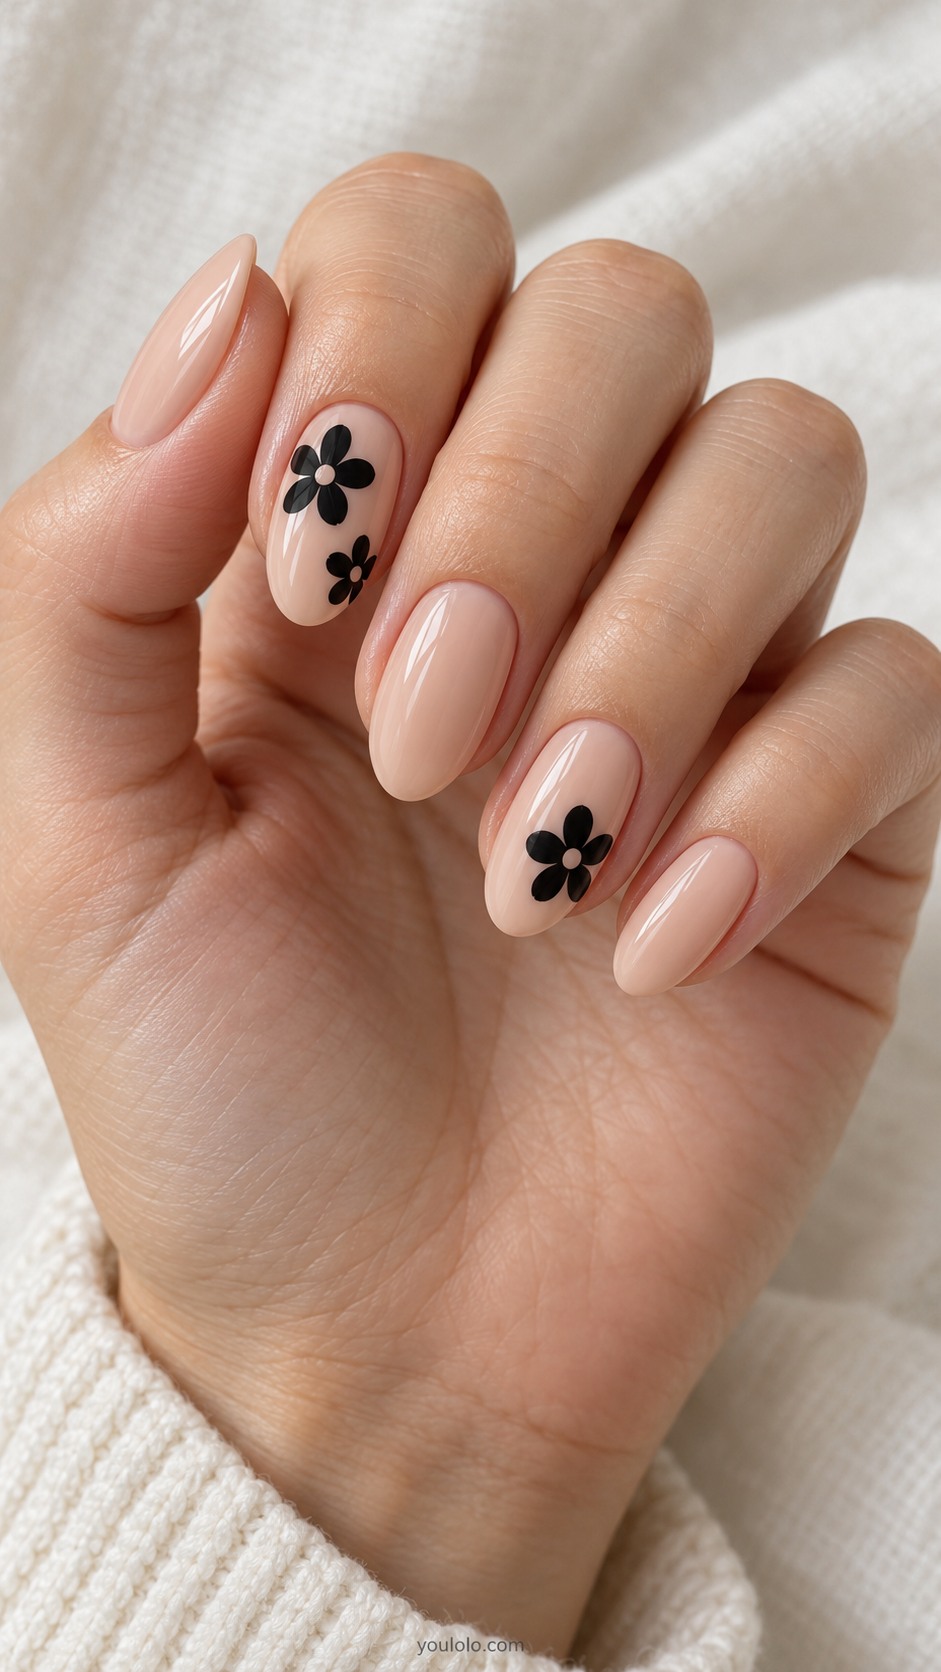
Black flowers on nude offer a graphic alternative to colorful floral art. Their simple petals and small open centers make the shapes clear from a distance. Let a few flowers sit near an edge instead of centering everything; the asymmetry keeps the arrangement from looking too rigid.
Palette and placement: Nude oval nails two accents flat black five-petal flowers with tiny nude centers, others plain.
The detail to discuss: Let a flower sit partly near an edge for a less rigid arrangement.
For another take on this direction, explore black-and-white polka-dot nails.
17. Leopard and Cow-Print Accents
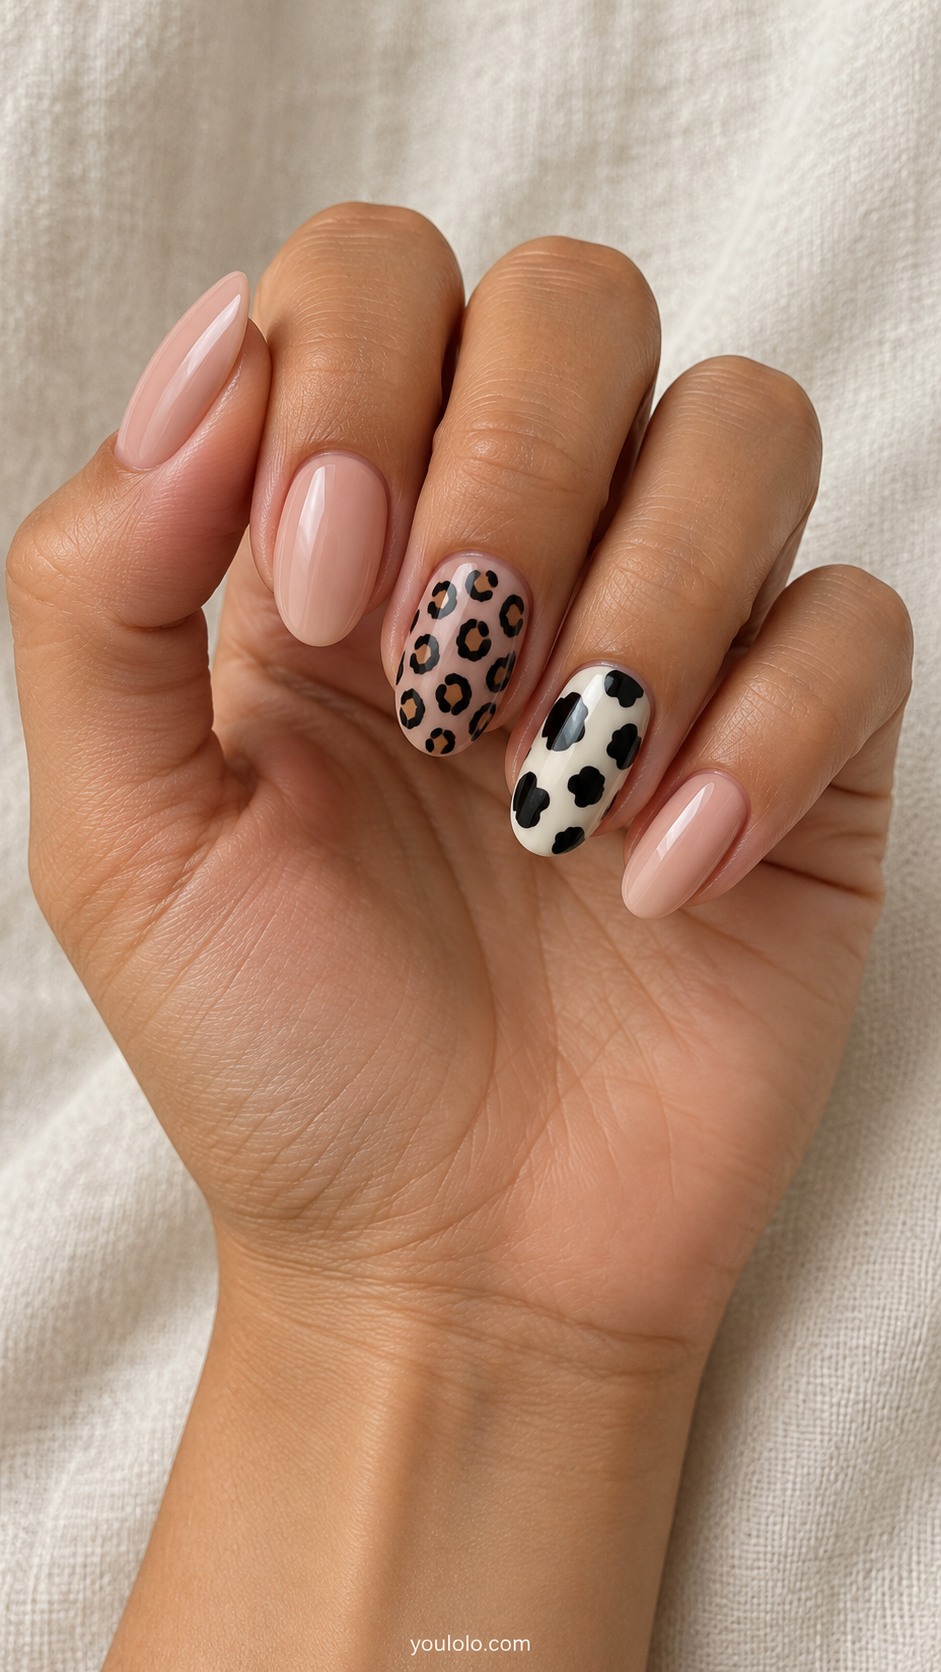
Leopard outlines and cow patches are different prints, so they work best as separate accents. Nude warms the leopard pattern, while ivory gives the cow print a clearer contrast. Plain nails between them help the shared black feel like a deliberate connection rather than an accidental mixture.
Palette and placement: Nude and ivory oval nails separate accents black outlined leopard spots on nude and black irregular cow patches on ivory, plain nude others.
The detail to discuss: Keep the prints on separate nails and repeat the same black to connect them.
18. Fine Black Flames

Black flames bring a pointed rhythm to the tip of a nude almond nail. The slender tongues should have open spaces between them so the shape remains visible. Keeping the base near the tip dark gives the flames a clear starting point and prevents them from looking like disconnected lines.
Palette and placement: Nude almond nails black French base with slim flame tongues rising from tips, glossy.
The detail to discuss: Leave generous nude gaps between the flames so their shape stays visible.
19. Stars and a Fine Spark
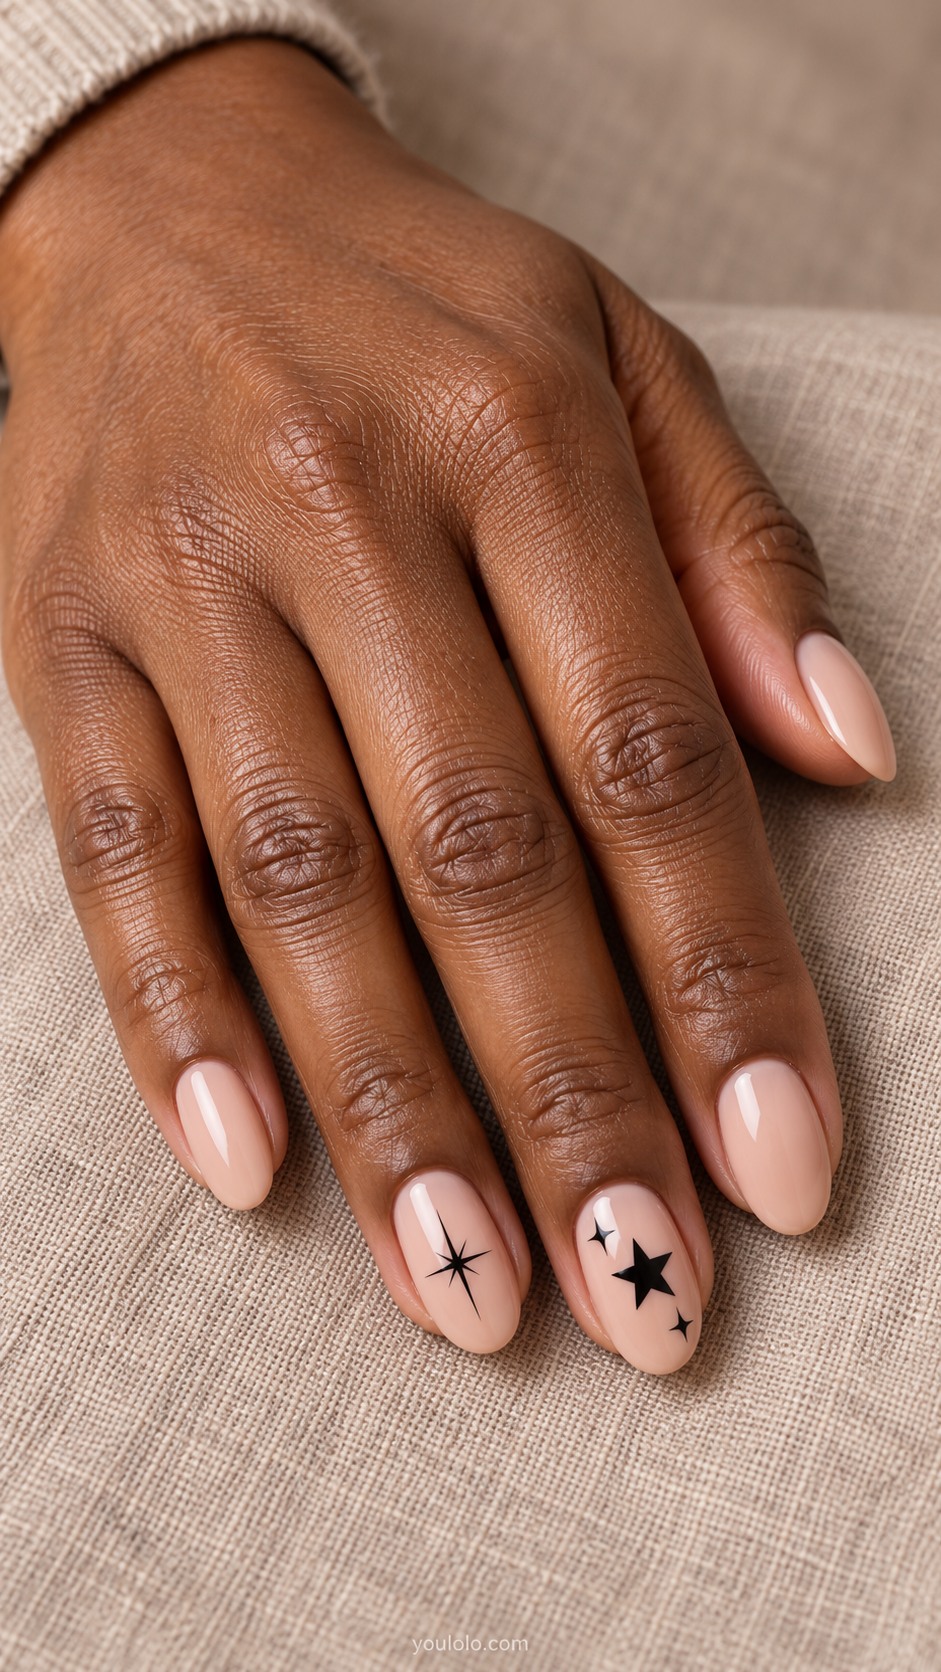
A solid star and a fine eight-point spark offer two levels of visual weight. The larger star anchors the design, while smaller marks keep it lively. Nude space around the symbols is essential. Too many stars of equal size would make the set feel more crowded and less deliberate.
Palette and placement: Nude oval nails one solid black five-point star with two small stars, another thin black eight-point sparkle, others nude.
The detail to discuss: Use one bold star as the anchor and smaller marks as supporting details.
20. Nested Black Arches

Nested black arches create a small graphic pattern that follows the rounded nail. Even spacing makes the design feel tidy, while the nude gaps keep it light. A few arches are enough to communicate the idea; adding more can make the lines merge at the narrower top.
Palette and placement: Nude oval nails two accents three nested black rainbow arches rising from tip, others nude.
The detail to discuss: Keep the distance between arches even, especially near the narrow top.
21. Windowpane and Pinstripes

Windowpane and pinstripes share a fine line weight, which lets them sit together comfortably. One pattern crosses in two directions, while the other travels only along the nail. Nude backgrounds keep the contrast gentle. Fewer lines usually create a clearer result on compact nails.
Palette and placement: Nude short rounded square nails one fine black windowpane grid accent and another vertical fine pinstripe accent, others nude.
The detail to discuss: Reduce the number of lines rather than compressing them at a short length.
22. Heart Outline and a Tiny Bow

An outlined heart and a tiny bow make a softer monochrome pairing. Both motifs stay small, leaving the nude base as the main color. The heart's empty center and the bow's fine tails keep the decoration delicate. Plain companions prevent the set from becoming too literal or busy.
Palette and placement: Nude oval nails one fine black heart outline and one tiny painted black bow near tip, plain nude companions.
The detail to discuss: Keep both motifs small, with plenty of clean space around them.
23. Organic Blobs and Chevron Tips

Rounded blobs and sharp chevron tips create contrast through shape rather than color. The curved accents feel loose, while the V-shaped tips feel structured. Keeping them on separate nails lets each treatment remain clear, and a repeated nude base ties the composition together.
Palette and placement: Nude oval nails separate accents bold rounded black blobs and double black chevron French tips, nude companions.
The detail to discuss: Use rounded blobs to balance the sharper V-shaped accent.
24. Smoky Tortoise and Soft Black Fade
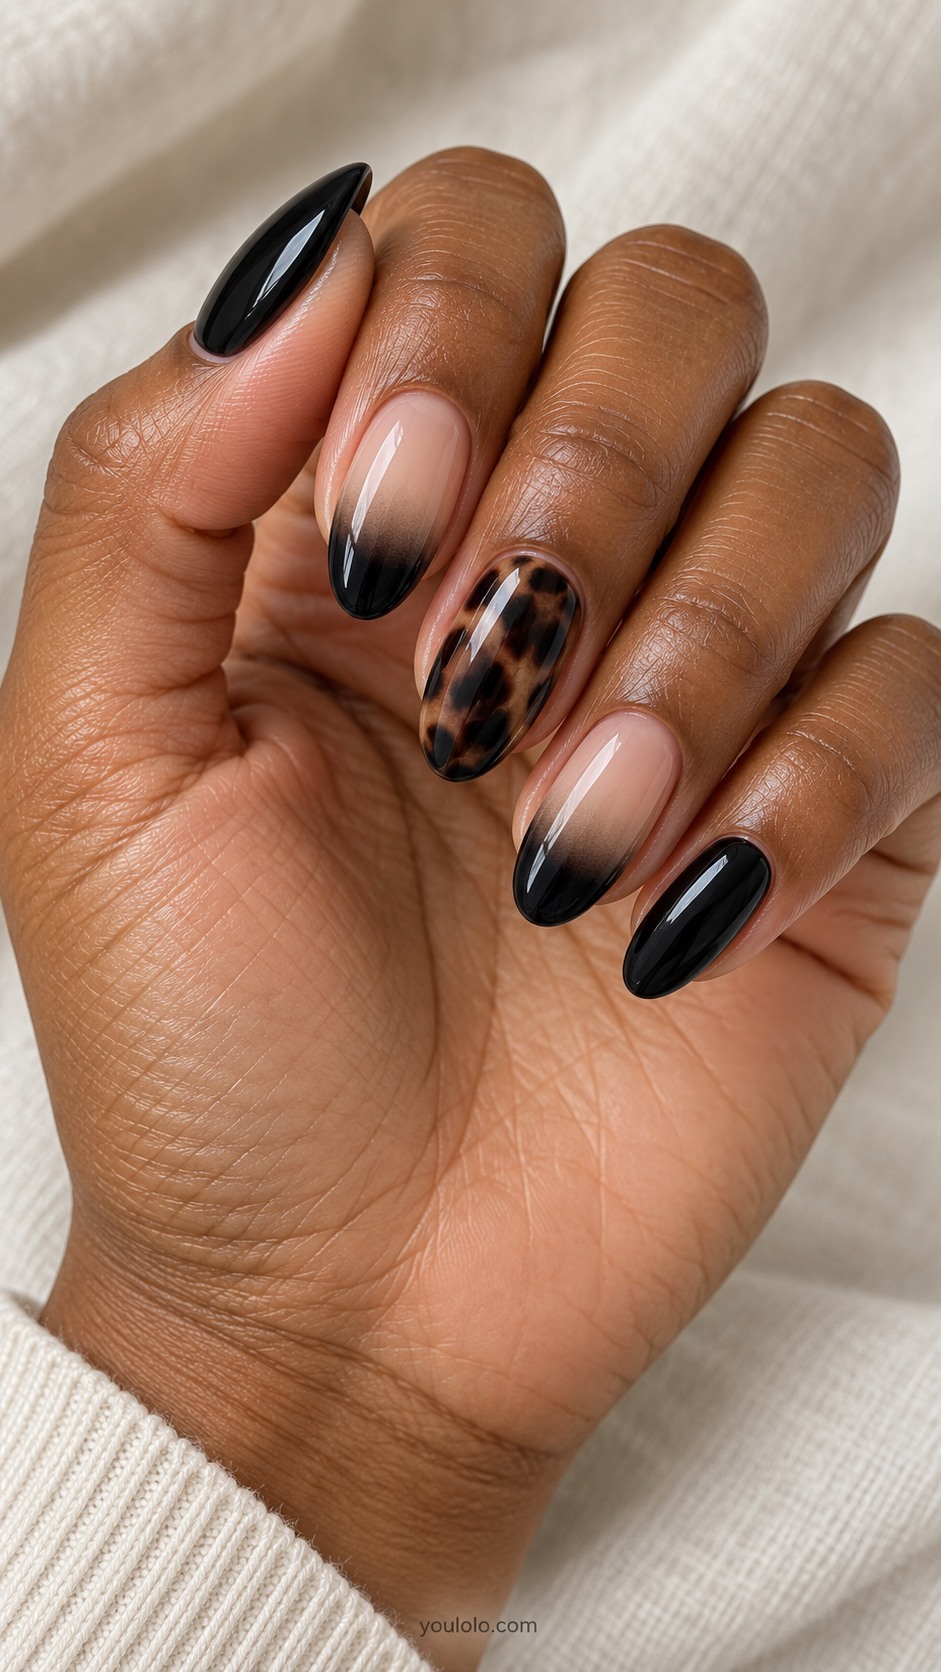
Smoky tortoiseshell and a soft black fade bring a little tonal depth to the monochrome palette. The tortoise accent uses muted brown as a bridge, while the gradient moves gradually from nude to dark. Glossy black companions make the lighter transitions more noticeable.
Palette and placement: Oval nails one dark smoky black and muted brown tortoiseshell accent, two nude nails fading gently to black at tip, others glossy black.
The detail to discuss: Ask for a soft fade on the gradient nails, without a visible dividing line.
25. Matte Tips and Glossy Black Texture

Matte black tips and shallow glossy texture show how much variation is possible without adding color. The French nails remain simple, while the dark accent nails use fine lengthwise ridges to catch light. The relief should be subtle enough that the silhouette still feels smooth and refined.
Palette and placement: Nude oval nails matte black French tips, two glossy black accents with subtle fine lengthwise low-relief ridges.
The detail to discuss: Keep the texture very shallow; the contrast in finish should do most of the work.
26. White, Black and a Mineral Edge
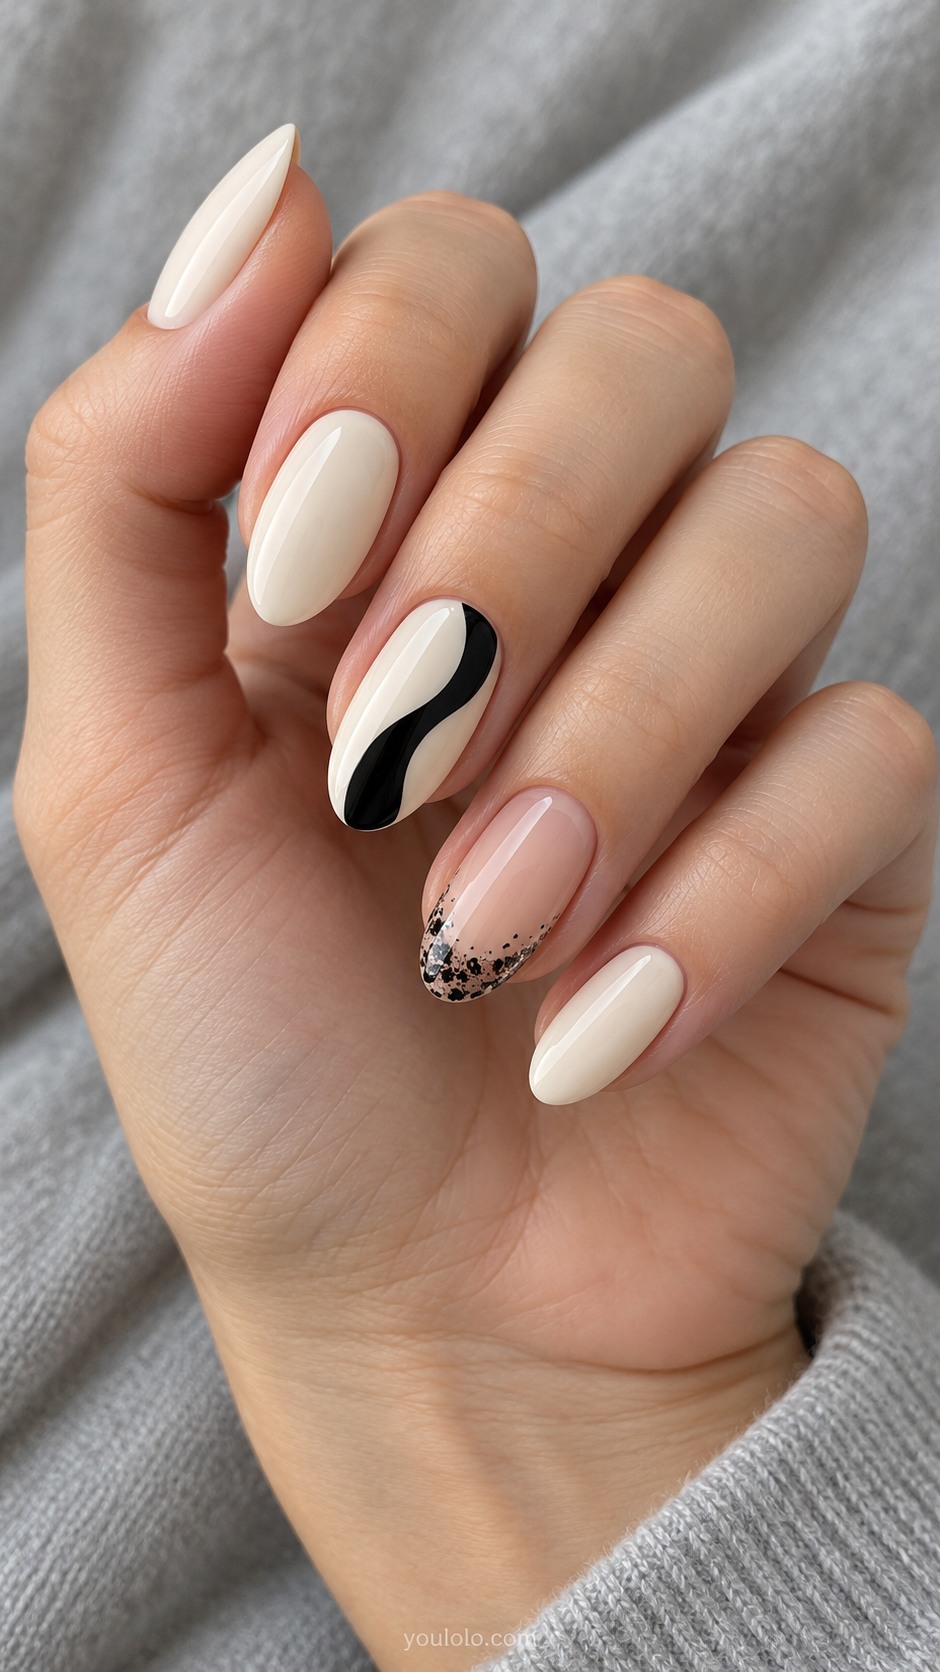
The final combination uses ivory, a bold black half-wave and a narrow mineral-like edge. Each accent has a different visual weight, so the plain white nails help balance the set. Keep the scattered glitter edge fine and irregular, allowing the nude background to show through.
Palette and placement: Ivory oval nails, one black half-wave accent, one nude nail with irregular fine black glitter mineral French edge, other nails glossy ivory.
The detail to discuss: Use a narrow scattered mineral edge rather than coating the entire tip heavily.
How to adapt your favorite to your own nails
Decide how much of each nail will be dark. A thin line or a narrow tip leaves the manicure mostly nude, while a half-wave or a black marble accent gives it more visual weight. Mixing those proportions deliberately helps the hand feel balanced.
When combining patterns, repeat one feature beyond the color. That might be a fine line weight, rounded shapes or the same amount of open nude space. Avoid adding a third unrelated pattern simply because there is an undecorated nail left; the plain nail may be what makes the other details work.
| Look | Good starting points | What matters most |
|---|---|---|
| Minimal | One line, half-moon, tiny heart | Placement and clean spacing |
| Graphic | Swirls, checks, split blocks | Clear boundaries between colors |
| Organic | Marble, zebra, leopard | Variation rather than identical repetition |
| Textural | Matte tips, glossy ridges, mineral edge | A controlled contrast in finish |
Before your appointment
Send the full-hand reference rather than only a close crop of one nail. Include your preferred length, shape and number of accents. Point out the detail you want to preserve if the artist needs to simplify the composition. Ask the salon to confirm the techniques, appointment time and price for that version.
For another view of how salon patterns are planned, browse OPI's nail-art tutorials. Use them as technique references alongside your chosen design, rather than expecting every product system to use the same process.
Monochrome nails: questions and practical choices
Are monochrome nails always only black and white?
In this collection, nude and sheer bases act as open space around black-and-white artwork. A small amount of muted brown appears in the tortoiseshell look. If you want a strict two-color set, choose the black-and-ivory swirls, checks or marble pairing.
Which designs are easiest to simplify?
A single line, a small dot, one heart or a narrow French tip can remain recognizable with very little decoration. Dense checks, animal prints and miniature face art need more careful editing when the nail surface is small.
How do I combine two different prints?
Repeat the same base and the same black, then keep the patterns on separate accents. A fine line weight can also connect different layouts, as it does with windowpane and pinstripes. Leave some nails plain if both prints are strong.
Should I choose matte or glossy black?
Gloss makes the dark color reflective; matte makes the surface visually quieter. You can combine them deliberately, as in the matte-tip set. Decide which area should catch the light before choosing the finish.
Can I use a softer white?
Yes. Ivory or milky white reduces the starkness of the contrast while keeping the design readable. Use the same pale tone across the set if you want the different accents to feel connected.
What makes simple line art look polished?
Clear spacing, controlled line width and a shape that suits the nail are more important than adding more marks. A few well-placed lines can communicate the design more clearly than a dense pattern.
Save your favorite set. Pick the amount of black first: a thin accent, a half-nail shape or a mostly dark manicure. Then choose one pattern family. This makes it easier to build a set that feels coherent, whether you want a quiet French manicure or a bold mix of graphic accents.