
The Best Fluffy Pancakes recipe you will fall in love with. Full of tips and tricks to help you make the best pancakes.


Pink striped nails can feel sweet, graphic, or surprisingly understated. The difference comes down to stripe width, contrast, and how many other patterns share the set. Blush and cream make a gentle combination; raspberry and pale pink create a more noticeable rhythm.
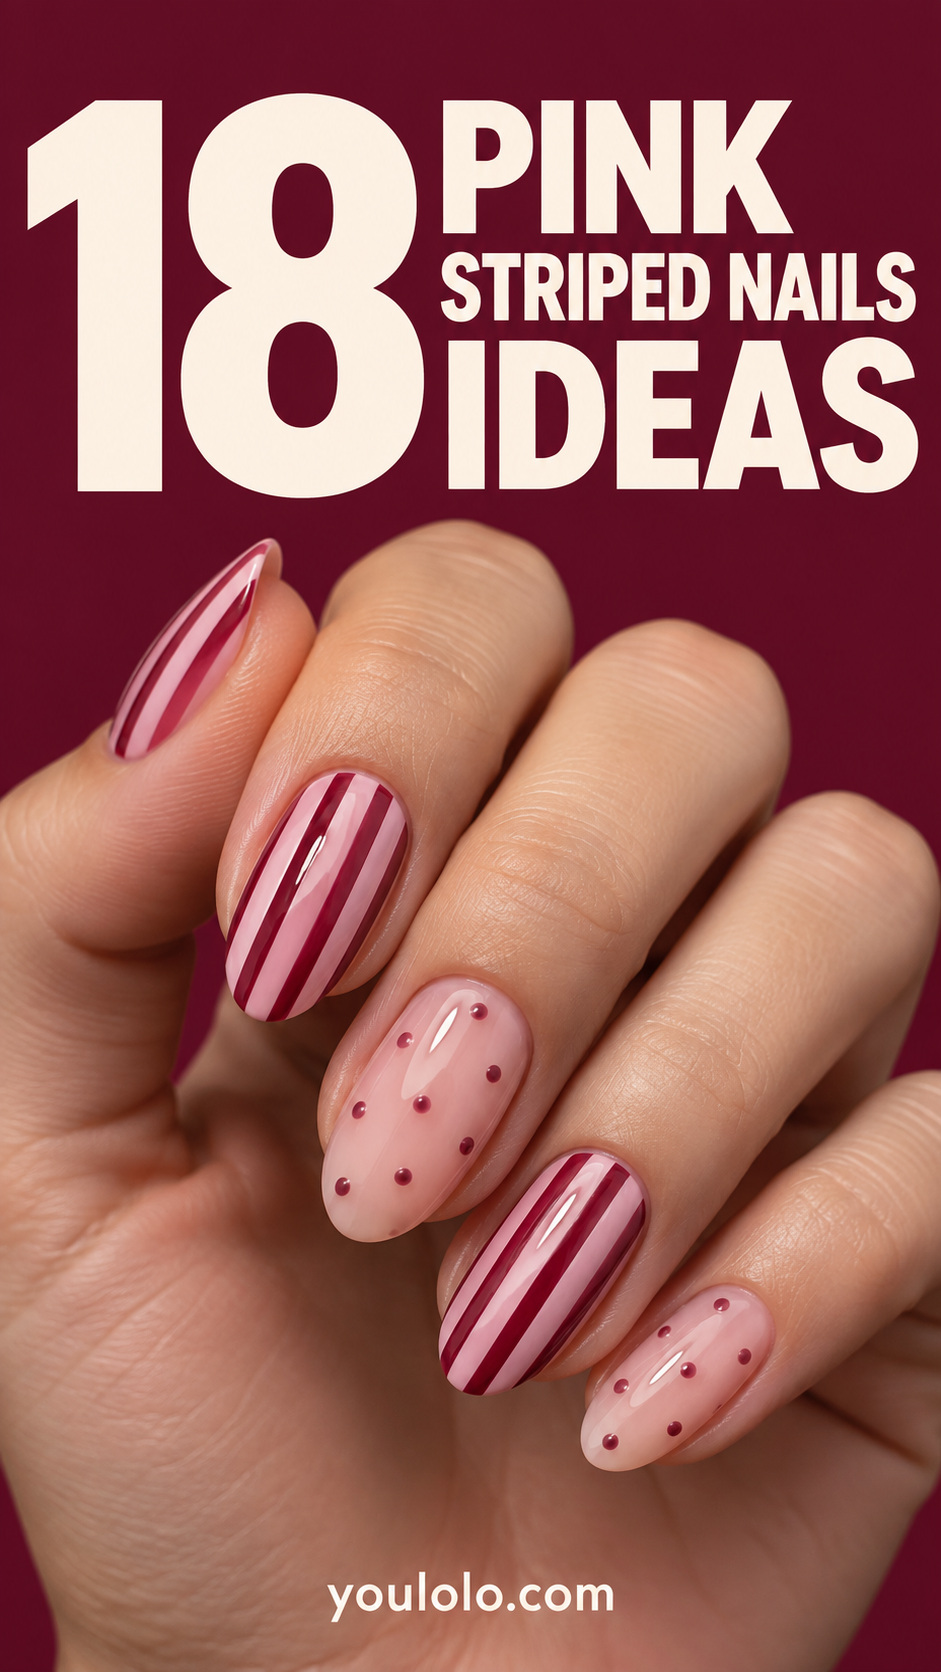
For a manicure inspired by candy colors and coquette styling, start with three main shades: a pale pink, a deeper rose, and a warm cream. Then decide whether stars will be a small accent or a central feature. You can include stripes, dots, and metallic details in one set without giving every nail all three.
Pink striped nails: build the palette before choosing the patterns
Pick one pink that repeats throughout the manicure. It can appear as a stripe on one nail, a dot on another, and a solid background on a third. That repetition helps the set feel intentional even when the motifs differ.
For a five-nail layout, try two striped nails, one dotted nail, one solid pink nail, and one star accent. Repeat the arrangement on the other hand or swap the positions while keeping the same colors.
1. Blush and cream vertical pinstripes
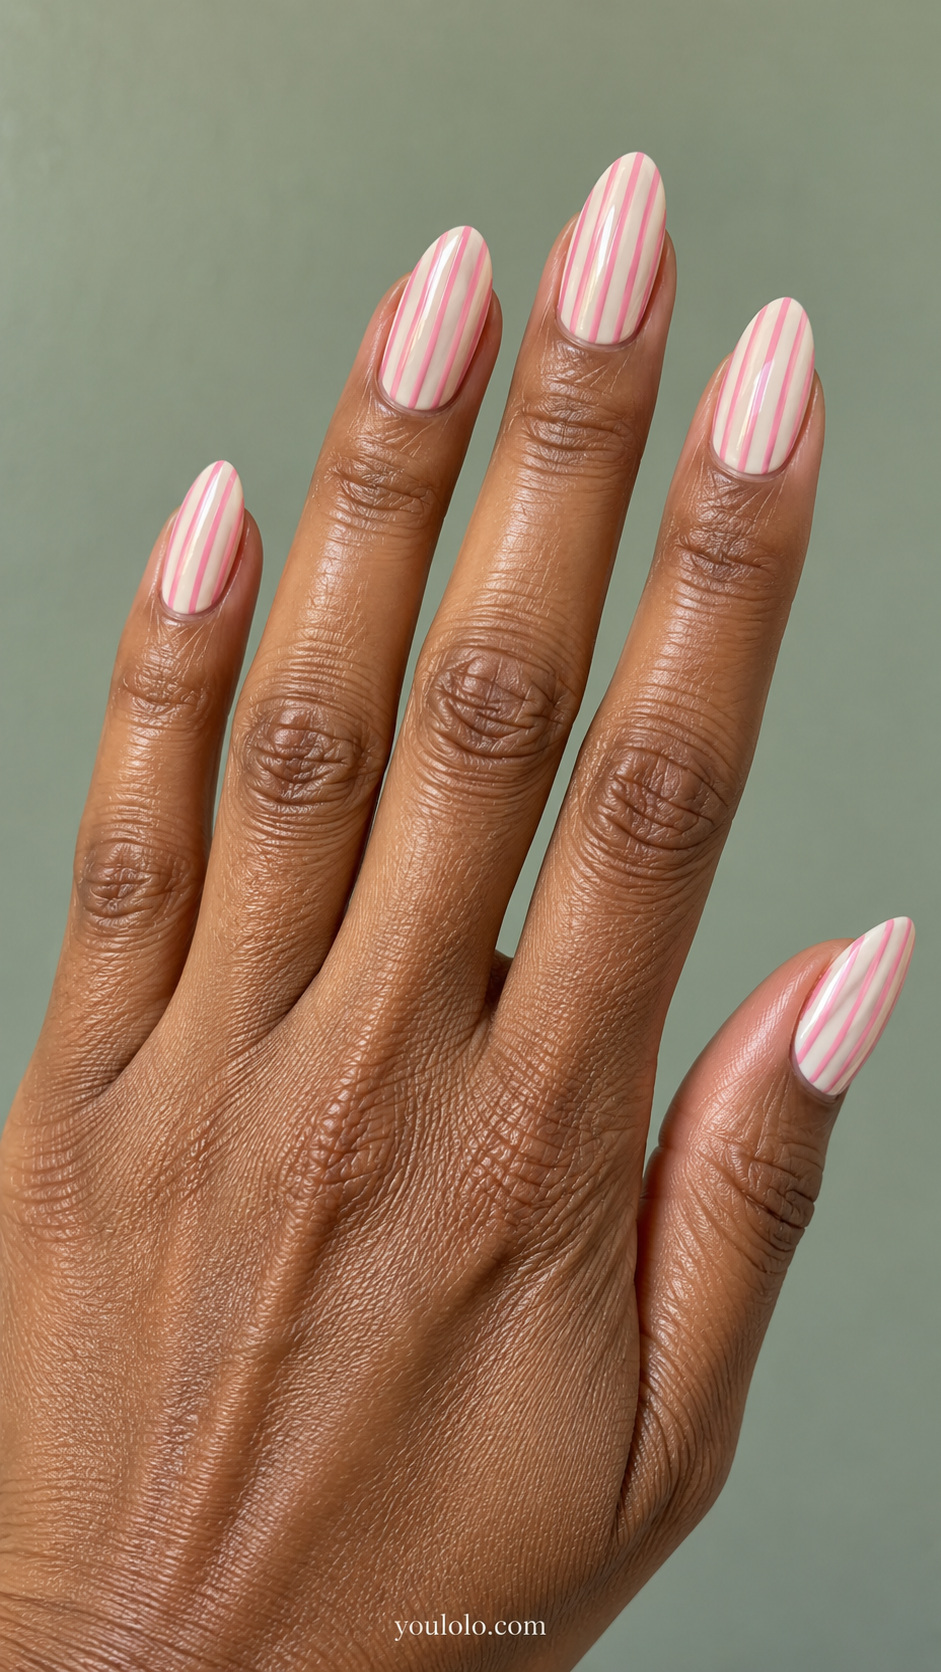
Paint fine, evenly spaced pink lines over a cream background. Let the base show clearly between the stripes so the design does not read as a solid color from a distance. On almond nails, run the lines along the length of the nail and keep the outermost lines comfortably within the edges.
2. Raspberry candy bands
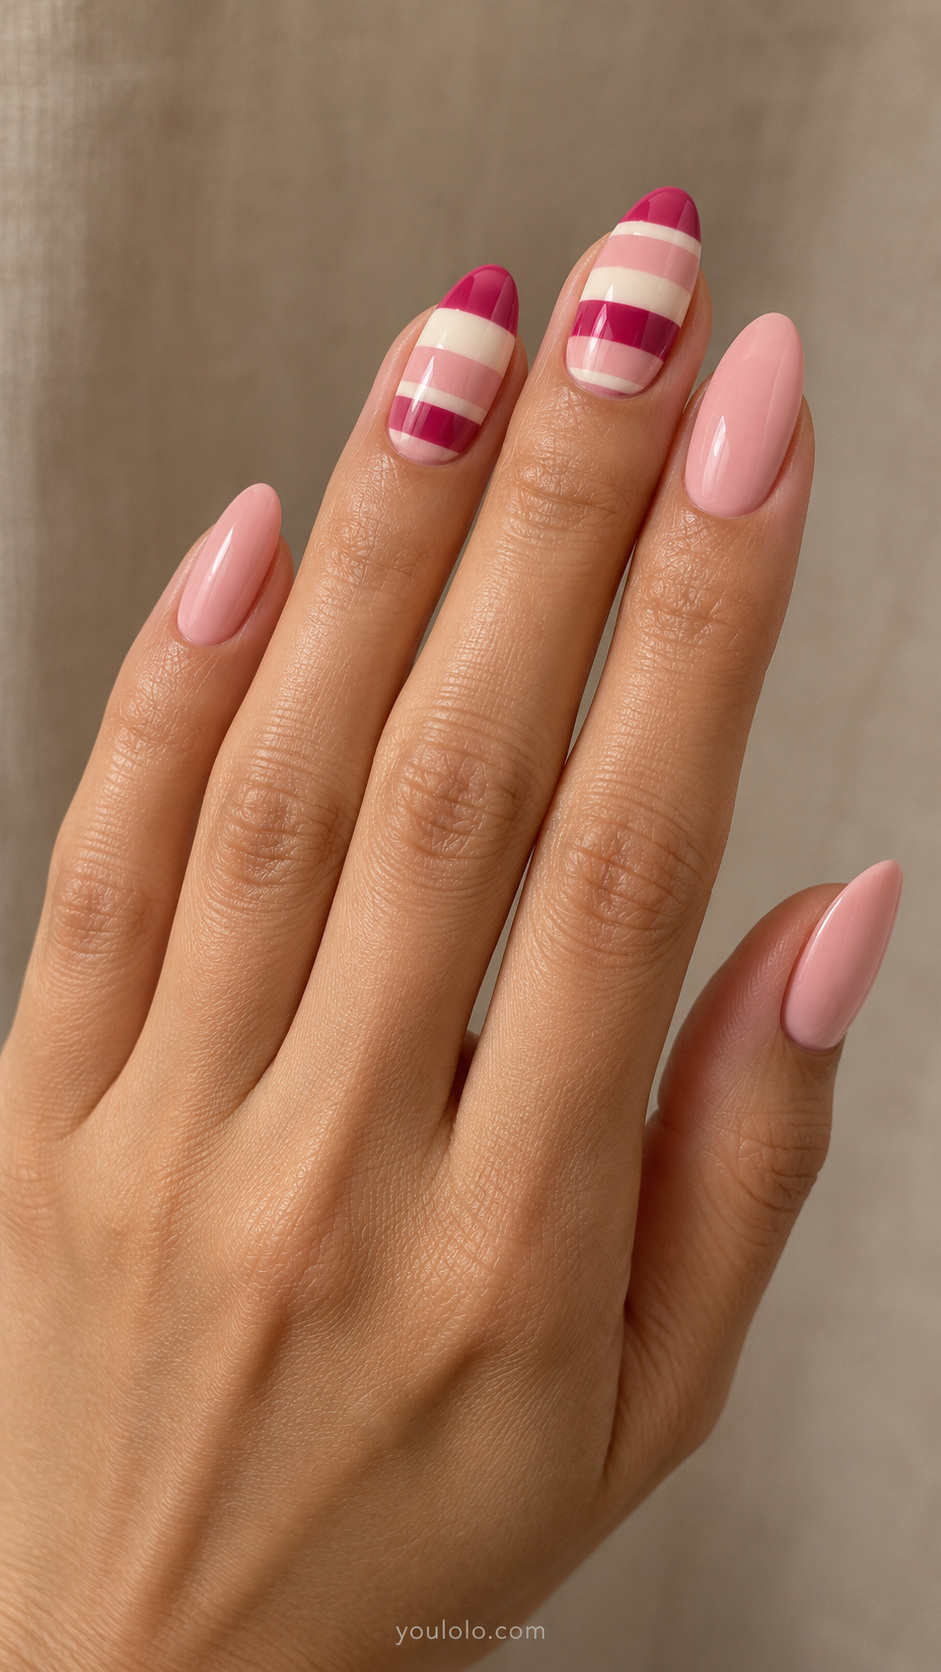
Alternate raspberry, petal pink, and cream in horizontal bands. Vary the width slightly to create a ribbon-like pattern, while keeping the edges clean. Use this busier design on one or two nails and pair it with solid blush nails so the bands have a clear place in the composition.
3. Pink stripes with a single gold star
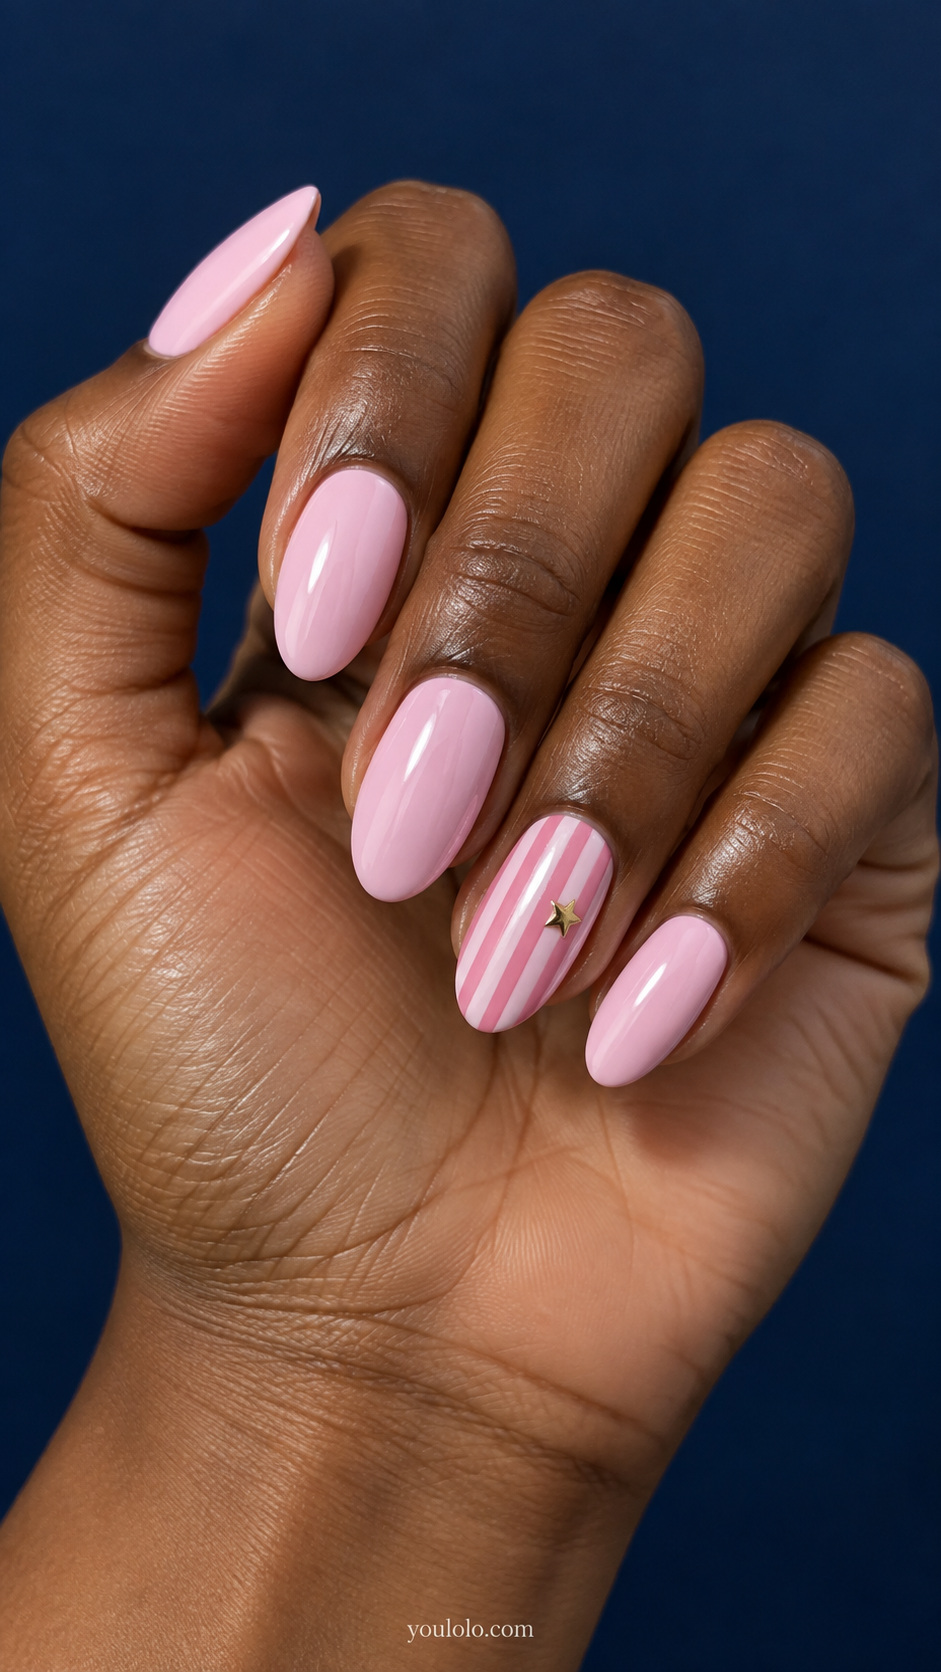
Add one small gold star to a striped accent nail, leaving the remaining nails flat and simple. Place the star where it does not hide the pattern. A painted star or flat decal gives a different result from a raised charm; specify which one you want when booking the design.
4. Tiny rose dots on a sheer background
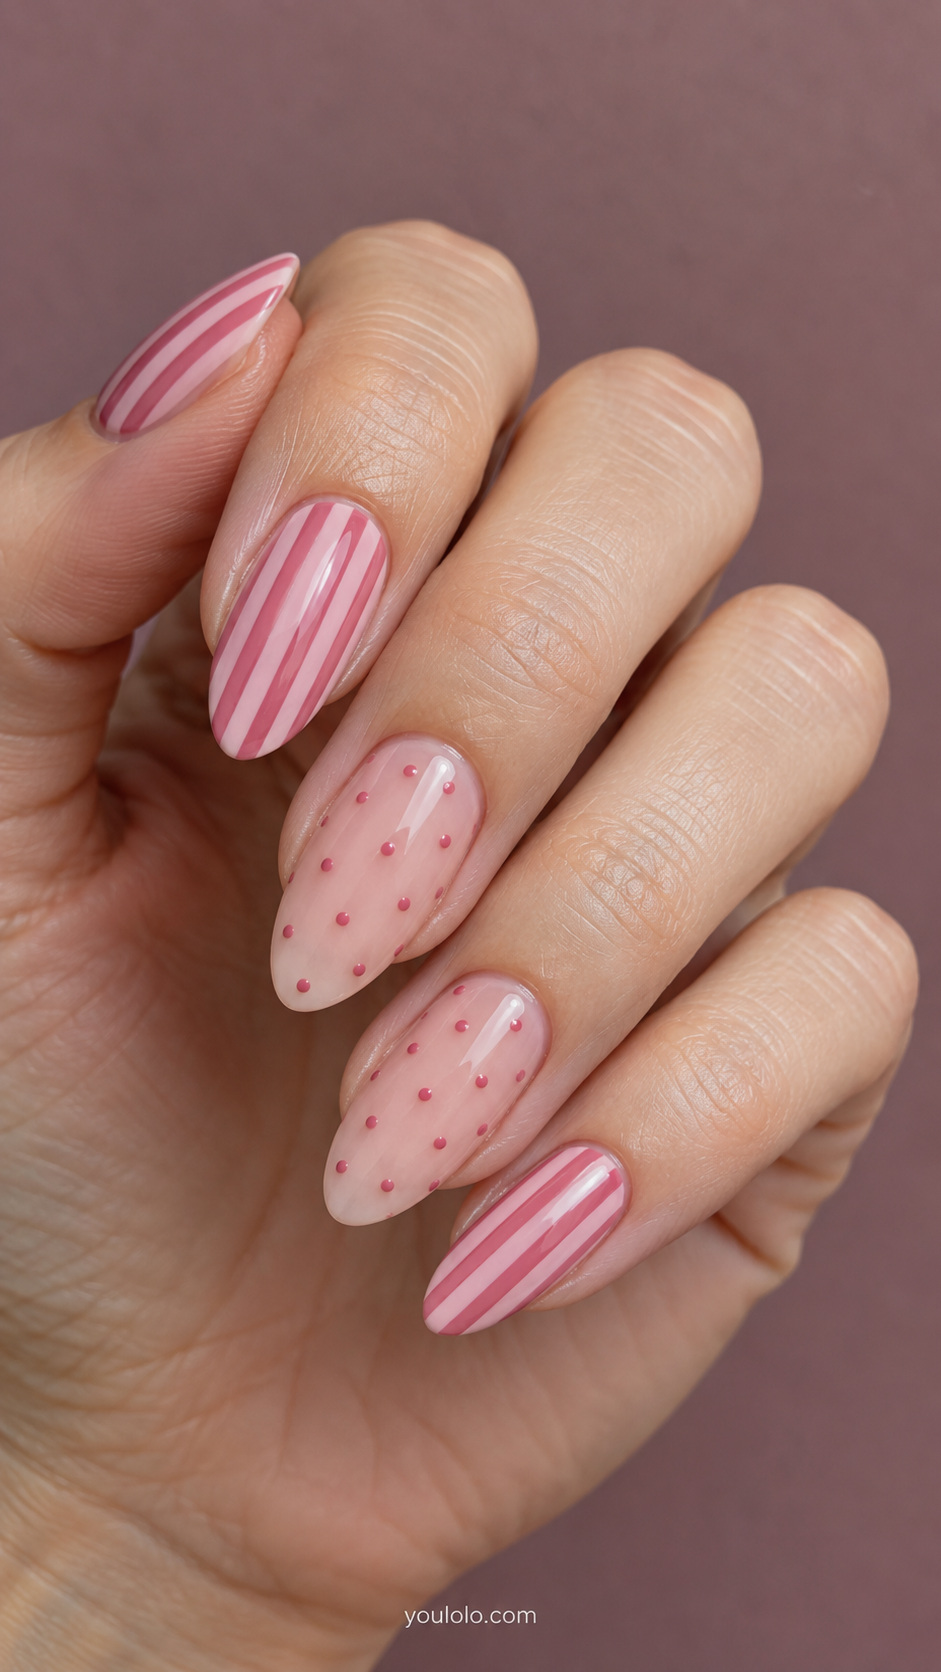
Pair striped nails with a translucent pink accent covered in small rose-colored dots. Keep the dots separated by visible space. This lighter pattern gives the eye a break from the stripes and works especially well if you want a mixed set that still feels delicate.
5. Alternating stripe directions
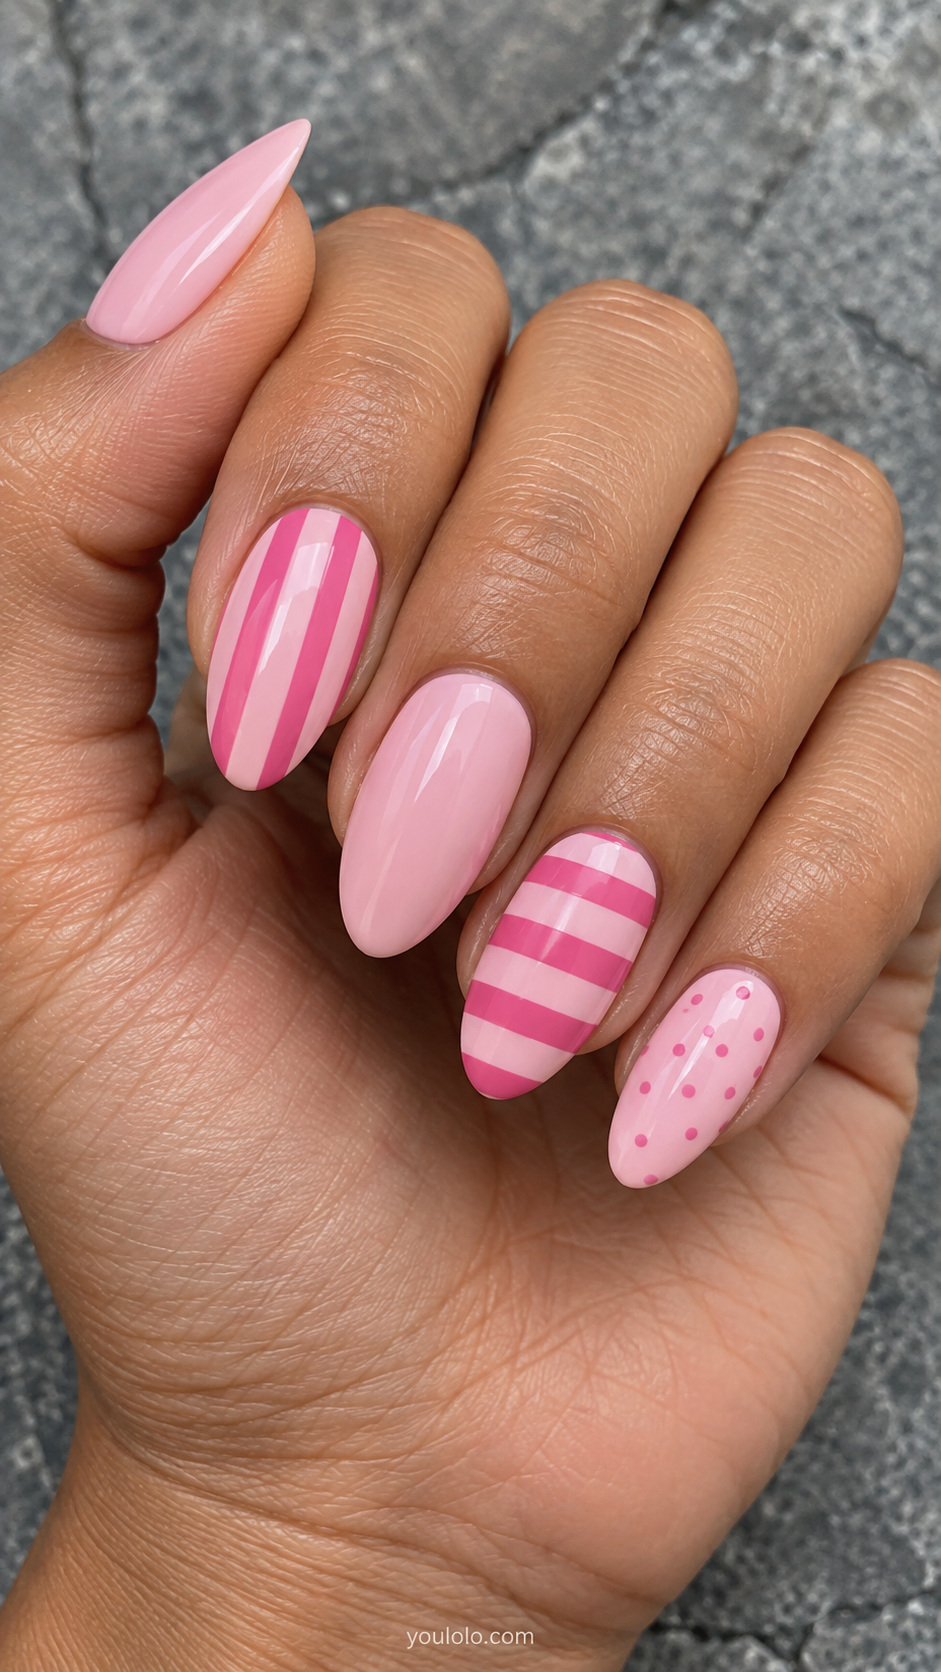
Use vertical lines on the index nail and horizontal bands on the ring nail, with the same three colors in both. The change of direction supplies the contrast. Keep the other nails solid or lightly dotted rather than introducing another large motif such as bows or flowers.
6. Candy-striped French tips

Move the stripes onto the tips and leave the main nail area a sheer pink. Choose two or three colors with enough contrast to stay visible in the smaller space. A broad French tip allows more stripes; a narrow tip works better with fewer lines.
7. Rose and caramel stripes
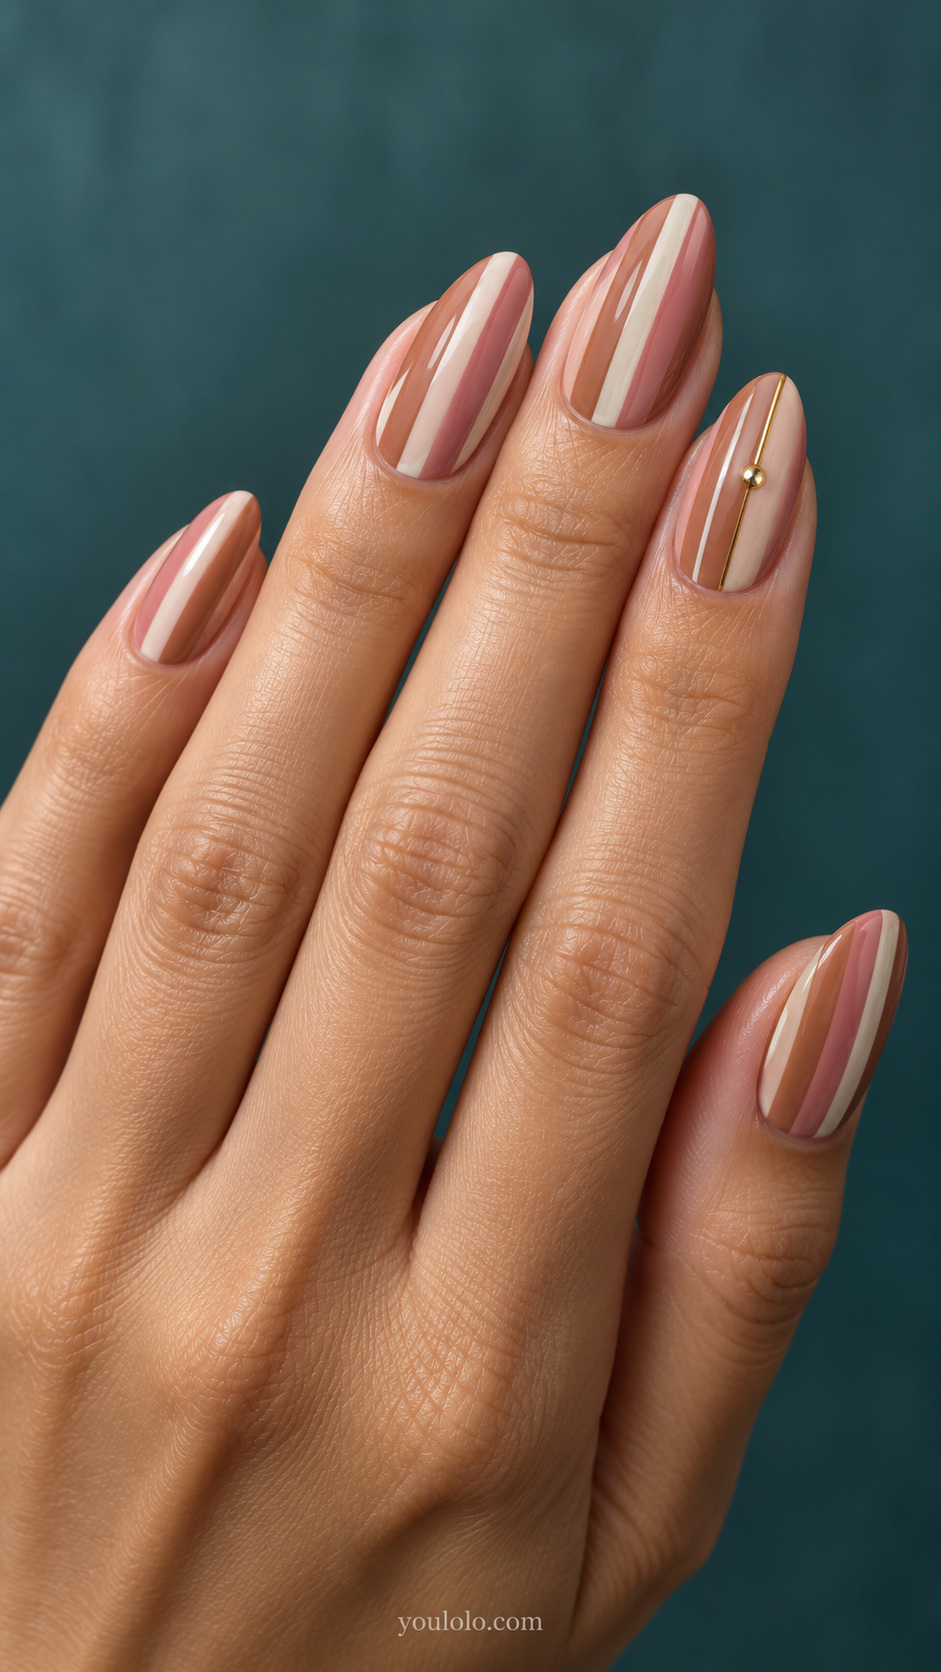
Bring a muted caramel shade into a dusty-pink palette for a softer, less sugary version. Use cream as the lightest stripe and limit gold decoration to one nail. This combination offers a warmer interpretation without relying on bright bubblegum pink or high-contrast white.
8. Pink gingham with matching dots
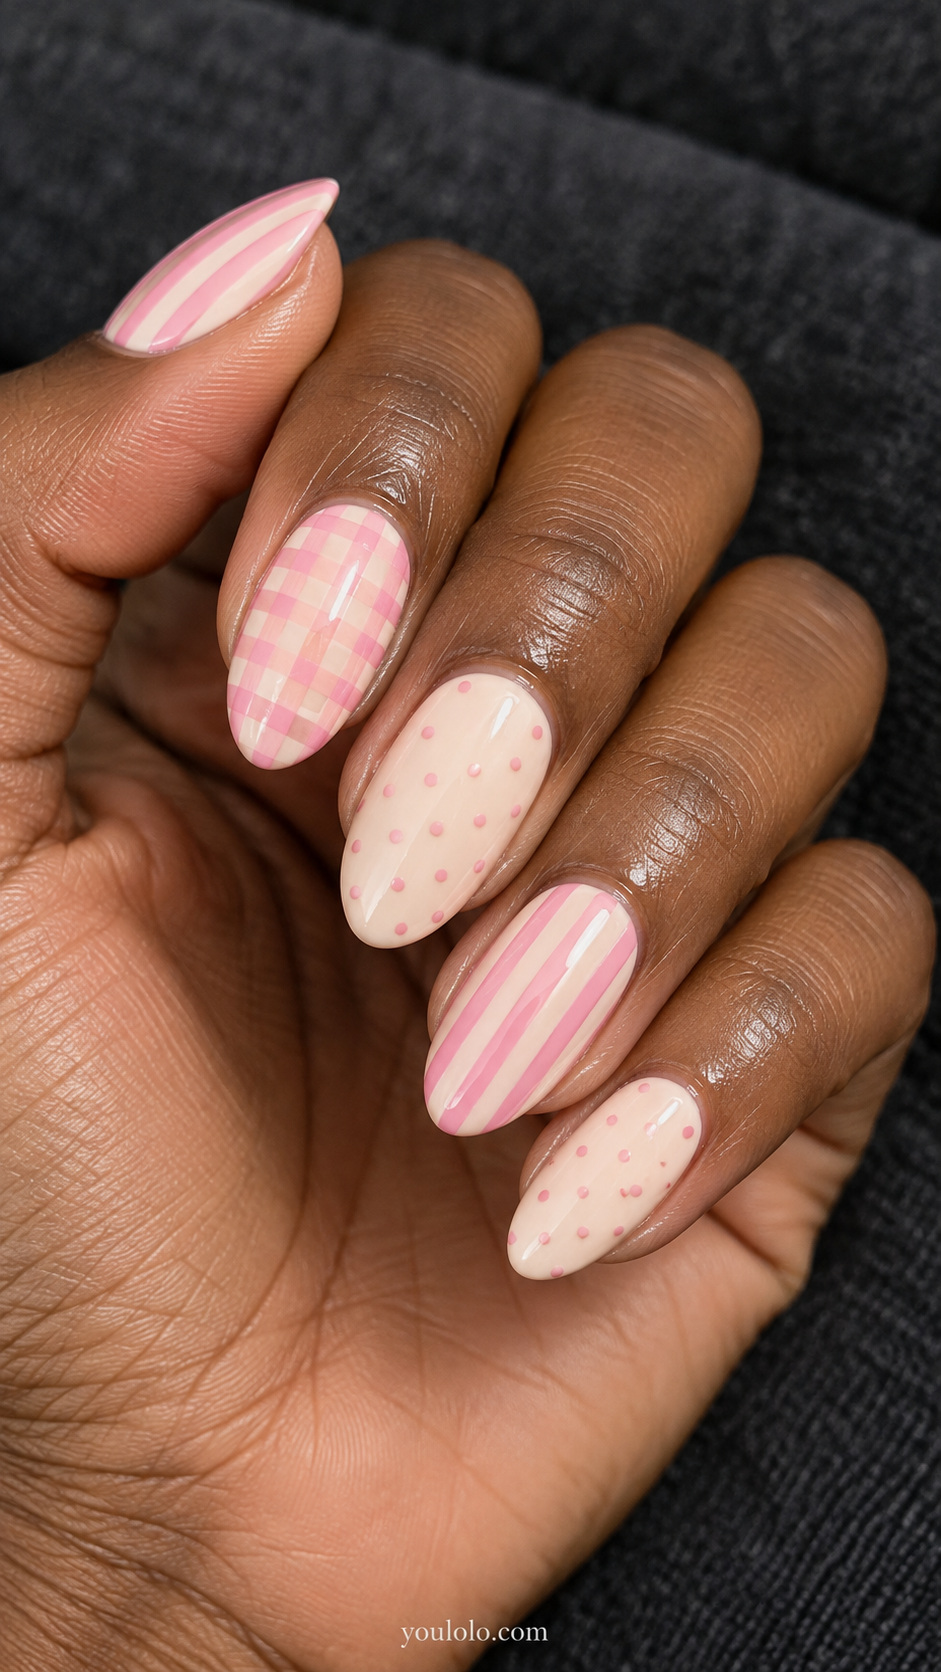
Cross fine pink lines over a cream base to create a gingham-inspired accent. Pair it with ordinary stripes and a few dots in the same pink. The crossed pattern should be the most detailed part of the set; using it on every nail can make the smaller motifs harder to distinguish.
9. Diagonal pink ribbon stripes
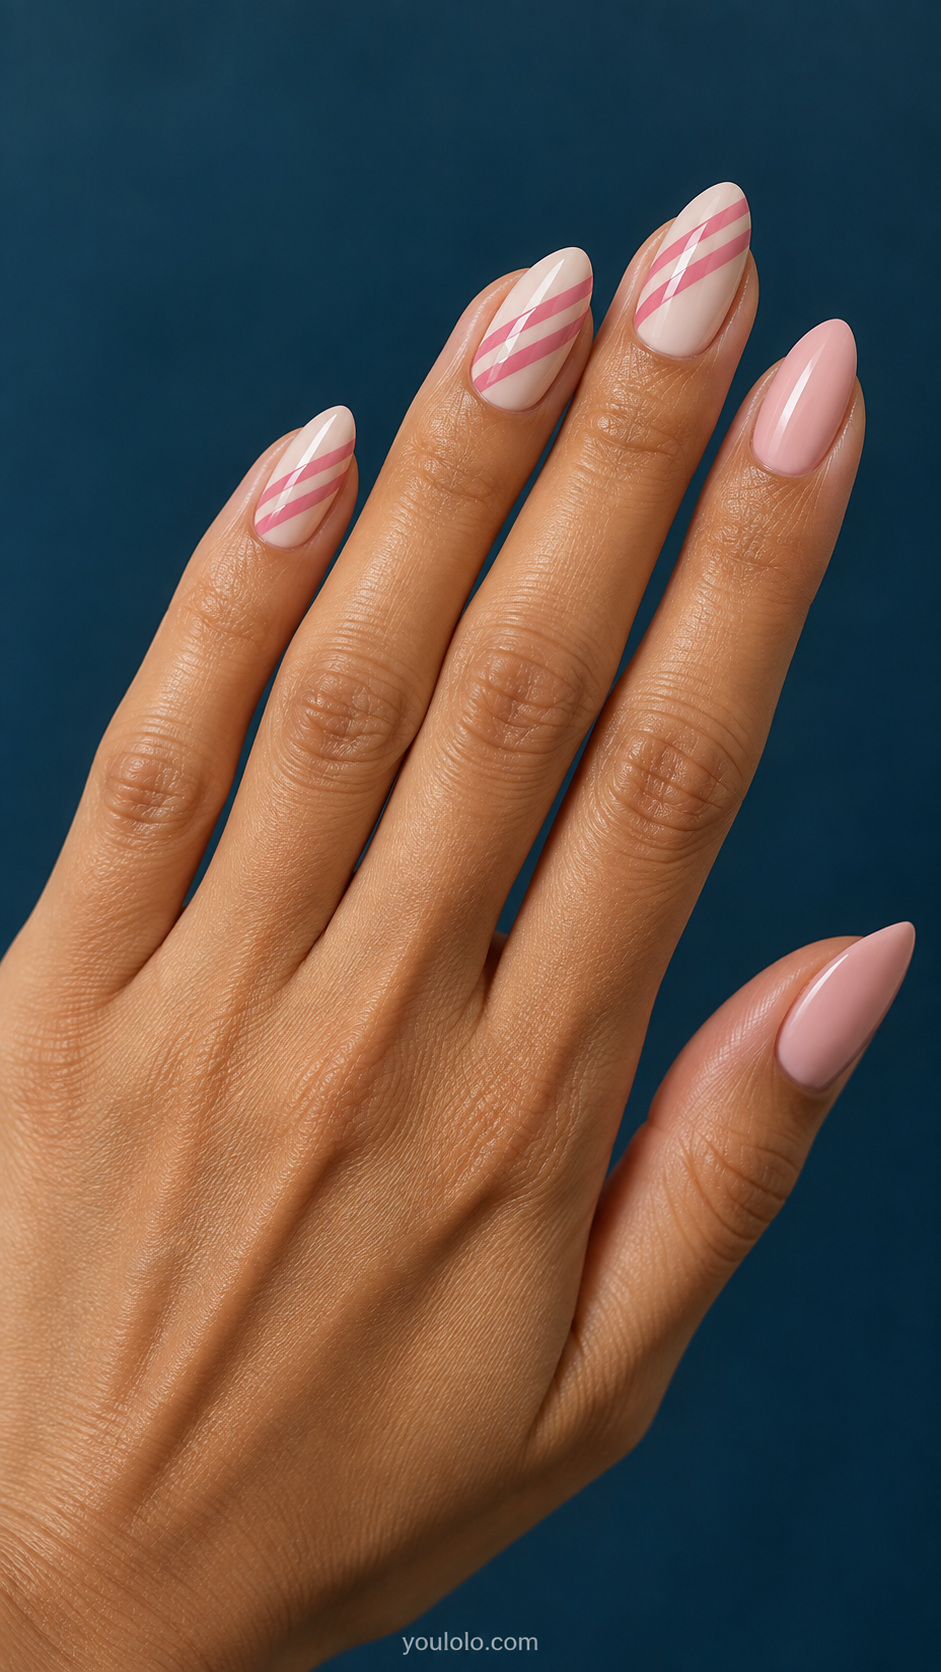
Run three parallel diagonal pink ribbons across a cream base, leaving visible cream between them. Pair two ribbon nails with plain blush nails so the angle is easy to notice. This layout adds movement without relying on a different color on every finger.
10. A single raspberry racing stripe
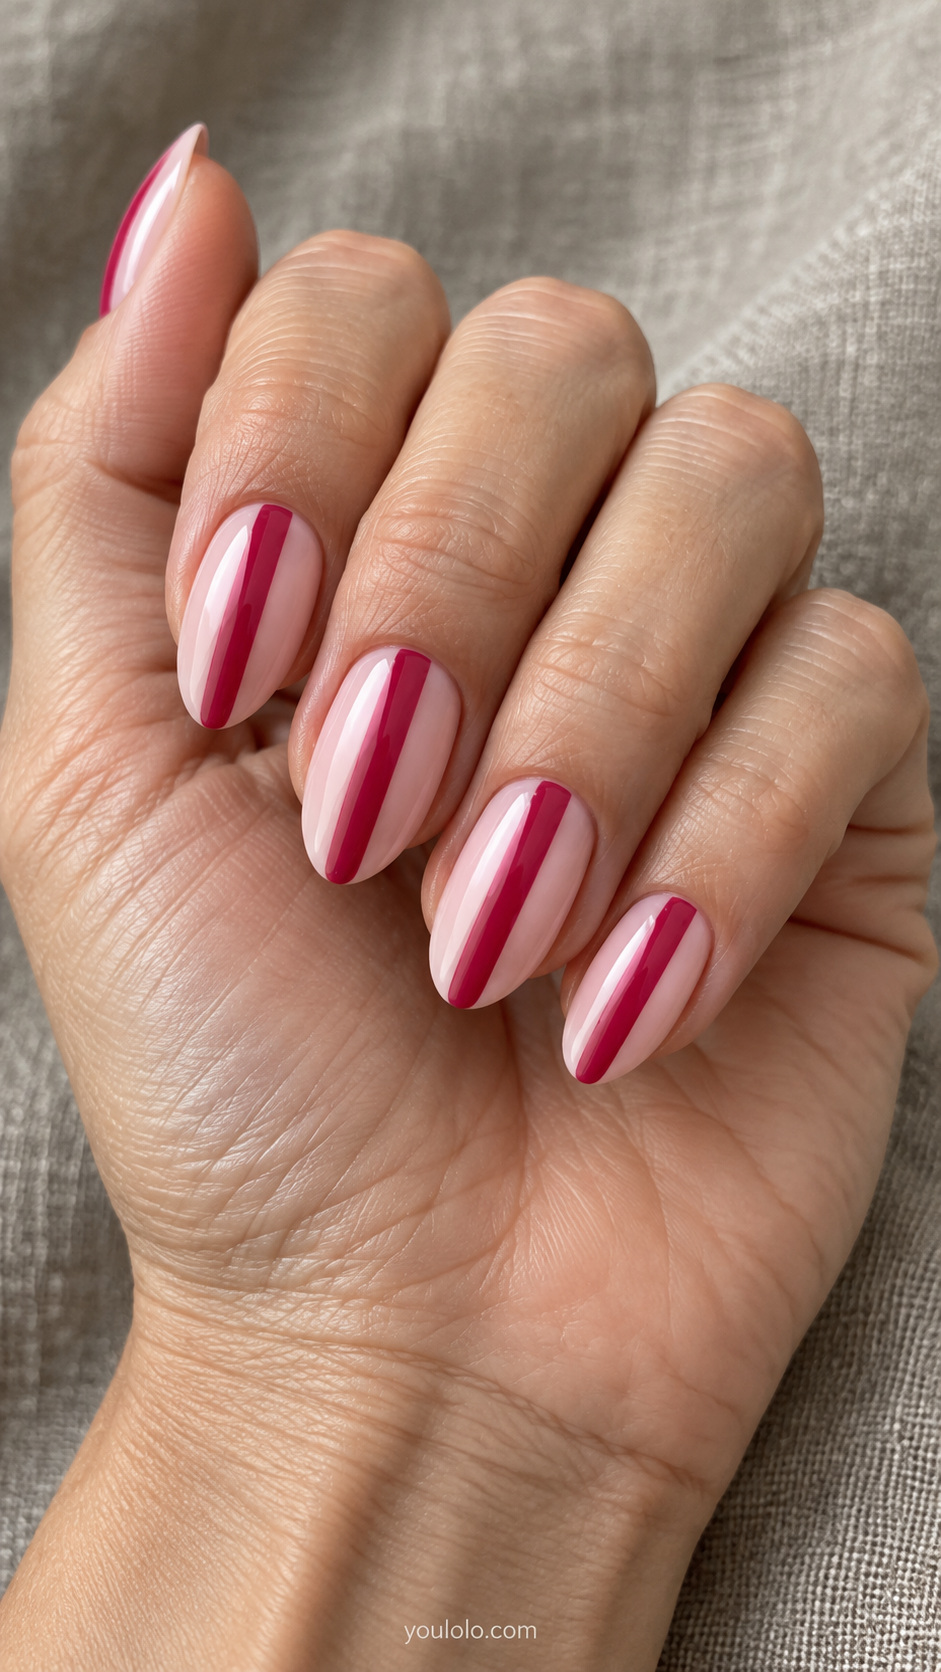
Use a milky blush base and one straight raspberry line down the center of each nail. Make the line broad enough to read clearly but narrow enough to leave pink visible on both sides. The simplicity is the feature here; stars and dots would change the graphic emphasis.
11. Pink stripes with open space
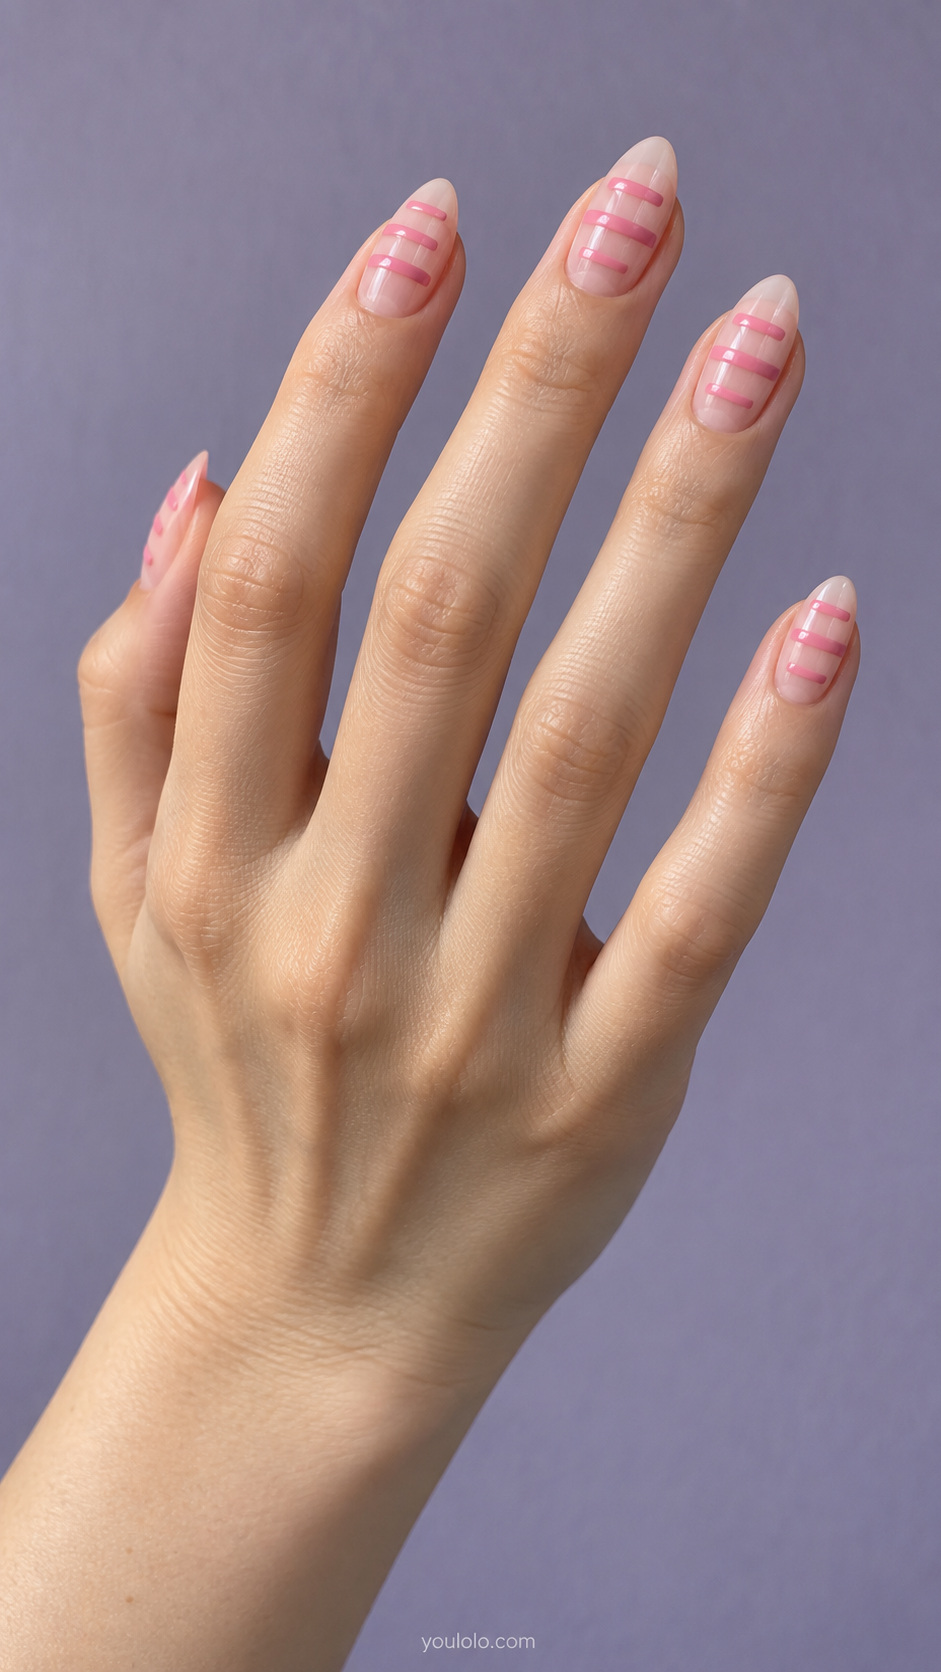
Paint a few short, parallel pink bars over a transparent-looking base, stopping them before they reach the edges. Keep the placement aligned from nail to nail. The uncovered areas make this design feel lighter than an all-over stripe and let the natural-looking base remain visible.
12. Scalloped candy-striped tips
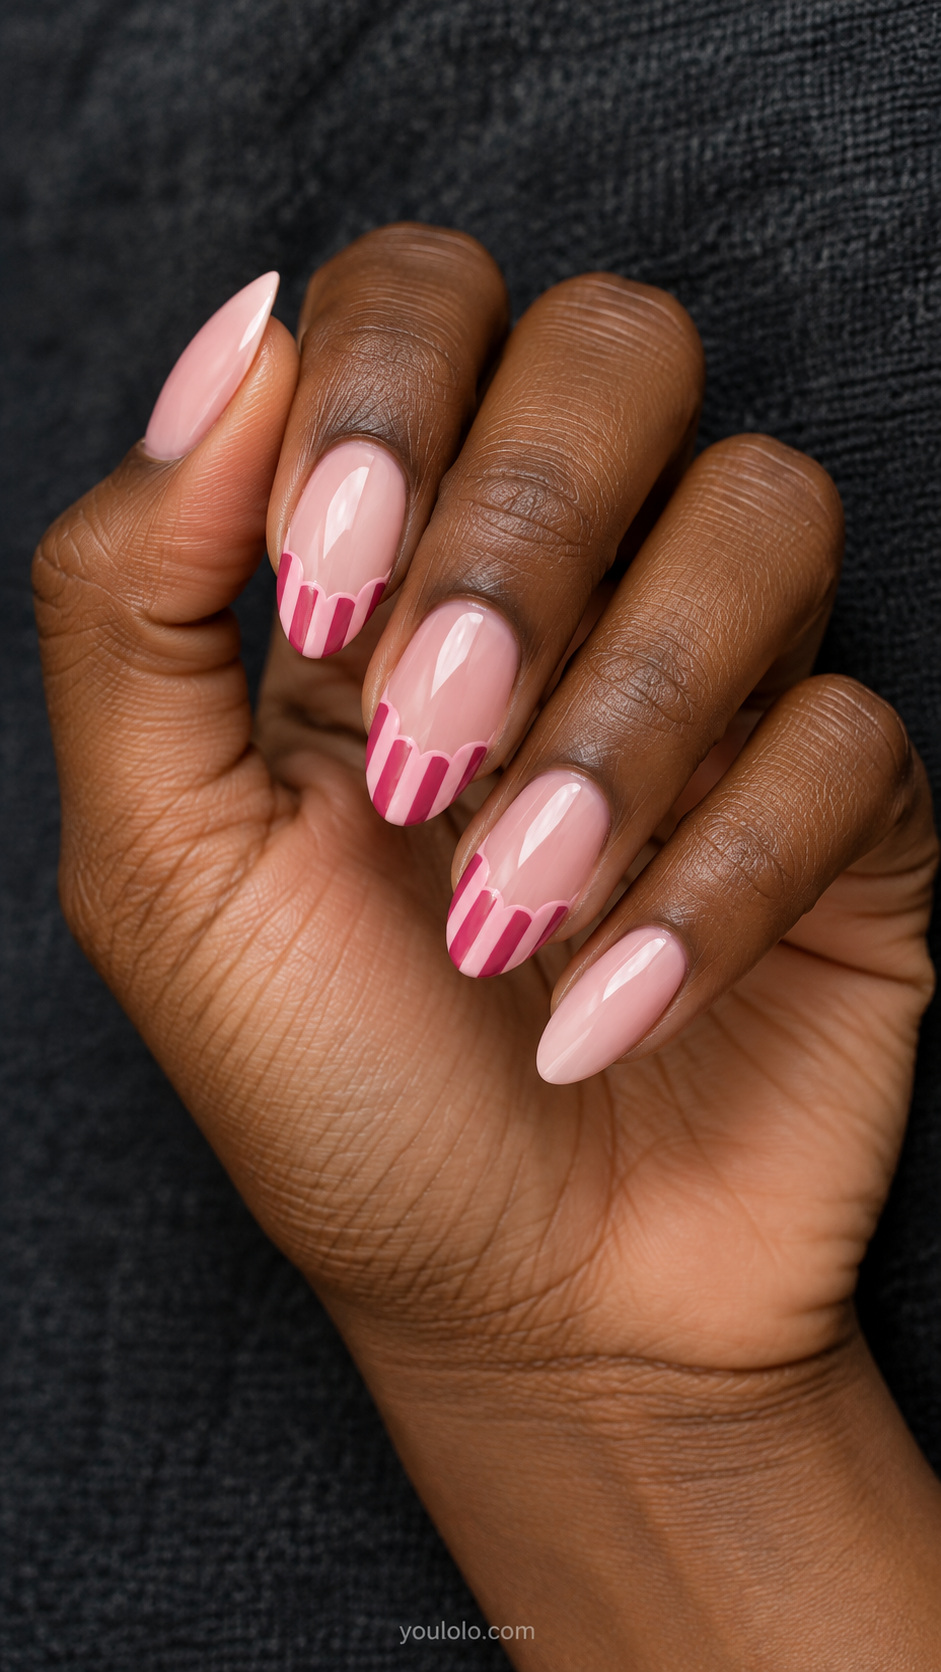
Give two striped French tips a softly scalloped inner edge instead of a smooth smile line. Use pale pink and raspberry stripes within the tip, then keep the other nails solid blush. The scallops need enough space to stay rounded; on shorter nails, use fewer curves.
13. A miniature bow over fine stripes
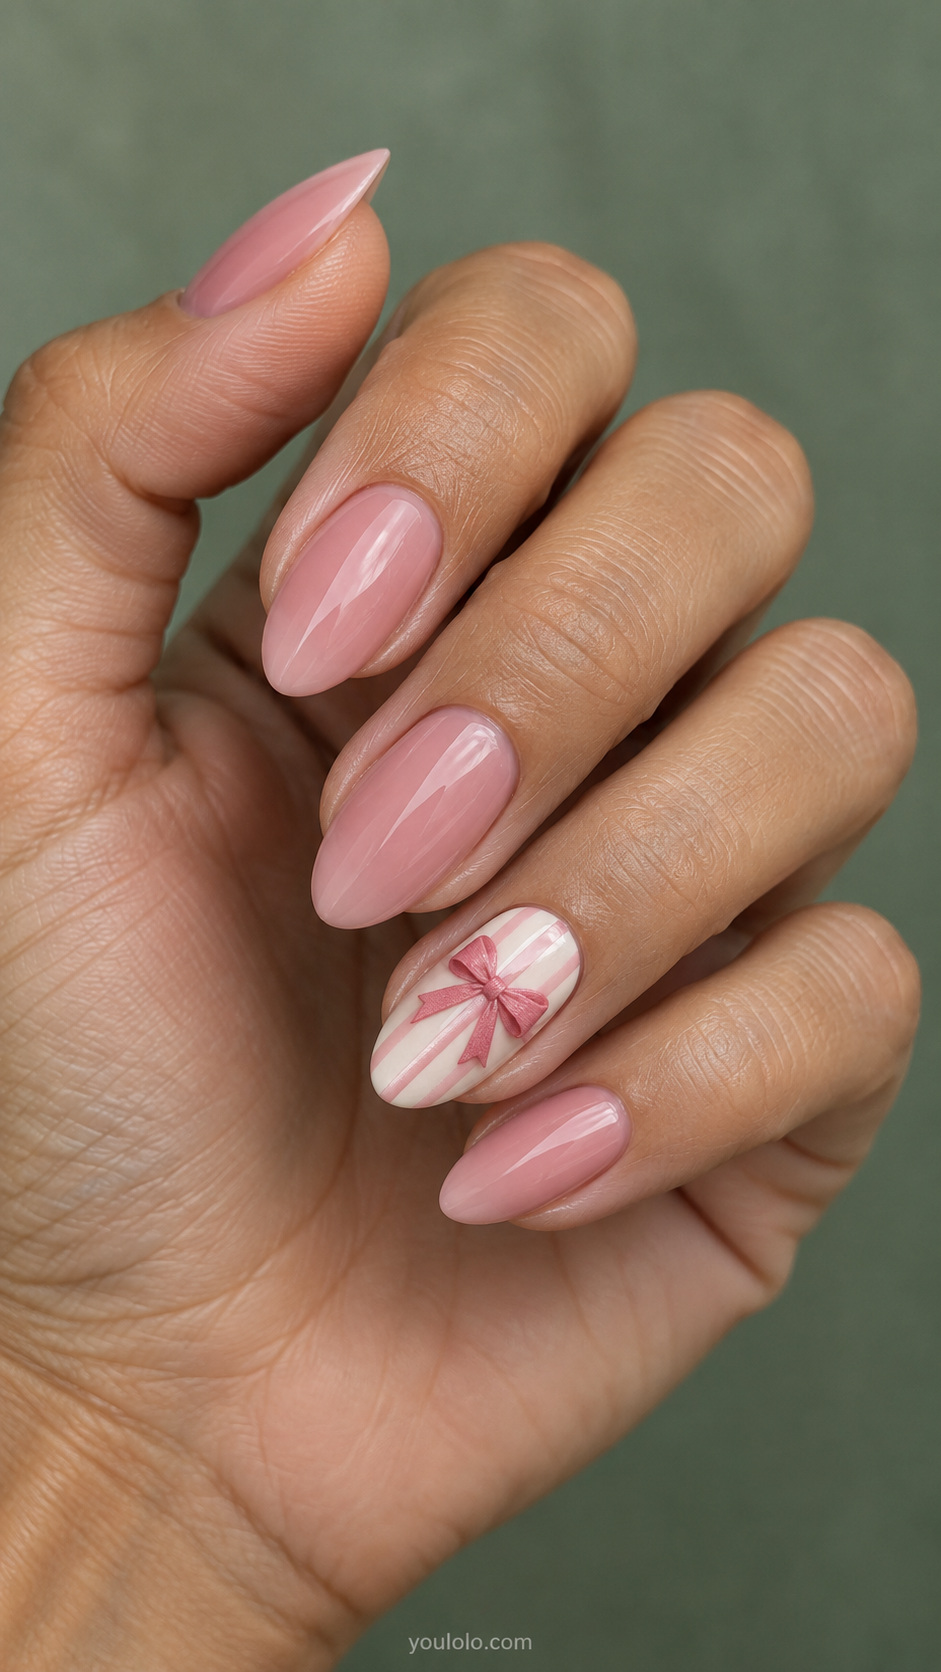
A small raised rose-pink bow gives a cream-and-blush striped accent a playful finish. Keep the surrounding nails simpler so the bow remains the focal point. If you prefer a smooth surface, ask for a flat painted bow with two clear loops and short tails instead of the raised version pictured.
14. Wavy pink lines on milky white
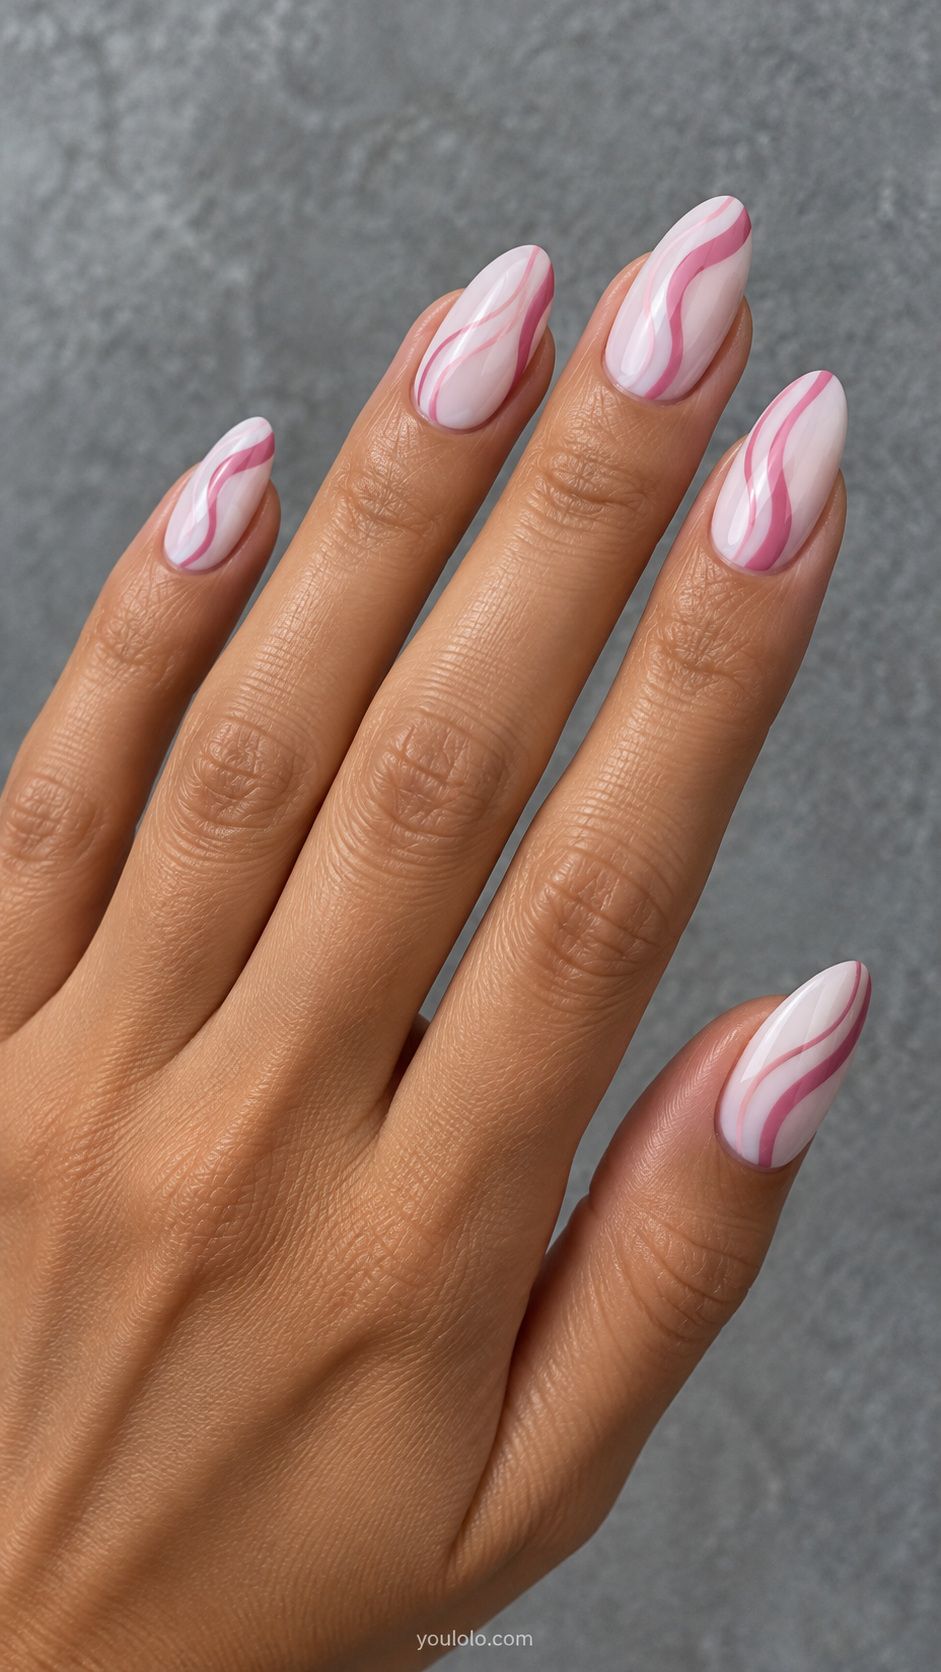
Replace ruler-straight stripes with slender waves in pale pink and deep rose. Let each line follow a similar curve so the set looks deliberate, not tangled. Use a milky white base for contrast and keep the line count low enough that the background remains visible.
15. Pink chevrons with cream breaks
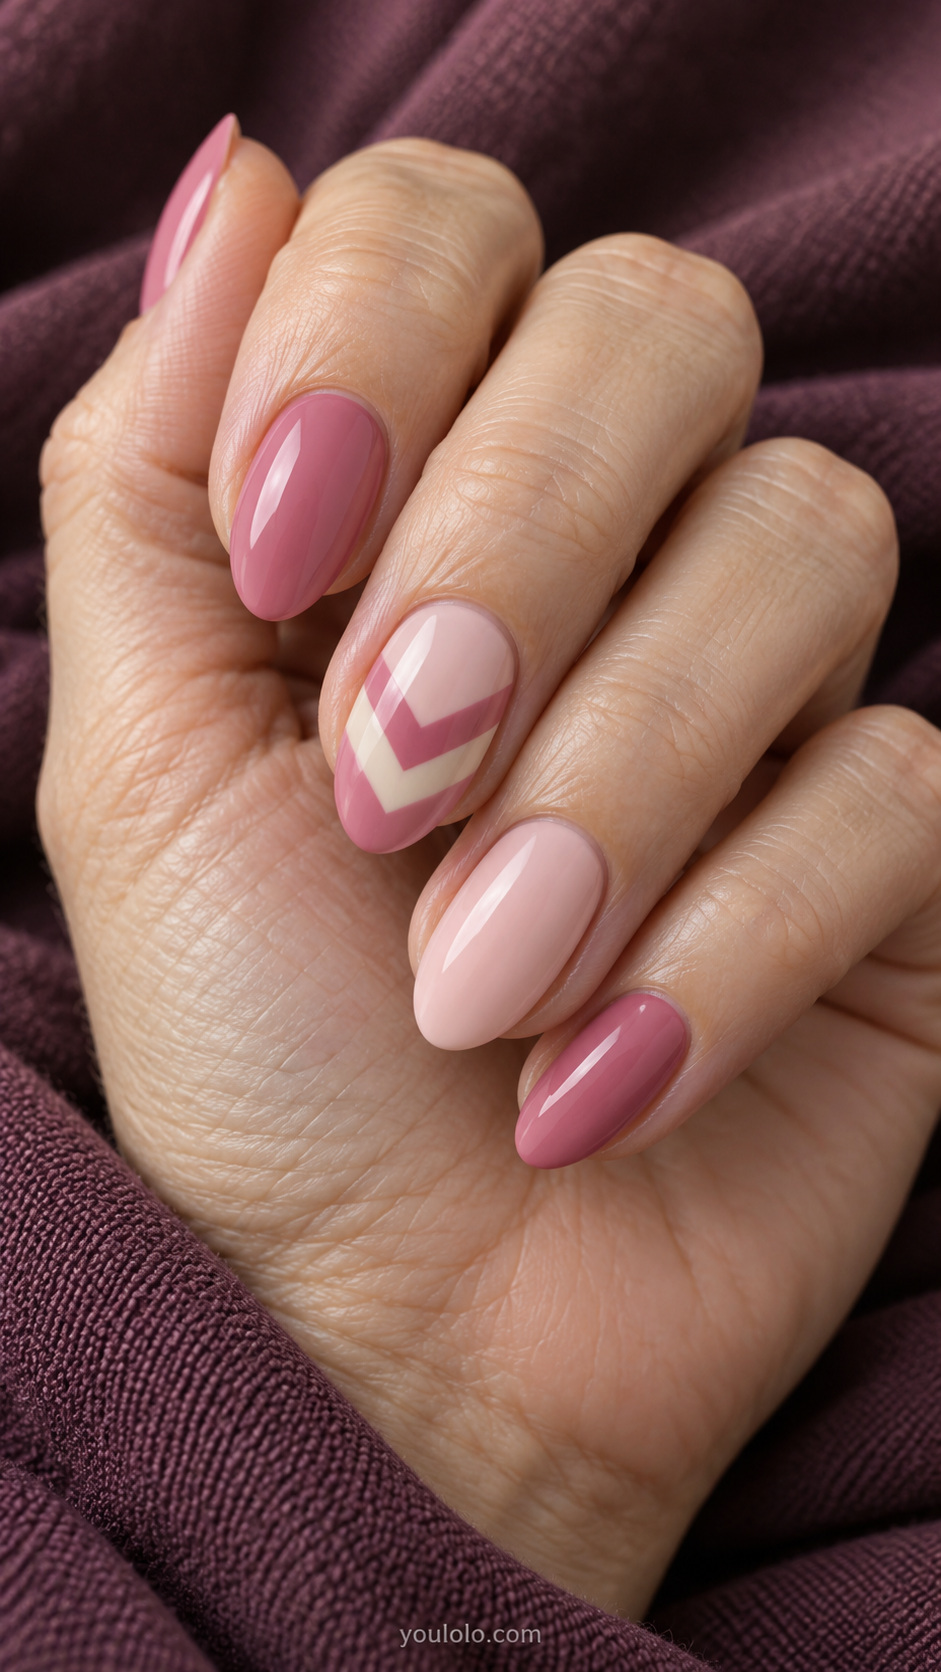
Create two stacked V-shaped pink bands on an accent nail, separated by a cream gap. Pair them with solid rose and blush nails. The V shapes point toward the tip, making the pattern distinct from ordinary horizontal stripes without requiring a sharper nail shape.
16. Rose stripes with a delicate silver thread
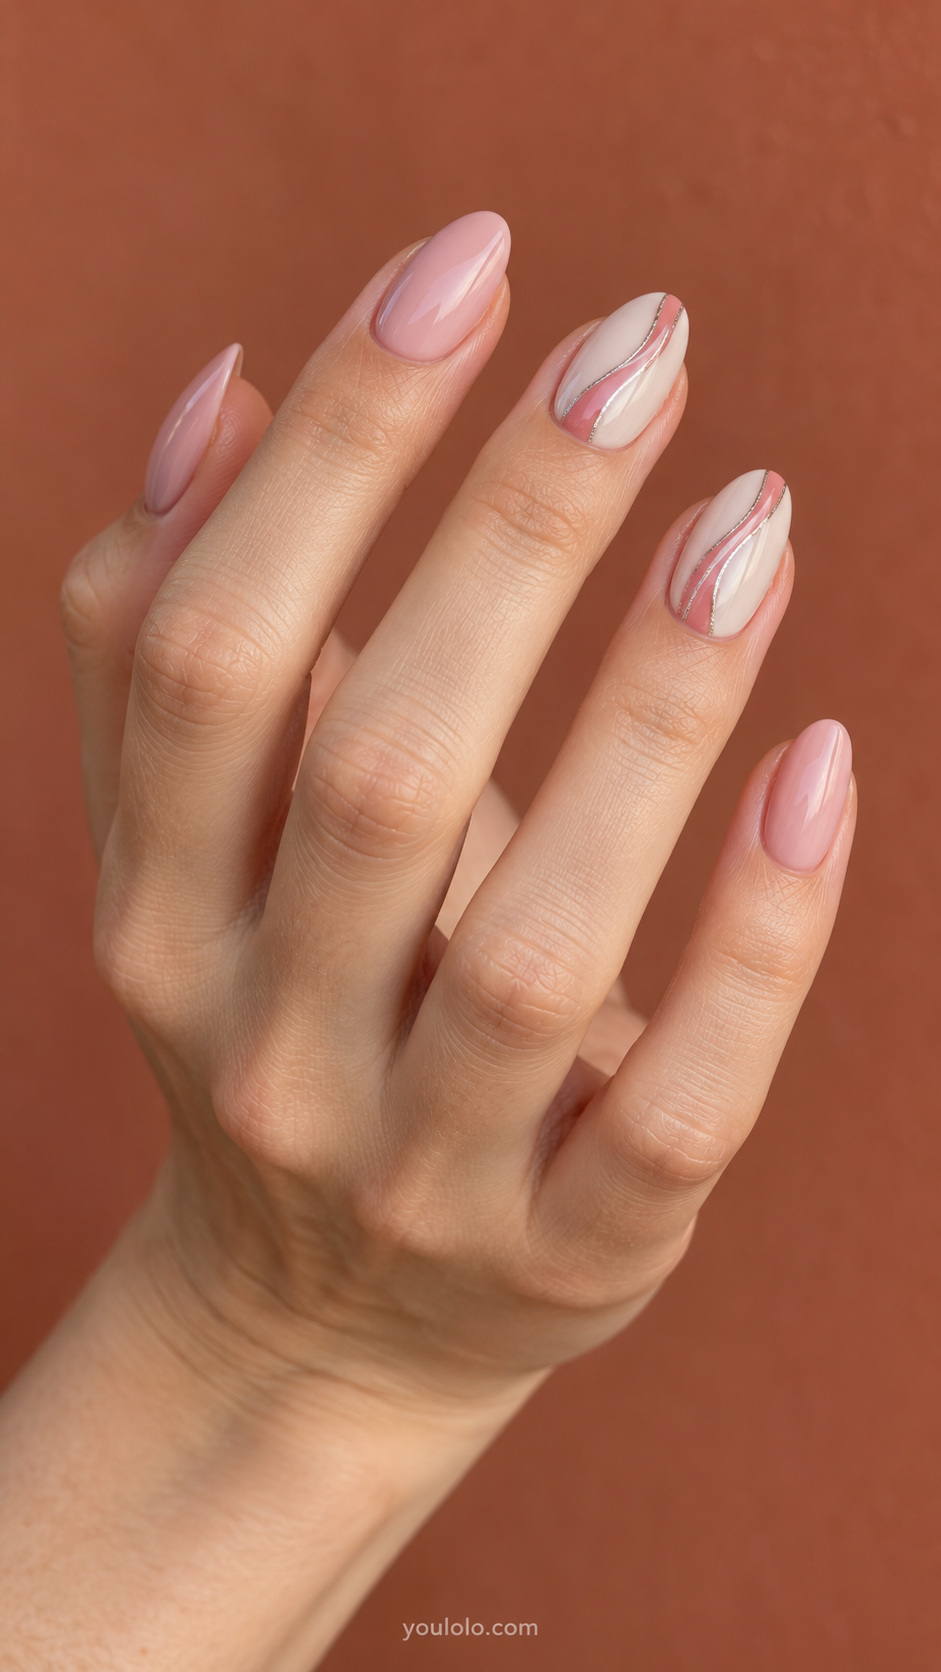
Add a very fine silver line beside one rose stripe on two cream accent nails. Treat silver as an outline rather than another broad band. The remaining nails can stay pale pink, giving the metallic thread a clear place without adding stars or crystals.
17. Broad pink blocks with fine pinstripes
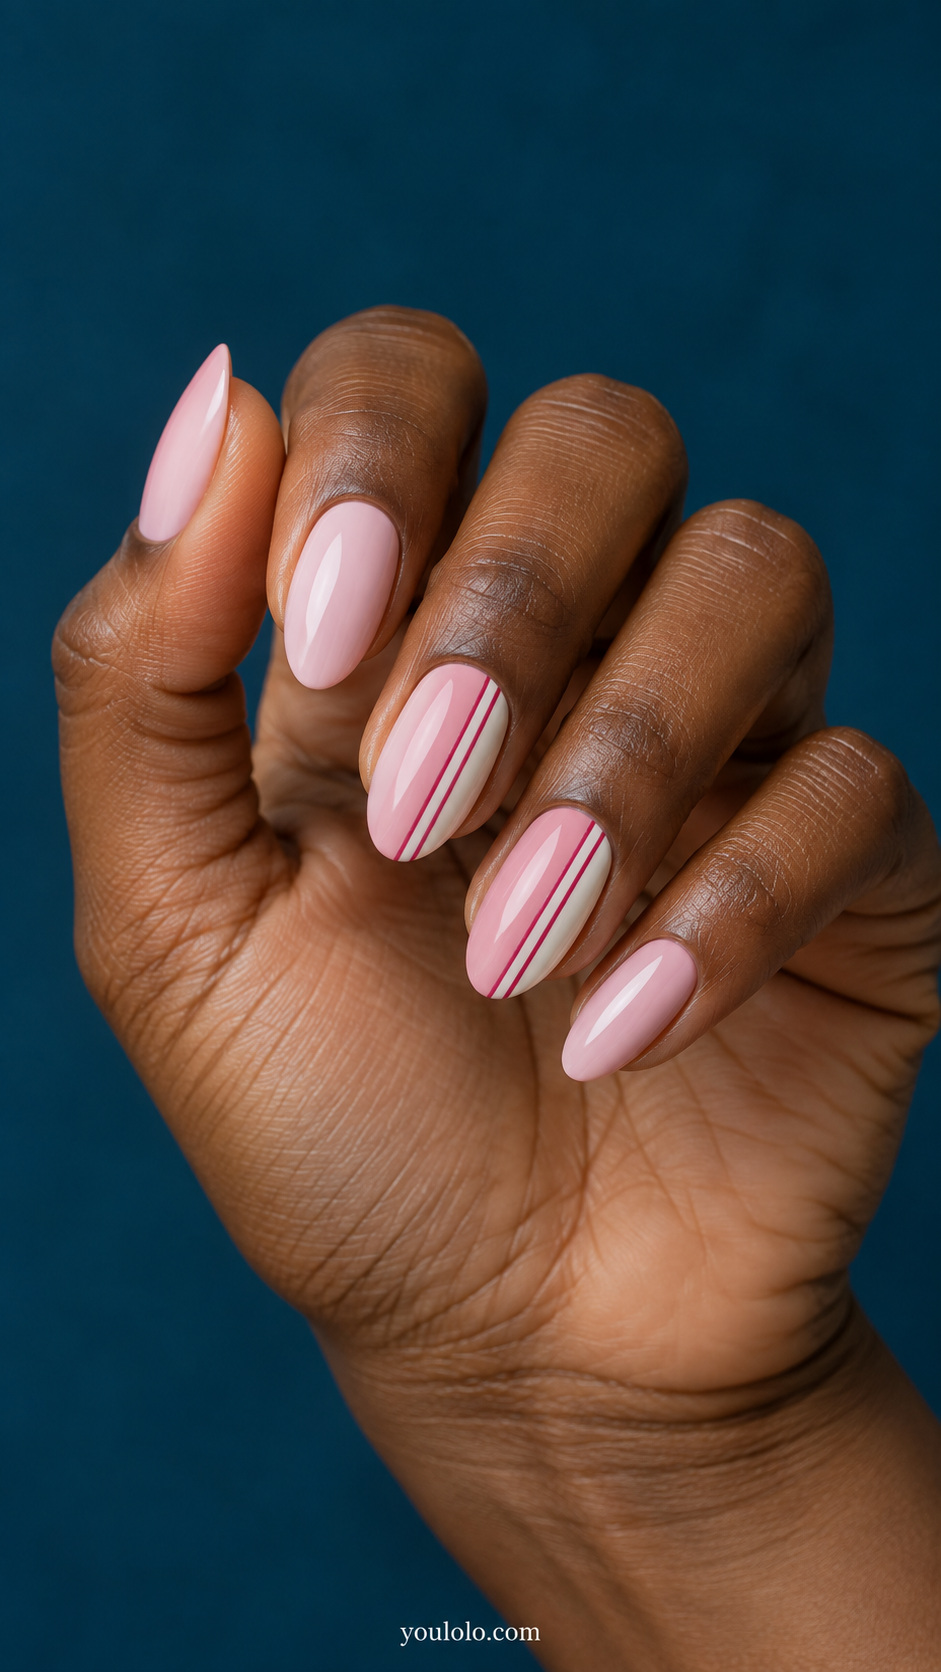
Divide an accent nail into a broad pale-pink panel and a narrower cream panel carrying two raspberry pinstripes. Repeat the same layout on a second nail and keep the rest plain. The contrast between broad and fine marks creates variety while using only the original palette.
18. Pink stripes with small cherry accents
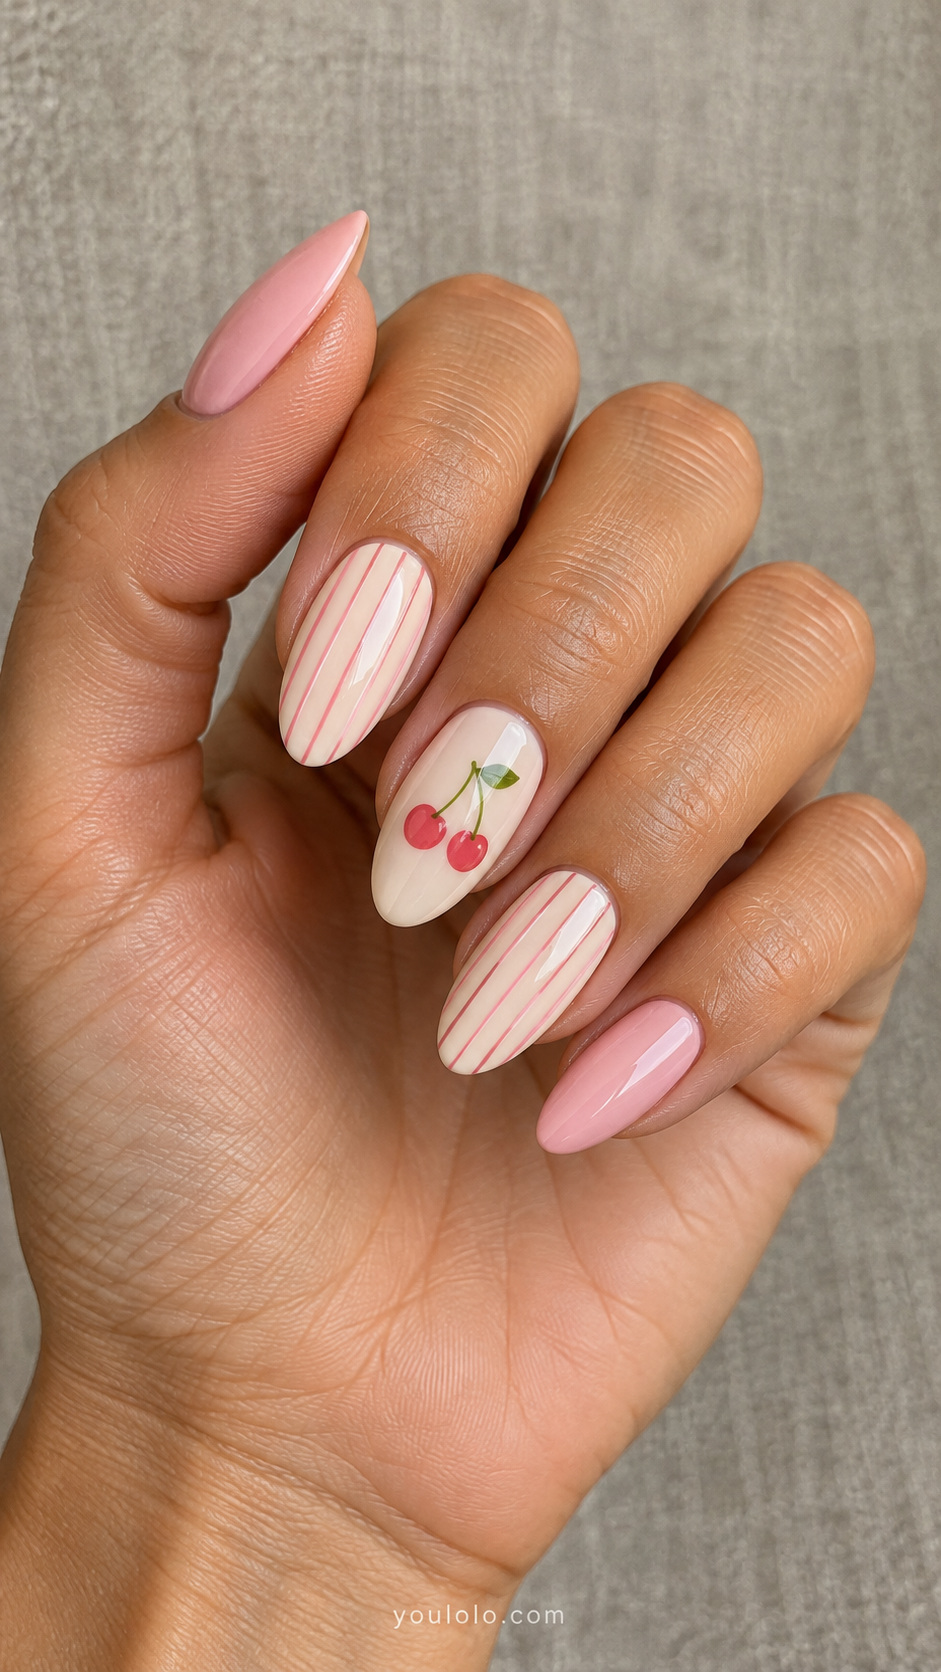
Use pale pink pinstripes on two cream nails and a tiny pair of red-pink cherries with a fine green stem on one separate accent. Leave two nails solid blush. Keeping the fruit on its own nail prevents the cherries and stripes from fighting for the same small surface.
Choosing a press-on version
The artwork can be painted onto a salon manicure or onto press-ons. “Press-on” describes how a finished nail is attached, while stripes and dots describe its decoration. A product listing that mentions gel may refer to the material or painted finish; it does not by itself explain the attachment method.
Before ordering, check the seller’s sizing method, the actual length and shape, and whether stars are flat or raised. Do not assume that labels such as XS or M correspond to the same measurements across different sellers. Wear time and reusability should come from the specific product instructions, rather than from the design’s name.
Planning pink striped nails without a crowded pattern
Start pink striped nails with one decision: do you want the stripes to cover the whole nail or act as a small accent? Full pinstripes create a stronger pattern. A single center line or a striped French tip leaves more quiet space. Choose that balance before adding dots, stars, or bows.
Designs 1, 9, and 15 show three different directions: vertical, diagonal, and chevron. They are useful alternatives when you like the same pink-and-cream palette but want a different arrangement. Design 10 is the simplest way to keep the stripe theme with very little linework.
Let one pink shade lead
Soft pink striped nails can use blush as the main color with cream between the lines. For a stronger contrast, bring in raspberry on selected stripes or a single accent nail. Rose and caramel give the pattern a warmer character. Pick the version that fits your usual clothes rather than adding every pink you like.
Look at the stripe spacing as carefully as the color. Wide cream breaks make the lines feel separate and readable. Very closely packed lines can merge visually at a distance. Ask your artist to show the planned width on one nail before repeating it across the hand.
Use the short-nail version of the idea
On short pink striped nails, choose fewer lines or place the pattern on only two nails. A tiny bow above several narrow stripes may leave very little room for the details to remain distinct. You can keep the bow and make the neighboring nail striped instead.
For a playful mixed set, choose one secondary motif. Dots give a different shape from the stripes, while a star creates a stronger focal point. Cherries introduce another color, so use them sparingly if you want pink to remain dominant.
Write down the layout before ordering
When ordering pink striped nails as press-ons, check the seller’s sizing method and choose the shape and length before approving the artwork. A design shown on long tips may need fewer lines on a shorter size. Ask for a layout image if the exact position of the accents matters to you.
For a linework reference, OPI’s Stripe Right tutorial shows a multicolor stripe design. Use it to discuss the line arrangement while keeping your chosen pink palette.
If you prefer a simpler finish between patterned manicures, our pink pearl manicure ideas offer softer alternatives. You can borrow their sheer base for pink striped nails while keeping the painted lines as the main feature.
Pink striped nails: frequently asked questions
Can this work on short nails?
Yes. Simplify the pattern: fewer stripes, smaller dots, and one accent motif are easier to distinguish on a smaller surface.
Do coquette nails need bows?
No. A soft pink palette, delicate lines, and small decorative details can suggest the mood without adding a bow to the design.
What should I ask for if I want a flatter finish?
Request painted stars or flat decals instead of raised charms, and show a reference for the final surface you prefer. The exact finish depends on the materials your artist uses.
Save the combination you like most and choose your stripe colors before the appointment. Those decisions will make the brief much clearer than asking for “cute pink nails” alone.



[…] linework is the part you like most, our pink striped manicure collection gives more arrangements to compare. A simple racing stripe or chevron can also be adapted to butter […]
[…] you want a more graphic pink manicure, compare these finishes with our pink stripe and dot designs. The distinction is simple: glazed pink almond nails make reflection the main detail, while stripes […]
[…] another direction, explore our pink striped manicure ideas and compare the amount of pattern before choosing your next […]